Worm composting, also known as vermicomposting, is a fantastic way to turn your food waste into nutrient-rich gold for your garden. But if you’re new to worm composting, it can be overwhelming to set up and maintain a thriving worm composting bin. That’s why we’ve put together this comprehensive guide to worm composting basics – to help you get started with confidence.
In this article, we’ll cover the essential steps to create a worm composting setup that works for you, including choosing the right equipment and understanding how worms break down organic matter into castings. We’ll also share some valuable maintenance tips and troubleshooting advice to keep your worm bin healthy and thriving. By the end of this guide, you’ll be well on your way to creating nutrient-rich worm castings that will take your gardening game to the next level.
Understanding the Benefits of Worm Composting
Worm composting offers numerous advantages over traditional composting methods, including increased efficiency and a reduced environmental impact for you. Let’s dive into the benefits of this sustainable practice.
What is Worm Composting?
Worm composting, also known as vermicomposting, is an innovative approach to waste management that’s gaining popularity worldwide. At its core, worm composting involves using red wiggler worms (Eisenia fetida) to break down organic matter into a nutrient-rich compost. This process occurs within a controlled environment, typically a worm bin or vermicomposting system.
Unlike traditional composting methods, which often rely on microorganisms and decomposition processes that can be slow and unpredictable, worm composting leverages the worms’ remarkable ability to consume and digest organic materials. Red wiggler worms are particularly well-suited for this task, as they thrive in environments with high moisture levels and a mix of carbon-rich “browns” (like dried leaves or shredded newspaper) and nitrogen-rich “greens” (such as food scraps or grass clippings).
By using worms to break down organic waste, worm composting offers several key advantages over traditional methods, including faster processing times, increased nutrient retention, and reduced odors.
Advantages of Using Worms in Composting
Using worms for composting offers numerous advantages that can take your composting process to the next level. One of the primary benefits is the increased nutrient value of the finished compost. Worms are capable of breaking down organic matter at a much faster rate than traditional composting methods, resulting in a rich, nutrient-dense compost. This is because worms can consume up to 50% of their body weight in food waste daily, which means they can efficiently process large amounts of material.
Another significant advantage of worm composting is its ability to reduce decomposition rates. Worms work tirelessly behind the scenes to break down complex organic matter into a fine, crumbly compost that’s perfect for fertilizing your plants. This process is also known as vermicomposting, and it’s a key factor in reducing odors associated with traditional composting methods.
In addition to these benefits, worm composting also helps reduce the likelihood of pests and diseases associated with traditional composting methods.
Challenging Traditional Methods: Why Choose Worm Composting?
When it comes to composting, traditional methods often come with their own set of challenges. For instance, pile-based composting requires a significant amount of space and can be heavy on maintenance needs. Not only do you need a dedicated area for the compost heap, but regular turning and monitoring are essential to prevent odors, pests, and uneven decomposition.
In contrast, worm composting – also known as vermicomposting – is an efficient alternative that offers several advantages over traditional methods. One of its key benefits is space savings: worms can thrive in compact containers, making it ideal for urban areas or small gardens. Furthermore, the process is relatively low-maintenance, with minimal need for turning or monitoring.
Another significant advantage of worm composting lies in its environmental impact. Unlike traditional composting, which often relies on energy-intensive aeration methods, vermicomposting uses the worms’ natural burrowing behavior to aerate the compost. This reduces energy consumption and minimizes greenhouse gas emissions.
Setting Up Your Worm Composting System
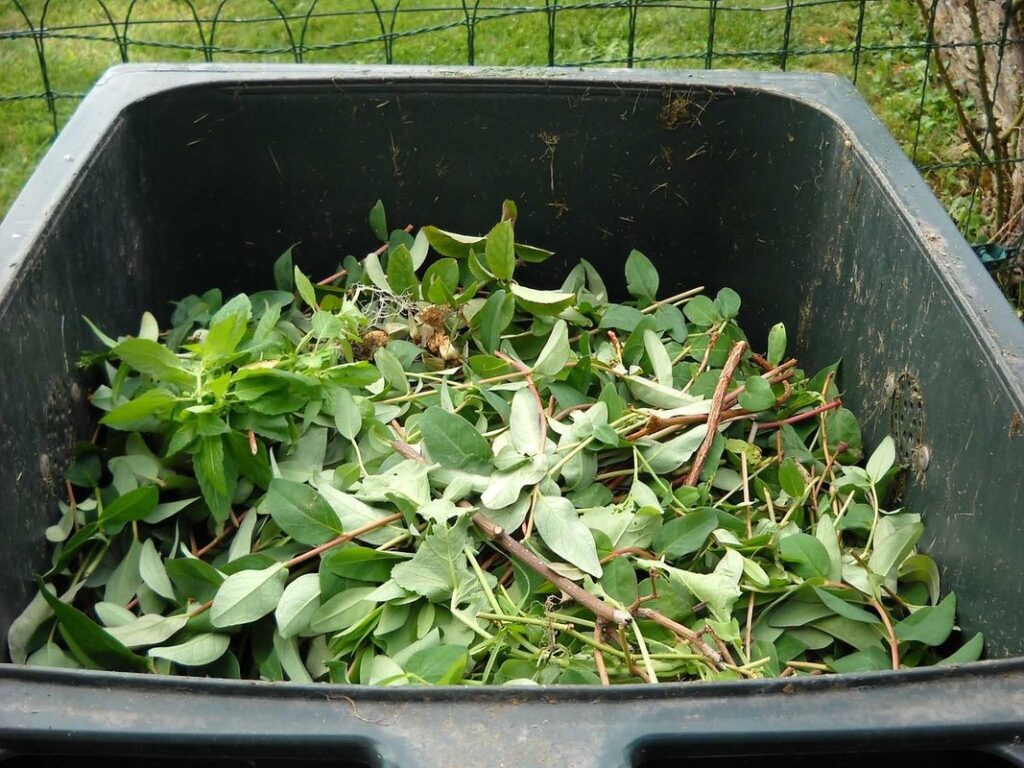
To set up a worm composting system, you’ll need to gather essential materials and understand how to create a suitable environment for your worms. This section will guide you through that process step-by-step.
Choosing the Right Bin for Worm Composting
When it comes to worm composting, choosing the right bin is crucial for successful vermicomposting. You have several options to consider: DIY bins, commercial units, and indoor/outdoor setups. If you’re on a tight budget or prefer a hands-on approach, a DIY bin made from plastic containers or wooden pallets can be an excellent choice.
Commercial worm composting bins are available in various sizes and materials, including durable plastic and metal options. These bins often come with features such as drainage systems and lids for easy access. Indoor setups are ideal for small spaces, but you’ll need to ensure proper ventilation to prevent moisture buildup. Outdoor bins can be made from recycled materials or purchased pre-made.
When selecting a bin, consider the size based on your waste generation rate and space constraints. A general rule of thumb is to provide at least 1 square foot of surface area per pound of food waste per day. Choose a material that’s easy to clean and maintain, such as BPA-free plastic or untreated wood.
Creating a Healthy Environment for Red Wiggler Worms
To create a healthy environment for red wiggler worms, you must ensure they have optimal conditions to thrive. First and foremost, temperature control is crucial. Red wigglers prefer temperatures between 55°F and 77°F (13°C and 25°C), making them ideal for most regions. Avoid exposing your worm bin to direct sunlight or freezing temperatures, as this can cause stress and even death.
Maintaining the right moisture levels is also essential. The composting pile should be kept moist, like a damp sponge. Aim for about 80-90% humidity, but avoid waterlogging, which can lead to anaerobic conditions and unpleasant odors. Monitor your worm bin’s moisture by checking its weight daily – if it feels dry, add some water.
Carbon-to-nitrogen ratios are another critical factor in creating a healthy environment. Red wiggler worms thrive on a mix of “green” (nitrogen-rich) and “brown” (carbon-rich) materials. Aim for a ratio of 2/3 brown to 1/3 green, adding plenty of leaves, straw, or shredded newspaper to balance out food scraps and grass clippings.
To achieve the perfect balance, add new materials in moderation and maintain regular aeration by turning your worm bin regularly. By providing these essential conditions, you’ll create an environment where red wiggler worms can multiply, break down organic matter efficiently, and produce rich compost for your garden.
Introduction of Red Wigglers and Other Composting Worm Species
Obtaining red wiggler worms or other suitable species is an essential step in setting up your worm composting system. These worms are specifically bred for their ability to break down organic matter quickly and efficiently, making them the ideal choice for home composting.
You can obtain red wigglers from a variety of sources, including online suppliers, nurseries, and gardening stores. When purchasing worms, ensure that you’re buying from a reputable supplier to guarantee the health and quality of your worms. A pound of worms is usually sufficient for a small-scale worm composting system, but this can vary depending on your setup.
Red wigglers are voracious eaters and thrive in environments with high humidity (60-80%) and temperatures between 55°F to 77°F (13°C to 25°C). They prefer a mix of bedding materials like coconut coir or shredded newspaper, which provides them with a comfortable living space. By replicating their natural habitat, you’ll create an ideal environment for your worms to thrive in.
When introducing new worms to your system, make sure to provide them with a sufficient amount of food and oxygen. Start by adding a small amount of compost materials and gradually increase the quantity as they adjust to their new environment.
Managing Your Worm Compost System for Optimal Performance
Now that your worm composting system is up and running, let’s dive into the nitty-gritty of maintaining it to ensure optimal performance and a thriving ecosystem. Proper management is key.
Maintaining the Right pH Levels in Your Compost
Maintaining the right pH levels is crucial for optimal worm composting performance. Worms thrive in environments with pH levels between 6.5 and 7.5, but a slight deviation can be detrimental to their health.
To monitor pH levels, you’ll need to purchase a pH test kit specifically designed for composting. These kits usually involve dipping a strip into the liquid or inserting a probe into the compost pile. Compare your reading to a chart provided with the kit to determine whether your pH level is within the desired range. If not, it’s essential to make adjustments.
Add acidic materials like peat moss or coffee grounds to lower the pH if it’s too high, while adding lime or wood ash will help raise the pH if it’s too low. It’s also crucial to maintain a balanced carbon-to-nitrogen ratio (C:N), as this can significantly impact pH levels. For example, if your compost has an excessive amount of nitrogen-rich food waste, it may produce ammonia, causing the pH level to rise.
Regularly monitoring and adjusting your pH levels will help ensure the health and productivity of your worm composting system.
Monitoring Moisture and Temperature Levels
Monitoring moisture and temperature levels is crucial for maintaining optimal conditions within your worm compost. Too much or too little of either can lead to issues such as odors, mold growth, and even the death of your worms.
Factors that can affect moisture levels include the aeration of the pile, the amount of bedding material used, and the ambient humidity in your environment. Aim for a mix of 80-85% moisture content by ensuring the pile is kept consistently damp but not waterlogged. Check moisture levels daily by feeling the top inch of the compost – it should feel like a damp sponge.
Temperature fluctuations can be affected by factors such as location, climate, and the size of your worm compost system. Aim for a temperature range between 55°F and 77°F (13°C to 25°C) to promote optimal microbial activity. Temperatures above 80°F (27°C) can lead to anaerobic conditions and reduced worm health. Monitor temperatures using an infrared thermometer, taking readings at the top, middle, and bottom of the pile.
By regularly checking moisture and temperature levels, you can identify potential issues before they become major problems. This proactive approach will help ensure your worm compost system runs smoothly and efficiently.
Managing Worm Population Growth and Reducing Odor Emissions
Monitoring worm population growth is crucial to maintaining a healthy and thriving composting system. You want to ensure that there are enough worms to break down the waste efficiently without overcrowding the bin. To achieve this balance, start by tracking the number of worms you add at the beginning of each cycle. Keep an eye on the worms’ reproduction rate, which can be influenced by factors like temperature, moisture, and food quality.
Aim for a ratio of 1-2 pounds of worms per 5-10 pounds of waste. If you notice your worm population growing too quickly, consider reducing the amount of new worms added each cycle or separating excess worms into a new bin. On the other hand, if you’re not seeing enough reproduction, adjust your conditions to favor a more hospitable environment.
Reducing odor emissions is also vital for maintaining a pleasant and hygienic composting setup. This can be achieved by ensuring good airflow within the bin, maintaining adequate moisture levels, and adding sufficient carbon-rich materials like shredded newspaper or coconut coir. Regularly turning the pile will help prevent anaerobic conditions that can lead to unpleasant odors.
Harvesting and Using Your Worm Castings
Now that you’ve got a thriving worm compost bin, it’s time to harvest the nutrient-rich castings and learn how to use them in your garden. Let’s explore some effective ways to utilize these valuable resources.
Collecting Mature Worm Compost (Castings)
When it’s time to harvest mature worm castings, also known as vermicompost or worm poop, you’ll be looking for a rich, dark brown material that resembles coffee grounds. This is the result of your worms’ hard work breaking down organic matter into a nutrient-dense compost.
To determine if your worm castings are mature and ready to harvest, check their moisture content. If they’re too dry, they won’t have the right consistency for use in your garden. Aim for a mixture that’s moist but not soggy – similar to a damp sponge. You can also assess the color: mature worm castings will be a deep brown or almost black hue.
In terms of texture, mature worm castings should crumble easily and have a slightly earthy smell. Avoid harvesting worm castings that are too wet or have an unpleasant odor, as these may indicate an imbalance in your system. When you’re satisfied with the moisture content, color, and texture of your worm castings, it’s time to harvest them for use in your garden.
Benefits and Uses of Worm Castings in Gardening
When you’re ready to put your worm castings to use in the garden, the benefits are numerous. For one, worm compost has a unique ability to improve soil structure, making it easier for roots to grow and plants to absorb water and nutrients. This is because worm compost contains humic acids, which help break down clay particles and aggregate sand particles, creating a more porous and aerated soil environment.
In addition to improved soil structure, worm castings are an excellent source of essential micronutrients like nitrogen, phosphorus, and potassium. These microorganisms also promote the growth of beneficial bacteria in the soil, increasing nutrient availability for plants. This can lead to healthier, more resilient plant growth, as well as increased crop yields.
One of the most exciting benefits of using worm compost is its ability to enhance microbial activity in the soil. As a result, your plants are better equipped to fight off pests and diseases naturally, reducing the need for chemical pesticides and fertilizers. To get started, simply mix 10-20% worm castings into your potting soil or garden beds before planting.
Incorporating Worm Castings into Your Soil Management Strategy
When it comes to incorporating worm castings into your soil management strategy, timing and application rates are crucial. To get the most out of this nutrient-rich resource, consider applying 10-20% of the total volume as a top dressing after harvest. This not only replenishes depleted nutrients but also improves soil structure.
For optimal results, aim to incorporate worm castings into your planting schedule around transplanting or seeding time. For established plants, use them as a side-dressing during growth stages. A 2-3 inch layer of castings is ideal for small-scale gardens. You can mix it with the existing soil or create raised beds using this compost.
Timing also plays a significant role in utilizing worm castings effectively. If you notice slow growth rates or nutrient deficiencies, reapply them as needed. Avoid over-applying, however, to prevent nutrient imbalances and increased susceptibility to pests and diseases.
Troubleshooting Common Issues with Worm Composting
Don’t worry if things don’t go as planned – we’ll walk you through common problems like odors, pests, and slow decomposition, so you can get back on track. Let’s tackle these issues together!
Identifying Potential Problems in the System
As you embark on worm composting, it’s essential to be aware of potential problems that may arise. Even with proper setup and maintenance, issues can still occur. One common problem is pests, such as fruit flies, ants, or even rodents, which can infest your worm bin. To prevent this, ensure your bin has a secure lid, keep it clean, and avoid overfeeding.
Odor problems are another issue that may arise from improper setup or inadequate maintenance. If your bin lacks adequate ventilation, moisture becomes trapped, leading to unpleasant odors. Regularly inspect your bin’s drainage system and aerate the bedding as needed. Also, maintain a balance of “green” (nitrogen-rich) and “brown” (carbon-rich) materials.
Uneven moisture levels can also cause problems. If the bedding is too wet, it may lead to anaerobic conditions, resulting in unpleasant odors or even kill your worms. Conversely, if it’s too dry, worms won’t thrive. Regularly check the moisture level by squeezing a handful of bedding; it should feel like damp soil.
Solutions for Addressing Common Worm Composting Issues
Addressing common issues with worm composting requires a proactive approach to maintaining a healthy system. One of the most common problems is odors emanating from the worm composter, which can be caused by an imbalance of “green” materials (food scraps) and “brown” materials (dried leaves or shredded newspaper). To rectify this issue, simply increase the ratio of brown materials to green materials.
Another common problem is the presence of pests in the worm composter. Red wigglers are resistant to many pests, but fruit flies can still be an issue if food scraps become too moist. To prevent this, ensure that all food scraps are buried beneath a layer of bedding material and maintain adequate moisture levels within the system.
It’s also essential to monitor pH levels regularly, as fluctuations can affect worm health and overall compost quality. Aim for a slightly acidic pH between 6.5-7.0 by adjusting the balance of materials or adding lime to raise the pH if necessary.
Regularly inspecting your worm composter will help you identify any potential issues before they become major problems. By staying on top of these maintenance tasks, you’ll be able to create a thriving and efficient worm composting system that produces nutrient-rich fertilizer for your garden.
Conclusion: Taking Your First Steps with Worm Composting
Now that you’ve learned the basics of worm composting, it’s time to put your knowledge into practice and start reducing your waste effectively at home. This final section will guide you through your first steps.
Recap of Key Takeaways
In conclusion to our comprehensive guide on worm composting basics, let’s recap the essential practices and considerations for successful worm composting. To get started, you’ll need a bin specifically designed for worm composting, as well as a mix of “red wiggler” worms and food scraps.
Some key takeaways from this article include:
* Maintaining optimal temperature and moisture levels in your worm bin is crucial for worm health and digestion.
* A carbon-to-nutrient ratio of 2:1 or 3:1 is ideal for balanced decomposition, with brown materials like coconut coir serving as a carbon source.
* Harvesting worm castings should occur every 1-2 months, depending on the size of your bin and the moisture levels within.
To avoid common mistakes, ensure you’re not overfeeding your worms or introducing too many acidic materials. Regular monitoring and maintenance will help maintain a thriving worm composting ecosystem. By following these essential practices and considering these key points, you’ll be well on your way to successful worm composting and a nutrient-rich soil amendment for your garden.
Next Steps for Beginner Worm Composters
As you’ve completed your first worm composting project and gained some hands-on experience, it’s time to take your skills to the next level. Congratulations on taking the first step towards sustainable waste management! Now that you have a basic understanding of worm composting, you’re likely eager to refine your techniques and improve your outcomes.
Consider attending workshops or online courses to deepen your knowledge. Organizations like the US Composting Council and the Worm Factory offer comprehensive training programs for both beginners and experienced composters. You can also join local worm composting communities or online forums to connect with fellow enthusiasts, share tips, and learn from their experiences.
To further refine your skills, try experimenting with different types of worms, varying carbon-to-nitrogen ratios, or exploring other applications for your worm castings – like using them as a natural fertilizer in your garden. Remember, practice makes perfect, so don’t be afraid to experiment and adapt new techniques to suit your specific needs. With patience, persistence, and continued learning, you’ll become a seasoned worm composting pro!
Frequently Asked Questions
Can I use other types of worms for worm composting besides red wigglers?
While red wiggler worms (Eisenia fetida) are the most popular choice for worm composting due to their exceptional vermicomposting abilities, you can also experiment with other composting worm species. However, ensure that any alternative worm species you choose is well-suited for indoor conditions and won’t escape or cause problems in your system.
How often should I harvest my worm castings, and what’s the ideal ratio of worms to food waste?
The ideal harvesting frequency varies depending on the size of your bin and the rate at which the worms process organic matter. Generally, it’s recommended to harvest every 1-2 weeks, when the bin is about 75% full. Maintain a balance between worm population and food waste – an ideal ratio is 1 pound of worms for every 5 pounds of food waste.
Can I use worm composting in small spaces like apartments or condos?
Worm composting can be done even with limited space, making it perfect for urban gardeners. Look for compact worm bins specifically designed for indoor use and follow the manufacturer’s guidelines for setup and maintenance. This will ensure a healthy environment for your worms while minimizing odors and mess.
What if I notice a strong odor emanating from my worm composting bin?
A pungent smell is often an indication of an imbalance in your system. Check that you’re maintaining the right moisture levels (50-70% water content) and ensuring adequate airflow within the bin. If the issue persists, consider adding more bedding or adjusting the C:N ratio to strike a better balance.
How do I handle worm escapees when they inevitably try to escape from my worm composting bin?
Worms can escape through tiny openings if the bin isn’t secure. To minimize this risk, ensure that your worm bin has a tight-fitting lid and drill holes for airflow are covered with mesh. If you notice escaped worms, gently collect them using a small container or return them to their bin undisturbed.