Winter is coming, and your garden needs some TLC. As the temperatures drop, your plants can become vulnerable to harsh winds, frost, and freezing temperatures. That’s where mulch comes in – a simple yet effective way to protect your garden from winter damage. But not all mulches are created equal, and choosing the right one for your climate zone is crucial. A well-applied layer of mulch can be the difference between a thriving garden come spring and a ruined one.
In this article, we’ll delve into the world of mulching for winter protection, covering everything from selecting the perfect mulch to applying it correctly and maintaining its effectiveness throughout the season. Whether you’re a seasoned gardener or just starting out, our expert guide will provide you with the knowledge you need to safeguard your garden against the elements.
Benefits and Importance of Mulching in Winter
Mulch protects soil from winter damage, but it also offers numerous benefits for your garden. Let’s explore why mulching is essential during the colder months.
Understanding the Role of Mulch in Winter Protection
When winter sets in, your garden and plants are exposed to extreme temperatures, harsh winds, and excessive moisture. Mulch plays a crucial role in protecting them from these adverse conditions, ensuring the soil’s health remains intact throughout the season.
As a protective barrier, mulch shields the soil from intense cold snaps, frost, and snowmelt that can cause damage to plant roots. It also prevents the soil from being washed away by heavy rainfall or frozen water. Mulch absorbs excess moisture, reducing the risk of waterlogged soil and root rot. By keeping the soil surface stable and dry, mulch helps prevent erosion and keeps plant growth on track.
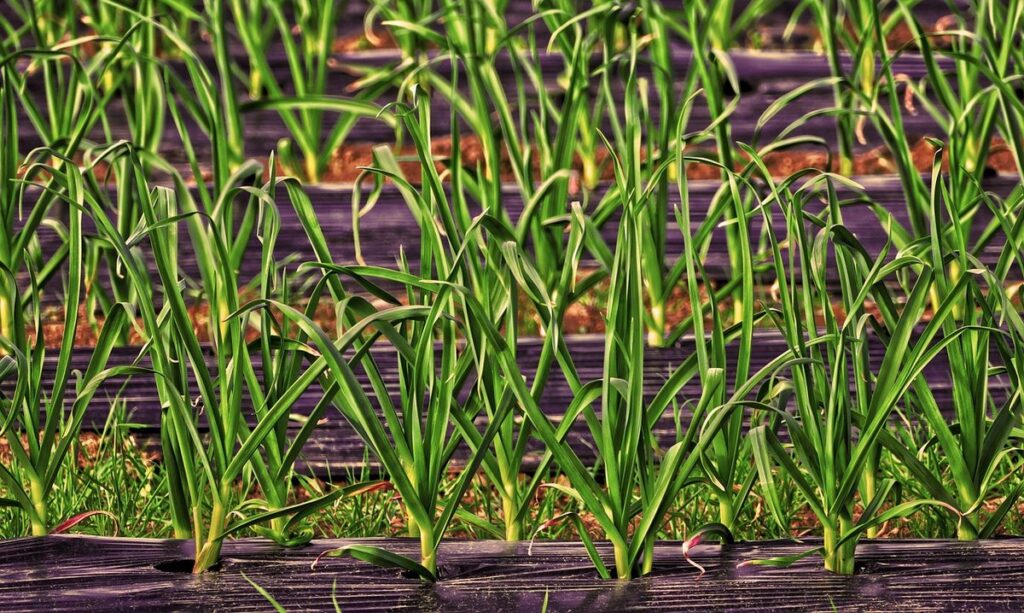
To get the most out of your winter mulching efforts, apply a thick layer (3-4 inches) of organic mulch such as straw or wood chips around your plants before the first frost. Replenish it periodically to maintain its effectiveness. Mulch is not just a protective measure; it also helps regulate soil temperature, retaining warmth during cold snaps and keeping soil cooler during heatwaves.
By employing this simple yet effective strategy, you can shield your garden from winter’s harsh conditions, ensuring the health of your plants and minimizing damage to your landscape.
Choosing the Right Type of Mulch for Winter
When it comes to choosing the right type of mulch for winter, you’ll want to consider what will provide the best protection for your plants while also being easy to apply and maintain. Let’s break down some of the most common types of mulches to help you make an informed decision.
Organic mulches like wood chips or bark are popular choices because they’re natural, biodegradable, and can be composted at the end of their life cycle. However, they may need to be replenished regularly as they break down over time. Inorganic options like plastic sheeting or landscape fabric offer a longer-lasting solution but come with environmental drawbacks.
Natural mulches such as pine straw or cocoa hulls are another option. They’re easy to spread and can help regulate soil temperature. Synthetic alternatives, on the other hand, often mimic these natural materials in appearance but contain chemicals that can leach into the soil.
Consider your specific climate, plant types, and maintenance schedule when selecting a mulch type. If you have trees or shrubs with shallow roots, for example, you may prefer to use a softer material like straw or pine needles.
Preparing Your Garden for Winter Mulching
Before winter arrives, it’s essential to prepare your garden for mulch protection by clearing away debris and weeds, creating a clean slate for your winter mulch. This process sets the stage for a healthy and protected garden through the cold months.
Assessing Your Soil Conditions Before Mulching
Before applying winter mulch, it’s essential to assess your soil conditions. This is often overlooked but crucial for the effectiveness of the mulching process. Let’s start with moisture levels: does your soil tend to dry out quickly or stay too wet? Check by inserting a finger into the soil – if it feels dry, it’s time to add some organic matter like compost to retain moisture. If it’s consistently waterlogged, consider raised beds or better drainage.
Next, check your soil pH using a DIY kit or sending a sample to a lab for analysis. Most plants prefer a slightly acidic to neutral soil pH (around 6-7). If your soil is too alkaline or acidic, mulching alone may not help, and you might need to amend the soil first.
Lastly, consider the nutrient content of your soil. Add compost if it’s lacking in nutrients, but avoid overfertilizing as this can harm plants during winter dormancy. A simple soil test will give you a good idea of what you’re working with and guide any necessary amendments before applying mulch. This initial assessment may seem time-consuming, but trust us – it’s worth the effort for optimal results.
Cleaning Up Your Garden Before Applying Mulch
Before you start applying mulch to protect your garden for winter, it’s essential to clean up any debris, weeds, and obstacles that could interfere with the process or create uneven surfaces. This step might seem tedious, but trust us – it’s worth the extra effort.
Start by removing any dead plants, branches, and leaves from the area where you’ll be applying mulch. These can provide a haven for pests and diseases to thrive, which can ultimately compromise your garden’s health. Use a rake or a broom to sweep away loose debris and make the surface smooth.
Next, tackle those pesky weeds that might be popping up in unwanted areas. Pull them out by hand or use a weeding tool to avoid spreading their seeds further. Make sure to remove any roots you can see to prevent regrowth.
Finally, check for any obstructions like rocks, toys, or other garden ornaments that could interfere with mulching. Move these aside or remove them altogether to ensure even coverage and prevent damage to your plants.
Applying Winter Mulch Effectively
Now that we’ve covered why winter mulching is essential, let’s dive into applying it effectively to protect your garden from harsh winter conditions.
Best Practices for Mulching in Different Climate Zones
When applying winter mulch protection, it’s essential to consider the regional climate conditions in your area. Different zones present unique challenges that require tailored approaches for optimal results.
For regions prone to extreme cold snaps, such as the Northeast or Midwest, apply a thicker layer of mulch (4-6 inches) to protect plant roots from freezing temperatures. Consider using a mix of organic materials like straw, wood chips, or bark that can withstand harsh winters and reduce moisture loss.
In areas with wet winters, like the Pacific Northwest or Southeastern states, opt for lighter mulching (2-3 inches) to prevent waterlogged soil conditions. Use lightweight materials like pine straw, grass clippings, or shredded leaves to minimize water retention.
For dry winter climates like California or Arizona, mulch lightly (2-3 inches) and choose drought-tolerant materials like coconut coir, pine needles, or recycled organic matter to reduce moisture loss while retaining some soil warmth. Remember to adjust your mulching schedule according to regional weather forecasts to ensure effective protection for your plants during harsh winter months.
Consider monitoring local temperature trends and adjusting your mulch thickness accordingly to prevent damage from extreme cold snaps or rapid thawing events.
Tips for Proper Mulch Depth and Distribution
When applying winter mulch, it’s essential to strike the right balance between providing adequate protection and preventing potential damage from excessive mulch accumulation. Mulch that’s too deep can cause more harm than good by suffocating plants, encouraging rot, and creating an environment conducive to pests and diseases.
Aim for a mulch depth of 2-3 inches for most perennials and woody ornamentals. This allows the mulch to breathe while still retaining moisture and regulating soil temperature. For sensitive plants like succulents or newly planted seedlings, opt for a shallower layer of around 1 inch.
To ensure proper distribution, start by applying a thin layer and gradually build up to the desired depth. Avoid piling mulch against plant stems, as this can lead to moisture accumulation and promote disease. Instead, gently spread it evenly, leaving about an inch of space between the mulch and plant crowns. Regular maintenance is also crucial – remove any accumulated debris or excessive mulch in the spring to prevent compaction and ensure healthy growth.
Long-Term Benefits of Winter Mulching
As you work towards creating a sustainable winter garden, understanding the long-term benefits of mulching is crucial to unlock its full potential and protect your plants year after year.
Conserving Soil Health and Fertility
When it comes to maintaining healthy soil, winter mulching plays a crucial role. Mulch helps regulate temperature fluctuations by insulating the soil from extreme cold temperatures and preventing it from freezing too deeply. This is especially important for plants with sensitive roots that can be damaged by frost.
Mulch also retains moisture in the soil, reducing the need for frequent watering during the dry winter months. By keeping the soil consistently moist, you’re helping to prevent erosion caused by water running off the surface. As a result, your soil’s natural ecosystem remains intact, allowing beneficial microorganisms and nutrients to thrive.
To maximize the benefits of mulch on soil health, apply a 2-3 inch layer of organic mulch around plants, keeping it at least 6 inches away from plant stems. Replenish as needed throughout the winter to maintain optimal coverage. By incorporating winter mulching into your routine, you’ll be taking proactive steps towards preserving your garden’s long-term fertility and soil health.
Encouraging Healthy Plant Growth in Spring
As you remove the winter mulch in the spring, you’ll be thrilled to see the burst of new growth that it has encouraged. The benefits of winter mulching extend far beyond just protecting plants from harsh weather conditions. By applying a thick layer of organic mulch around the base of your plants during the winter months, you create an ideal environment for healthy plant growth in the spring.
This is because winter mulch helps to regulate soil temperature, retaining moisture and reducing the risk of frost damage. As a result, roots are able to grow stronger and more extensive, providing a solid foundation for new growth. Additionally, winter mulching suppresses weed growth, which can compete with your plants for water and nutrients.
When you remove the mulch in the spring, make sure to do so gradually, allowing the soil to warm up before planting. This will help prevent shocking the roots of your plants and encourage them to grow vigorously throughout the growing season. With a good layer of winter mulch in place, you’ll be rewarded with lush, vibrant growth that’s perfect for enjoying all summer long.
Managing Mulch Over Time: Maintenance and Replacement
As winter weather takes its toll on your mulched garden beds, it’s essential to maintain and eventually replace the mulch to ensure optimal protection for your plants. Regular maintenance will help extend the lifespan of your mulch.
Regular Inspections for Signs of Damage or Wear
Regular inspections are crucial to maintaining the integrity and effectiveness of your winter mulch. Set aside time each month to walk through your mulched areas, scanning for signs of degradation, pest infestations, or other issues that could compromise its protective capabilities.
Check for discolored or moldy patches, which can indicate moisture accumulation or fungal growth. Look out for pests like rodents, slugs, and snails, which may be attracted to the decaying mulch. Also, inspect for signs of wear around tree bases, paths, and other areas where foot traffic is high.
If you notice any problems, address them promptly. Remove and replace damaged or moldy mulch with fresh material, ensuring a uniform layer that maintains its barrier function. Consider implementing a mulch rotation schedule to minimize the risk of pests and diseases becoming established in your garden. For instance, if you’re using wood chips, consider switching to alternative organic materials like straw or bark chippings to reduce the likelihood of pest infestations.
Replenishing or Replacing Winter Mulch as Needed
As winter slowly gives way to spring, it’s essential to replenish or replace your winter mulch to maintain its effectiveness as a protective barrier for your plants. Schedule regular replenishments to ensure you have an adequate layer in place. Aim to add 2-3 inches of new mulch each spring, working it in well to avoid any gaps or unevenness.
Check your mulch regularly during the winter months, replacing old or damaged material with fresh batches as needed. This will help maintain its water-repellent properties and prevent erosion around plant stems. Consider scheduling a monthly “mulch refresh” to keep your garden looking tidy and healthy.
When replenishing or replacing mulch, be sure to clear any debris or weeds that may have accumulated on top of the existing layer. This will also give you an opportunity to inspect for any damage caused by winter weather conditions, such as freeze-thaw cycles or extreme temperatures.
Additional Considerations and Best Practices
As you’ve learned how to apply mulch effectively, here are some crucial additional tips to ensure a healthy and protected garden come springtime. We’ll cover best practices for specific situations.
Mulching Around Trees and Shrubs
When it comes to mulching around trees and shrubs during winter, it’s essential to treat delicate plant specimens with care. Before applying mulch, assess the unique needs of each plant. For example, newly planted trees may require a layer of mulch that’s 3-4 inches thick to maintain moisture and regulate soil temperature.
Delicate shrubs like azaleas or rhododendrons prefer a thinner layer of mulch, about 1-2 inches deep. This allows for air circulation and prevents waterlogged soil conditions. Consider the mature size of the plant when applying mulch, as you don’t want to overcrowd the area with too much material.
When working around trees and shrubs, keep in mind their root systems. For example, shallow-rooted plants like ornamental grasses require a wider mulched area than deep-rooted trees. To create a balanced look, apply mulch in a circular pattern, starting from the base of the plant and moving outward.
Remember to leave space for air circulation and watering around each plant. This will prevent moisture buildup and ensure healthy growth during the winter months.
Integrating Winter Mulch with Other Garden Strategies
Incorporating winter mulching into your broader gardening plan is essential to ensure a cohesive approach to maintaining a healthy, thriving garden throughout the year. One key aspect to consider is timing. Mulch application should be done before the ground freezes, typically in late fall or early winter. This allows for maximum protection and helps prevent soil erosion.
To integrate mulching with other garden strategies, consider combining it with techniques like crop rotation and companion planting. For instance, mulching can help retain moisture and suppress weeds in areas where you’re growing water-intensive crops or sensitive plants that require optimal conditions.
Another crucial aspect is choosing the right type of mulch for your specific needs. Organic options like wood chips or bark can add nutrients to the soil as they break down, while inorganic materials like plastic sheeting provide a more straightforward barrier against cold temperatures. Ultimately, selecting the most effective mulching method will depend on your garden’s unique conditions and requirements.
Be sure to also plan for removal when spring arrives, as compacted mulch can prevent air and water from reaching plant roots.
Frequently Asked Questions
Can I use mulch on slopes or uneven terrain?
Yes, you can still apply winter mulch to slopes or uneven terrain, but it’s crucial to ensure the mulch stays in place during snowmelt and heavy rainfall. Use landscape pins or geotextiles to secure the mulch, and consider using a specialized mulch mix designed for sloping areas.
How do I prevent mulch from washing away in winter rain?
To prevent mulch from being washed away by heavy winter rains, choose a mulch with good water retention properties. Organic mulches like wood chips or bark can work well. Also, ensure the mulch layer is thick enough (at least 3-4 inches) to withstand erosion.
Can I mix different types of mulch for better protection?
While it’s possible to mix different types of mulch, it’s not always recommended. Some mulches might not complement each other in terms of texture or water retention properties. For example, mixing straw with wood chips can create an inconsistent layer that may allow weeds to grow through.
How often should I replenish winter mulch as new growth appears?
Replenish winter mulch whenever new growth appears, usually in late winter or early spring. Remove the existing mulch and replace it with fresh material, making sure to maintain a consistent 2-3 inch layer around plants.
Can I use leftover fall leaves as winter mulch?
While fall leaves can be a natural and cost-effective option for winter mulching, they have some limitations. Leaves can harbor weed seeds and might not provide sufficient insulation against extreme cold snaps. Consider using them as part of a layered mulching approach or mixing with other materials to achieve better results.