As a gardener, you’ve likely found yourself staring at tiny seedlings in their small pots, wondering when the right moment is to transfer them to bigger containers. This crucial step, known as potting on, can make all the difference in promoting healthy growth and development. When done correctly, it can be the key to unlocking your seedlings’ full potential. But get it wrong, and you risk shocking or even killing your young plants. In this article, we’ll explore the ideal time to pot on seedlings and provide expert guidance on how to make a smooth transition from small pots to bigger containers. We’ll cover the signs that indicate it’s time to pot on, as well as tips for ensuring a successful transfer.
Understanding Seedling Growth Stages
As you tend to your seedlings, it’s essential to recognize the distinct growth stages they go through, which will help guide your decision on when to pot them up into larger containers. Let’s break down these key milestones together!
Stage 1: Germination and Seedling Establishment
Germination is the first and most critical stage of seedling growth. During this period, usually lasting 7-14 days, a seed absorbs water, breaks dormancy, and begins to grow its roots and sprout. Providing optimal conditions for germination, such as warmth (most seeds require temperatures above 65°F), light, and moisture, is crucial.
Proper care during this stage involves keeping the soil consistently moist but not waterlogged. A temperature-controlled environment helps speed up or slow down germination depending on the seed’s requirements. For example, lettuce seeds typically germinate in as little as 3-5 days at 70°F, while tomato seeds take around 7-10 days.
Avoid overwatering, which can lead to fungal diseases and root rot, devastating a young seedling. Monitor your seed trays closely for the first signs of growth, usually appearing as tiny green shoots or roots starting to emerge from the soil. Once germinated, seedlings require more light than ever before, so move them to a brighter location or consider using grow lights.
Keep in mind that seeds have varying levels of dormancy, and some may take longer to germinate than others. Check the specific requirements for your chosen variety to ensure you provide the right conditions for optimal growth.
Stage 2: Seedling Development and Root Growth
At this stage, seedlings begin to focus their energy on developing a robust root system and producing leaves. One of the key milestones is the emergence of the first set of true leaves, which typically occurs 1-2 weeks after germination. These new leaves are usually larger and more rounded than the initial seed leaves, marking a significant growth spurt.
As the roots grow deeper into the soil, they start to branch out in search of nutrients and water. This is an essential period for root development, as it allows the seedling to absorb moisture and nutrients efficiently. You’ll notice that the seedling’s stem becomes thicker, and its color changes from pale green to a more vibrant shade.
Keep an eye out for these signs of readiness for potting on: the roots have filled the cell or pot, the leaves are reaching the top of the container, and the stem is thickening. When you notice these cues, it’s time to transfer your seedling into a larger pot with well-draining soil to accommodate its growing root system.
Identifying Signs of Readiness
Now that you’ve got your seedlings growing strong, it’s time to think about giving them more space – but how do you know when they’re ready for a bigger pot?
1. Root Growth Outgrowing Containers
As you continue to care for your seedlings, it’s essential to monitor their progress and identify signs that they’ve outgrown their containers. One of the most crucial visual cues is root growth. If you notice roots protruding from the drainage holes or circling around the inside of the pot, it’s a clear indication that the roots have exceeded the container’s capacity.
Another key indicator is soil conditions. Check if the top inch of soil feels dry to the touch after watering. This could mean the roots have consumed all available water and nutrients, making it difficult for the seedling to thrive in its current pot.
Look for signs of root bound plants as well, such as:
• A decrease in growth rate
• Wilting or yellowing leaves
• The need for more frequent watering
• Visible roots on the surface of the soil
If you observe any of these symptoms, it’s likely time to transplant your seedling into a larger container. This will provide the necessary space for the roots to expand and support continued growth. Remember to handle the roots with care when transplanting to minimize damage and ensure the health of your young plant.
2. Leaf Development and Nutrient Requirements
As seedlings grow, their leaf development provides valuable clues to their nutrient needs. Keep an eye on the size and color of leaves to determine if they’re getting enough nutrients. Leaf shape can also indicate potential issues – for instance, pale or wilted leaves might be a sign that your seedling is lacking nitrogen.
Monitor leaf growth daily by checking the rate at which new leaves emerge from the node (the joint where the leaf meets the stem). A steady flow of nutrient-rich water or fertilizer encourages healthy development and can influence the rate of growth.
If you notice slow growth, it’s not just a matter of waiting for more time to pass – there are some key adjustments you can make to your care routine that will help stimulate growth:
* Provide adequate light: Seedlings need bright light to undergo photosynthesis and grow new leaves.
* Maintain consistent moisture levels: Overwatering or underwatering can stunt growth. Aim for an even balance of wetness in the soil.
Keep a close eye on changes in your seedling’s appearance, particularly around the first two weeks after transplanting. If you catch any signs of nutrient deficiency early on, make adjustments to prevent further stunting.
Choosing the Right Time for Potting On
When potting on seedlings, timing is everything. In this next part of our guide, we’ll help you figure out when to move your seedlings into larger pots.
Determining Seedling Maturity
When assessing seedling maturity for potting on, it’s essential to evaluate several key factors. A healthy root system is a crucial indicator of readiness. Gently lift the seedling out of its container and inspect the roots. If they’ve filled the available space, are circling around the edges, or are growing through drainage holes, it’s likely time for potting on.
Another critical factor is leaf size. As seedlings grow, their leaves will naturally increase in size. However, if you’re considering potting on, look for signs of excessive leaf growth or overcrowding within the container. If this is the case, it may be necessary to prune back some of the seedling’s foliage before transferring.
Lastly, evaluate overall plant vigor by examining the seedling’s appearance. Are the leaves a vibrant green color? Is new growth evident? Does the stem appear sturdy and straight? A healthy, mature seedling will typically exhibit these characteristics.
Environmental Factors Influencing Potting-On Timing
When potting on seedlings, it’s essential to consider the environmental factors that can influence their growth. Weather conditions play a significant role in determining when to pot on. For instance, if you live in an area with frequent rain or high humidity, seedlings may grow too quickly and require potting on sooner. Conversely, dry spells can slow down growth, making it necessary to wait until the weather improves before transferring them.
Temperature fluctuations also impact seedling development. Young plants prefer temperatures between 65-75°F (18-24°C), which is why spring and fall are ideal seasons for transplanting. Avoid potting on during periods of extreme heat or cold, as this can cause shock and hinder growth. Light exposure is another critical factor to consider. Seedlings grown under direct sunlight may require more frequent potting on due to their rapid growth rate. Conversely, those in low-light conditions might need less frequent transplants.
Consider these environmental factors when deciding when to pot on your seedlings. Monitor the weather forecast and adjust your transplant schedule accordingly.
Preparing Seedlings for Transplanting
To ensure a smooth transition from seed tray to pot, it’s essential to prepare your seedlings properly before transplanting them outdoors. This includes hardening off and checking their root health.
Cleaning and Pruning Seedlings
When potting on seedlings, it’s essential to give them a head start by cleaning and pruning them before transplanting. Start by gently removing excess soil from the roots of your seedling, taking care not to damage any delicate hairs or roots. This will prevent waterlogged conditions that can lead to root rot.
Next, inspect your seedling’s roots for any weak or damaged areas. Use sterile scissors or pruning shears to carefully trim away these areas, promoting healthy growth and preventing the spread of disease. Be cautious not to over-prune, as this can stress the plant further.
Harden off your plants by gradually exposing them to outdoor conditions over a period of 7-10 days. Start by moving them from their indoor environment to a shaded area outdoors for a few hours each day, gradually increasing exposure to direct sunlight and wind. This will prepare your seedlings for the stresses of transplanting and reduce shock once they’re in their final pot.
By following these steps, you’ll be giving your seedlings the best chance at success when it’s time to transplant them into larger pots or directly into the garden.
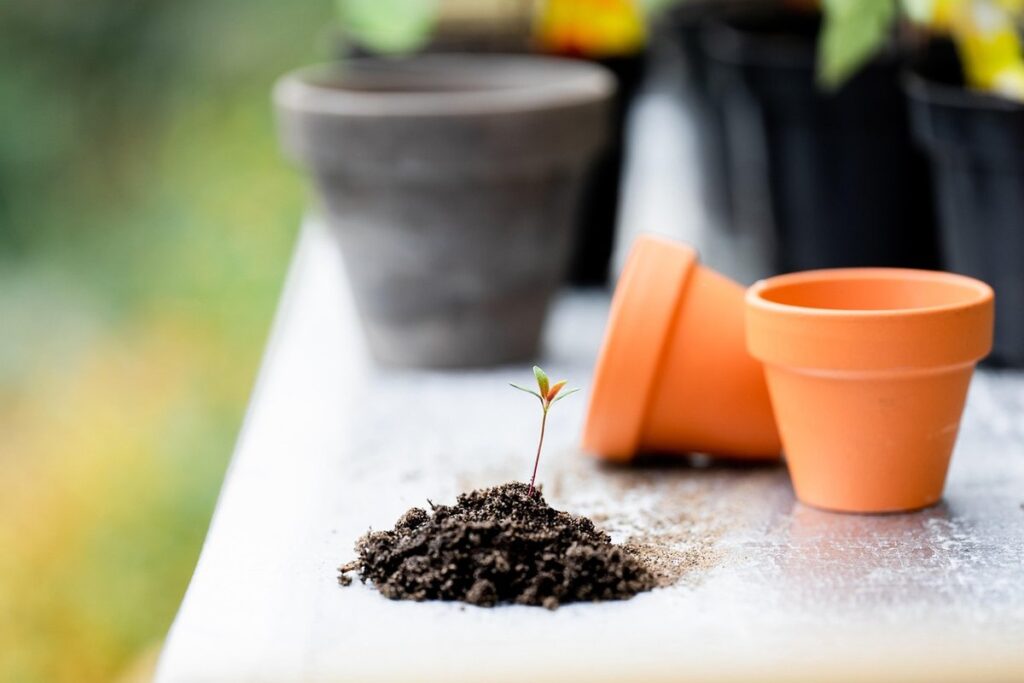
Selecting the Right Container and Potting Mix
When transplanting seedlings into larger containers, it’s crucial to select the right container and potting mix to support their continued growth. A suitable container should have a few key characteristics: sufficient depth for the root system, adequate drainage holes, and a wide enough mouth for easy access.
Choose a container made from breathable materials like terracotta or ceramic, which allow for airflow and moisture regulation. Avoid using plastic containers with no drainage, as this can lead to waterlogged soil and root rot. Consider the size of your seedlings: small pots (around 4-6 inches in diameter) are suitable for seedlings with delicate roots, while larger pots (8-12 inches in diameter) are better suited for more robust plants.
The potting mix is also vital in ensuring healthy transplanting. Opt for a well-draining mix specifically designed for seedlings or young plants. This type of mix will retain moisture without becoming too soggy, and provide adequate nutrients for continued growth.
Techniques for Successful Transplanting
When transplanting seedlings, timing is crucial, and using the right techniques can make all the difference in their survival and growth. We’ll walk you through some essential tips to get it just right.
Watering and Handling Seedlings
When potting on seedlings, it’s crucial to handle them with care and provide optimal watering conditions to minimize transplant shock. Over-handling can cause the delicate roots to become damaged, leading to a slower growth rate and increased risk of disease.
To avoid this, gently lift the seedlings out of their current container, taking care not to disturb the surrounding soil or root system. Use a fork to loosen any stubborn clumps, rather than tugging on the plant itself. Once removed, handle the seedling by its leaves, never its stem or roots.
Watering is also critical during this process. Avoid getting water directly onto the leaves or crown of the plant, as this can cause rot and other issues. Instead, water at soil level, allowing the moisture to soak in slowly. This will give the roots a chance to absorb the water without causing undue stress.
By taking these simple steps, you’ll be able to reduce transplant shock and set your seedlings up for success. With proper care, they’ll thrive in their new pot and continue to grow strong and healthy.
Monitoring Seedling Recovery Post-Transplantation
Monitoring seedling recovery post-transplantation is a crucial step to ensure successful transplanting. As you observe your seedlings settling into their new environment, look for signs of adaptation and resilience. One key indicator is the emergence of new growth patterns. Check if the seedlings are producing new leaves, stems, or roots at an expected rate, indicating that they’re thriving in their new potting mix.
A healthy transplant should be able to withstand minor stressors like temperature fluctuations, humidity changes, or watering adjustments without displaying visible signs of distress. Observe your seedlings for stress tolerance by gently misting them with water and checking if they react negatively. If the leaves droop, wilt, or develop brown edges, it may indicate overwatering, underwatering, or nutrient deficiencies.
To monitor recovery effectively, regularly inspect your seedlings for these signs of adaptation and resilience. Check their color, texture, and overall appearance to ensure that they’re not succumbing to transplant shock. With attention to these details, you can identify potential issues early on and adjust your care routine accordingly, setting the stage for a successful growth period in their new potting environment.
Troubleshooting Common Issues
If you’re experiencing problems with seedlings that are refusing to thrive, this section will help you identify and resolve common issues. Don’t worry, most problems have simple solutions!
Dealing with Transplant Shock
Dealing with Transplant Shock
Transplant shock is a common issue that can occur when seedlings are suddenly moved from their original container to a larger pot. This stress can cause weakened roots, wilted leaves, and even death if not addressed promptly. To prevent transplant shock, it’s essential to harden off your seedlings before transplanting them into the new soil.
To harden off your seedlings, start by gradually exposing them to outdoor conditions over the course of 7-10 days. Begin by moving them outside for a few hours a day, then increase the duration each day until they’re fully acclimated to the outdoors. This process will help strengthen their roots and prepare them for the transition.
If you do encounter transplant shock, there are steps you can take to recover your seedlings. First, ensure they’re receiving adequate water and nutrients. You may also want to prune any damaged leaves or stems to prevent further stress. With proper care and attention, most seedlings will be able to recover from transplant shock within a few weeks.
Encouraging Healthy Root Development Post-Transplantation
When potting on seedlings, it’s not uncommon for them to experience shock and stress. One critical aspect of their recovery is promoting healthy root development. To achieve this, you need to pay close attention to your seedling’s watering schedule.
Initially, reduce the frequency of watering as the soil takes longer to dry out in larger containers. Be cautious not to overwater, which can lead to weak and spindly growth. Instead, observe your plant’s response and adjust accordingly. A good rule of thumb is to water only when the top inch of soil feels dry.
Fertilizing post-transplantation is also crucial for encouraging healthy root development. Use a balanced fertilizer at half the recommended strength, and apply it once every two weeks. This will provide essential nutrients without causing an excessive build-up that can harm your seedling.
Monitor your plant’s response closely by looking out for signs of nutrient deficiency or overabundance. Keep in mind that seedlings have different needs than mature plants, so be patient and make adjustments as necessary to ensure a strong foundation for future growth.
Frequently Asked Questions
What if I notice my seedlings are outgrowing their containers, but the weather is unpredictable? Can I still pot them on?
Yes, you can still pot your seedlings on even during uncertain weather conditions. To minimize risk, choose a container with good drainage to prevent waterlogged soil, and ensure it’s large enough for the growing roots. Monitor the seedling’s condition closely after transplanting, and be prepared to provide protection if necessary.
How often should I inspect my seedlings for signs of readiness to pot on?
Regularly inspect your seedlings every 7-10 days during the germination stage and as needed thereafter. Check for signs like root growth outgrowing containers or leaf development indicating nutrient requirements are being met. This will help you catch the ideal time for potting on before it’s too late.
Can I use any type of container for transplanting, or do I need to choose specifically designed pots?
While not essential, using a container with good drainage and suitable size is crucial for successful transplanting. Look for containers with built-in water reservoirs or select unglazed terracotta pots that allow excess moisture to escape. Avoid plastic or thin-walled containers as they may cause the soil to dry out too quickly.
How long after potting on should I expect my seedlings to recover from transplant shock?
Seedling recovery time can vary depending on factors like root damage, handling, and environmental conditions. Generally, allow 1-2 weeks for your seedlings to adjust to their new surroundings. Monitor their condition closely during this period, providing optimal care and support as needed.
What if I notice some of my seedlings are not responding well to potting on? Are there any common issues I can troubleshoot?
Transplant shock or other complications may occur due to various reasons like root disturbance, temperature fluctuations, or inadequate light. Identify the cause by examining your seedling’s condition and adjust its care accordingly. Common solutions include adjusting watering schedules, providing more light, or pruning damaged roots to encourage healthy recovery.