When it comes to growing delicious chives in your garden, timing is everything. The best time to plant chives depends on various factors such as climate, region, and hardiness zones. If you’re eager to start enjoying fresh, fragrant chives all year round, understanding the optimal planting schedule is crucial. But where do you even begin? This article will guide you through the process of preparing your soil, selecting the right variety for your area, and caring for your chive plants. We’ll explore the ideal times to plant chives in different climates and regions, helping you maximize your harvest and enjoy the benefits of these versatile herbs throughout the year. Whether you’re a seasoned gardener or just starting out, this post will give you the insights needed to grow thriving chive plants that bring flavor and beauty to your garden.
Understanding Chive Planting Basics
To grow delicious and healthy chives, it’s essential to understand the basic needs of your plant, including optimal soil conditions and sunlight requirements. Let’s dive into these fundamental principles together.
Climate and Region Considerations
When planting chives, it’s essential to consider the climate and region you’re in, as this will significantly impact when to plant. Chives are a hardy perennial herb that can thrive in various conditions, but they do have specific frost tolerance requirements.
In regions with mild winters, such as USDA Hardiness Zones 9-11, chives can be planted year-round. However, in areas with colder winters, like zones 3-5, it’s best to plant chives in the spring or early fall when the soil has cooled down. This allows the plants to establish themselves before winter sets in.
Before planting, check your region’s frost dates to ensure you’re planting at the right time. Chives can tolerate light frosts but may die back if exposed to prolonged periods of freezing temperatures. In areas with extreme weather conditions, consider planting chives in containers that can be moved indoors during harsh winters or summers.
Remember to also choose a variety suitable for your region’s climate and soil type. This will ensure your chive plants grow strong and healthy throughout the seasons.
Soil Preparation and Chive Root Depth
Before planting chives, it’s essential to prepare the soil to provide optimal conditions for growth. Chives prefer well-draining soil with a pH between 6.0 and 7.0. If your soil is too alkaline or acidic, amend it with organic matter like compost or peat moss to achieve the ideal pH range.
To ensure good drainage, add a mix of sand, perlite, or vermiculite to improve soil structure. Chives don’t tolerate waterlogged conditions, so make sure the soil drains excess moisture quickly. The ideal root depth for chives is about 6-8 inches deep. This allows the roots to spread out and establish a strong foundation without being too shallow.
For optimal growth, plant chives in areas with good air circulation to prevent fungal diseases. If you’re planting in containers, use a potting mix specifically designed for herbs and make sure it has good drainage holes. Regularly check the soil moisture and adjust as needed to prevent root rot and other issues. By providing the right conditions, you’ll be well on your way to growing healthy and thriving chives.
Determining the Right Time to Plant Chives
When it comes to planting chives, timing is everything. In this next part of our guide, we’ll explore how to determine when the right time is for your garden.
Spring Planting: Timing and Tips
When planting chives in the spring, timing is crucial for optimal growth and flavor. In most regions, it’s safe to start sowing chive seeds indoors 4-6 weeks before the last frost date. This allows young seedlings to develop a strong root system before being transplanted outdoors. Alternatively, you can directly sow seeds in the garden when the soil has warmed up to at least 40°F (4°C).
To ensure success, choose a spot with full sun and well-draining soil. Sow seeds about 1/8 inch deep and 6-8 inches apart. Keep the soil consistently moist during the first few weeks after sowing. Once seedlings have 2-3 sets of leaves, thin them out to prevent overcrowding.
For direct sowing in the garden, wait until the soil has warmed up to at least 40°F (4°C). Use a garden fork to gently loosen the soil, then sow seeds about 1/8 inch deep and 6-8 inches apart. Water well and keep the soil consistently moist during the first few weeks after sowing.
Keep in mind that chives can be sensitive to extreme temperatures. Avoid planting in areas with standing water or where water tends to collect. With proper care, young chive plants should start producing tender shoots within 6-8 weeks.
Fall Planting: A Good Alternative?
If you’re eager to get started with growing chives but missed the spring window, don’t worry – fall is a viable alternative for planting these versatile herbs. In fact, cooler temperatures and shorter days can actually work in your favor when it comes to cultivating healthy chive plants.
When deciding whether to plant chives in the fall, consider the ideal temperature range of 60°F to 70°F (15°C to 21°C). This allows the seeds to germinate without being too exposed to extreme cold or heat. Additionally, with shorter days and cooler nights, chives will require less water and care, making them more resistant to pests and diseases.
To plant chives in the fall, sow the seeds directly into well-draining soil about 8 weeks before the first frost date in your area. Keep the soil consistently moist during this time, but avoid overwatering. With proper care, you can enjoy a bountiful harvest of fresh chives throughout the winter months.
Choosing the Right Variety
Now that you know when to plant chives, it’s time to decide which variety is best for your garden. With so many options available, choosing the right one can be a bit overwhelming.
Hardy Chive Varieties for Year-Round Harvest
If you’re looking for chive varieties that can thrive year-round and provide a steady supply of fresh herbs, consider growing hardy types like Allium schoenoprasum ‘Fernleaf’ or ‘Lilyturf’. These varieties are not only low-maintenance but also adaptable to different regions with varying climate conditions.
Allium schoenoprasum ‘Fernleaf’, for instance, is a compact and slow-bolting chive variety that grows to be about 8-10 inches tall. Its slender leaves and stems produce an abundance of small, purple flowers in the spring, making it a popular choice among gardeners who want a continuous harvest.
In contrast, ‘Lilyturf’ is a type of ornamental grass-like chive that forms clumps over time. It’s particularly suitable for regions with mild winters and cool summers, as it can tolerate temperatures as low as 10°F (-12°C) and withstand short periods of drought.
Both of these hardy varieties are relatively easy to grow from seed or divisions and require minimal care once established. By choosing one of these reliable options, you’ll enjoy a consistent supply of chives throughout the growing season, making them an excellent choice for gardeners who want to maximize their harvest.
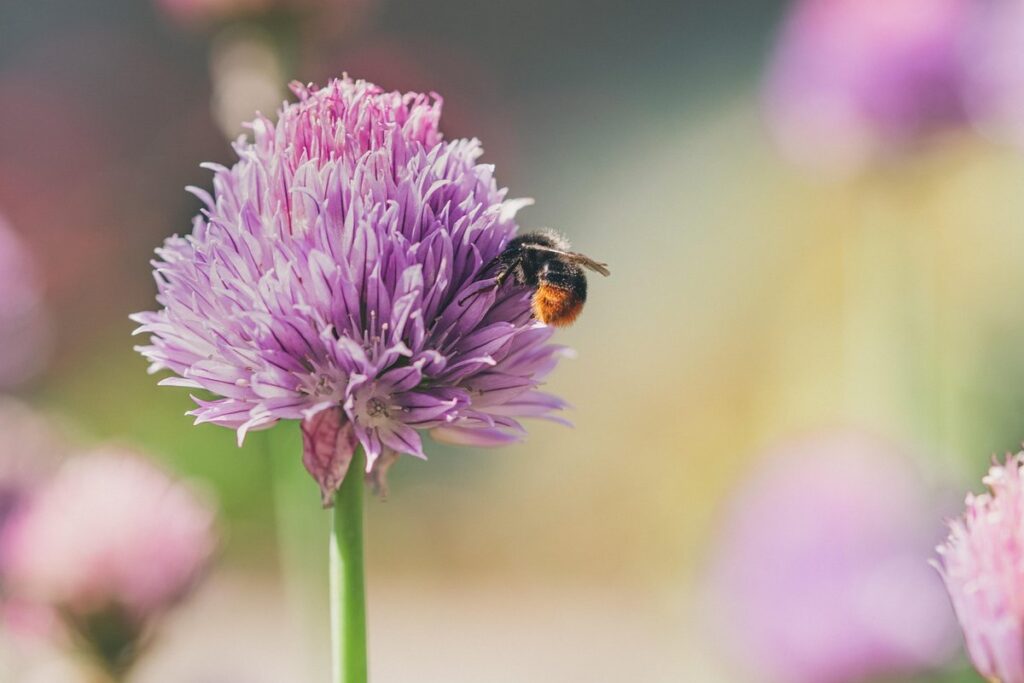
Ornamental Chives: A Different Story
Ornamental chives are often overlooked as a viable option for gardeners who want to add some color and texture to their landscape. These flowering varieties of chives have many unique characteristics that set them apart from hardy, edible types. Ornamental chives come in a variety of colors, including pink, purple, white, and bi-colored, making them an attractive addition to any garden bed.
One key difference between ornamental and hardy chives is their growth habit. Ornamental chives tend to be more compact and bushy, growing to about 12-18 inches tall, while hardy types can reach heights of over two feet. This makes ornamental chives a great option for smaller spaces or containers.
In terms of care, ornamental chives require similar maintenance to their edible counterparts, but they don’t need to be harvested as frequently. They also tend to attract pollinators and other beneficial insects, making them a great choice for wildlife-friendly gardens.
Preparing the Garden for Chive Planting
Before you can bring your chives to life, it’s essential to prepare your garden by loosening the soil and removing any debris that might interfere with their growth. This step will give your chives a healthy foundation.
Testing Soil pH and Nutrient Levels
Before planting chives, it’s essential to test your soil pH and nutrient levels. Chives are relatively adaptable plants, but they still require a specific set of conditions to thrive. Soil testing will help you identify potential issues that might affect your crop’s growth.
A common nutrient deficiency in garden soils is nitrogen (N), phosphorus (P), and potassium (K) imbalance. Nitrogen promotes leafy growth, phosphorus supports root development, while potassium enhances overall plant health. Without adequate levels of these nutrients, chives may struggle to produce healthy foliage or flowers. To address NPK deficiencies, you can use organic fertilizers like compost or well-rotted manure.
Another critical aspect of soil testing is pH level. Chives prefer slightly acidic to neutral soils with a pH between 6.0 and 7.5. If your soil’s pH is too high (alkaline) or too low (acidic), it can lead to nutrient deficiencies, making it challenging for chives to absorb essential nutrients. To adjust the pH level, you can use lime to raise it or sulfur to lower it.
To get started with soil testing, purchase a DIY kit or send a sample to a laboratory for analysis. Follow the instructions carefully and take note of your results. This will give you an accurate picture of your soil’s nutrient levels and help you make informed decisions about how to amend them before planting chives.
Companion Planting: Tips and Tricks
Companion planting is an effective way to enhance the growth and health of your chives. By pairing chives with the right plants, you can create a thriving garden ecosystem that minimizes pests, diseases, and other issues. Chives are known to benefit from being planted alongside certain vegetables and herbs.
Some examples of plants that complement chives well include carrots, radishes, beets, lettuce, parsley, and cilantro. These plants benefit from the repelling properties of chives, which keep away pests like aphids and spider mites. On the other hand, chives can also be planted alongside mint to improve its growth and flavor.
When choosing companion plants for your chives, consider the specific growing conditions required by each plant. Make sure they share similar sunlight, water, and soil requirements to avoid conflicting needs. Some companion plants may require more space or support than others, so plan accordingly to ensure optimal growth.
A key benefit of companion planting with chives is the improvement in flavor and aroma. By planting these herbs alongside other vegetables and herbs, you can create a balanced and delicious flavor profile that adds depth to your cooking.
Chive Plant Care After Planting
Now that you’ve successfully planted your chives, it’s essential to provide them with proper care to ensure healthy growth and a bountiful harvest. This section will walk you through the steps for caring for your newly planted chive crop.
Watering and Mulching Techniques
Watering and mulching are crucial aspects of chive plant care, especially during the initial stages after planting. When it comes to watering, it’s essential to strike a balance between keeping the soil moist and not overwatering your chives.
Overwatering can lead to root rot, which can be detrimental to your plants’ health. A good rule of thumb is to water your chives when the top inch of soil feels dry to the touch. You should also avoid getting water on the leaves or crown to prevent fungal diseases.
To avoid overwatering, make sure the pot has good drainage holes and that you’re not watering too frequently. It’s better to err on the side of caution and underwater slightly than to risk drowning your plants. In terms of mulching, a thin layer of organic material like straw or bark chips can help retain moisture in the soil while preventing weeds from growing.
Some popular options for mulch include composted manure, grass clippings, and wood chips. Just be sure not to pile it too high, as this can cause more harm than good by depriving the roots of oxygen. A 2-3 inch layer is usually sufficient.
Pruning and Harvesting Chives
Pruning and harvesting chives is an essential part of their care. To encourage bushy growth, prune your chive plants regularly by cutting back the flower stalks to about half their height after they’ve finished blooming. This will direct the plant’s energy towards producing new leaves rather than seeds.
When it comes to harvesting, the optimal time for chives is early in the morning, just before sunrise. Cut off the individual leaves or stems with scissors or pinch them off with your fingers to avoid damaging the rest of the plant. You can harvest chives at any time of year, but the most flavorful ones are typically obtained from plants that have been exposed to cooler temperatures.
To determine if your chives need pruning, look for signs of flowering and yellowing leaves. Regular pruning will also help prevent the plant from becoming leggy and promote a more even growth habit. By harvesting regularly, you’ll be able to enjoy a continuous supply of fresh chives throughout the growing season.
Frequently Asked Questions
Can I plant chives indoors as a year-round solution?
Chives can be grown indoors, but it’s essential to replicate outdoor conditions for optimal growth. Provide bright indirect light, maintain temperatures between 60-70°F (15-21°C), and keep the soil consistently moist. However, indoor-grown chives may not thrive as well as those planted outdoors, so consider supplementing with additional lighting.
How often do I need to harvest my chive crop for continuous growth?
Regular harvesting is crucial for maintaining a healthy, productive chive plant. Pinch or cut off individual chive stems when they reach about 6 inches (15 cm) in height. This will encourage new growth and prevent the plant from flowering prematurely.
What if I accidentally plant chives in a location with poor drainage?
If you’ve planted chives in an area with inadequate drainage, it may be challenging for the roots to thrive. Consider transplanting your chives to well-draining soil or adding organic matter like compost to improve soil structure and water penetration.
Can I grow multiple varieties of chives together without compromising their growth?
While growing different chive varieties can enhance flavor profiles and attract beneficial pollinators, some may have conflicting growth habits or require specific care. For instance, hardy varieties might outcompete more delicate ornamental chives. Separate plantings will allow you to tailor care to each variety’s needs.
Should I divide and replant my chive roots every year for optimal health?
Chives are a hardy perennial herb that can thrive in the same location for multiple years, but division may still be necessary after 3-4 growing seasons. When dividing your chive roots, make clean cuts just above a node to encourage new growth and avoid damaging the plant’s crown.