When it comes to harvesting your homegrown sage leaves, timing is everything. The age-old question of “when to harvest” can be a bit tricky, especially if you want to ensure that your leaves have the best flavor, aroma, and quality possible. As any seasoned herb gardener knows, the right time to harvest can make all the difference in your culinary creations. In this comprehensive guide, we’ll walk you through the growth stages of sage, taking into account climate and weather conditions, to help you determine when to pick your leaves for optimal results. Whether you’re a beginner or an experienced gardener, understanding how to harvest sage at the right time will elevate your cooking and gardening skills alike. Let’s dive in and explore the best practices for harvesting sage leaves!
Understanding Sage Plant Growth Stages
To grow healthy sage plants, it’s essential to understand their growth stages and how they develop into robust producers of fragrant leaves. Let’s dive into the specifics of each stage.
Identifying Sage Growth Cycles
Sage plants go through distinct growth stages that impact their leaf production and flavor. To determine when to harvest sage leaves, it’s essential to understand these cycles.
Sprouting typically occurs within 1-2 weeks after planting sage seeds or seedlings. During this stage, the seedling develops its first set of leaves, known as cotyledons. As the plant grows, it will transition into a vegetative growth phase. This is characterized by an increase in leaf production and a robust root system.
Vegetative growth usually occurs during spring and early summer when sage plants are exposed to optimal temperatures and moisture levels. It’s essential to recognize this stage, as it directly influences the quantity of leaves available for harvesting. Sage plants typically reach their peak vegetative growth around 60-90 days after planting.
During flowering, which often happens in late summer or early fall, sage plants focus on producing seeds rather than new leaves. This stage can be identified by the appearance of small purple flowers on the plant’s stalks. To maximize leaf production and flavor, it’s crucial to harvest sage leaves during the vegetative growth phase before the plant starts flowering.
Recognizing Sage Leaf Development
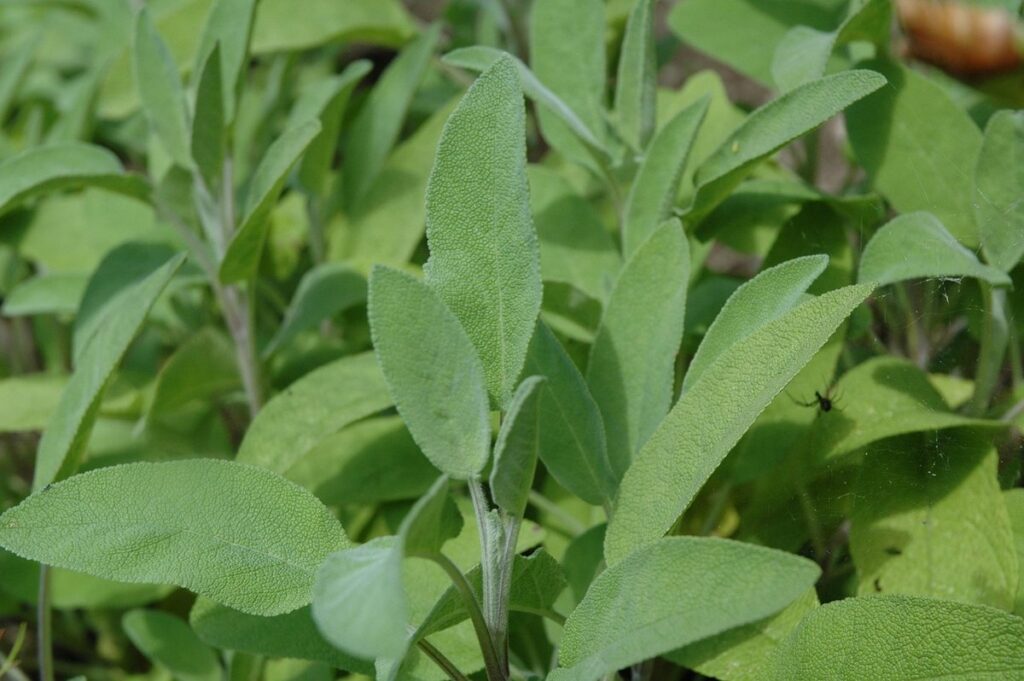
Recognizing mature sage leaves is crucial to ensure optimal flavor and aroma. At full maturity, sage leaves are typically a deep green color with a slightly lighter underside. They have a robust, slightly crinkled texture and reach their maximum size of around 2-3 inches (5-7.5 cm) in length.
To determine if your sage leaves are mature, gently pinch or twist one from the stem. A ripe leaf should come off easily, leaving a small amount of stem attached to the plant. Avoid over-maturity, which can cause the leaves to turn brown and wilted. Signs of over-maturity include dull, faded coloration and a soft, limp texture.
To prevent over-maturity, harvest your sage leaves regularly throughout the growing season. Aim for a balance between harvesting enough for immediate use and leaving some leaves on the plant to continue growing. This will also encourage bushy growth and prevent the plant from flowering prematurely, which can reduce leaf production.
Determining Harvest Time Based on Climate and Weather
To determine when to harvest your sage leaves, it’s essential to consider how climate and weather conditions can impact the plant’s growth and flavor. Let’s explore how to make this determination.
Effects of Temperature on Sage Leaves
Sage leaves are susceptible to temperature fluctuations, which can significantly impact their quality and flavor. When temperatures soar above 85°F (30°C), sage leaves may become bitter and develop off-flavors. On the other hand, extreme cold can cause the leaves to become brittle and lose their aroma.
Ideally, harvest sage leaves when the temperature ranges between 60°F (15°C) and 75°F (24°C). This allows for optimal flavor development and retention of essential oils. Avoid harvesting during peak heat or cold snaps, as this can compromise leaf quality.
To determine if your sage is ready to be harvested at a favorable temperature, inspect the leaves regularly. Check for any signs of damage or discoloration, which may indicate exposure to extreme temperatures. Harvesting sage in moderation and allowing some leaves to remain on the plant will encourage regrowth and help maintain a consistent flavor profile.
Keep in mind that even within the optimal temperature range, factors like sunlight, soil quality, and watering schedules can also influence leaf quality. Monitor your plants’ responses to these variables to ensure you’re harvesting at the best possible time for optimal flavor.
Impact of Rain and Drought on Sage Leaf Harvesting
Sage leaves are sensitive to extreme weather conditions, which can significantly impact their flavor and aroma. When it rains, sage leaves tend to become waterlogged, leading to a loss of potency and a slightly bitter taste. Ideally, harvest sage during the morning after a gentle overnight rain when the leaves have had time to dry out.
On the other hand, droughts can cause sage plants to bolt, resulting in a less flavorful and aromatic crop. To mitigate this effect, try harvesting sage leaves when they’re just beginning to show signs of stress due to water scarcity. This is often during the late morning or early afternoon when the sun is still shining but the heat has not been too intense.
In general, it’s best to harvest sage leaves after a rain shower or when the plant has had access to consistent moisture levels over several days. Regular harvesting also helps maintain the plant’s overall health and encourages new growth.
Assessing Sage Leaf Maturity through Visual Inspection
When assessing maturity, look for leaves that are a vibrant green color and have reached their full size, indicating they’re ready to be harvested. This visual inspection is crucial in determining when your sage leaves are at peak freshness.
Checking for Proper Moisture Content
Proper moisture content is crucial when it comes to sage leaf maturity. When leaves are too dry, they can become brittle and prone to breaking, which not only affects their appearance but also their flavor and aroma. Dry sage leaves can be bitter or unpleasantly flavored, making them less desirable for culinary use.
To check the moisture content of your sage leaves, gently touch a few leaves with your fingers. If they feel stiff or crunchy, it’s likely that they’re too dry. On the other hand, if they feel soft and pliable, they should be ready for harvest. You can also perform a simple water drop test by placing a droplet of water on a leaf. If the water is absorbed quickly without leaving any visible residue, the leaves are in good condition.
Keep in mind that ideal moisture levels vary depending on the intended use of your sage leaves. For drying and storing, you’ll want to aim for a slightly higher moisture content to prevent shrinkage and maintain flavor.
Evaluating Sage Leaf Color and Texture
Evaluating the color of mature sage leaves is crucial to determine their optimal harvesting time. A healthy, mature leaf should have a deep green color with no signs of yellowing or browning. The ideal shade may vary slightly depending on the specific sage variety, but generally, it’s a vibrant emerald green. Avoid leaves with any visible discoloration, as this can indicate stress or disease.
When evaluating texture, look for firm, plump leaves that snap cleanly when bent. Avoid leaves that are wilted, soft, or have an unnatural brittleness. Fresh sage leaves should have a slight sheen to them, indicating high moisture content.
To assess leaf freshness and quality, gently pinch the stem of the leaf between your thumb and index finger. If it releases a fragrant aroma and the leaf feels springy, it’s likely at its peak freshness. Avoid leaves with a dull or stale scent, as this can indicate over-maturity or decay. By paying attention to these visual cues, you’ll be able to identify the ideal time to harvest your sage leaves for optimal flavor and fragrance.
Using Tools and Techniques for Measuring Sage Leaf Maturity
To determine when your sage leaves are ready, you’ll need to know how to measure their maturity accurately. Here, we’ll explore various tools and techniques that can help.
The Role of a Moisture Meter in Harvesting
Using a moisture meter is an essential tool for determining the optimal harvest time of sage leaves. This handheld device measures the water content within the leaf, providing a clear indication of its moisture level. By using a moisture meter, you can avoid over-harvesting and ensure that your sage leaves are picked at their peak freshness.
When to use a moisture meter? Typically, it’s best to check the moisture levels 1-2 weeks before harvest time. This allows you to monitor any changes in water content and make adjustments accordingly. For example, if the moisture level is still high, it may be beneficial to wait another week or two before harvesting.
It’s essential to note that a moisture meter will not guarantee optimal harvest timing alone, but rather serve as an additional tool to guide your decision-making process.
Manual Methods for Evaluating Sage Leaf Dryness
Evaluating sage leaf dryness is crucial for determining its maturity. While using tools like moisture meters can provide accurate readings, there are also manual methods that work effectively. One such method involves using a food dehydrator or oven to check the leaf’s dryness.
Using a food dehydrator is an efficient way to manually evaluate sage leaf dryness. Simply place a few leaves in the dehydrator and set it to its lowest temperature setting (around 135°F). After several hours, check the leaves for their texture and flexibility. If they crinkle easily when touched or folded, they’re likely dry enough.
Alternatively, you can use your oven on the lowest heat setting (usually around 150°F). Place a single layer of sage leaves on a baking sheet lined with parchment paper and let it sit for 1-2 hours. Check the leaves periodically to avoid over-drying. If they crack or break when bent, they’re ready.
Keep in mind that these manual methods may not provide as accurate results as moisture meters, but they can still give you an idea of the sage leaf’s dryness level.
Harvesting and Processing Sage Leaves
Now that you know when to harvest sage leaves, let’s dive into how to carefully pluck and process them for optimal flavor and potency in your cooking. We’ll cover every step of harvesting and processing.
The Best Times to Harvest Sage Leaves for Different Uses
Harvesting sage leaves at the right time is crucial to bring out their unique flavor and aroma. When it comes to using sage for cooking, the best time to harvest is just before the plant blooms. This allows you to capture the full potency of its oils and flavors. For culinary purposes, snip off a few sprigs from the top growth, leaving some stem intact to encourage new growth.
For medicinal uses, such as making teas or infusions, it’s ideal to harvest sage leaves when they’re in their early stages of growth. Younger leaves tend to be more fragrant and have higher levels of antioxidants. Simply pinch off individual leaves or stems from the lower parts of the plant.
If you’re growing sage for its ornamental value, consider harvesting a few stems regularly to encourage bushy growth and prevent legginess. This will also help promote new flower buds to form. Remember to always harvest with scissors or pinch off individual leaves to avoid damaging the plant’s delicate roots. By timing your harvest correctly, you can enjoy the full benefits of this versatile herb.
Storage and Preservation Techniques
Once you’ve harvested your sage leaves, it’s essential to store and preserve them properly to maintain their flavor, aroma, and potency. There are several techniques to choose from, depending on your desired outcome.
Drying is a popular method for preserving sage leaves, as it allows for long-term storage without sacrificing flavor. You can air-dry the leaves by tying them in small bunches and hanging them upside down in a warm, dry place. Alternatively, you can use a food dehydrator or oven on the lowest heat setting to speed up the process.
Freezing is another effective way to preserve sage leaves. Simply chop or bruise the leaves and store them in an airtight container or freezer bag. This method helps retain more of the leaf’s natural oils and flavor compounds than drying. To use frozen sage, simply thaw the desired amount and add it to your recipe.
Making infusions is also a great way to preserve sage leaves. Simply steep the leaves in hot water to create a fragrant tea that can be stored in the fridge for up to two weeks. This method is perfect for preserving small quantities of fresh sage or using up leftover leaves.
Frequently Asked Questions
Can I harvest sage leaves at any time, or do they need a certain number of days to mature?
Yes, you can start harvesting sage leaves as soon as they reach about 2-3 inches (5-7.5 cm) in length, but for optimal flavor and aroma, it’s best to wait until the plant is around 6 months old. Harvesting too early can reduce the leaf’s potency.
How often should I harvest my sage leaves, and will this affect the plant’s growth?
You can harvest sage leaves as needed, ideally every 7-10 days, depending on your desired amount of foliage. Regular harvesting encourages bushy growth, while allowing the plant to go dormant can cause it to become leggy.
Can I use a moisture meter to determine if my sage leaves are ready for harvest?
Yes, a moisture meter can be an effective tool in determining when to harvest sage leaves. However, it’s essential to note that leaves should still be checked visually for dryness and maturity before harvesting.
What happens if I accidentally pick sage leaves too early or late? Will they still be usable?
While leaves picked too early may lack flavor and aroma, those picked too late might become bitter. If you’ve harvested at the wrong time, you can still use them in cooked dishes where flavor is less crucial, like soups or stews.
Can I propagate my sage plant by dividing it during harvest, or should I let it grow undisturbed?
Sage plants can be propagated through division after they have reached around 1-2 feet (30-60 cm) in height. This method encourages new growth and helps maintain the plant’s overall health.