If you’re interested in cultivating your own garlic at home, understanding how this versatile ingredient grows from seed to harvest is essential. As with any plant, recognizing visual cues for maturity and development is crucial to ensure a successful harvest. But have you ever stopped to think about what garlic actually looks like as it grows? From tiny seeds to the mature bulbs we use in cooking, garlic undergoes a remarkable transformation. In this comprehensive guide, we’ll take you through each stage of garlic growth, from germination and plant development to the visual signs that indicate maturity is near. By the end of this article, you’ll be equipped with the knowledge to spot the telltale signs of a healthy garlic crop, making it easier than ever to grow your own delicious homegrown garlic.
Early Growth Stages
When you first plant garlic, it looks deceptively small and insignificant, but don’t worry, this tiny bulb will soon start to grow and develop its characteristic shape.
Germination and Sprouting
Garlic cloves begin their journey above ground with germination and sprouting. This process typically takes 2-4 weeks after planting, depending on factors like soil quality, moisture, and temperature.
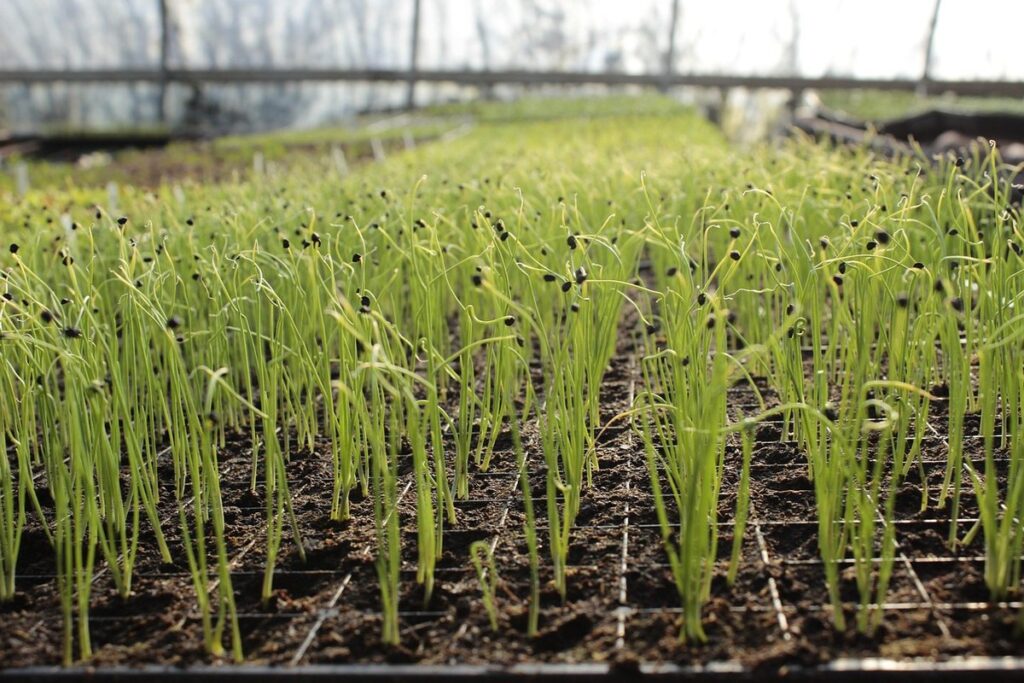
As the clove starts to break down, a small green shoot emerges from the center. This initial growth is usually around 1-2 inches tall and resembles a tiny green spear or needle. Be patient – this tiny sprout will grow rapidly over the next few weeks.
Within a week or two after emergence, the first set of leaves will appear. These are often referred to as “true” leaves, as they resemble the leaves of mature garlic plants. They’ll be longer and broader than the initial shoot, with a more vibrant green color. As new growth continues, your garlic plant will develop an intricate system of leaves, providing energy for bulb development.
Keep in mind that the initial sprouts may appear spindly or weak, but this is normal. With proper care and conditions, they’ll thicken and strengthen over time.
Plant Development in the First Few Weeks
As you start to notice growth from your garlic cloves, it’s essential to observe their development closely during the first few weeks. This is a critical period for establishment of the root system and formation of the leaves.
During this time, you’ll begin to see green shoots emerging from the soil, often at an angle or directly above the clove. These initial leaf blades are usually narrow, pointed, and tightly wrapped around each other as they grow upwards. It’s crucial not to confuse these new growths with weeds or unwanted plants; their fragile leaves will soon unfurl and expand.
The first few weeks also mark the beginning of stem elongation in garlic plants. As the shoots develop, you’ll notice them growing taller and thicker, gradually producing a more substantial stalk that supports multiple sets of leaves. Meanwhile, the root system continues to grow and spread underground, anchoring the plant firmly in place.
Plant Morphology
When you grow garlic, it’s fun to observe its unique characteristics. In this next part of our exploration, we’ll take a closer look at what makes garlic plants distinct from others in your garden.
Leaves and Foliage
When growing garlic, it’s easy to overlook the leaves and foliage, but these are crucial for the plant’s survival. Garlic leaves, also known as foliage, play a vital role in photosynthesis, just like the leaves of other plants. The shape of garlic leaves is typically lanceolate or elliptical, with a pointed tip.
The size of garlic leaves can vary depending on factors such as climate and soil quality, but they are usually around 12-18 inches long and 1-2 inches wide. The color of garlic leaves ranges from bright green to a deep blue-green hue, with some varieties having a reddish tint.
The arrangement of garlic leaves is typically in a linear or rosette pattern, emerging from the center of the plant. New growth appears at the base of the plant, with older leaves gradually turning yellow and dying back as they reach the end of their life cycle. This natural process allows new leaves to emerge and support continued photosynthesis.
In terms of care, it’s essential to ensure garlic plants receive adequate light and water to maintain healthy foliage.
Inflorescence and Flower Formation
As garlic plants mature, they begin to produce inflorescences – tall stalks that rise from the center of the plant and carry the flowers and seeds. At first, these stalks appear as thin, green spikes or tubes that emerge from the central point of the plant. As they grow, the inflorescence develops into a complex structure composed of individual buds, flowers, and seed heads.
The buds on the garlic inflorescence are small, tight clusters of white or pale yellow color. They begin to appear at the base of the stalk and gradually move upwards as more growth occurs. As each bud matures, it opens up to reveal a delicate flower with six petals. These flowers usually develop in shades of purple, sometimes white, but rarely remain uncolored.
The seed heads form on top of the inflorescence, containing numerous tiny seeds that are crucial for garlic propagation. When the plant is mature and has reached its maximum height, it will start producing a tall, upright stem with seed heads at the very end. This stage marks the end of the life cycle, signaling that the bulbs have been sufficiently replenished by the seeds formed on the inflorescence.
When examining your garlic plants for flower development, look for these signs:
• Tiny green spikes emerging from the center
• Tight buds forming along the stalks
• Flowers opening in shades of purple or white
• Seed heads appearing at the top of the plant
Monitor your plants closely during this phase to ensure a bountiful harvest and healthy propagation.
Visual Cues for Maturity
As you begin to identify garlic growth, look out for visual cues that indicate maturity, such as green shoots and yellowing stalks. These signs signal when your garlic is ready for harvest.
Determining Garlic Bulb Size and Shape
When assessing the maturity of garlic, growers often focus on determining the bulb size and shape. A fully formed bulb will typically have a diameter that is about 2-3 times larger than its neck. To measure this, gently dig around the base of the plant with your fingers or a small tool, taking care not to damage any surrounding roots.
The circumference can also give you an idea of the size and maturity of the bulb. A fully grown garlic head will have a circumference that is about 6-8 inches (15-20 cm) in diameter. To check this, gently measure around the base of the plant with your thumb or a flexible measuring tape.
In addition to size, color and texture can also be indicators of maturity. A mature bulb will typically turn yellow or tan as it matures, while green shoots may still be present on the outside. The skin should feel firm and tight over the bulb, giving way slightly when pressed.
Identifying Signs of Over-Maturity or Disease
As you inspect your garlic plants, it’s essential to recognize the signs of over-maturity and common diseases that can affect their health. Over-maturity is often characterized by the bulb splitting open, exposing the individual cloves. This occurs when the bulb has reached its maximum size and is no longer supported by the surrounding soil.
Common indicators of disease in garlic include yellowing or browning leaves, which may be accompanied by a powdery mildew or black spot on the foliage. Fungal infections can be particularly devastating to garlic crops, causing significant yield loss and even plant death.
To address these issues promptly, regular inspections of your plants are crucial. Check for signs of disease at least once a week during peak growing seasons, taking note of any changes in leaf color or texture. If you notice an outbreak, treat the affected area immediately with fungicides specifically designed for garlic cultivation.
Keep in mind that some discoloration can be caused by normal aging, so it’s essential to differentiate between natural senescence and disease symptoms.
Environmental Factors Affecting Growth
As you watch garlic grow, it’s essential to consider how environmental factors can impact its development and appearance. From sunlight to soil quality, each element plays a significant role in shaping your garlic’s growth.
Climate-Related Influences
When it comes to growing garlic, understanding the climate-related influences on its development is crucial for optimal growth. Garlic needs a delicate balance of temperature, sunlight exposure, water availability, and humidity to thrive.
Firstly, temperature plays a significant role in garlic’s growth. Optimal temperatures range from 35°F to 75°F (2°C to 24°C), with ideal temperatures between 55°F to 65°F (13°C to 18°C) for most varieties. Temperatures above 80°F (27°C) can lead to bulb splitting and reduced yields, while temperatures below 25°F (-4°C) can cause the bulbs to rot.
Sunlight exposure is another critical factor, with garlic requiring at least six hours of direct sunlight per day. However, excessive sunlight can cause scorching, especially in regions with intense summer sun. Water availability is also vital, as garlic needs consistent moisture levels throughout its growth cycle. Overwatering, on the other hand, can lead to root rot and other diseases.
Humidity levels should be moderate, around 50-60%, to prevent fungal diseases that thrive in high humidity environments. By being aware of these climate-related influences, growers can adapt their management strategies accordingly and provide optimal conditions for garlic growth.
Soil Quality and Nutrient Availability
When it comes to growing garlic, soil quality and nutrient availability play a crucial role in determining the plant’s vigor and bulb size. A good understanding of these factors can help you optimize your growing conditions and achieve healthier, more productive plants.
The pH level of your soil is one factor to consider. Garlic prefers a slightly acidic to neutral soil pH, ranging from 6.0 to 7.0. If your soil is too alkaline or too acidic, it can lead to nutrient deficiencies and stunted growth. For example, if the pH is too high (above 8.0), sulfur- and phosphorus-rich nutrients may be unavailable to the plants.
In addition to pH, nutrient availability also impacts garlic growth. Essential macronutrients like nitrogen (N), phosphorus (P), and potassium (K) are vital for plant development. Organic matter content in your soil is another important factor, as it contributes to its structure, water-holding capacity, and microbial activity.
To improve your soil’s quality and nutrient availability, consider incorporating compost or well-rotted manure into your garden bed. This will increase the organic matter content, enhancing the soil’s overall fertility and structure. Regularly test your soil to determine its pH level and nutrient deficiencies, making adjustments as necessary to ensure optimal growing conditions for your garlic plants.
Common Growth Issues
If you’re wondering what healthy garlic looks like growing, it’s essential to know how to spot common issues that can impact its growth. Look out for signs of pests, diseases, and nutrient deficiencies in your garlic plants.
Pests and Diseases
As garlic grows, it’s not uncommon for gardeners to encounter pests and diseases that can hinder its development. One of the most recognizable signs of pest infestation is the presence of tiny, soft-bodied insects on the leaves or stems. Aphids are a common culprit, feeding on the sap of young plants and causing curled or distorted growth. Spider mites are another potential issue, spinning fine webs between leaves and sucking plant juices.
On the other hand, diseases can manifest in various ways, including fungal infections that cause white powdery patches or black spot disease that appears as small, circular lesions. Bacterial spot disease is a more common issue, causing small, dark spots to form on the leaves. To identify these problems, look for telltale signs such as yellowing or browning foliage, stunted growth, or an unusual texture.
If you suspect your garlic plants are affected, isolate them immediately to prevent further spread. Use neem oil or insecticidal soap to control aphids and spider mites, while treating fungal infections with a fungicide specifically designed for garlic. For bacterial spot disease, remove infected leaves and maintain good air circulation to promote healthy growth.
Nutrient Deficiencies and Toxicities
As you care for your garlic plants, it’s essential to recognize the signs of nutrient deficiencies and toxicities. These issues can be detrimental to optimal growth, affecting the plant’s appearance, flavor, and overall health.
Nutrient deficiencies are common problems that can arise from inadequate soil preparation or over-fertilization. Nitrogen (N) deficiency is one of the most prevalent issues in garlic cultivation. A lack of nitrogen will cause the leaves to turn yellow, followed by a reduction in bulb size and quality. Sulfur (S) deficiency, on the other hand, may lead to an increased susceptibility to disease, such as powdery mildew.
Soil salinity is another common toxicity issue that can harm garlic plants. Excessive salt levels can cause the leaves to become scorched or develop a brittle texture. To identify and correct these issues, monitor your plant’s growth closely and test your soil regularly. Correcting nutrient deficiencies requires balancing fertilization with pruning, while toxicities often require repotting or changing growing conditions.
Regular monitoring of temperature, water, and light exposure can help prevent these problems altogether. By being aware of potential nutrient deficiencies and toxicities, you’ll be able to provide the best possible care for your garlic plants.
Harvest and Post-Harvest Care
Now that you’ve identified your garlic plants, it’s time to know when and how to harvest them for maximum flavor and quality. Proper post-harvest care is also crucial for long-term storage.
Timing the Harvest
Timing the harvest is crucial to ensure that your garlic bulbs are mature and ready for consumption. To determine if your garlic is ripe, look for these key indicators: bulb size, neck formation, and leaf coloration.
A mature garlic bulb should be firm and plump, with a diameter of at least 1-2 inches (2.5-5 cm). The bulb should feel heavy for its size, indicating that it’s full of cloves. Check the neck, which is the stem end of the bulb, for signs of drying out or discoloration. A healthy garlic bulb will have a dry, papery skin on the neck.
As your garlic approaches maturity, the leaves will begin to turn yellow and wilt. This is a natural process, but be careful not to confuse it with nutrient deficiencies or pests. Check the soil moisture regularly to ensure that the bulbs are getting enough water during this critical period.
Keep an eye out for signs of readiness: when about one-third of the garlic leaves have turned yellow, your bulbs are likely ready to harvest. This usually occurs 3-4 months after planting, depending on weather conditions and cultivar variety.
Handling and Storage Practices
When handling and storing harvested garlic, it’s essential to maintain proper cleanliness and drying methods to prevent spoilage. First, gently brush off any loose dirt from the bulbs using a soft-bristled brush or a clean cloth. Next, dry the garlic thoroughly with a paper towel or let it air-dry in a shaded area for several hours. Avoid exposing the garlic to direct sunlight, as this can cause the cloves to sprout.
For long-term storage, store the dried garlic in a cool, well-ventilated area away from direct sunlight and moisture. You can also store garlic in breathable containers like paper bags or mesh sacks. It’s essential to keep the garlic in small bunches or individual bulbs to prevent overcrowding, which can lead to rot and spoilage.
Proper storage conditions can extend the shelf life of garlic for up to 6-8 months. To maintain quality, inspect your stored garlic regularly for signs of mold or sprouting, and use any spoiled cloves immediately or discard them altogether. By following these simple handling and storage practices, you’ll be able to enjoy your homegrown garlic throughout the year.
Frequently Asked Questions
What if I miss the optimal germination time for my garlic?
Don’t worry, germination timing can vary depending on factors like soil quality and temperature. If you’re concerned about missing the optimal window, keep a close eye on your plants’ progress, and be prepared to adjust your care routine accordingly. Most importantly, maintain consistent moisture levels and monitor for signs of sprouting.
Can I grow garlic in containers or does it require direct sunlight?
Yes, garlic can thrive in containers with proper care. While direct sunlight is beneficial, garlic can also tolerate partial shade. Choose a container with good drainage and use a well-draining potting mix to prevent waterlogged soil. This will help your garlic plants grow robustly even in less-than-ideal conditions.
How do I identify nutrient deficiencies in my garlic crop?
Nutrient deficiencies can manifest in various ways, such as yellowing leaves or stunted growth. Keep an eye out for these signs and consider getting a soil test to determine the root cause. Address any deficiencies promptly by adjusting your fertilizer regimen or using organic amendments. Regularly inspecting your plants will help you catch issues before they become severe.
What if I notice pests or diseases affecting my garlic crop?
No, it’s not uncommon for garlic crops to be affected by pests or diseases. Act quickly to address the issue: remove infected plants, adjust your care routine to prevent re-infestation, and consider using organic pest control methods. For fungal diseases, ensure good air circulation around your plants and avoid overwatering.
How do I store harvested garlic to maintain its quality?
Yes, proper storage is crucial for extending the shelf life of your harvested garlic. Store bulbs in a dry, cool place with good ventilation, away from direct sunlight. You can also consider refrigerating or freezing individual cloves to preserve them for longer periods. Keep in mind that different types of garlic may have varying storage requirements.