Are you tired of dealing with mysterious holes in your beehive frames or discovering fluffy cocoons amidst your bees’ hard work? You’re not alone. Wax moths can be a frustrating and costly problem for beekeepers, especially when it comes to garden hives. These pesky insects infest honeycombs and disrupt the delicate balance of your beehive’s ecosystem. But what exactly is the life cycle of wax moths in garden hives? And more importantly, how can you prevent and control these unwanted visitors from taking over your bees’ home? In this article, we’ll delve into the different stages of a wax moth‘s life cycle, explore the causes of infestations, and provide actionable tips on prevention and control strategies to maintain healthy beehives.
Introduction to Wax Moths and Their Impact on Honey Bees
Let’s talk about a common problem facing many garden hives: wax moths, and how these pests impact our beloved honey bees. In this section, we’ll explore what happens when they invade.
What are Wax Moths?
Wax moths are a type of insect that belongs to the family Pyralidae. They are also known as honeycomb moths or honey moths. Wax moths are closely related to honey bees, and their larvae feed on the wax combs used by honey bees for storing honey and pollen.
These insects are an important part of the ecosystem, but they can also be a nuisance in garden hives when their populations get out of control. Wax moths are typically found in areas where honey bees have established colonies, such as in beehives or log cabins.
It’s worth noting that wax moths do not directly harm honey bees, but rather feed on the wax combs used by the bees to store food and brood. This can weaken the overall health of the hive and make it more susceptible to disease and pests.
If you’re a beekeeper, keeping an eye out for signs of wax moth infestations is crucial in maintaining the health of your honey bees. Look for signs such as holes or tunnels in the wax combs, or actual moths flying around the hive.
The Impact of Wax Moths on Honey Bee Colonies
Wax moths can have a devastating impact on honey bee colonies. When infestations occur, it’s not just the moths themselves that cause problems, but also the damage they inflict on the hive. A single wax moth larva can eat through an entire comb in just a few days, leaving behind a mess of destroyed cells and debris.
As a result, honey bee populations begin to suffer. Reduced food stores mean bees are more likely to starve during winter or times of drought. Increased mortality rates follow as weakened colonies struggle to fend off diseases and pests. If left unchecked, wax moth infestations can lead to the collapse of entire hives.
To mitigate these effects, beekeepers must be vigilant about monitoring their colonies for signs of moths and take swift action if an infestation is detected. This may involve isolating the affected colony, removing damaged combs, or implementing integrated pest management strategies. By staying proactive, beekeepers can help protect their bees from wax moth damage and preserve the health of their hives.
Life Cycle Stages: Egg, Larva, Pupa, and Adult
The life cycle of wax moths in garden hives is a complex process that involves four distinct stages. Let’s dive into each stage to better understand how these pests develop.
Egg Stage: Identification and Timing
Identifying wax moth eggs can be a crucial step in preventing infestations within garden hives. These eggs are relatively small, typically measuring between 1-2 millimeters in length and 0.5-1 mm in width. They are usually white or pale yellowish in color, allowing them to blend in with the surrounding hive environment.
Wax moth eggs can be found on the combs, either directly attached to the wax cells or loosely placed nearby. It’s essential to inspect the combs regularly for any signs of infestation. When searching for eggs, pay close attention to areas with damaged or weakened comb, as these are more susceptible to moth activity.
To confirm egg identification, gently remove a suspected egg from its location using a soft-bristled brush. Hold it up against a light source; if the egg is indeed that of a wax moth, it will have a smooth, oval-shaped appearance and a distinct white or pale yellow color. If you suspect an infestation, take action promptly to prevent the development of larvae and subsequent damage to your hive. Regular inspections and prompt removal of eggs can help maintain a healthy and thriving bee colony.
Larval Stage: Feeding Habits and Growth Patterns
During the larval stage, wax moth caterpillars go through an incredible transformation, growing up to 10 times their initial weight. This voracious appetite is fueled by their unique feeding habits, which are quite different from those of honey bee brood. Unlike honey bees, which feed on royal jelly and pollen, wax moth larvae devour the wax cappings and combs of the hive, often causing significant damage.
As they grow, wax moth caterpillars exhibit a fascinating growth pattern. They typically take around 2-3 weeks to complete their larval stage, during which time they shed their skin multiple times as they outgrow it. This process is similar to that of honey bee brood, but the pace and feeding habits are distinct. It’s essential for gardeners and apiarists to recognize these differences to implement effective management strategies.
To prevent wax moth infestations, maintain a healthy balance in your hive by ensuring adequate ventilation, monitoring temperature fluctuations, and storing excess honey in sealed containers. Regular inspections will help you detect any signs of infestation early on, allowing you to take prompt action.
Pupal Stage: Transformation and Emergence
The pupal stage is where the magic happens for wax moths. After the larval stage, the caterpillar will spin a silk pad and attach itself to a surface within the hive, where it will undergo an incredible transformation. This process typically takes anywhere from 7-14 days, depending on factors such as temperature, humidity, and food availability.
During this time, the pupa undergoes a radical metamorphosis, as its body breaks down and reorganizes into the adult form. The pupal stage is often referred to as the “resting stage,” but don’t be fooled – it’s anything but restful for the moth inside! As the transformation unfolds, the pupa will start to show signs of emergence, such as slight movements or twitching.
Timing-wise, you can expect the adult moths to emerge in late summer to early fall, typically around August or September. Environmental factors like temperature and humidity play a significant role in determining when exactly they’ll emerge. For example, if the hive is exposed to sudden changes in temperature or moisture, it may trigger premature emergence. Keep an eye on your hives’ conditions to ensure optimal timing for emergence.
Causes of Wax Moth Infestations in Garden Hives
To better understand how to prevent infestations, let’s dive into what causes these pests to take over your garden hives in the first place.
Factors Contributing to Wax Moth Infestations
Wax moth infestations can be attributed to several factors, all of which are interconnected and often interdependent. Poor honey bee health is a significant contributor, as weak or diseased bees are less capable of defending their hive against wax moths.
Inadequate hive management also plays a crucial role in facilitating wax moth infestations. This includes failing to inspect the hive regularly, neglecting to replace old comb, and not maintaining a strong bee population through regular splitting. For instance, if a hive is overwintered with weakened bees, it may struggle to fend off wax moths come spring.
Environmental factors also influence the likelihood of an infestation. Drought, for example, can weaken honey bee colonies, making them more susceptible to pest attacks. Similarly, areas with mild winters or unseasonal warmth can disrupt the natural balance between honey bees and wax moths, leading to a greater risk of infestation. As a beekeeper, being aware of these factors will help you take proactive measures to mitigate the risks and protect your hives from wax moth damage.
Signs of a Potential Wax Moth Infestation
As a beekeeper, it’s essential to be vigilant and recognize the warning signs of a potential wax moth infestation in your garden hive. A sudden appearance of these pests can quickly lead to significant damage to your hive and impact your honey production.
One of the primary indicators of an impending infestation is a noticeable increase in dust or debris around the hive entrance. Wax moths shed their skin as they grow, leaving behind fine, powdery particles that can be blown away by wind or tracked into neighboring areas.
Another warning sign is the presence of adult wax moths, which are usually seen flying around the hive at night. These moths have a distinctive greyish-white color with brown stripes and are about 1-2 inches in length. You may also notice holes or tunnels on the surface of honeycombs or brood boxes, indicating that the larvae have begun to eat through the wax.
Regular inspections of your hive can help you catch any issues early on, allowing you to take prompt action and prevent a full-blown infestation from occurring. If you suspect an infestation, carefully remove any affected combs and treat them with diatomaceous earth or other non-toxic methods before reintroducing them into the hive.
Prevention and Control Strategies for Garden Hives
To keep your garden hives thriving, it’s essential to implement effective prevention and control strategies to minimize the impact of wax moths on your beehive. Learn how to protect your bees in this section.
Best Practices for Hive Maintenance and Inspection
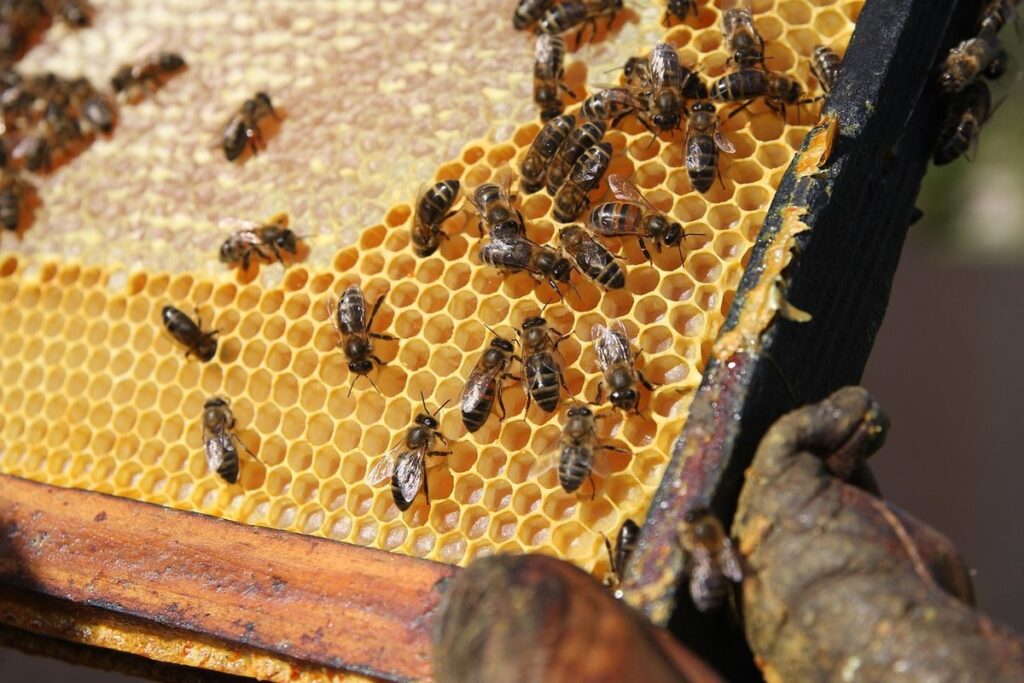
Regular hive inspections are crucial to detect wax moths early on and prevent infestations. As you inspect your hives, look for signs of moth activity such as shredded honeycomb, discarded pupae cases, or actual adult moths flying around the area. Check the hive’s structure, including any gaps or cracks where moths might be entering.
Proper cleaning and sanitation techniques are also essential to control wax moths. Remove debris and dead bees from the hive regularly, taking care not to crush bees or damage equipment. Use a stiff brush to scrub the hive’s surfaces, especially areas with visible moth activity. Replace any affected frames with fresh ones, ensuring they’re free of any debris.
To prevent future infestations, maintain good ventilation within the hive by ensuring adequate space between frames and proper airflow. Keep your hives away from direct sunlight, which can weaken the wax and make it more susceptible to moth damage. By following these best practices, you’ll significantly reduce the risk of wax moths taking over your garden hives.
Chemical and Non-Chemical Methods for Wax Moth Control
When it comes to managing wax moth infestations in garden hives, there are two primary approaches: chemical treatments and non-chemical methods. Chemical treatments involve using synthetic substances to kill the moths and their larvae. These can be effective, but they also pose risks to bees and other beneficial insects.
Some common chemical treatments include pyrethrin sprays and permethrin dusts. However, these products must be used with caution and according to the manufacturer’s instructions to avoid harming your bees.
On the other hand, non-chemical methods offer a safer and more environmentally friendly alternative. Diatomaceous earth (DE) is a popular choice for controlling wax moths. This powder works by dehydrating the larvae, causing them to die. Simply sprinkle DE around the edges of the hive or directly on affected areas.
Another option is to use essential oils like lavender or tea tree oil, which can repel wax moths without harming your bees. By using a combination of these methods, you can effectively manage wax moth infestations and protect your garden hives.
Natural Predators and Beneficial Insects in the Hive Ecosystem
As you explore the delicate balance of a garden hive, it’s essential to understand which natural predators and beneficial insects play a vital role in regulating wax moth populations. Let’s take a closer look at these key players.
Natural Predators of Wax Moths: Identification and Role
Wax moths have natural predators that play a crucial role in maintaining the balance of the hive ecosystem. One such predator is the Trichogramma wasp, which lays its eggs inside the wax moth’s egg sacs, thereby controlling their population. These parasitic wasps are tiny, around 1-2 millimeters in length, and have distinctive yellow or orange stripes on their bodies.
Another important natural predator of wax moths is the Ichneumonid wasp, specifically the species Ampulex compressa. These wasps are known to attack adult wax moths, injecting them with paralyzing venom before dragging them back to their nests for feeding their young. This process not only reduces wax moth numbers but also helps regulate the hive’s overall population.
By introducing these beneficial insects into your garden hive, you can help maintain a healthy balance of species and reduce the need for pesticides or other chemical controls. To attract Trichogramma wasps and Ichneumonid wasps to your hive, provide a diverse range of flowers and plants that offer nectar and pollen resources throughout the year.
Beneficial Insects and Their Contributions to Hive Balance
Beneficial insects play a crucial role in maintaining a balanced ecosystem within the hive. Among these beneficial insects are beeswax moths, which might seem counterintuitive at first due to their association with damage to honeycombs. However, they contribute significantly to the balance of the hive’s ecosystem.
Beeswax moths (Achroia grisella) serve as a natural cleanup crew, breaking down and recycling old or damaged comb material. This process is essential for maintaining the structural integrity of the hive and preventing the buildup of debris that can harbor diseases.
In addition to their role in waste management, beeswax moths also contribute to the nutrient cycle within the hive. As they feed on the wax, they deposit nutrients back into the hive through their feces, which are then absorbed by the honeybees. This nutrient-rich waste becomes a valuable resource for the colony.
To encourage beneficial insects like beeswax moths in your garden hives, maintain a balanced ecosystem by ensuring proper ventilation, controlling pest populations, and providing adequate food sources. By fostering a healthy environment, you can promote a harmonious balance between beneficial insects and honeybees within the hive.
Conclusion: Maintaining Healthy Garden Hives through Wax Moth Management
Now that we’ve walked you through the life cycle of wax moths, let’s explore practical tips for maintaining healthy garden hives. Effective management is key to preventing infestations.
Recap of Key Points and Takeaways
In conclusion, maintaining healthy garden hives requires a thorough understanding of wax moth life cycle and management. As we’ve discussed, wax moths undergo four distinct stages: egg, larva, pupa, and adult. These stages can occur rapidly, with the entire process taking as little as 2-4 weeks under ideal conditions.
To recap, infestations often result from poor hive maintenance, including inadequate cleaning and repair of damaged wood. Regular inspections and timely interventions can help prevent these issues. To maintain healthy garden hives, it’s essential to implement prevention strategies such as using durable, moth-resistant materials for hive construction, storing honeycombs in well-ventilated areas, and avoiding the use of strong-smelling chemicals.
By prioritizing good hive management practices, you can significantly reduce the risk of wax moth infestations. Remember, a healthy garden hive is not just a necessity but also an opportunity to promote biodiversity and sustainable beekeeping practices. By taking proactive steps towards wax moth management, you’ll be contributing to the long-term health and productivity of your garden hives.
Recommendations for Future Research and Hive Management Practices
To ensure continued progress and improvement in managing wax moths in garden hives, several recommendations for future research and hive management practices are essential. Firstly, it’s crucial to investigate the effects of integrated pest management (IPM) techniques on reducing wax moth infestations. This can involve implementing a combination of physical barriers, sanitation measures, and monitoring programs.
Additionally, conducting studies on the role of nutrition in honey bee colony health is vital for developing effective strategies against wax moths. A well-nourished hive is better equipped to resist external threats. Beekeepers should also explore using beneficial insects, such as parasitic wasps, to control wax moth populations naturally.
Beekeepers can take proactive steps by regularly inspecting their hives and monitoring for signs of infestation, including holes in honeycombs, discolored combs, or the presence of moths themselves. Removing infested comb material and replacing it with new frames is also a recommended practice. Furthermore, maintaining good hive hygiene through regular cleaning and disinfection can help prevent wax moth outbreaks.
To support this effort, beekeepers need to work together by sharing their experiences, knowledge, and best practices in managing wax moths. This collective approach will foster the development of evidence-based management strategies and ensure that all stakeholders are informed about the latest research findings.
Frequently Asked Questions
How can I identify the presence of wax moths in my garden hive before they cause significant damage?
Identifying wax moths early is crucial for effective management. Look out for small holes, shredded honeycomb, or silky cocoons in your hive frames. Check the combs regularly, especially after a nectar flow when bees are storing excess honey. Monitor temperature fluctuations and ensure proper ventilation to prevent moisture buildup, which can attract these pests.
Can I use natural predators of wax moths as a standalone solution for infestation control?
While natural predators like lady beetles or lacewings can help regulate wax moth populations, they should be used in conjunction with other management strategies. This integrated approach includes proper hive maintenance, cleaning, and controlling factors contributing to infestations. Natural predators are not a substitute for regular inspection and preventative measures.
How often should I inspect my garden hives for signs of wax moths?
Regular inspections are critical for early detection and prevention. Inspect your hives every 1-2 weeks during peak nectar flows or periods of high bee activity. Be prepared to spend more time examining the combs, especially if you’ve noticed any issues previously.
What’s the best method for cleaning out wax moth infested combs?
Cleaning should be done with care to avoid spreading larvae or adult moths to other parts of the hive. Remove severely damaged areas and replace them with new frames or boxes. Use a gentle brush or cloth to clean the remaining honeycomb, ensuring all debris is removed. Sanitize tools and equipment between uses to prevent re-infestation.
Can I use essential oils as a repellent for wax moths in my garden hives?
While some beekeepers claim success with certain essential oils, their effectiveness against wax moths can vary depending on several factors, including the specific oil used, concentration applied, and type of hive setup. Essential oils should be tested carefully and not relied upon solely as a control method.