Are you tired of seeing your water bills soar during dry spells or summer months when everyone else is using their garden hoses? Collecting rainwater with a water butt can be a simple yet effective way to reduce your household’s environmental impact and lower those pesky water bills. By installing a water butt in your yard, you’ll not only conserve main water supply but also create a sustainable source of clean water for your plants and garden.
In this article, we’ll explore the benefits of using a water butt to harvest rainwater and provide a step-by-step guide on how to set one up at home. We’ll cover the best places to position your water butt, how to maintain it properly, and tips for connecting it to your garden irrigation system. Whether you’re looking to reduce your carbon footprint or simply save some money on your next water bill, collecting rainwater with a water butt is an excellent place to start.
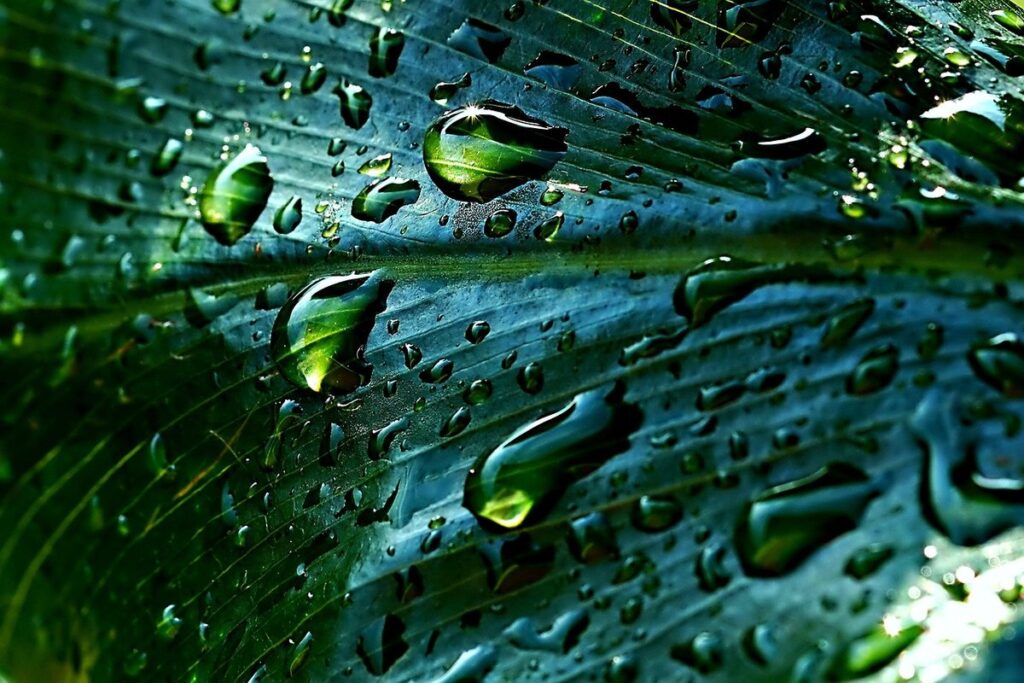
Benefits of Rainwater Harvesting
By collecting and storing rainwater, you can significantly reduce your water bills and do your part for the environment. Let’s explore some of the biggest benefits of rainwater harvesting together.
Reducing Water Bills and Environmental Impact
Collecting rainwater through water butt rainwater harvesting is not only an eco-friendly solution but also a cost-effective one. One of the most significant benefits of harvesting rainwater is that it can significantly reduce your household water bills. According to the UK’s Water Services Regulation Authority, households can save up to £150 per year by collecting just 10 cubic meters of rainwater.
This reduction in water consumption not only saves you money but also minimizes environmental strain. The average person uses around 150 liters of water per day for drinking, cooking, and cleaning. By using rainwater for non-potable purposes like flushing toilets, washing cars, or watering plants, we can reduce our reliance on mains water supplies. This decrease in demand helps to conserve precious water resources and reduces the pressure on wastewater treatment facilities.
To get started with reducing your water bills through rainwater harvesting, consider installing a water butt with a capacity of at least 100 liters. Regularly check and clean your gutters to ensure they are free-flowing and direct rainwater into your water butt. By following these simple steps, you can start saving money and doing your part for the environment today!
Meeting Increased Demand for Water
Rainwater harvesting is particularly beneficial during periods of drought or increased demand for water. These situations often strain our main water supply, leading to restrictions and conservation efforts. By collecting and storing rainwater, you can supplement your main water source and reduce your reliance on municipal supplies.
In the UK alone, for instance, over 20% of household water is used for flushing toilets and washing clothes. During a drought, this demand can skyrocket. Rainwater harvesting allows you to divert some of this pressure off your mains supply by using rainwater for non-potable purposes like toilet flushing and laundry.
When implementing a rainwater harvesting system, consider the capacity of your storage tank and the amount of water you need to collect. A general rule of thumb is to aim for at least 100-150 liters per square meter of roof area. This will give you enough water to meet basic household needs during dry periods.
Choosing the Right Water Butt Size and Type
When it comes to choosing a water butt, selecting the right size and type is crucial for efficient rainwater harvesting. Let’s explore how to make the perfect choice for your needs.
Factors to Consider When Selecting a Water Butt
When selecting a water butt for rainwater harvesting, there are several key factors to consider. First and foremost is size. A larger capacity water butt will be able to store more water, but it will also take up more space in your garden. Consider the available space you have and how often it rains in your area when deciding on the ideal size.
The material of the water butt is another crucial factor. Plastic water butts are the most common type and are generally inexpensive. However, they can degrade over time and may not be as durable as other materials such as metal or wood. Consider the lifespan you need from your water butt and choose a material that suits your needs.
Finally, cost is an important consideration when selecting a water butt. While it’s tempting to go for the cheapest option, consider the long-term benefits of investing in a higher-quality water butt. A more expensive option may last longer and provide better performance, making it a worthwhile investment in the long run.
Popular Types of Water Butts for Small Gardens
When it comes to choosing a water butt for your small garden, there are several popular types to consider. Plastic water butts are a cost-effective and easy-to-install option, perfect for beginners. They come in a range of sizes, from 100-liter to 1,000-liter capacities, making them suitable for gardens of all shapes and sizes.
Another popular choice is metal water butts, which offer durability and long-lasting performance. They can withstand harsh weather conditions and are often made from recycled materials. If you’re looking for a more eco-friendly option, consider a wooden or polypropylene water butt, which can be easily disassembled and reused.
When selecting a type of water butt, consider factors such as space constraints, budget, and maintenance needs. For example, if you have limited space, an underground water butt may be a better option, while those with a larger garden may prefer a freestanding model.
Installing Your Water Butt
Now that you’ve chosen your water butt, it’s time to install it securely and correctly on a stable base, following the manufacturer’s instructions and local building codes.
Preparing the Site for Installation
Before you start installing your water butt, it’s essential to prepare the site properly. This will ensure that your rainwater harvesting system functions efficiently and effectively. Start by selecting a location for your water butt that is level, accessible, and close to your home or building.
When choosing a spot, consider the following factors: proximity to downpipes, sunlight exposure, and wind direction. You’ll want to position your water butt under a downpipe, but also ensure it’s not exposed to direct sunlight, which can cause algae growth and affect water quality. Additionally, avoid installing your water butt in areas with strong winds, as this can lead to system damage.
Clear the area around your chosen spot of any debris or obstructions. This includes leaves, twigs, and other materials that could interfere with the installation process or clog the downpipe. If you’re installing a new water butt, make sure to lay a level surface for the base. This will ensure that your system remains stable and secure over time.
Connecting the Downpipe to the Water Butt
Connecting the downpipe to the water butt is a crucial step in ensuring that your rainwater harvesting system functions correctly. To do this, you’ll need to locate the suitable position for the water butt in relation to the downpipe. Typically, this will be near the wall or gable end of the building, allowing gravity to guide the flow of water from the roof to the water butt.
Begin by ensuring that your downpipe is securely attached to the water butt using a suitable connector, such as a hose clip or gutter adapter. These connectors come in various sizes and types, so choose one that matches the diameter of your downpipe and water butt inlet.
Next, position the water butt beneath the downpipe, taking care not to kink or bend the pipe. You can use a level to ensure the water butt is perfectly horizontal and stable on its base. Finally, connect the hose clip or gutter adapter securely, tightening it firmly but avoiding over-tightening, which may damage the connector.
By following these simple steps, you’ll successfully connect your downpipe to the water butt, allowing the rainwater to flow freely into your storage container for future use.
Maintaining and Upgrading Your Water Butt System
Now that you’ve set up your water butt system, it’s essential to maintain and upgrade it regularly to ensure it continues to provide you with a reliable source of clean rainwater. This section will guide you through those crucial maintenance tasks.
Regular Maintenance Tasks for Optimal Performance
To ensure your water butt rainwater harvesting system operates at its best, regular maintenance is crucial. Start by checking the butts for debris and sediment that can accumulate over time. Use a soft-bristled brush to gently scrub away any visible particles, paying attention to areas around the lid and overflow pipe.
Regularly inspect the system’s gutters and downspouts for blockages or damage, which can compromise water flow. Clean leaves and twigs from the gutters every few weeks during peak foliage seasons, and consider installing gutter guards to prevent debris buildup.
Also, check the O-ring seals around the lid and overflow pipe connections for signs of wear or dryness. Apply a silicone-based lubricant to keep these areas watertight. Lastly, monitor water quality by checking the system’s pH levels and nutrient content. Perform partial draining and cleaning every 6-12 months to maintain optimal performance.
Remember, regular maintenance is key to extending the lifespan of your system and preventing potential issues that may require costly repairs or replacements.
Potential Issues and How to Address Them
While rainwater harvesting systems are designed to be efficient and reliable, potential issues can still arise. One common problem is contamination of the stored water. This can occur if the collection surface is not properly maintained, allowing debris and pollutants to enter the system. For instance, leaves and twigs from nearby trees can fall onto the roof or other surfaces, contaminating the collected rainwater.
To prevent contamination, it’s essential to regularly inspect and clean the system. Check for any blockages in the downpipes and ensure that the gutters are clear of debris. You should also install a first flush device, which allows the initial flow of water from the roof to be diverted, taking any contaminants with it.
Leaks are another potential issue, often caused by poor installation or damage over time. To minimize this risk, choose high-quality components and follow the manufacturer’s instructions for installation and maintenance. Regularly inspect your system for signs of wear and tear, such as cracks in the barrels or loose fittings. Addressing these issues promptly can help prevent more significant problems down the line.
Using Collected Rainwater in Your Home and Garden
Now that you have your water butt up and running, let’s explore some creative ways to use the collected rainwater around your home and garden.
Water Butt Applications for Indoor Use
Collected rainwater can be used for various indoor applications beyond just watering plants. One of the most significant uses is flushing toilets. This might seem unconventional, but it’s a highly effective way to conserve water and reduce your household’s carbon footprint. With some basic plumbing modifications, you can connect your water butt directly to your toilet cistern.
Another useful application is washing machines. By installing a pump system that connects your water butt to your washing machine, you can wash clothes with collected rainwater instead of municipal water supplies. This not only reduces your reliance on public utilities but also saves energy and money in the long run.
It’s essential to note that collected rainwater may require some treatment before use for indoor applications. Depending on the quality of your roof and surrounding environment, there might be contaminants present in the collected water. Always consider using a filtration system or UV purifier to ensure safe usage.
When implementing these systems, remember to follow proper installation guidelines and local regulations regarding rainwater harvesting. With careful planning and execution, you can unlock the full potential of your water butt collection system for indoor use.
Utilizing Collected Rainwater for Outdoor Tasks
Using collected rainwater for outdoor tasks can be a game-changer for water-conscious homeowners. Not only does it save you money on your water bills, but it also reduces the strain on municipal water supplies. Let’s explore some of the practical uses of harvested rainwater for your outdoor space.
For gardening enthusiasts, using rainwater is a no-brainer. You can use it to water plants, feed your garden hose, or even fill up your birdbath. This reduces the amount of chemicals and minerals that enter your soil from tap water, promoting healthier plant growth. For instance, you can set up a drip irrigation system that delivers the rainwater directly to the roots of your plants.
If you have a car or like to keep your driveway clean, you can also use rainwater for washing cars or cleaning outdoor surfaces. It’s an eco-friendly way to maintain your home and vehicles without contributing to stormwater runoff. To make it even easier, consider installing a separate tap for your harvested rainwater, so you can easily access it when needed.
Safety Considerations and Regulations
When it comes to collecting rainwater, safety should always be your top priority. This section explores essential guidelines for safe installation and maintenance of water butts and other rainwater harvesting systems.
Preventing Contamination and Bacterial Growth
Preventing contamination and bacterial growth is crucial when harvesting rainwater. Rainwater can be contaminated with pollutants from the roof, gutters, downspouts, and surrounding environment, including heavy metals, bacteria, viruses, and other microorganisms. To prevent this, it’s essential to ensure that your water butt is properly installed, maintained, and regularly cleaned.
Regularly inspect your gutters and downspouts for blockages, rust, or debris buildup. Also, check the roof for moss, lichen, or algae growth, which can wash off into the rainwater collection system. Use a first flush device to divert the initial flow of water from the roof, which may contain contaminants, away from the storage tank.
To prevent bacterial growth, store your collected rainwater in a clean, dark container with a tight-fitting lid. Use a UV-resistant material or add a treatment solution that inhibits microbial growth. Always check the pH level and electrical conductivity (EC) of the water to ensure it’s safe for non-potable uses, such as flushing toilets or irrigating plants.
Compliance with Local Water Harvesting Laws and Regulations
Before installing and using a rainwater harvesting system with your water butt, it’s essential to understand the local laws and regulations governing this practice. Compliance requirements may vary depending on your location, so familiarize yourself with your area’s specific rules.
In the UK, for instance, the Water Supply (Water Quality) Regulations 2010 set standards for collecting, storing, and using rainwater from water butts. Ensure that your system meets these regulations by installing a first flush device, which allows the initial flow of water to be diverted before it reaches the storage tank.
To comply with local laws and regulations, consider the following:
* Check if you need a permit or license to collect and store rainwater in your area.
* Familiarize yourself with any specific requirements for water butt size, material, and maintenance.
* Ensure that your system is properly labeled and visible to prevent confusion about its purpose.
Remember, compliance is not only a legal requirement but also ensures the safety and quality of the collected rainwater.
Frequently Asked Questions
How Often Should I Check and Maintain My Water Butt?
Regular maintenance is key to ensuring the cleanliness and effectiveness of your water butt system. We recommend checking your water butt every 2-3 months for any signs of contamination, blockages, or bacterial growth.
Can I Use Collected Rainwater for Drinking or Cooking?
While collected rainwater is generally safe, it’s essential to follow proper testing and treatment procedures before using it for drinking, cooking, or even washing fruits and vegetables. Consider investing in a water quality test kit and following local guidelines for safe use.
How Do I Prevent Contamination and Bacterial Growth in My Water Butt?
To minimize the risk of contamination and bacterial growth, ensure your downpipe is properly fitted, and clean any debris from the collection area regularly. Also, consider adding a first flush device to divert debris from the initial flow and a UV filter or chlorine tablets to disinfect the collected water.
What Are Some Common Issues I Might Encounter When Connecting My Water Butt to the Downpipe?
One common issue is improper connection, which can lead to leaks or reduced water flow. Ensure you’ve chosen the correct adapter for your downpipe type and followed the manufacturer’s instructions carefully. If you’re still experiencing problems, consult a professional plumber for assistance.
Can I Use Collected Rainwater in My Home for Laundry and Washing?
Yes, collected rainwater is an excellent choice for non-potable purposes like laundry, washing cars, or cleaning outdoor surfaces. However, it’s crucial to follow local regulations regarding the use of harvested rainwater for household tasks. Also, be sure to label your water butt as “non-potable” to avoid confusion with potable water sources.