If you’re eager to grow your own delicious vegetables but don’t have a sprawling backyard, you’re not alone. Container vegetable gardening is a great alternative for city dwellers, small-space enthusiasts, and anyone looking to add some fresh produce to their lives without breaking the bank. But where do you start? Choosing the right materials and soil mix is crucial for success. You’ll want to learn about container sizes, material options, and how to create a well-draining potting mix that promotes healthy plant growth.
In this article, we’ll cover everything you need to know to grow a thriving vegetable garden in containers. We’ll discuss pest management strategies, seasonal care tips, and provide advice on selecting the best vegetables for container gardens. Whether you’re a seasoned gardener or just starting out, by the end of this post, you’ll have the knowledge and confidence to start growing your own delicious veggies right on your balcony, patio, or even indoor spaces!
Choosing the Right Containers
When it comes to growing delicious vegetables in containers, selecting the right pots and planters is crucial. Let’s dive into the factors to consider for a thriving container garden.
Selecting the Perfect Container Size
When selecting containers for vegetable gardening, the size of the container is just as crucial as the type of soil and sunlight it receives. Different vegetables have varying growth habits and space requirements, making it essential to choose a container that caters to their needs.
For example, leafy greens like lettuce, kale, and spinach can thrive in smaller containers (around 5-7 gallons) due to their compact growth habit. These plants are ideal for balconies or patios where space is limited. On the other hand, vining vegetables such as tomatoes and cucumbers require more space and a larger container (at least 12-14 gallons) to accommodate their spreading habits.
When choosing a container size, consider the mature plant size, not just the seedling stage. Also, don’t forget about air circulation and root growth – overcrowding can lead to disease issues and poor yields. By selecting the right container size for your specific vegetables, you’ll be well on your way to a bountiful harvest in containers.
Materials to Avoid and Opt For
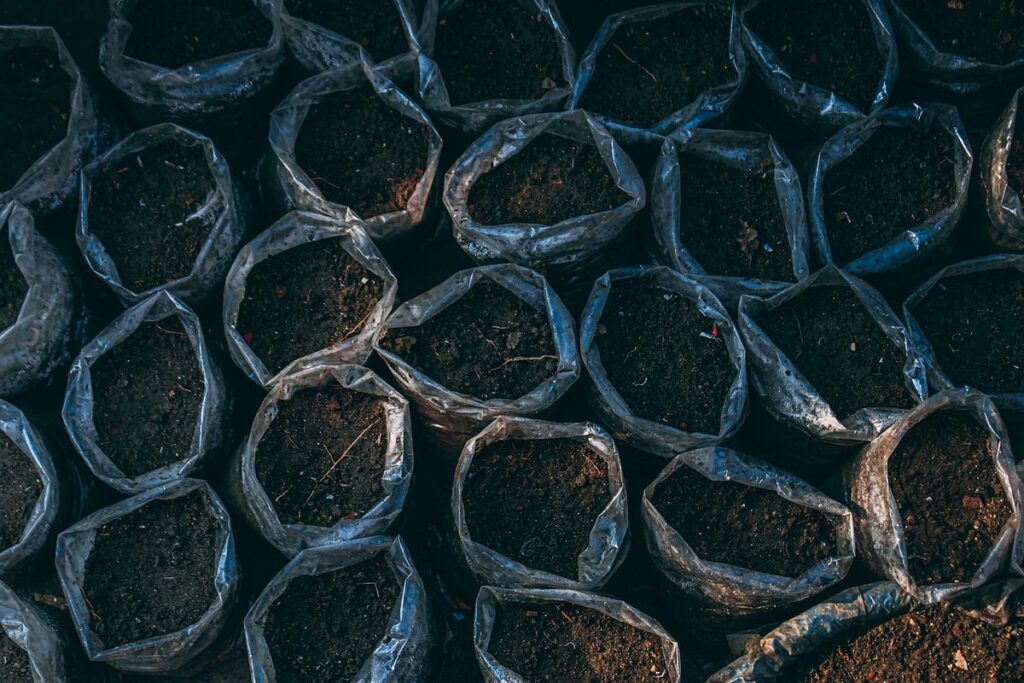
When selecting containers for vegetable gardening, it’s essential to choose materials that are durable, safe, and suitable for the specific plants you’re growing. One material to avoid is thin-walled plastic containers, which can become brittle with age and may crack under changing temperatures. They also tend to harbor bacteria and other microorganisms, which can harm your plants.
On the other hand, wood containers have their own set of drawbacks. Untreated wood can leach chemicals into the soil, harming your vegetables, while treated wood may contain toxic substances like arsenic. If you do opt for a wooden container, ensure it’s made from sustainably sourced materials and has been properly treated.
Ceramic and terracotta containers are excellent alternatives to plastic and wood. They’re breathable, allowing excess moisture to escape and preventing waterlogged soil. Look for containers with good drainage holes and avoid those with painted or glazed surfaces, which can retain moisture and harbor pests.
Container Maintenance: A Guide to Preparing Your Garden
To ensure your container garden thrives, regular maintenance is crucial. Before planting, inspect the containers for any damage or wear. Check the drainage holes and make sure they’re not clogged with debris. If necessary, drill new holes to improve airflow and prevent waterlogged soil.
Next, clean the containers thoroughly with a mixture of soap and water. Rinse them well and let them dry completely before filling with potting mix. This will help prevent any bacteria or pests from affecting your plants.
When selecting potting mix, choose a high-quality blend specifically designed for container gardens. Avoid using regular garden soil as it can compact in containers, reducing drainage and air circulation. Instead, opt for a mix that’s lightweight and has good water-holding capacity.
Finally, prepare the containers by adding a 1-2 inch layer of potting mix at the bottom. This will help with drainage and prevent the roots from growing too deep.
Soil and Fertilization Essentials
When it comes to growing vegetables in containers, understanding how to work with soil and fertilizers is crucial for optimal yields. In this section, we’ll cover the essentials of soil selection and fertilizer use.
Understanding Container Soil Mixes
When it comes to container vegetable gardening, selecting the right soil mix is crucial for optimal growth and yields. However, with numerous options available, it can be overwhelming to decide between potting soils, compost, and other amendments.
Potting soils are specifically designed for containers and typically contain a blend of peat moss, vermiculite, or perlite, which help retain moisture and provide drainage. These mixes usually lack the nutrients found in natural soil, so fertilizers may be necessary to support plant growth. Compost, on the other hand, is made from decomposed organic matter and can be used as a component of your mix or added separately. Its benefits include improved soil structure and fertility.
Consider your specific needs when choosing a container soil mix. For example, if you’re growing vegetables that prefer well-draining soils, such as tomatoes, opt for a mix with high perlite content. If you’re concerned about retaining moisture in the face of frequent watering, look for mixes containing peat moss or coconut coir.
Fertilizing Container Gardens: Timing and Type
Fertilizing container gardens is essential to provide vegetables with the necessary nutrients for healthy growth and production. When it comes to selecting a fertilizer, you have two main options: organic and synthetic.
Organic fertilizers are made from natural materials such as compost, manure, or bone meal. These fertilizers release nutrients slowly over time, providing a steady supply of nutrients to your plants without burning their roots. Examples of organic fertilizers include fish emulsion, alfalfa meal, and kelp meal. They’re also environmentally friendly, biodegradable, and non-toxic.
Synthetic fertilizers, on the other hand, are made from chemical compounds that provide an immediate boost of nutrients to your plants. However, they can be harsh on plant roots and soil ecosystems if overused or misapplied. Examples include ammonium nitrate and urea.
When it comes to timing, fertilize container gardens at the following stages:
* At planting time
* When seedlings are 1-2 inches tall (about 1-2 weeks after transplanting)
* During peak growth periods (usually during summer months)
* After harvesting (to replenish nutrients depleted by fruiting)
Vegetable Selection and Planting Strategies
When it comes to growing a thriving container garden, selecting the right vegetables and planting them strategically is crucial for success. Let’s explore the best techniques for choosing and placing your favorite veggies in containers.
Choosing Vegetables Suitable for Containers
When choosing vegetables for container gardening, it’s essential to select varieties that are compact or dwarf, making them perfect for small spaces. These types of plants are specifically bred to thrive in smaller containers and produce fruit at a more manageable size.
Consider selecting varieties from the following categories:
• Leafy greens like lettuce, kale, and spinach, which can be harvested continuously and require minimal space
• Cherry tomatoes and compact pepper varieties that produce smaller fruit and can be trained to climb up trellises or cages
• Herbs such as basil, mint, and cilantro, which are easy to grow in containers and add fresh flavor to a variety of dishes
When shopping for these varieties, look for keywords like “compact,” “dwarf,” or “patio” on seed packets or plant labels. This indicates that the plant is specifically bred for smaller spaces.
Some popular compact varieties include ‘Tiny Tim’ tomatoes, ‘Bush Blue Lake’ beans, and ‘Parisienne’ lettuce. These plants will not only provide you with a bountiful harvest but also add visual interest to your container garden.
Seed Starting and Direct Sowing: Tips and Tricks
When it comes to starting vegetables from seed in containers, you have two main options: seed starting and direct sowing. While both methods can be effective, they have their pros and cons.
Seed starting involves planting seeds indoors 4-6 weeks before the last frost date, providing them with optimal growing conditions until they’re ready to transplant into larger containers. This method is ideal for vegetables like tomatoes, peppers, and eggplants that require a head start on the growing season. However, it can be more labor-intensive and requires separate equipment for seed starting.
Direct sowing, on the other hand, involves planting seeds directly into large containers where they’ll mature. This method is suitable for vegetables like lettuce, radishes, and herbs that prefer cooler temperatures and don’t require a head start. To achieve optimal results with direct sowing, make sure to plant at the right depth (usually 2-3 times deeper than the seed’s length) and maintain consistent moisture levels.
To give your container-grown vegetables the best chance of success, consider using a combination of both methods. Start seeds indoors for vegetables that require a head start, then direct sow those that prefer cooler temperatures or don’t require pre-starting.
Watering and Irrigation Techniques
Proper watering is crucial for container gardens, and we’ll show you how to use the right techniques to keep your plants hydrated and thriving. This includes tips on frequency and quantity of water application.
The Importance of Consistent Moisture Levels
Maintaining consistent moisture levels is crucial for container gardens. This ensures that your vegetables receive just the right amount of water, which promotes healthy growth and prevents overwatering issues.
To monitor soil moisture effectively, start by inserting your finger into the soil up to the first knuckle. If the soil feels dry, it’s time to water. However, if it’s still damp, wait another day or two before checking again. You can also use a moisture meter, which provides an accurate reading of the soil’s moisture levels.
It’s easy to overwater your container garden, especially when the weather is hot and dry. Overwatering causes roots to rot, leading to weak and stunted growth in vegetables. To avoid this, water deeply but infrequently. Instead of watering every day or two, try watering once a week. This encourages deep root growth, making your plants more resilient to drought.
For example, when growing tomatoes in containers, it’s essential to maintain consistent moisture levels. Tomatoes need about 1 inch of water per week, either from rain or irrigation. Aim to provide this amount evenly throughout the week, rather than flooding the soil with too much water at once.
Drip Irrigation Systems: A Game-Changer for Container Gardens?
Drip irrigation systems have revolutionized the way we water our container gardens. If you’re looking for an efficient and effective way to provide your vegetables with the right amount of moisture, look no further than a drip irrigation system.
These systems work by delivering water directly to the roots of the plants through a network of tubes and emitters. This targeted approach ensures that the soil remains consistently moist, but not waterlogged – perfect for container gardens where roots can easily become compacted.
To install a drip irrigation system in your container garden, start by planning out the layout of your tubes and emitters. Make sure to space them evenly apart, taking into account the mature size of each plant. Next, attach the drip tape or tubing to the water source, and adjust the flow rate as needed. Maintenance is minimal – simply check for clogs or kinks on a regular basis, and clean out any debris that may be affecting the system’s performance.
A well-designed drip irrigation system can make all the difference in a thriving container garden.
Pest Management and Common Pests to Watch Out For
As you cultivate your container garden, it’s essential to stay vigilant against common pests that can damage your vegetables. Keep an eye out for aphids, whiteflies, and slugs in particular.
Identifying Common Pests Affecting Vegetable Containers
When it comes to vegetable gardening in containers, pests can be a significant challenge. Identifying common pests is crucial to prevent infestations and ensure a healthy crop. Some of the most common pests affecting container-grown vegetables include aphids, whiteflies, and spider mites.
Aphids are tiny, soft-bodied insects that feed on plant sap, causing curled or distorted leaves. Whiteflies are small, flying insects that also feed on sap, leaving behind sticky honeydew residue. Spider mites are microscopic arachnids that suck plant fluids, causing yellowing or bronzing of leaves.
To prevent infestations, ensure good air circulation around your containers by maintaining a distance of at least 6-8 inches between plants. Regularly inspect your plants for signs of pests, and use neem oil or insecticidal soap to treat affected areas. Keep your containers clean and free of debris, and avoid overwatering, which can attract pests.
In addition to these common pests, be on the lookout for other threats like caterpillars, cutworms, and slugs. By being vigilant and taking preventative measures, you can protect your container-grown vegetables from pest damage and enjoy a healthy harvest.
Organic and Integrated Pest Management (IPM) Techniques
When it comes to container gardening, it’s essential to adopt organic and integrated pest management (IPM) techniques to ensure a healthy and thriving garden. IPM is an approach that combines physical, cultural, biological, and chemical controls to manage pests in a holistic way.
To start with, make sure you’re choosing varieties of vegetables that are resistant to common pests such as tomatoes for hornworms or peppers for aphids. You can also use row covers to prevent pests like whiteflies and spider mites from reaching your plants.
If you do encounter pests, don’t reach for chemical pesticides just yet! Instead, try introducing beneficial insects like ladybugs or lacewings that prey on common garden pests. Companion planting is another effective method – certain plants like basil repel aphids while others like marigolds deter nematodes.
For example, if you notice aphid infestations on your broccoli plant, you can simply blast the affected areas with a strong jet of water to dislodge them. Be sure to inspect your plants regularly and take action at the first sign of pests to prevent them from spreading.
Seasonal Care and Maintenance Tips
As you tend to your container garden, it’s essential to keep up with seasonal changes to ensure your vegetables continue to thrive. This means adjusting care routines accordingly to prevent common problems.
Spring and Fall Container Garden Prep
As we transition from spring to fall, and vice versa, it’s essential to prepare your container garden for the changing seasons. This involves pruning, dividing, and replanting to ensure optimal growth and prevent pests and diseases from taking hold.
In the spring, after the last frost has passed, prune any dead or damaged plants to make way for new growth. For leafy greens like lettuce and kale, simply trim back the outer leaves to encourage bushy growth. For flowering plants like tomatoes and peppers, remove any weak or spindly growth to direct energy towards producing fruit.
In the fall, when the days get shorter and cooler, it’s time to start thinking about overwintering your container garden. Divide and replant perennials like herbs and vegetables that have outgrown their containers or are showing signs of decline. This will give them a fresh start for the next growing season. For annuals, simply remove any dead or dying plants and add fresh soil and fertilizer to prepare the container for new growth in the spring. By taking these simple steps, you’ll be able to enjoy your container garden all year round.
Winterizing Your Container Garden: Tips for a Successful Harvest
As winter approaches, it’s essential to prepare your container garden for the harsh weather conditions. Winterizing your container garden will help protect your plants from extreme temperatures, frost, and moisture fluctuations. Start by selecting cold-hardy vegetable varieties that can thrive in cooler temperatures.
When choosing containers for winterization, select those with good drainage holes to prevent waterlogged soil. You’ll also want to add a layer of insulation around the containers using materials like straw or bubble wrap. This will help retain heat and protect roots from freezing temperatures.
For a successful harvest, make sure your container garden receives enough sunlight during winter months. If possible, position your containers near a south-facing wall or under a cold frame to maximize sunlight exposure. Also, keep an eye on the soil temperature, as it should remain above 40°F (4°C) for optimal growth. Water plants sparingly, but make sure not to let them dry out completely.
By following these winterization tips, you’ll be able to enjoy a bountiful harvest even in the midst of winter. Remember to also mulch around the containers to retain moisture and suppress weeds. With proper care, your container garden will thrive during the colder months and provide a steady supply of fresh produce throughout the year.
Frequently Asked Questions
Can I use a mixture of different container sizes for my vegetable garden, or should they all be the same size?
While it might seem convenient to mix-and-match containers, it’s generally best to choose one standard size and stick with it. This ensures even growth patterns and makes maintenance easier. If you must vary container sizes, place larger pots towards the north to avoid shading smaller ones.
How do I prevent pests from spreading between my containers?
To prevent pest migration, make sure each container has its own drainage system and isn’t directly adjacent to other containers. Consider using row covers or fine mesh to keep airborne pests out. Regularly inspect your plants for signs of infestation and address any issues promptly.
What’s the best way to label my containers so I can easily identify what’s growing in each one?
Use a permanent marker to label each container with the plant name, date, and other relevant details. Alternatively, you can purchase pre-printed labels or use a gardening app to track your plants’ progress. Keep your labels near the containers for easy reference.
Can I grow leafy greens like lettuce and spinach in containers year-round?
While these veggies prefer cooler temperatures, some varieties are more tolerant of warmer conditions than others. To extend their growing season, provide partial shade during summer months and maintain consistent moisture levels. Harvest regularly to encourage new growth and prevent bolting.
How often should I repot my container garden, and what signs indicate it’s time?
Repot your containers every 6-12 months or when you notice a significant decrease in soil fertility or drainage. Look for signs like yellowing leaves, stunted growth, or waterlogged soil – these all suggest it’s time to refresh the potting mix and prune overgrown roots.