When it comes to keeping our gardens looking their best while being kind to the environment, we’re always on the lookout for cost-effective and sustainable solutions. One often overlooked option is straw mulch, which offers a wealth of benefits for gardeners who want to reduce waste and minimize their ecological footprint. Not only can straw mulch help retain moisture in the soil, suppress weeds, and regulate temperature, but it’s also incredibly budget-friendly compared to other mulching options like wood chips or bark. In this article, we’ll delve into the advantages of using straw as mulch, explore how to prepare and apply it effectively, and provide you with a step-by-step guide on incorporating straw mulch into your garden for a beautiful and sustainable space.
Benefits and Advantages of Using Straw as Mulch
Using straw as mulch offers numerous benefits, from suppressing weeds to retaining moisture in your soil. We’ll explore these advantages up close.
Cost-Effective Alternative to Traditional Mulches
When it comes to choosing a mulch material, cost is often a significant consideration. Straw stands out as a remarkably affordable option compared to other popular choices like wood chips or pine needles. A single ton of straw typically costs between $30 and $50, while wood chips can range from $50 to $100 per ton, depending on the type and quality.
One key reason straw is so cost-effective is its abundant supply. Straw is a byproduct of wheat harvesting, making it widely available in many regions during certain times of the year. This surplus reduces production costs and allows suppliers to pass the savings on to customers. Furthermore, using straw as mulch eliminates the need for expensive additives or treatments often required with other materials.
If you’re considering straw as an alternative to traditional mulches, keep in mind that prices may vary depending on your location and supplier. To get the best value, shop around, compare prices, and negotiate if possible. By making straw your go-to mulch material, you can enjoy a more affordable solution for garden bed maintenance while still reaping its numerous benefits.
Environmentally Friendly Option
When it comes to mulching with straw, one of the most significant benefits is its environmentally friendly nature. Unlike synthetic mulches that can contribute to pollution and waste, straw is a biodegradable and sustainable option. In fact, straw is often considered a waste product from agriculture, making it an excellent way to repurpose what would otherwise be discarded.
Using straw as mulch also helps reduce the amount of waste sent to landfills. According to the Environmental Protection Agency (EPA), nearly 40% of municipal solid waste in the United States comes from food and yard trimmings – including crops like wheat, oats, and barley that are commonly used for straw production. By using straw as mulch, you’re not only reducing waste but also creating a nutrient-rich environment for your plants.
To incorporate straw into your mulching routine, simply spread it evenly around 2-3 inches thick over the soil surface. As the straw breaks down, it will add organic matter to the soil and help retain moisture, reducing the need for frequent watering. With its biodegradable nature and ability to reduce waste, using straw as mulch is a simple yet effective way to create an eco-friendly garden.
Aesthetically Pleasing Options for Mulching
When it comes to incorporating straw mulch into your landscaping design, there are numerous aesthetically pleasing options to consider. For a rustic charm, try mixing straw with other natural materials like pine needles or small rocks to create a visually appealing border around gardens and pathways.
You can also use straw mulch as a decorative layer in raised beds, adding depth and texture to the overall design. Simply spread a 2-3 inch layer of straw over the bed’s surface, weaving in any additional plants or flowers as needed.
To add a touch of elegance, try incorporating straw mulch into your outdoor decor through creative container gardening. Fill large planters with a mix of succulents and wildflowers, topping them off with a 1-2 inch layer of straw for a pop of color and texture.
Consider using straw mulch as a pathway material, too – simply rake the straw into place, creating a meandering path through your garden that’s both functional and visually stunning. With these simple yet effective ideas, you can breathe new life into your landscaping design while still reaping the benefits of straw mulch’s practical advantages.
Preparing Straw for Use as Mulch
Before using straw as mulch, it’s essential to prepare it properly to ensure effective moisture retention and weed suppression. This involves cleaning, drying, and possibly aerating the straw.
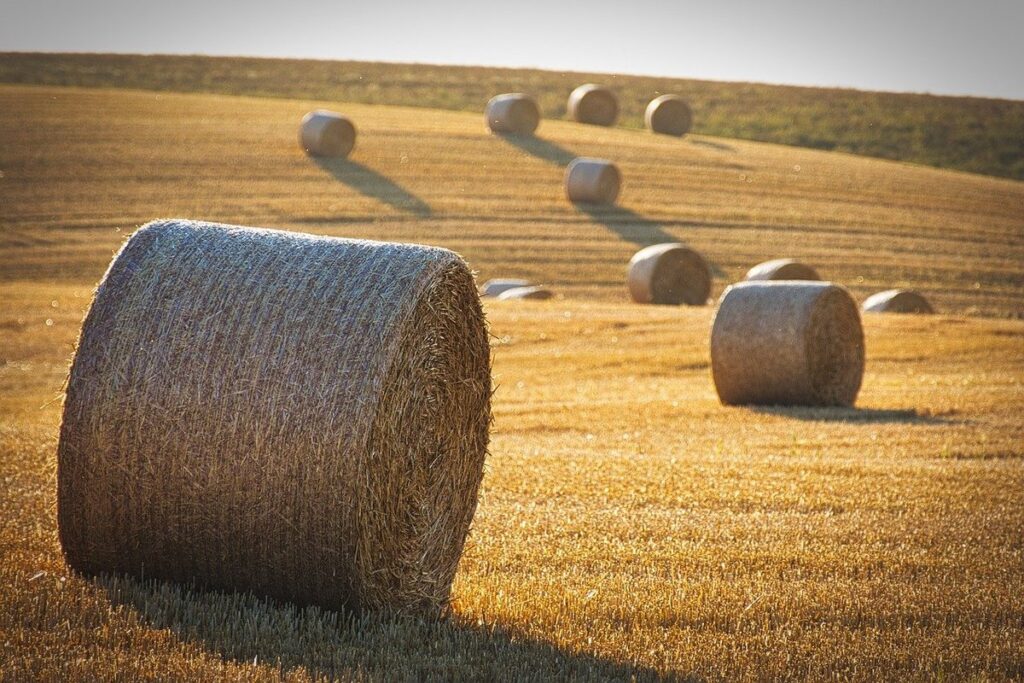
Harvesting and Collecting Straw
When it’s time to harvest and collect straw for use as mulch, there are several factors to consider. One of the most important is crop rotation. Straw production can be a lucrative crop, but it’s essential to rotate it with other crops to maintain soil health. For example, planting oats or rye after a season of wheat or barley will help improve soil fertility and structure.
To ensure high-quality straw, it’s crucial to harvest at the right time. Wait until the plants have reached full maturity and the grain is dry, as this will make the straw easier to collect and process. When collecting straw, use a combine harvester or other machinery specifically designed for this task. Avoid using tractors with attached headers, as they can damage the straw and reduce its quality.
Regularly inspecting your fields during harvesting will also help identify any areas where straw may be under- or over-matured. This way, you can adjust your collection schedule accordingly to maximize efficiency and minimize losses.
Drying and Processing Straw
Drying and processing straw is a crucial step before using it as mulch. Excess moisture can lead to mold growth, which not only spoils the straw but also releases spores into the air that can exacerbate respiratory issues like asthma. To prevent this, you’ll need to dry the straw thoroughly.
The best way to dry straw is by spreading it out in a single layer on a clean surface, such as a driveway or a large tarp. You can also use a machine specifically designed for drying hay and straw. The ideal moisture level for mulch is between 15% and 20%. If the straw is too damp, it will retain moisture from the soil, potentially causing root rot in plants.
To process dried straw, you can either bale it or chop it into smaller pieces using a chipper or a mower with a mulching attachment. Baling makes the straw easier to store and transport, while chopping creates more surface area for better soil coverage. Regardless of how you choose to process your straw, make sure it’s completely dry before applying it around your plants.
Storage and Handling of Straw Mulch
When storing and handling straw mulch, it’s essential to follow proper procedures to maintain its quality and prevent spoilage. First, make sure the straw is dry and free of debris before storing it. Moisture can cause mold and mildew, which can lead to rotting and compromise the effectiveness of the mulch.
Store the straw in a cool, dry place with good ventilation. Avoid stacking it too high or covering it with plastic tarps, as this can create an ideal environment for moisture buildup. Instead, use breathable covers like canvas or burlap to protect the straw from direct sunlight and precipitation.
When handling straw mulch, always wear gloves to avoid getting your hands dirty and to prevent any debris from entering your eyes. Use a pitchfork or rake to spread the straw evenly, taking care not to compact it too much. This will help maintain airflow and prevent moisture from accumulating in the pile. Regularly inspect the stored straw for signs of spoilage, such as mold, mildew, or pests, and take corrective action promptly if you notice any issues.
Application Techniques for Straw Mulch
Now that you have a stockpile of straw, let’s dive into the nitty-gritty of applying it as mulch effectively. We’ll cover the best ways to lay down and maintain your straw mulch for optimal results.
Layering and Spreading Methods
When it comes to layering and spreading straw mulch, there are several methods you can use to achieve the best results. The recommended depth for straw mulch varies depending on the climate and the type of plants being grown. In general, a depth of 2-3 inches is sufficient for most gardens, but in areas with intense heat or dry spells, you may need to apply a thicker layer.
One common method is to spread the straw evenly across the bed, using a rake or broom to ensure it’s distributed uniformly. This helps prevent bare spots and ensures that all plants receive equal benefit from the mulch. Alternatively, you can create a layered effect by applying a thin layer of compost or fertilizer before topping with straw. This method not only provides nutrients but also adds visual appeal to your garden.
For large areas, consider using a lawn spreader or leaf blower to efficiently cover the surface. Remember to overlap your passes slightly to prevent missed spots and ensure complete coverage.
Compressing and Compacting Straw
Compressing and compacting straw is an essential step in creating an effective mulch that will retain moisture and prevent settling. When straw is spread evenly over the soil surface, it can settle significantly due to wind, rain, or foot traffic. This settling can lead to a thin layer of mulch, which may not provide adequate protection for your plants.
By compressing and compacting the straw, you can prevent this settling and ensure that your mulch remains in place throughout the growing season. To do this, you can use a lawn roller or a heavy object, such as a boulder, to compress the straw. Alternatively, you can use a hand tamper or a rake to manually compact the straw.
Compacting the straw also helps it hold water more effectively. When straw is compressed, its fibers become more tightly packed, allowing it to absorb and retain moisture better. This means that your plants will receive consistent moisture levels, even during dry periods. By following these simple steps, you can enjoy the full benefits of using straw mulch, including improved soil health, reduced weed growth, and increased plant resilience.
Mulching Around Plants and Trees
When applying straw mulch around plants and trees, it’s essential to consider their root growth patterns and soil temperature needs. For example, deciduous trees have a deeper taproot system that can extend beyond the drip line of the tree canopy, while evergreen trees tend to have shallower roots.
To accommodate these varying root depths, apply straw mulch in a way that allows for easy root access. Create a “root zone” by leaving a 6-8 inch radius around the trunk of trees free from mulch. This will prevent moisture and nutrients from being trapped near the surface, which can cause root rot.
For plants with shallow roots, such as perennials or vegetables, apply straw mulch at a depth of 2-3 inches to maintain soil temperature consistency. Mulching at this depth also helps retain moisture in the top layer of soil, reducing evaporation and minimizing the need for supplemental irrigation.
Maintenance and Upkeep of Straw Mulch
To keep your straw mulch looking its best, you’ll want to regularly inspect it for signs of mold, mildew, or insect infestation. We’ll walk you through the maintenance and upkeep tasks that ensure a healthy and thriving garden.
Watering and Irrigation Considerations
When using straw mulch, it’s essential to understand that proper watering and irrigation techniques are crucial to prevent waterlogging and erosion. Water can quickly accumulate between the straw layers, leading to an anaerobic environment that fosters fungal growth and weed development.
To avoid this issue, make sure to maintain a consistent moisture level in your garden bed by watering deeply but infrequently. Aim for about 1 inch of water per week, either from rain or irrigation systems. Avoid frequent shallow watering, as this can lead to over-saturation and root rot in plants.
Mulching with straw also reduces soil temperature fluctuations, which helps regulate plant growth and prevents excessive moisture loss through evapotranspiration. To ensure effective irrigation, consider installing a drip irrigation system or soaker hose to deliver water directly to the roots of your plants, reducing runoff and erosion risks. Regularly inspect your garden bed for signs of waterlogging and adjust your watering schedule accordingly.
Monitoring and Replenishing Straw Mulch
Monitoring straw mulch’s condition is crucial to maintaining its effectiveness. Check the mulch regularly for signs of degradation, such as mold, mildew, or weed growth. Look for moisture levels, as excessive wetness can lead to rot and create an ideal environment for pests. If you notice any issues, take action promptly.
To replenish straw mulch, remove any affected areas by scraping off the damaged portion with a rake or shovel. Dispose of the removed material responsibly. Replace the removed amount with new straw, ensuring it’s evenly distributed and maintains a consistent thickness.
It’s also essential to replenish the straw mulch periodically as it breaks down over time. A general rule of thumb is to add 1-2 inches of fresh straw every 6-12 months, depending on environmental conditions. This will maintain a suitable moisture barrier and suppress weeds effectively. Regularly inspecting your mulched area will help you anticipate when replenishment is necessary.
By monitoring and replenishing straw mulch, you can maintain its benefits while minimizing waste and ensuring your garden remains healthy and thriving.
Challenges and Limitations of Using Straw as Mulch
While straw can make a great mulch, there are some important challenges and limitations to consider before using it. Let’s take a closer look at what you might encounter.
Pests and Diseases Associated with Straw
When using straw as mulch, it’s essential to be aware of potential pests and diseases that can affect its quality and performance. Rodents are one common pest associated with straw mulch. These unwanted critters can burrow through the straw, creating tunnels and nests, which can weaken the structure and make it less effective at retaining moisture.
Fungal growth is another concern when using straw as mulch. This occurs when straw becomes damp or wet for an extended period, providing a perfect environment for fungi to thrive. As fungi grow, they can create unsightly black spots on the surface of the mulch, which can be unappealing and even spread disease.
To mitigate these issues, it’s crucial to store straw properly before applying it as mulch. Keep it dry, well-ventilated, and away from direct sunlight. When using straw for mulching, apply a thin layer (around 2-3 inches) and maintain good drainage around plants. Regularly inspect your mulched areas for signs of pests or disease, taking prompt action to address any issues that arise.
Fire Hazards and Precautions
Using straw as mulch can be a great way to retain moisture and suppress weeds, but it also poses some significant fire hazards. Straw is highly combustible and can ignite easily, especially when exposed to heat sources like direct sunlight, sparks from lawn mowers or other equipment, or even cigarettes.
If you live in an area prone to wildfires, using straw as mulch may not be the best choice for your garden. However, if you still want to use it, there are some precautions you can take to minimize the risk of fires. First, ensure that the straw is dry and free from any debris or obstructions that could fuel a fire.
When applying straw mulch, maintain a safe distance between the mulched area and any nearby structures or flammable materials. Keep the mulch depth shallow, typically around 2-3 inches, to reduce the likelihood of fires spreading quickly. Also, avoid using straw mulch in areas with high foot traffic or where sparks from equipment are common.
It’s also a good idea to check local regulations regarding fire safety and consult with your neighbors if you’re planning to use straw as mulch in an area prone to wildfires.
Conclusion
In conclusion, using straw as mulch is a simple yet effective way to improve your garden’s health. By following the steps outlined in this post, you should be able to successfully incorporate straw into your mulching routine. Remember to apply a 2-3 inch layer of straw around your plants, keeping it at least an inch away from any stems or leaves.
As you continue to use straw as mulch, keep in mind that it will eventually break down and need to be replenished. Set aside some time each year to add fresh straw to your garden beds. This will ensure that your soil remains consistently covered and protected.
By taking these small steps, you’ll be well on your way to creating a thriving and healthy garden. So go ahead and give straw mulching a try – your plants will thank you!
Frequently Asked Questions
What is the ideal thickness for applying straw mulch?
When applying straw mulch, it’s essential to maintain a minimum of 2-3 inches of depth to ensure effective moisture retention and weed suppression. However, you can also adjust this based on your specific climate and plant requirements. Be sure to leave enough space for air circulation and growth.
Can I use straw mulch in areas with high foot traffic?
While straw mulch is an excellent choice for garden beds and pathways, it’s not the best option for high-traffic areas like sidewalks or driveways. In these cases, consider using a more durable material that can withstand heavy wear and tear, such as gravel or brick pavers.
How do I prevent mold and mildew from growing in my straw mulch?
To minimize the risk of mold and mildew growth, ensure your straw is dry before applying it to your garden. You can also mix in a small amount of lime with the straw to help reduce moisture retention. Regularly inspect your straw mulch for signs of decay and replenish as needed.
Can I use colored or dyed straw mulch?
While colored or dyed straw mulch may look appealing, it’s essential to note that these options can sometimes contain chemicals that can leach into the soil. Opt for natural, untreated straw instead to ensure a safer and more sustainable gardening practice.
How often should I replenish my straw mulch?
The frequency of replenishing your straw mulch depends on various factors like climate, soil type, and plant growth rates. As a general rule, aim to replenish every 6-12 months or when the mulch has broken down significantly. Keep an eye out for signs of decay and adjust your schedule accordingly.