Are you struggling to understand how queen cells work in your beehive? Identifying and managing these tiny, yet crucial structures can make all the difference between a thriving colony and one on the brink of collapse. When it comes to honey production and overall hive health, a well-managed queen cell is essential. But what exactly are queen cells, and how do you recognize them? In this article, we’ll delve into the world of bee biology and explore best practices for identifying, managing, and thriving with queen cells in your beehive. Whether you’re an experienced beekeeper or just starting out, learning to maximize honey production while maintaining a healthy colony is within reach – let’s get started!
The Importance of Queen Cells
Queen cells are the key to a healthy, thriving beehive. In this section, we’ll explore their crucial role and why maintaining adequate queen cell numbers is essential for your colony’s success.
What are Queen Cells?
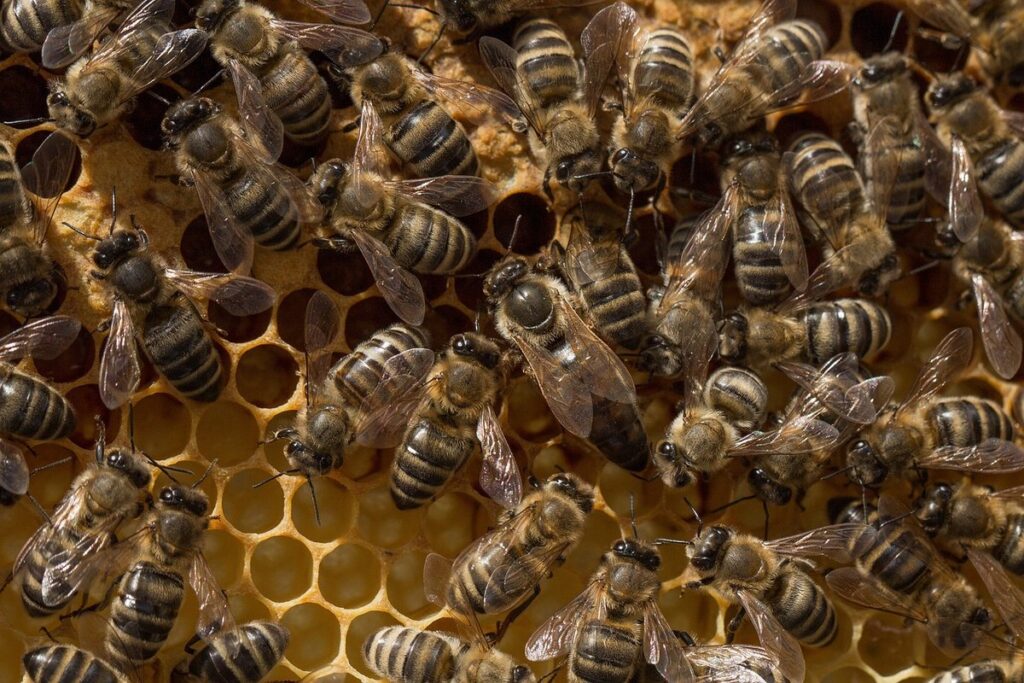
Queen cells are the foundation of every thriving beehive. They are specialized cells within the brood nest where a new queen bee is raised and nurtured to adulthood. These cells are typically built by worker bees, who carefully construct them using wax from their own bodies.
A single queen cell can contain multiple larvae, each destined to become a future queen. The worker bees select the healthiest larvae and place them in queen cells, feeding them a diet rich in nutrients to promote growth and development. As the larvae mature, they are fed royal jelly, a nutrient-rich substance produced by the worker bees.
The purpose of queen cells is two-fold: to ensure the colony’s survival and growth. When the current queen bee reaches the end of her lifespan or becomes unsuitable for breeding, the new queens raised in these cells will take over as the colony’s queen. This ensures that the colony remains healthy and productive, as a strong queen is essential for egg-laying and population growth.
In addition to replacing an aging queen, queen cells also play a crucial role in colony expansion. A mature queen can establish a new hive by swarming with thousands of worker bees, creating a thriving new colony.
Factors Influencing Queen Cell Formation
When it comes to queen cell formation, there are several external and internal factors at play. Environmental changes can trigger the creation of new queen cells, often as a result of an existing queen’s aging or failure. For example, if a beekeeper removes a weak or failing queen from her colony, the workers may quickly build a new queen cell to replace her.
Nutrition also plays a significant role in the formation of queen cells. A well-fed and healthy colony is more likely to produce new queens than one that’s struggling to find food. Bees will often prioritize the development of new queen cells when they have access to an abundance of nectar and pollen. Additionally, genetic predisposition can influence the likelihood of queen cell formation – some breeds are naturally more inclined to produce new queens than others.
To encourage queen cell production in your own colonies, consider implementing strategies like supplementing with nutrient-rich foods or introducing a strong, healthy queen. Monitoring temperature and humidity levels within your apiary can also help create an environment conducive to queen cell development. By paying attention to these factors, you can increase the chances of successful queen cell formation and ensure the long-term health and productivity of your colony.
Benefits of Understanding Queen Cells
Understanding queen cells is crucial for beekeepers as it enables them to make informed decisions about their colony’s management. By recognizing the importance of these cells, you can improve your overall management strategy and enhance honey production.
One of the key benefits of understanding queen cells is improved colony growth and stability. When a new queen is produced from a healthy cell, she will often supersede the existing queen, leading to increased egg-laying and brood development. This means that beekeepers can anticipate and prepare for an influx of bees, allowing them to plan for splits or swarms.
Furthermore, identifying issues with queen cells early on can help prevent problems such as decreased honey production, reduced hive strength, or even colony loss. By monitoring cell health and inspecting for signs of disease or pests, you can take proactive measures to address these issues before they escalate.
By understanding the intricacies of queen cells, beekeepers can make more informed decisions about their apiaries, ultimately leading to healthier, more productive colonies and increased honey yields.
Types of Queen Cells and Their Characteristics
There are several types of queen cells, each with its unique characteristics that can impact your hive’s health and productivity. Let’s explore the different varieties you might encounter in your beehives.
Different Kinds of Queen Cells
When it comes to queen cells in beehives, there are several types that can emerge under different circumstances. One of these is the emergency queen cell, which forms when a hive is under stress and the existing queen’s performance is waning. This type of cell can appear anywhere on the comb, often near the edge or in areas with high humidity.
Another common type is the supersedure queen cell, which develops when the bees decide to replace their existing queen due to her aging or declining health. These cells are typically found on the upper side of the honeycomb and are usually clustered together.
Lastly, there’s the swarm cell, which forms just before a hive prepares for swarming. This type of cell is often found near the center of the comb, and its presence can indicate an impending swarm. Recognizing these different types of queen cells can help beekeepers anticipate potential issues within their hives and take proactive measures to manage the situation.
In emergency situations, it’s essential to identify the type of queen cell present and address the underlying issue promptly to prevent further stress on the colony.
Characteristics of Each Type of Cell
When it comes to queen cells, each type has unique characteristics that set them apart from one another. Understanding these differences is essential for beekeepers to make informed decisions about the health and well-being of their colonies.
Larval cells are typically smaller and more compact than capped cells, with a smooth, rounded surface. They can be found in various stages of development, often near the honeycomb’s edge or at the back of the frame. As these cells mature, they’ll become more prominent and develop a characteristic “waist” where the cell tapers slightly.
Capped cells, on the other hand, are larger and more oval-shaped, with a distinct cap of wax covering the top. They’re usually placed in the center of the honeycomb or near the cluster’s edge. Capped cells are further divided into two subtypes: capped supersedure cells and emergency queen cells.
Supersedure cells are typically larger than emergency cells and often have a more pronounced “waist.” They serve as replacements for an aging or failing queen, allowing the colony to maintain its reproductive capabilities. Emergency cells, by contrast, are used when the colony faces an immediate threat of losing its queen due to illness, injury, or other reasons.
Both supersedure and emergency cells play crucial roles in ensuring the colony’s survival and success. By recognizing these distinct types of queen cells, beekeepers can better assess their colonies’ needs and make informed decisions about managing their populations.
Tips for Identifying Queen Cells
When inspecting your beehive for queen cells, it’s essential to know what you’re looking for. Start by gently tilting the frames to observe the cells from multiple angles. Look for cells that are larger than normal brood cells and have a slightly concave bottom.
One visual cue is the presence of royal jelly, which can appear as a creamy or yellowish substance at the cell’s entrance. Gently scrape away some debris with your frame scratcher to get a better view. Be cautious not to damage the cells in the process.
To monitor the queen’s activity, observe how often she visits each cell. A healthy queen will regularly inspect her cells for eggs and larvae. If you notice the queen neglecting certain cells or showing little interest, it may indicate a potential issue with the cell’s development.
It’s also crucial to check for the presence of pharate queens – the future replacement queens that develop in cells alongside brood. These cells are slightly larger than normal brood cells and have a transparent membrane covering their entrance. Monitor these cells closely, as they can signal an impending queen succession.
Creating and Maintaining Healthy Queen Cells
Creating healthy queen cells is crucial for a thriving colony, so let’s dive into the best practices for selecting, caring for, and maintaining these vital cells. This section will cover essential tips to ensure your queen cells stay healthy and productive.
Preparing the Hive for Queen Cell Formation
As you prepare for potential queen cell formation, it’s essential to ensure that your hive is in optimal condition. A healthy and thriving colony is more likely to produce high-quality queen cells. To start, focus on providing your bees with an adequate food supply. This means ensuring they have access to a consistent source of nectar-rich flowers or a reliable sugar substitute like bee feed.
Next, make sure your hive has sufficient space for the queen cell formation process to occur. A crowded hive can lead to reduced queen quality and even queen failure. Consider adding supers or splits to your hive to increase space and promote airflow. This will also give you more flexibility if you need to introduce a new queen in the future.
Finally, consider the environmental conditions within your hive. Temperature fluctuations can impact queen cell development, so ensure that your hive is situated in a location with minimal temperature extremes. Additionally, maintain good ventilation by ensuring proper airflow between frames and through any supering or insulation used. This will keep your bees comfortable and promote healthy growth.
Care and Maintenance of Existing Queen Cells
Caring for existing queen cells is crucial to ensure their survival and development into healthy queens. When it comes to feeding, provide them with a constant supply of high-quality royal jelly and honey. A good rule of thumb is to maintain a temperature range between 85°F to 90°F (29°C to 32°C) near the queen cups to promote growth.
Monitor the queen cells closely for signs of mold, disease, or pests. Regularly inspect the cells for any visible damage or issues that may affect the queens’ development. To reduce stress in the colony, consider moving the brood box to a more stable location or dividing the hive if necessary.
Maintaining a clean and well-ventilated environment is essential for healthy queen cell development. Ensure good airflow by placing the hive at least 3 feet away from any obstacles that may trap heat or moisture. Regularly clean the hive equipment, including frames and foundation, to prevent disease transmission.
Keep in mind that queen cells can be sensitive to vibrations and sudden movements, so it’s best to handle them gently when inspecting the hive. By following these guidelines and taking a proactive approach to care and maintenance, you’ll be well on your way to raising healthy queens for your colony.
Factors Affecting Queen Cell Success or Failure
The success or failure of queen cell development is often the result of a complex interplay between internal and external factors. Genetics play a significant role, as the quality of the queen cell’s parent stock can greatly impact its performance. For instance, a healthy and well-fed colony with a strong genetic foundation will be more likely to produce high-quality queens.
Nutrition also plays a crucial role in the development of the queen cell. A diet rich in nutrients is essential for the growth and development of the developing larva. Factors such as the availability of nectar, pollen, and water can greatly impact the quality of the final product. Inadequate nutrition can lead to poor development and reduced fertility.
Disease is another critical factor that can affect queen cell success or failure. Common issues such as American Foulbrood, Nosema, and Varroa mites can all have a devastating impact on queen cell development. It’s essential to monitor your colony regularly for signs of disease and take action promptly if any issues are detected.
By understanding these factors and taking steps to mitigate their negative impacts, you can increase the chances of successful queen cell development. This includes providing a healthy environment, maintaining good nutritional habits, and monitoring for signs of disease.
Recognizing Signs of Queen Cell Emergence
When it comes to monitoring your beehive, recognizing signs of queen cell emergence is crucial for making informed decisions about when to split or merge colonies. Let’s take a closer look at these key indicators together!
Early Warning Signs of New Queens
As you monitor your beehive for signs of queen cell emergence, it’s essential to recognize early warning signs that indicate new queens may be developing within their cells. One noticeable change is a shift in the behavior of the existing queen. She may become more aggressive or less active, signaling her replacement is imminent.
Changes in pheromone levels can also signal the presence of new queens. The pheromones produced by the current queen help regulate colony activity and reproductive cycles. As new queens mature, they begin to produce their own pheromones, which may disrupt the existing balance, causing changes in hive behavior.
Keep an eye out for unusual hive activity, such as increased fanning or a sudden surge in bee population growth. These changes can indicate that a new queen is getting ready to emerge and take over the colony. To confirm your suspicions, inspect the cells where you suspect queen cells are developing and look for signs of new queen development.
If you notice any of these early warning signs, it’s crucial to monitor your hive closely to ensure a smooth transition when the new queen emerges.
Monitoring for Successful Emergence
Monitoring for Successful Emergence is crucial to ensure that the new queen emerges healthy and strong. Regular inspections of the queen cells are essential to track the emergence process.
Start by checking the queen cells daily, around 24 hours before the expected emergence date. Look for signs such as the queen cell’s shape changing from a straight line to a slight curve, indicating the queen is about to emerge. Check for any visible movement or pulsing of the bees surrounding the cell, which can indicate the queen is ready to come out.
Monitor the colony’s overall health by checking for factors like brood pattern, honey stores, and food availability. A healthy colony will have a regular brood pattern with adequate stores, ensuring that the new queen has enough resources to establish herself.
Additionally, consider setting up a “watcher” frame or an observation hive to get a closer look at the emergence process. This can be especially helpful if you’re new to beekeeping or want more insight into the process.
Integrating New Queens into the Colony
When integrating new queens into an existing colony, it’s essential to consider the phasing out of the old queen and ensure a smooth transition. This process can be delicate, but with careful planning, you can minimize disruption to the colony and promote a healthy environment for your bees.
To begin, it’s crucial to identify when the old queen is no longer viable or nearing the end of her lifespan. Look for signs such as reduced egg-laying capacity, slower movement, or an increased presence of swarm cells within the hive. Once you’ve determined that it’s time to introduce a new queen, prepare a separate colony with the new queen by introducing her 7-10 days before the planned introduction date.
When the new queen is ready to be introduced, carefully remove the old queen from the main colony and replace her with the new one. To avoid any potential conflicts between the two queens, it’s best to keep them separated for a few days while they establish their dominance within the hive.
Managing Queen Cells in Practice
As you navigate the world of queen cell management, this practical section will walk you through real-world strategies for monitoring and maintaining healthy queen cells in your beehive. Effective methods await!
Real-World Examples of Queen Cell Management
When it comes to managing queen cells in practice, looking at real-world examples can be incredibly valuable. Experienced beekeepers have developed various strategies for successful queen cell management, and we can learn from their approaches.
Take the example of a beekeeper who uses a method called “supersedure” – where they deliberately introduce a new queen to replace an aging one. By doing so, they avoid the stress caused by introducing new queens in front of established ones, which can lead to fighting between them. This approach has been shown to increase overall hive health and productivity.
Another example is from a beekeeper who implemented a “catch-and-release” strategy for dealing with swarms. When a swarm forms, instead of trying to contain it, they carefully catch the queen and her attendants in a special cage, then release them into a new hive. This approach not only prevents damage to the parent colony but also gives the beekeeper an opportunity to observe and learn from the swarm.
These examples demonstrate that there’s no one-size-fits-all solution for managing queen cells – each situation requires its own unique approach. By studying successful strategies, we can adapt them to our own needs and improve our overall queen cell management skills.
Common Mistakes to Avoid When Dealing with Queen Cells
When dealing with queen cells in your beehive, it’s easy to make mistakes that can have serious consequences for the health and productivity of your colony. One common mistake is misidentifying a queen cell as a healthy brood cell or vice versa. This can happen when you’re not familiar with the appearance of developing queens or when you’re under pressure to inspect the hive quickly.
Poor nutrition is another critical issue that can impact queen cell development. If the worker bees are not producing enough royal jelly and bee bread, the larvae may not have the necessary nutrients to develop into a healthy queen. This can be due to a variety of factors including inadequate foraging opportunities, poor hive management, or an imbalance in the nectar flow.
Providing insufficient space is another mistake that can lead to issues with queen cells. If there isn’t enough room for the workers to lay eggs and tend to the developing queens, you may end up with over- or under-crowding of the cells. This can result in poor queen quality, reduced brood production, and an increased risk of disease and pests.
Best Practices for Long-Term Success
As you continue to work with queen cells in your beehive, it’s essential to remember that successful management is an ongoing process. Effective queen cell management requires a combination of knowledge, observation, and adaptation. By embracing a culture of learning and continuous improvement, you’ll be better equipped to handle the unique challenges that arise in your apiary.
One key takeaway from our discussion is the importance of understanding the needs of your colony. This means staying informed about factors like climate, nutrition, and disease prevalence in your area. Be prepared to adjust your queen cell management strategies accordingly, whether it’s by selecting more resilient queens or implementing targeted treatments for pests and diseases.
Regular observation of your queen cells will also help you identify areas where you can improve. Take note of the queen’s behavior, brood production, and overall colony health. This information will inform your decision-making and enable you to make data-driven choices about queen cell management. Remember, effective queen cell management is a continuous process that requires patience, persistence, and a willingness to learn and adapt.
Frequently Asked Questions
What happens if I miss the ideal time for queen cell formation?
Don’t worry, it’s not a lost cause! While optimal timing is crucial for successful queen cell emergence, it’s not impossible to establish new queens outside of peak season. You can try using queen excluders or splitting your colony to stimulate new queen cell formation. Keep in mind that this might require some extra effort and patience, but with proper care and attention, you can still achieve healthy and thriving colonies.
How do I ensure the health of my existing queen cells?
Maintaining a clean and well-ventilated environment is essential for the development of your existing queen cells. Regularly inspect the hive for signs of disease or pests and take corrective action if necessary. Make sure to monitor temperature fluctuations, as these can affect the quality and viability of your queen cells.
What’s the best way to integrate new queens into my colony?
A smooth transition is key when introducing new queens to your established colonies. To minimize disruption, introduce new queens during a period of relative calm in the hive, ideally after a nectar flow has replenished food stores. Monitor the reaction of your existing queen and workers closely, as some may resist the newcomer.
Can I use a single frame to establish multiple queen cells?
While it’s technically possible to create multiple queen cells on a single frame, this can be challenging due to space constraints and competition for resources among the larvae. Consider using multiple frames or splits within your colony to promote optimal growth and development of new queens.
How do I know if my queen cells have successfully emerged with viable queens?
Monitor your hive’s overall health and performance indicators, such as honey production, brood patterns, and general worker behavior, over a period of 4-6 weeks following emergence. If you notice any signs of decline or disruption in these areas, it may indicate that the new queens are not thriving, prompting further investigation and corrective action.
What’s the best way to store queen cells for transportation?
When transporting queen cells, prioritize maintaining optimal temperature (around 55°F/13°C) and humidity levels. Avoid direct sunlight exposure and extreme temperatures during transit. Consider using specialized transport containers or beekeeping bags with built-in insulation to ensure safe passage of your precious queen cells.