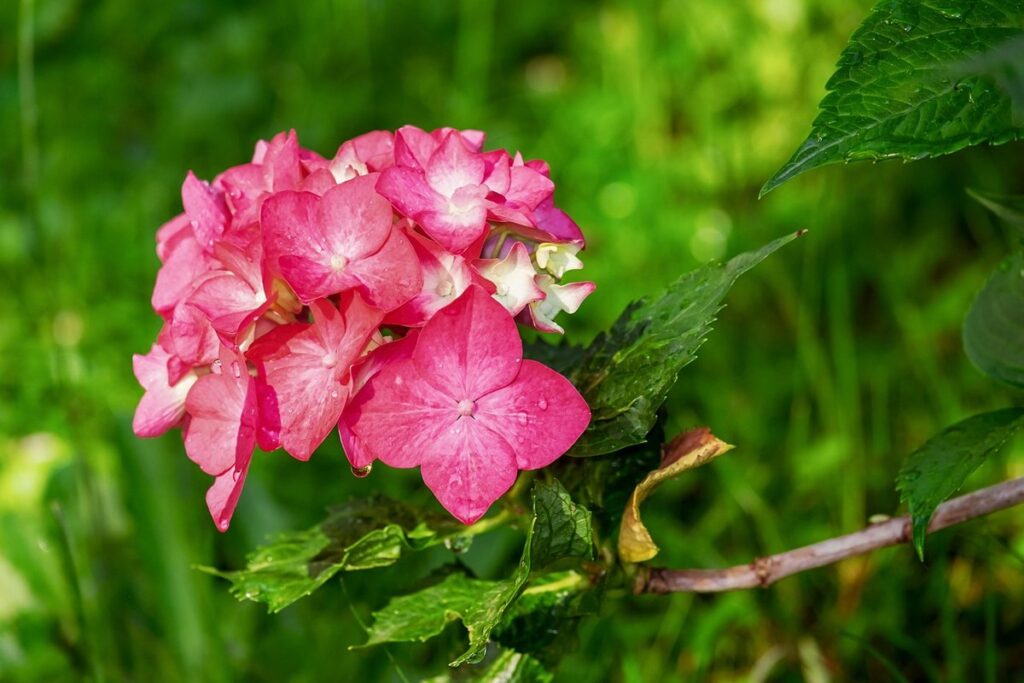
Trimming your hydrangea is an essential part of its maintenance, but many gardeners struggle with getting it right. Not only can improper pruning techniques damage the plant, but they can also affect future blooms. If you’re eager to enjoy vibrant flowers and keep your hydrangea healthy, you need to know when and how to trim it correctly.
In this article, we’ll guide you through the process of trimming your hydrangea, including choosing the right time for pruning, preparing the plant, and avoiding common mistakes that can harm the plant. We’ll also share expert tips on pruning techniques and aftercare to ensure healthy blooms. By following these simple steps, you’ll be able to enjoy beautiful flowers and keep your hydrangea looking its best all season long.
Choosing the Right Time to Trim Your Hydrangea
When it comes to trimming your hydrangea, timing is everything. We’ll walk you through the best seasons and conditions for pruning these beautiful flowers.
Understanding Hydrangea Growth Cycles
Hydrangeas have distinct growth cycles that are essential to understand before pruning them. These beautiful flowering shrubs grow and bloom in a specific sequence, and pruning at the right time can encourage optimal blooms and maintain their overall health.
In late winter or early spring, hydrangeas are dormant, allowing for thorough pruning of dead, diseased, or damaged branches. This stage is ideal for cutting back overgrown stems to promote new growth and encourage healthy development.
During spring and summer, new growth emerges, with buds forming on the tips of branches. Pruning during this time can lead to fewer blooms or even damage the plant’s ability to produce flowers in subsequent years. It’s best to avoid pruning at this stage unless absolutely necessary.
In fall, the hydrangea’s growth slows down, making it an excellent time for pruning before new growth begins. This helps control the size and shape of the shrub while also promoting next year’s blooms. Understanding these growth cycles will help you prune your hydrangeas effectively, ensuring they continue to thrive and provide stunning flowers year after year.
Identifying the Best Season for Pruning
When it comes to pruning your hydrangea, timing is everything. The optimal season for trimming depends on several factors, including your climate, plant age, and the color you want your blooms to be.
In general, spring-blooming hydrangeas should be pruned immediately after they finish blooming in late spring or early summer. This allows the plant to focus its energy on producing flowers for next year’s bloom cycle. On the other hand, fall-blooming hydrangeas can be pruned in late winter or early spring, as long as you do it before new growth begins.
If you live in a hot and dry climate, it’s best to prune your hydrangea during its dormant season, which is typically from December to February. This will help prevent stress on the plant caused by pruning during periods of high heat. If you’re growing an older hydrangea that needs rejuvenation, consider pruning it in late winter or early spring when the plant is still dormant.
When pruning your hydrangea, keep in mind that over-pruning can reduce flower production, so be sure to only remove dead, diseased, or damaged branches.
Preparing Your Hydrangea for Trimming
Before you begin trimming your hydrangea, make sure to remove any dead flowers and debris to encourage healthy growth and prevent disease. Now let’s get started on preparing your plant!
Inspecting the Plant Before Pruning
Before you start pruning your hydrangea, it’s essential to inspect the plant carefully to ensure its overall health and identify any potential issues that may require attention. Begin by examining the leaves for signs of disease such as yellowing, browning, or blackening. Check for any powdery mildew, rust, or other fungal infections that can weaken the plant. Look for pests like aphids, whiteflies, or spider mites, which can cause damage to the leaves and flowers.
Also, check the stems for signs of dieback or damage from extreme weather conditions. Inspect the base of the plant for any debris, weeds, or mulch that may be harboring pests or diseases. If you notice any issues, treat them promptly with organic or chemical controls as needed. A healthy plant is more likely to respond well to pruning and produce beautiful blooms.
Take a closer look at individual branches, checking for signs of weak growth or disease. Gently remove any dead, diseased, or damaged wood, making clean cuts just above a node (where a branch meets the stem). This will help prevent the spread of disease and encourage healthy new growth. By inspecting your hydrangea carefully before pruning, you’ll be able to address any potential problems and ensure a thriving plant.
Gaining Proper Access and Tools
Before you start trimming your hydrangea, it’s essential to have the right tools and access to all areas of the plant. First, let’s talk about ladder safety. When working with a hydrangea that has grown quite tall, a ladder is often necessary. To safely access the upper branches, invest in a sturdy ladder that’s specifically designed for garden use. Make sure it’s on a firm, level surface and consider having someone hold the ladder for added stability.
For trimming itself, you’ll need pruning shears or loppers, depending on the size of the stems. Pruning shears are ideal for smaller branches, while loppers are better suited for thicker ones. A pair of long-handled pruning shears can also be helpful in reaching those hard-to-access areas without needing a ladder. Additionally, consider investing in a pruning saw or pole saw for more extensive trimming.
When using any equipment near the ground, ensure it’s not touching branches or other flammable materials to avoid accidental fires. Always maintain three points of contact with the ladder (two hands and one foot, or two feet and one hand) to prevent accidents.
Trimming Techniques: Removing Old Blooms and Canes
When trimming your hydrangea, it’s essential to remove old blooms and canes to encourage new growth and prevent disease. We’ll walk you through how to do this effectively in a way that promotes healthy blooms.
Understanding Hydrangea Bloom Cycles
When you’re trimming your hydrangea, it’s essential to understand its bloom cycle to ensure you’re removing the right stems at the right time. Hydrangeas produce two types of blooms: old wood and new wood.
Old wood blooms are produced on last year’s growth, typically on the oldest canes of the plant. These flowers tend to be larger and more vibrant in color, but they often set seed, which can exhaust the plant’s energy. To encourage more blooms, remove these spent flowers (called “deadheading”) after they’ve finished blooming. Cut them off at a 45-degree angle just above a bud eye – this will help direct energy to newer growth.
New wood blooms, on the other hand, grow from current season’s new stems and often produce fewer, yet still beautiful, flowers. These tend to be more delicate in appearance but are usually indicative of healthy plant development. Allow these stems to remain intact and enjoy their bloom cycle, which typically occurs mid-to-late summer.
By identifying old wood versus new wood blooms, you can strategically prune your hydrangea to promote healthy growth and maximize future blooms.
Cutting Back Old Blooming Wood
When it’s time to trim back old blooming canes on your hydrangea, it can be a bit overwhelming to know where to start. The goal is to maintain the plant’s shape while encouraging new growth and preventing disease from taking hold. Start by identifying the oldest canes, usually gray or brown in color, which are the ones that produced flowers last season.
Using pruning shears or loppers, cut these old canes back to about 6-8 inches above the ground. This will make way for new stems to grow and produce blooms in the upcoming season. Be careful not to damage any of the younger canes or buds as you work your way through the plant.
As you trim, keep an eye out for any signs of disease or pests that may be hiding on the old canes. Remove any affected areas immediately to prevent the problem from spreading to other parts of the plant. This is also a good opportunity to inspect the roots and replant if necessary.
Shaping Your Hydrangea: Removing Dead or Diseased Wood
When pruning your hydrangea, it’s essential to remove any dead or diseased wood to promote healthy growth and prevent the spread of disease. Let’s walk through how to identify and safely remove affected branches.
Identifying Damaged or Diseased Canes
When inspecting your hydrangea for dead or diseased wood, it’s essential to identify signs of damage or disease before removing any branches. Fungal infections are a common issue that can cause lesions on the stems and branches, often accompanied by a white or yellowish growth. Look for powdery mildew or black spot on leaves, which can also indicate fungal problems.
Check for infestations like aphids, whiteflies, or spider mites by examining the undersides of leaves and stems for eggs, eggshells, or actual pests. Also, inspect the plant’s base for signs of root rot, such as soft, mushy wood or a foul odor.
To identify diseased canes, gently remove a small section of bark to expose the underlying tissue. If it’s discolored, soft, or oozing sap, it may be diseased. For damaged branches, look for splits, cracks, or breaks in the stem. Remove any canes that show these signs, and consider disinfecting pruning tools between cuts to prevent spreading disease.
Safely Removing Dead or Diseased Canes
When it comes to safely removing dead or diseased canes from your hydrangea, it’s essential to do so without harming the surrounding healthy areas of the plant. To start, inspect the affected area carefully and identify the extent of the damage. If you notice any signs of disease, such as black spots, mold, or an unusual growth pattern, it’s best to remove the entire cane to prevent further spread.
To make the removal process easier, use a sharp, sterile pruning tool like loppers or pruning shears. Make a clean cut just above a bud eye (the small swelling on the stem where new growth occurs), cutting at a 45-degree angle. This will help direct water away from the cut area and promote healthy healing.
Cutting too far back can sometimes lead to dieback of surrounding stems, so be mindful not to remove too much wood in one go. Start with small cuts and monitor your plant’s response before removing more significant sections. Also, avoid pruning during extreme weather conditions or when the plant is under stress, as this can weaken its defenses further.
Hydrangea Aftercare: Caring for Your Pruned Plant
Now that your hydrangea has been pruned, it’s essential to care for it properly to encourage new growth and prevent disease. This section will walk you through the aftercare process.
Watering and Fertilizing Post-Pruning
After you’ve pruned your hydrangea, it’s essential to provide the right post-pruning care for a healthy and thriving plant. One of the most critical aspects is watering. Hydrangeas require consistent moisture, especially during the first few weeks after pruning. Water your plant deeply once or twice a week, depending on weather conditions. Make sure the soil is moist but not waterlogged, as this can lead to root rot.
As for fertilization, it’s best to wait until new growth appears before applying any fertilizer. At this stage, use a balanced, slow-release fertilizer (10-10-10) to promote healthy growth and blooming. Avoid over-fertilizing, as this can damage your plant’s delicate roots.
Keep an eye out for potential issues such as aphids, spider mites, or powdery mildew, which may be more prone to appear after pruning. Regularly inspect your plant and take action promptly if you notice any signs of pests or diseases. By following these post-pruning care tips, you’ll help your hydrangea recover quickly and establish a strong foundation for future growth and blooming.
Promoting Healthy Growth and Blooms
Now that you’ve pruned your hydrangea, it’s essential to promote healthy growth and blooms. Mulching is a great way to encourage new growth, as it retains moisture and suppresses weeds that can compete with your plant for nutrients. Apply a 2-3 inch layer of organic mulch around the base of your hydrangea, keeping it a few inches away from the stem.
The frequency of pruning also plays a crucial role in promoting blooms. Hydrangeas typically produce new flowers on old wood, so avoid pruning them too heavily after they’ve bloomed. If you want to encourage more blooms, prune your hydrangea immediately after it finishes flowering, removing any dead or diseased branches and shaping the plant as needed.
Environmental conditions like sunlight, temperature, and watering also impact your hydrangea’s ability to produce new growth and blooms. Ensure your plant receives at least 4-6 hours of direct sunlight per day, and maintain consistent moisture levels by watering it regularly. Avoid overwatering, which can lead to root rot and other issues.
Fertilize your hydrangea annually with a balanced, slow-release fertilizer to provide essential nutrients for growth. Follow the manufacturer’s instructions for application rates and timing. By following these tips, you’ll be well on your way to enjoying beautiful blooms from your pruned hydrangea for years to come.
Common Hydrangea Trimming Mistakes to Avoid
Trimming a hydrangea can be intimidating, especially if you’re unsure what to avoid. Let’s explore some common mistakes that can harm your beautiful blooms instead of helping them thrive.
Over-Pruning and Under-Pruning Risks
When it comes to hydrangea trimming, finding the right balance is crucial. Over-pruning and under-pruning are two common mistakes that can have severe consequences for your plant’s health.
Over-pruning involves cutting back too much of the plant, leaving little to no foliage or flowers. This can lead to a host of problems, including reduced blooming, weakened roots, and even plant death. For instance, if you cut back a mature hydrangea by more than one-third, it may not recover. On the other hand, under-pruning means not cutting back enough, resulting in weak and spindly growth.
To avoid these issues, take note of your hydrangea’s natural shape and growth pattern. If it has a leggy habit, prune selectively to maintain a balanced appearance without over-stimulating new growth. For smaller varieties, prune more aggressively, but still aim for about one-third of the plant at most. Remember, regular maintenance pruning is essential, but drastic cuts should be avoided unless absolutely necessary.
Ultimately, finding the right balance requires careful observation and consideration of your hydrangea’s unique needs. By being mindful of these risks, you can enjoy vibrant blooms and a healthy, thriving plant for years to come.
Common Misconceptions About Pruning
Pruning hydrangeas can be intimidating, especially when there are many misconceptions floating around. Let’s debunk some common myths that might be holding you back from giving your hydrangea the TLC it needs.
Firstly, one of the most prevalent misconceptions is that pruning in the fall will lead to no blooms the following year. While it’s true that pruning in late summer or early fall can reduce blooming potential for the next season, this only applies if you prune at the wrong time – specifically after the plant has stopped producing flowers. If you prune during the dormant season (winter), your hydrangea will still produce plenty of blooms come springtime.
Another common myth is that hydrangeas require frequent pruning to maintain their shape and promote blooming. Not true! In fact, most types of hydrangeas prefer to be left alone, except for an annual deadheading session after they’ve finished flowering. Over-pruning can actually do more harm than good, leading to weak growth and reduced blooming potential.
By understanding these common misconceptions, you’ll be well on your way to becoming a hydrangea pruning pro in no time!
Frequently Asked Questions
Can I trim my hydrangea at any time of the year, or are there specific seasons for pruning?
Yes, it’s essential to prune your hydrangea during its dormant season, typically between late winter and early spring. This allows you to make more extensive cuts without stressing the plant. Pruning during active growth can lead to disease issues and reduced blooms.
What happens if I accidentally over-prune my hydrangea?
Over-pruning can be detrimental to your hydrangea’s health and future blooms. If you’ve inadvertently removed too much of the plant, wait for new growth to emerge in spring before making further cuts. This will help guide you on where to prune to promote healthy growth.
How do I know if my hydrangea is experiencing root rot or another issue that requires pruning?
Inspect your hydrangea regularly for signs of disease or pests. Look for soft, mushy stems, black spots on leaves, or actual insects like aphids. Prune off affected areas immediately to prevent the spread and protect the rest of the plant.
Can I trim my hydrangea in the fall, just before winter?
While it’s technically possible to prune your hydrangea in the fall, this is not recommended. Pruning at this time can stimulate new growth that may not harden off before winter, making it vulnerable to cold damage and potentially harming the plant.
What kind of tools should I use for pruning my hydrangea, and how do I care for them?
Use sharp, clean pruning shears specifically designed for plants with woody stems. Disinfect your tools between cuts to prevent spreading disease. Regularly sharpen and maintain your shears according to the manufacturer’s instructions to ensure they remain effective.