Transplanting seedlings can be one of the most critical steps in growing your plants from seeds. It requires careful planning, preparation, and execution to ensure that your young seedlings make a smooth transition into their new environment. If you’re like many gardeners, you’ve likely encountered issues with seedlings that are either too leggy or too delicate for transplanting. But don’t worry, we’ve got you covered! In this article, we’ll share expert tips and techniques on how to successfully prepare your seedlings for transplant, from hardening off to post-transplant care. Whether you’re a seasoned gardener or just starting out, our guide will walk you through the process of transplanting seedlings with ease, ensuring that they grow strong and healthy in their new home.
Preparing Your Seedlings for Transplant
Before transplanting, it’s essential to prepare your seedlings for a smooth transition by hardening them off and acclimating them to outdoor conditions. This process typically takes around 7-10 days.
Checking Seedling Health and Vigor
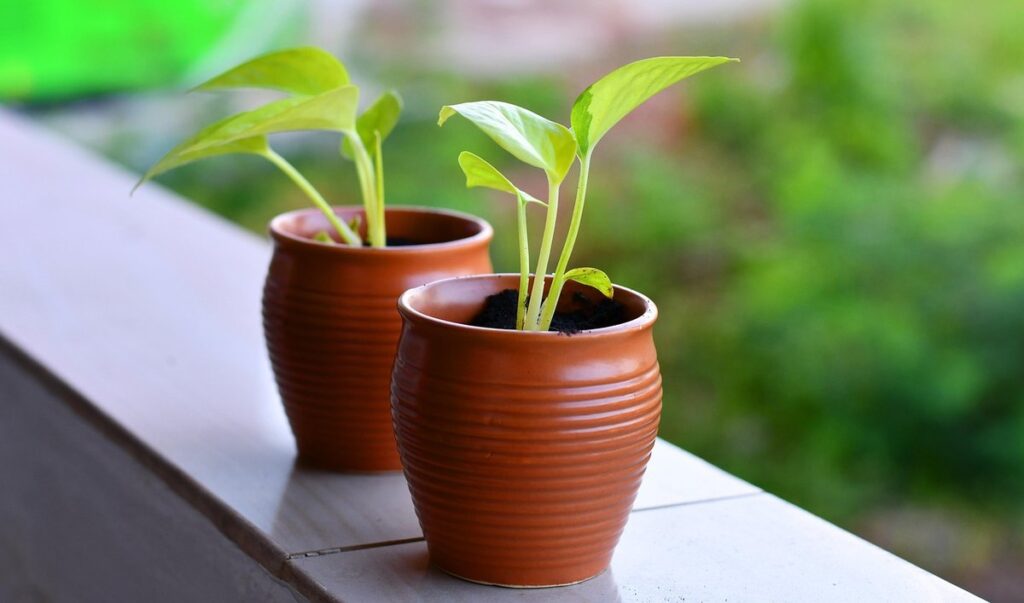
Checking seedling health and vigor is crucial before transplanting them into their final destination. Healthy seedlings are more likely to thrive and establish themselves quickly after transplanting. On the other hand, stressed or diseased seedlings may struggle to adapt to their new environment, leading to reduced yields or even death.
To identify signs of stress or disease in your seedlings, look out for yellowing leaves, droopy stems, or excessive wilting. These can be indicative of underwatering, overwatering, or nutrient deficiencies. Check the soil moisture by inserting your finger into the soil up to the first knuckle; if it feels dry, it’s time to water.
Adequate light, water, and fertilization are essential for promoting strong growth in seedlings. Make sure they’re receiving sufficient light, typically 12-14 hours a day, depending on the type of plant. Water them thoroughly but avoid overwatering, which can lead to root rot and other issues. Fertilize your seedlings with a balanced, water-soluble fertilizer (20-20-20) once a week to provide essential nutrients for growth.
Regularly inspect your seedlings for pests or diseases, such as aphids, whiteflies, or fungal infections. Use neem oil or insecticidal soap to control infestations, and treat fungal infections with a fungicide specifically designed for seedlings. By catching issues early on, you can take corrective action and give your seedlings the best chance of success after transplanting.
Pruning Seedlings Before Transplant
Pruning your seedlings before transplanting may seem counterintuitive, but it’s a crucial step to ensure their survival and success. By pruning your seedlings, you can reduce shock, increase root development, and improve plant shape.
When to Prune Seedlings?
Before transplanting, prune your seedlings when they have 2-3 sets of true leaves or when the stems start to become leggy. This allows them to focus their energy on developing a strong root system rather than producing foliage. For example, if you’re growing tomatoes, prune them back by one-third to half to encourage bushy growth and prevent them from becoming leggy.
How to Prune Seedlings?
Pruning seedlings is relatively simple. Use clean, sharp scissors or pruning shears to remove any weak or spindly stems. Cut just above a node (where a leaf meets the stem), leaving no more than 1/4 inch of stem attached. This will encourage new growth from the node and promote healthy root development.
By pruning your seedlings before transplanting, you’ll give them a head start on establishing themselves in their new environment.
Choosing the Right Time and Location for Transplant
When transplanting seedlings, timing and location are crucial factors to consider, and getting it right will make a huge difference in their survival and success. Let’s dive into the specifics of choosing the perfect time and spot for your seedling transplant.
Understanding Transplant Shock
Transplant shock is a common phenomenon that occurs when seedlings are transferred from one location to another. It’s caused by a combination of factors, including soil compaction, temperature fluctuations, and inadequate light. When seedlings experience transplant shock, their roots are unable to adapt quickly enough to the new environment, leading to stress and potentially even death.
Soil compaction is a major contributor to transplant shock. When soil is compacted, it becomes difficult for roots to breathe and absorb water and nutrients. To minimize this issue, make sure to loosen the soil in the new location before planting your seedlings. A simple technique is to use a fork to gently loosen the top 6-8 inches of soil.
Temperature fluctuations can also cause transplant shock. If the new location has extreme temperatures, it may be necessary to provide some shade for the seedlings until they adjust. Adequate light is another crucial factor in preventing transplant shock. Ensure that the new location receives at least 4-6 hours of direct sunlight per day. By taking these precautions, you can minimize the risk of transplant shock and give your seedlings the best chance to thrive.
Selecting a Suitable Transplant Site
When transplanting seedlings, selecting a suitable location is just as crucial as choosing the right time. A spot with optimal climate, soil conditions, and sunlight will set your plants up for success. Different types of plants have varying needs, so it’s essential to tailor your selection accordingly.
For example, seedlings that prefer cooler temperatures, like lettuce or kale, should be placed in a spot with partial shade to prevent scorching. On the other hand, sun-loving tomatoes and peppers thrive in full sun but may require additional support to withstand strong winds.
Consider factors like wind direction when transplanting seedlings. If your garden is situated near a prevailing wind path, choose plants that can tolerate wind, such as succulents or coneflowers. Frost pockets, areas where cold air accumulates and can damage delicate leaves, should also be avoided for sensitive varieties.
Nearby water sources are another consideration. Seedlings with deep roots, like carrots or parsnips, require consistent moisture but may struggle in areas with poor drainage. By choosing a location that addresses these needs, you’ll give your seedlings the best chance to establish themselves and grow into healthy, thriving plants.
Preparing the Soil for Transplant
Before transplanting seedlings, it’s crucial to prepare the soil to prevent shock and ensure a smooth transition for your young plants. This involves loosening compacted soil and amending it as needed.
Testing and Amending the Soil
Testing and amending the soil is a crucial step before transplanting seedlings. It’s essential to determine the pH level of your soil, as most plants prefer a slightly acidic to neutral range (pH 6-7). You can purchase a soil testing kit or send a sample to a lab for analysis.
The nutrient content and structure of your soil also play critical roles in seedling growth. A well-balanced mix should contain organic matter like compost, which improves drainage, retain moisture, and supports beneficial microbial activity.
If your test reveals nutrient deficiencies or an off-pH reading, don’t worry – it’s easily amendable! You can add organic matter like peat moss or humus to lower the pH. If the soil is too alkaline, sprinkle some elemental sulfur to adjust the level.
Fertilizers are another crucial addition for seedlings. Choose a balanced, water-soluble formula that contains nitrogen (N), phosphorus (P), and potassium (K) – typically in a 10-10-10 ratio. Avoid over-fertilizing, as this can damage your seedlings’ delicate roots.
Lime is used to raise the pH level, but use it sparingly, as excessive amounts can harm your plants. Follow the manufacturer’s instructions for application rates and timing.
Creating a Smooth Transition with Soil Preparation Techniques
When transplanting seedlings, it’s essential to prepare the soil for their new home. A smooth transition from pot to garden bed requires more than just gentle handling – it demands a welcoming environment that meets their needs. One technique to achieve this is double-digging, which involves loosening the soil to a depth of about 12-18 inches, removing any debris or roots, and mixing in organic matter like compost.
This method allows for better root growth, increased water retention, and improved air circulation – all critical factors for seedling success. Raised beds offer another option, providing excellent drainage, warmer soil temperatures, and easier maintenance. These elevated plots can be filled with a mix of topsoil, perlite, and vermiculite for optimal growing conditions.
Container gardens are also an excellent choice for transplanting seedlings, offering control over the soil composition, precise watering, and protection from pests. When implementing these techniques, keep in mind that soil pH and nutrient levels must be matched to your plants’ requirements. Test the soil before transplanting and adjust accordingly. By incorporating one or more of these methods into your gardening routine, you’ll set your seedlings up for a thriving life beyond their pot.
Transplanting Seedlings: The Process
When it’s time to transplant your seedlings, the process can seem daunting, but with a few simple steps you’ll be on your way to happy and healthy plants. In this next section, we’ll walk through each step of transplanting seedlings successfully.
Handling and Watering Seedlings During Transplant
When handling seedlings during transplant, it’s essential to be gentle to minimize root disturbance and prevent shock. Start by carefully removing the seedling from its container, taking care not to touch the roots. Use a fork or chopstick to gently loosen the soil if necessary, but avoid pulling on the roots.
To reduce water stress, water your seedlings thoroughly before transplanting. This helps ensure they’re well-hydrated and can withstand the transfer process. Make sure the potting mix is moist but not waterlogged, as this can cause root rot.
When transplanting, place the seedling in its new container at the same depth it was previously growing. Gently firm the soil around the roots to secure them. Avoid compacting the soil too much, which can prevent proper drainage and lead to overwatering issues.
After transplanting, water your seedlings thoroughly but avoid overwatering. Check the moisture level by sticking your finger into the soil up to the first knuckle. Water only when the top inch of soil feels dry. Monitor your seedlings closely in the first few days after transplanting to catch any potential issues early on.
Planting at the Right Depth and Spacing
When planting seedlings at the right depth and spacing is crucial for their survival and growth. You want to make sure that you’re giving them enough room to breathe and absorb nutrients from the soil without being too cramped. The general rule of thumb is to plant seedlings at a depth where their crown (where the stem meets the roots) is level with the surrounding soil. However, this can vary depending on the type of plant.
For example, if you’re transplanting seedlings with deep taproots like carrots or beets, it’s best to plant them shallower than other vegetables to accommodate their extensive root systems. On the other hand, plants with shallow roots like lettuce or herbs can be planted a bit deeper. When spacing seedlings, aim for 2-3 times the mature width of the plant to prevent overcrowding and promote healthy growth.
For instance, if you’re planting tomatoes, which can grow up to 3 feet wide, leave about 2-3 feet between each seedling. Similarly, for leafy greens like kale or spinach, allow about 1-2 inches between each plant. By following these guidelines, you’ll set your seedlings up for success and enjoy a bountiful harvest.
Post-Transplant Care for Seedlings
Now that you’ve successfully transplanted your seedlings, it’s essential to provide them with proper care to ensure they thrive in their new environment. This includes adjusting watering and fertilization schedules accordingly.
Monitoring Transplanted Seedlings for Signs of Stress
When transplanting seedlings, it’s not uncommon for them to exhibit signs of stress after being introduced to their new environment. Yellowing leaves, stunted growth, and wilting are common indicators that something is amiss.
To identify the underlying cause of these issues, start by examining the root system. Check if the roots have become compacted or constricted due to overwatering or inadequate spacing. You can also inspect for signs of pests or diseases, such as aphids, spider mites, or fungal infections.
If you notice that your seedlings are experiencing stunted growth, assess their light and temperature conditions. Seedlings require a balance of warmth and light to develop strong roots and stems. Ensure they’re receiving adequate light (around 12-14 hours a day) and maintaining optimal temperatures between 65°F to 75°F.
By addressing these potential causes, you can take corrective measures such as repotting with fresh potting mix, pruning affected areas, or adjusting their environment to meet their needs.
Providing Optimal Growing Conditions After Transplant
Maintaining optimal growing conditions after transplant is crucial for seedling survival and success. Temperature control is one of the most critical factors to consider. Most seedlings prefer daytime temperatures between 65-75°F (18-24°C) and nighttime temperatures around 55-65°F (13-18°C). Avoid placing your seedlings near heating vents, radiators, or drafty windows, as this can cause stress.
Humidity management is another essential aspect of post-transplant care. Seedlings thrive in environments with moderate humidity levels, typically between 40-60%. To maintain optimal humidity, you can cover the pot with a clear plastic bag or cloche to create a mini-greenhouse effect.
Pest control is also vital during this period. Check your seedlings regularly for signs of pests like aphids, whiteflies, and spider mites. Use organic pest control methods whenever possible, such as neem oil or insecticidal soap.
By paying attention to these factors, you’ll create a supportive environment that allows your seedlings to thrive after transplant. For example, keep the soil consistently moist but not waterlogged, and provide adequate light exposure (but avoid direct sunlight during peak hours).
Troubleshooting Common Transplant Issues
Even experienced gardeners encounter transplanting setbacks, so let’s tackle common issues like seedling shock, overwatering, and root disturbance head-on. We’ll work through solutions to get your seedlings thriving again.
Identifying and Addressing Root Bound Seedlings
Root bound seedlings are a common issue when transplanting, and it’s essential to identify and address this problem early on. Overwatering is one of the primary causes of root bound conditions, as excessive moisture can lead to waterlogged soil, causing roots to grow outwards rather than downwards. Similarly, underpotting can also contribute to root bound seedlings, as the limited root space can cause the roots to become constricted and circling.
To identify if your seedling is root bound, gently remove it from its container and inspect the roots. Look for signs of circling or twisting, which indicate that the roots have outgrown the pot. You may also notice a mass of tangled roots at the base of the plant.
To promote healthy root development, repot your seedling into a slightly larger container with fresh potting mix. Prune any circling roots to encourage new growth and prevent further constriction. By addressing root bound conditions promptly, you can ensure your seedlings continue to thrive after transplanting.
Managing Pests and Diseases After Transplant
Monitoring your transplanted seedlings for signs of pests and diseases is crucial to prevent damage and ensure their health. Common culprits like aphids, whiteflies, and fungal infections can quickly spread if left unchecked.
Aphids and whiteflies are often brought into the garden on transplanted seedlings, so be sure to inspect your plants carefully before transplanting. Look for tiny eggs or live pests on the undersides of leaves, stems, and soil around the roots. If you notice any infestations, use neem oil or insecticidal soap to control them.
Fungal infections can also develop after transplanting, especially if the seedlings are waterlogged or exposed to high humidity. Watch for yellowing or wilted leaves, and inspect the plant’s stem and roots for signs of fungal growth. To manage fungal diseases, remove infected areas, improve air circulation, and treat with fungicides like copper-based products.
Remember, a proactive approach is key to preventing pest and disease issues after transplanting. By monitoring your seedlings regularly and using integrated pest management (IPM) techniques, you can keep these problems under control and give your plants the best chance to thrive.
Conclusion: Success with Transplanting Seedlings
Now that you’ve successfully transplanted your seedlings, let’s discuss how to ensure they continue thriving and reach their full potential. We’ll cover the final tips for a healthy transition.
Recap of Key Takeaways
As we wrap up this journey on transplanting seedlings like a pro, let’s take a moment to recap the key takeaways. Patience is essential when handling delicate seedling roots, and it’s crucial to avoid overwatering or underwatering during the transition period. Attention to detail is also vital, as ensuring proper root growth and acclimation to new conditions can make all the difference in your plant’s long-term success.
As we’ve discussed, adapting to specific growing conditions is essential for a seamless transplant process. Be it adjusting for temperature fluctuations, humidity levels, or soil pH, understanding your seedling’s unique needs will help you navigate any challenges that arise. By incorporating these key takeaways into your transplanting routine, you’ll be well on your way to achieving successful results. For example, if you’re transplanting sensitive seedlings indoors, consider providing a consistent environment with controlled temperatures and humidity levels.
Incorporating these strategies into your practice will not only save time but also yield healthier plants that thrive in their new environments.
Final Tips and Encouragement
As you put your newfound skills to work and start transplanting seedlings like a pro, remember that it’s okay to make mistakes along the way. In fact, they’re an essential part of the learning process. Don’t be discouraged if some of your seedlings don’t thrive at first – it’s all about persistence and practice.
The key to mastering transplanting is to keep trying, experimenting with different techniques and tools until you find what works best for you. Take note of what does and doesn’t work, and use that knowledge to refine your approach. Continuously learning from your mistakes and successes will help you develop the skills needed to tackle even the most delicate seedlings.
Remember, transplanting seedlings is a skill that takes time to develop, but with patience and dedication, anyone can become proficient. Don’t be afraid to reach out for guidance or advice from more experienced gardeners – we’ve all been there once. By staying committed and motivated, you’ll soon find yourself transplanting like a pro, confidently nurturing your seedlings into healthy, thriving plants.
Frequently Asked Questions
Can I transplant seedlings on a cloudy day if it’s been hardening off for the recommended amount of time?
Yes, you can still transplant seedlings on a cloudy day as long as they have received adequate light and hardened off properly. Cloudy days can provide some relief from intense sunlight, making it easier to acclimate seedlings to outdoor conditions.
How do I handle seedlings that are too leggy or root-bound during the transplanting process?
To address leggy or root-bound seedlings, gently trim back overgrown stems and tease out tangled roots. This will help them adapt more quickly to their new environment and reduce stress caused by constricted growth.
What if I notice signs of transplant shock in my seedlings after they’ve been transplanted into the garden?
Yes, transplant shock is a common issue that can be minimized with proper care. If you notice signs of stress or disease, such as yellowing leaves or droopy stems, increase watering and provide optimal growing conditions to help your seedlings recover.
Can I use a different type of soil mix for transplanting seedlings if my garden has poor soil quality?
Yes, using a high-quality potting mix specifically designed for seed starting can make a big difference in the success of your transplants. This will ensure that your seedlings have the best possible start and adapt quickly to their new environment.
How long does it take for seedlings to establish themselves after transplanting, and what are some signs of successful establishment?
Seedlings typically need 1-2 weeks to fully establish themselves after transplanting. Signs of successful establishment include new growth, increased leaf color, and robust root development.