Halloween wouldn’t be the same without those iconic jack o’lanterns, would it? Carved from pumpkins with intricate designs and eerie grins, they’re a staple of autumn celebrations around the world. But have you ever stopped to think about where this tradition comes from? What’s behind the mysterious faces we create in our pumpkins every year?
As it turns out, there’s more to jack o’ lanterns than just their spooky charm. From ancient Celtic rituals to modern-day crafting tips, the art of carving pumpkins has a rich history and significance that’s worth exploring. In this article, we’ll delve into the origins and symbolism of traditional jack o’lanterns, plus provide expert advice on design ideas, decoration inspiration, and pumpkin preservation techniques to make your Halloween celebrations truly unforgettable.
A Brief History of Jack o’ Lanterns
Let’s take a step back in time and explore the origins of the jack o’ lantern, from its ancient Irish roots to its evolution into a beloved Halloween tradition.
Origins in Ancient Ireland
In ancient Ireland, the tradition of carving turnips and other root vegetables to ward off spirits during the Celtic festival of Samhain has its roots. The Celts believed that on October 31st, the boundary between the living and the dead became blurred, and spirits of the deceased would return to earth.
To keep these malevolent entities at bay, people would carve frightening faces into turnips or other root vegetables and place them in their windows or doorways. These carved vegetables were meant to mimic the spirits’ own terrifying visages, thereby scaring them away from homes and communities.
The Celts called these lanterns “souling lights,” and they were believed to offer protection against evil spirits. Over time, turnips gave way to pumpkins as a more readily available and easier-to-carve alternative. Today, we know these carved pumpkins as jack o’lanterns. If you’re looking to tap into this ancient tradition, try using a traditional Irish recipe for souling lights: carve scary faces into large turnips or squash, add a candle or tea light inside, and place them in your windows to ward off any unwanted spirits.
Evolution into Pumpkin Carving
As Irish immigrants arrived in North America, they brought with them their beloved tradition of carving turnips and other root vegetables for the Samhain festival. However, finding suitable alternatives to their native turnips proved challenging. Pumpkins, being abundant and easily available in the New World, soon became the ideal substitute.
In fact, pumpkins were not only a practical choice but also a symbol of good fortune and prosperity, which aligned perfectly with the spirit of Samhain. Irish immigrants began experimenting with pumpkin carving, adapting their traditional techniques to the new gourd. They discovered that pumpkins’ thicker flesh made them easier to carve than turnips, allowing for more intricate designs.
As the tradition of pumpkin carving gained popularity among North American communities, it eventually became an integral part of the Halloween celebrations. To this day, carved pumpkins continue to be a staple of the holiday, with countless variations and designs adorning doorsteps and windowsills. If you’re interested in trying your hand at pumpkin carving, start by choosing a design that suits your skill level, and use a serrated knife or specialized pumpkin-carving tool for best results.
The Significance of Samhain
At the heart of Halloween’s origins lies Samhain, an ancient harvest festival celebrated by the Celts over 2,000 years ago. This significant event marked the end of summer and the beginning of winter, a time when the veil between the living and the dead was believed to be at its thinnest. The Celts would light bonfires and wear costumes to ward off spirits, setting the stage for modern-day Halloween celebrations.
Samhain’s connection to harvest festivals is evident in the abundance of food and drink associated with it. The Celts would gather crops, fruits, and nuts, using them to make offerings to their ancestors and gods. This tradition of honoring the harvest continues today, albeit in a more subtle form. As you prepare for Halloween, consider incorporating elements from Samhain into your celebrations. For instance, try making traditional Irish or Scottish dishes like colcannon (mashed potatoes with kale) or bridies (meat pies).
Remember that these small nods to tradition can add depth and meaning to your festivities. By acknowledging the roots of our modern celebration, we honor the cultures that came before us and connect with the natural world around us.
Designing Your Jack o’ Lantern
Now that you’ve chosen your pumpkin, let’s get started on designing a jack o’ lantern that will shine brightly on your porch and impress trick-or-treaters. We’ll explore some classic design ideas to inspire you.
Choosing the Perfect Pumpkin
When it comes to choosing the perfect pumpkin for carving, several factors come into play. First and foremost, consider the size of the pumpkin. A larger pumpkin provides more surface area to work with, but it may be more difficult to handle, especially if you’re new to carving. On the other hand, a smaller pumpkin is easier to manage, but may not yield as intricate designs.
In terms of type, sugar pumpkins are ideal for jack o’ lanterns due to their symmetrical shape and sweet, fine-grained flesh. These characteristics make them perfect for carving intricate patterns and details. Other varieties like Connecticut Field or Long Island Cheese also work well, but keep in mind that they may have a more irregular shape.
When selecting your pumpkin, choose one with a hard, smooth skin and no signs of soft spots or mold. This will help ensure it lasts longer and withstands the carving process. Consider storage conditions as well – if you plan to carve your pumpkin soon after purchasing, select a smaller variety to save space. If you’re storing it for an extended period, choose a larger one with a more robust stem for better durability.
Basic Carving Techniques
When it comes to carving your jack o’ lantern, having some basic techniques under your belt can make all the difference. First and foremost, let’s talk safety. Always carve your pumpkin on a stable surface, away from any flammable materials or open flames. Make sure you have a good light source nearby to illuminate your design.
To begin carving, start by selecting a suitable tool – we recommend a serrated knife specifically designed for pumpkin carving. Hold the knife at an angle and gently scoop out the top layer of the pumpkin, creating a lid that will serve as the opening for your design.
Next, use a smaller, more delicate tool to create intricate designs and patterns within the pumpkin. Start with simple shapes and gradually work your way up to more complex designs. Use a marker or pencil to lightly sketch out your pattern before carving to ensure accuracy. Remember to take breaks and stay hydrated while carving – it’s easy to get caught up in the creative process!
Advanced Carving Designs
For those who want to take their jack o’ lantern game to the next level, we’ve got you covered with some advanced carving designs that’ll make your pumpkin stand out from the rest. One way to achieve intricate patterns is by using stencils. You can find pre-made stencils online or create your own using cardstock and a printer. Try using stencils for Celtic knots, spiders, or other Halloween-themed designs.
Another approach is to use freehand carving techniques. Start with simple shapes like circles, spirals, or waves, and gradually work your way up to more complex patterns. For example, you can try carving a 3D effect by layering different shapes on top of each other. To achieve this, carve the main shape first, then use smaller tools to add details and textures.
To add an extra layer of complexity, try combining stencils with freehand carving. This will give you the freedom to create intricate patterns while still maintaining some level of precision. Remember, practice makes perfect, so don’t be afraid to experiment and try new designs – it’s all part of the fun!
Jack o’ Lantern Decorations and Displays
Transform your porch into a spook-tacular setting with creative jack o’ lantern decorations, from carved designs to clever displays. Let’s explore some inspiring ideas together!
Lighting Up the Night
When it comes to lighting up your jack o’ lanterns, you have plenty of options to choose from. One classic and traditional method is using candles. Simply place a tea light or votive candle inside the pumpkin, making sure not to touch any flammable materials. This will create a warm, flickering glow that’s perfect for porch displays.
However, with the rise of modern technology, there are now safer and more energy-efficient alternatives available. LED lights are a great option, as they’re easy to install and provide a bright, consistent light. You can choose from various colors and styles, including string lights or fairy lights that wrap around your pumpkins for a unique look.
Some popular options include battery-operated candles, which offer the same ambiance without the risk of fire, and solar-powered lights, perfect for outdoor displays where electricity is not readily available. Consider combining multiple lighting sources to create a dynamic display – just be sure to follow safety guidelines when mixing different types of light sources.
Display Ideas
When it comes to showcasing your carved pumpkins, the display ideas are where you can get really creative. Let’s start with some ideas for centerpieces. A classic approach is to place a few smaller jack o’ lanterns on a tiered serving dish or tray, creating a visually appealing and balanced arrangement. You could also group them together in a large bowl or vase, adding some greenery like eucalyptus or ferns to add depth.
For mantel decor, consider lining the middle with a garland of artificial fall leaves or branches. Then, arrange your carved pumpkins on either side, filling any gaps with candles or lanterns. This creates a warm and inviting ambiance that’s perfect for Halloween.
If you’re displaying your jack o’ lanterns outdoors, think about creating a focal point by placing them in a large urn or container. You could also line the porch or steps with small pumpkins or gourds, adding some soft lighting to create a spooky glow.
Themed Decorations
When it comes to themed decorations, jack o’ lanterns are the perfect centerpiece for creating an immersive atmosphere. For a haunted house, consider grouping multiple pumpkins around a focal point, such as a creaky door or a dimly lit entrance. Arrange them to resemble tombstones, with carved names and dates that add to the eerie ambiance.
For a fall-themed party, think about incorporating seasonal elements like hay bales, vintage lanterns, and plenty of greenery. Place jack o’ lanterns among the arrangements to bring warmth and coziness to the space. You can also use them as centerpieces for the tables, surrounded by candles, leaves, or pumpkins in various sizes.
If you’re hosting a Halloween party for kids, consider creating a “Pumpkin Patch” area where they can pick their own jack o’ lanterns. This can be achieved with cardboard boxes or small baskets filled with fake pumpkins and some props like witches hats or fake spiders. The goal is to create an interactive experience that lets them get creative while enjoying the spooky atmosphere.
The Art of Pumpkin Carving: Techniques and Tips
Now that you’ve got your design down, let’s dive into some expert techniques for carving out intricate patterns and designs on your pumpkin. From basic tools to advanced tips, we’ve got you covered!
Stenciling and Patterns
Using stencils and patterns is an excellent way to add intricate designs to your jack o’ lantern without having to worry about freehanding it. If you’re a beginner, this technique can help you achieve professional-looking results with minimal effort.
To get started, choose a stencil or pattern that suits your design preferences. You can find these online or in craft stores, and they usually come in various shapes, sizes, and themes. Place the stencil on top of your pumpkin and use a marker or pencil to mark the areas you want to carve.
When using stencils, it’s essential to align them properly with the surface of the pumpkin. To avoid mistakes, start by marking the center of the pumpkin and then place the stencil on top of that mark. This will ensure symmetry and evenness in your design. Additionally, use a ruler or straightedge to guide your knife when carving around the edges of the stencil.
By following these steps, you’ll be able to create intricate designs with ease, saving you time and reducing the risk of mistakes.
Special Effects and Textures
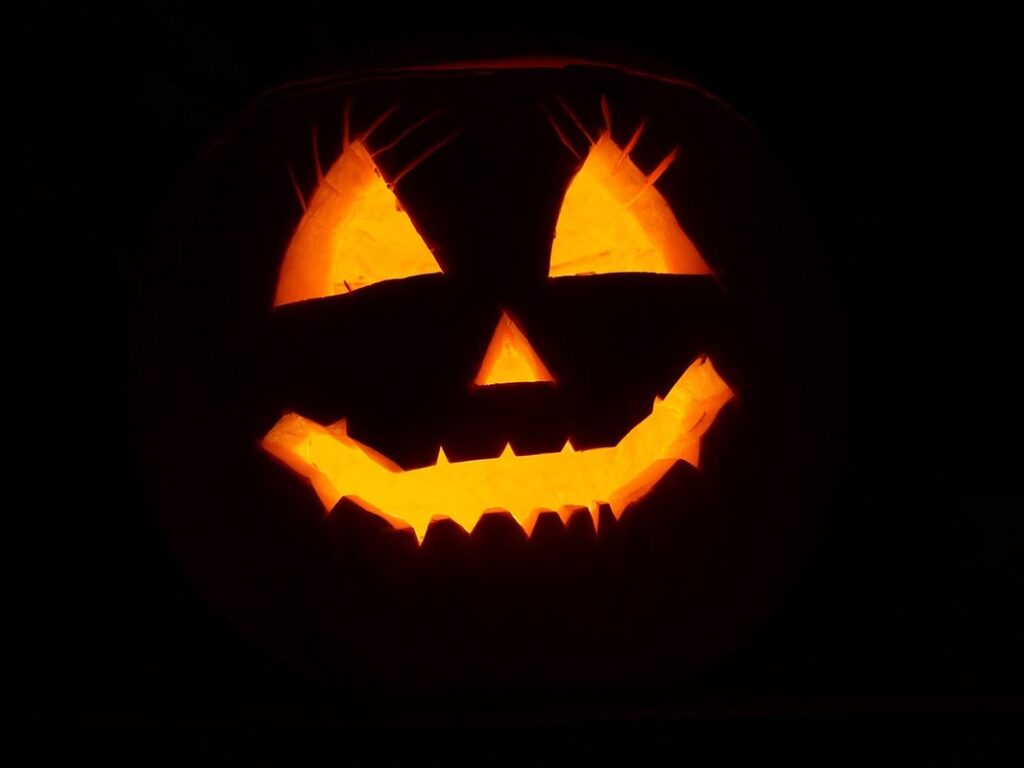
When it comes to taking your pumpkin carving game to the next level, special effects and textures can make all the difference. One of the most iconic special effects is glowing eyes, which can be achieved by using a glow stick or LED light placed inside the pumpkin. This creates an otherworldly effect that’s perfect for Halloween.
To create textured surfaces on your jack o’ lanterns, try using different carving techniques, such as stippling or hatching. Stippling involves creating small dots with the tip of your knife to achieve a smooth, gradient-like effect. Hatching, on the other hand, involves creating parallel lines that can be used to create detailed textures and patterns.
For example, you could use stippling to create a realistic, bumpy skin texture on a carved pumpkin. Or, use hatching to add fine details like facial features or foliage. To take it even further, try combining different techniques with paint or markers to add color and depth to your design.
Experimenting with special effects and textures can help you unlock new levels of creativity in your pumpkin carving. Don’t be afraid to get creative and try out different techniques – the results are sure to impress!
Troubleshooting Common Issues
We’ve all been there – you’re excited to create your masterpiece, but something goes awry. Don’t worry, it’s not uncommon for pumpkin carving to hit a snag. Uneven cutting is one of the most common issues, often due to incorrect tool handling or not having a stable surface. To avoid this, make sure to use a sharp knife and carve on a flat surface.
Stuck tools are another pesky problem that can ruin your mood. To prevent this from happening, dip your knife in warm water before carving – it will help reduce friction and allow for smoother cuts. Also, be gentle when inserting the blade into the pumpkin, as sudden jolts can cause it to get stuck.
If you do encounter a stuck tool, don’t panic! Gently rock the knife back and forth while applying gentle pressure. You can also try using a paper towel to apply heat to loosen the tool.
The Science Behind Jack o’ Lanterns
You might be surprised at how the tradition of carving jack o’ lanterns is rooted in ancient science and folklore, which we’ll explore next. Let’s delve into the fascinating history behind this spooky staple.
Curing and Preserving Pumpkins
If you’re planning to carve and display your jack o’ lantern for an extended period, it’s essential to know how to cure and preserve pumpkins. This process involves creating a dry environment that inhibits the growth of bacteria and fungi, which can cause the pumpkin to rot.
To start, select a pumpkin with a hard rind and minimal soft spots. Wipe the entire surface with a disinfectant solution to eliminate any dirt or bacteria. Next, use a fan to circulate air around the pumpkin, reducing moisture levels. You can also place a paper towel in the lid of the container to absorb excess moisture.
It’s crucial to keep the temperature between 50-60°F (10-15°C), as this range slows down bacterial growth. Monitor your pumpkin regularly, and make adjustments as needed. By following these steps, you can extend the shelf life of your jack o’ lantern by several weeks or even months.
Bacterial Growth and Mold Prevention
When you bring home that perfect pumpkin and start carving it into a jack o’ lantern, you might not think about the potential for bacterial growth and mold to take over. But the truth is, carved pumpkins can be a breeding ground for bacteria and mold, which can lead to unpleasant odors and even food safety issues.
Carved pumpkins have high moisture levels, making them an ideal environment for microorganisms like E. coli and Salmonella to thrive. And when you add a bit of warm temperature and darkness, the perfect storm is created. To prevent bacterial growth and mold in your carved pumpkin, make sure to dry it thoroughly after carving and before displaying it. You can also use a spray or brush-on coating that contains fungicides to help prevent mold.
Another tip is to carve your pumpkin just before displaying it, as this will minimize the time it spends in its vulnerable state. And finally, don’t be afraid to discard your jack o’ lantern if you notice any signs of mold or bacteria growth – it’s better safe than sorry when it comes to food safety and your guests’ health!
Composting Pumpkin Waste
As you’re enjoying your jack o’ lanterns, don’t forget about the environmental impact of pumpkin waste. Those carved pumpkins may bring a spooky smile to your face, but they also contribute to landfill waste and greenhouse gas emissions.
Here’s the thing: pumpkins are biodegradable, but the way we dispose of them isn’t always eco-friendly. A significant portion of pumpkin waste ends up in landfills, where it decomposes and produces methane – a potent greenhouse gas. In fact, according to the US Environmental Protection Agency (EPA), food waste accounts for 21% of municipal solid waste in the United States.
So, what can you do? Composting is a great way to reduce your environmental footprint while still enjoying those jack o’ lanterns. You can compost pumpkin scraps, seeds, and even the carved-out insides by adding them to your home compost pile or bin. Simply mix the wetter materials like pumpkin pulp with drier ones like leaves or straw, and let nature do its magic.
By composting pumpkin waste, you’re not only reducing landfill waste but also creating nutrient-rich soil for your garden or houseplants.
Conclusion: The Timeless Appeal of Jack o’ Lanterns
As you’ve made it through our journey into the world of traditional jack o’ lanterns, I’m sure you’ll agree that their charm is undeniable. Whether you’re a seasoned decorator or just starting to explore the world of fall festivities, there’s something special about these glowing faces that seems to captivate us all. Perhaps it’s the nostalgic feel they evoke, transporting us back to childhood memories of pumpkin-carving parties and cozy autumn evenings. Whatever the reason, one thing is clear: jack o’ lanterns have a timeless appeal that transcends generations.
As you look to incorporate them into your own fall celebrations, don’t be afraid to get creative with design and materials. From traditional candlelit faces to more modern, LED-lit creations, the possibilities are endless. So why not give it a try? Grab some pumpkins, gather your family or friends, and start carving – you never know what masterpiece might emerge!
Frequently Asked Questions
Can I use a real candle to illuminate my jack o’ lantern, or are LED candles the safer option?
Yes, using LED candles is a safer option for illuminating your jack o’ lantern. They provide a warm and festive glow without the risk of an open flame catching nearby materials on fire.
What’s the best way to preserve my carved pumpkin from bacterial growth and mold?
To prevent bacterial growth and mold in your carved pumpkin, make sure it’s completely dry before displaying it. You can also use a solution of 1 part bleach to 10 parts water to disinfect the surface and help prolong its life.
How do I create intricate designs on my jack o’ lantern without using stencils or patterns?
To create intricate designs on your jack o’ lantern, start by carving out the basic shape and then use a combination of smaller tools, such as gouges and chisels, to add detail and texture. You can also experiment with different linoleum cutters for more complex patterns.
What’s the ideal size and type of pumpkin to choose for my jack o’ lantern?
When choosing a pumpkin for your jack o’ lantern, look for one that’s symmetrical and has a smooth, even surface. For traditional designs, a medium-sized pumpkin with a rounded shape is usually best, as it allows for easy carving and displays well.
Can I use a vegetable knife to carve my pumpkin, or do I need specialized tools?
While a sharp vegetable knife can be used to carve your pumpkin in a pinch, specialized tools like gouges and chisels are recommended for creating intricate designs and detailed patterns. These tools will allow you to achieve more precise cuts and add more texture to your design.