Are you tired of limited space or poor soil conditions holding back your vegetable garden? Container vegetable gardening is a game-changer for those who want to grow their favorite fruits and veggies, regardless of where they live. With a few simple tips and tricks, you can enjoy a bountiful harvest in even the smallest of spaces. In this article, we’ll share our expert advice on how to choose the right container size, select the perfect soil blend, and maintain your garden for optimal results. From selecting easy-to-grow vegetables like tomatoes and cucumbers to troubleshooting common issues like pests and diseases, we’ve got you covered. By the end of this article, you’ll be a pro at container gardening and on your way to a thriving vegetable garden. Let’s get started!
Choosing the Right Containers
When it comes to container vegetable gardening, selecting the right containers is crucial for healthy growth and optimal yields. Let’s explore some key factors to consider when choosing your containers.
Selecting the Perfect Size and Material
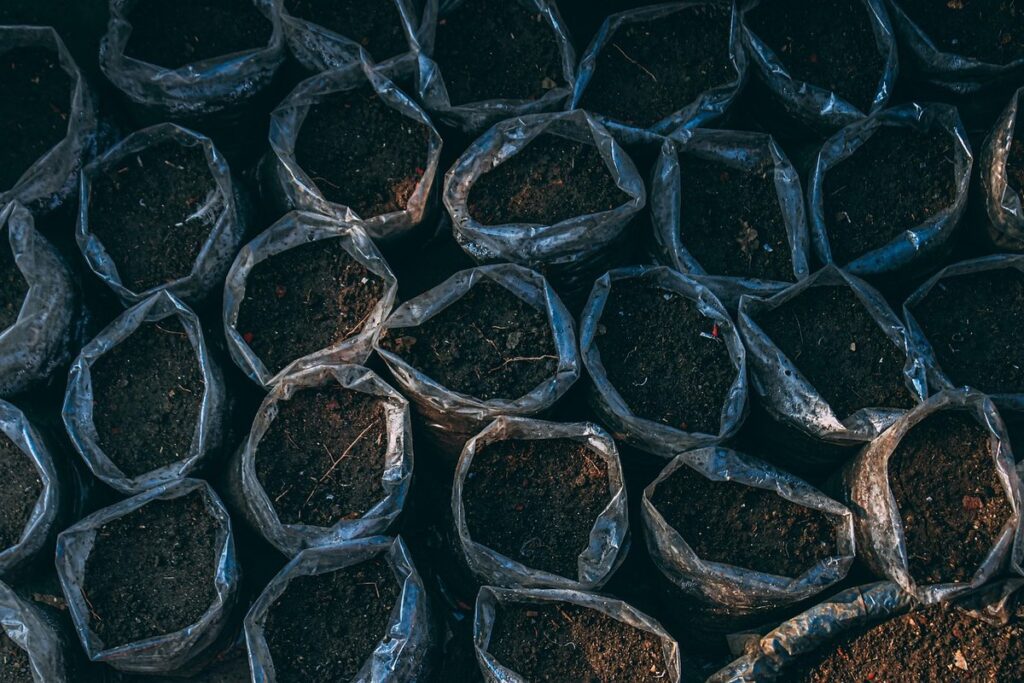
When it comes to selecting containers for your vegetable garden, the size and material play crucial roles in determining its success. First and foremost, consider the space where you’ll be placing your container garden. Choose a size that fits comfortably in the available area, taking into account the mature size of the plants. A general rule of thumb is to select containers that are at least 5-7 gallons for small spaces, like balconies or patios, and larger ones for bigger areas.
Popular container sizes include small (6-8 inches deep) for herbs and cherry tomatoes, medium (10-12 inches deep) for leafy greens and peppers, and large (14-16 inches deep) for vining plants like cucumbers and squash. Material-wise, plastic containers are lightweight and affordable, but may degrade over time due to UV exposure. Wooden containers add a rustic touch and can be reused, while ceramic pots offer better insulation and durability.
When deciding between materials, consider the climate you live in and how it affects your garden’s needs. For example, if you live in an extremely hot region, ceramic or wooden containers would be a good choice to reduce heat stress on plants. Ultimately, choose a container that suits your space and gardening style, and don’t hesitate to mix-and-match different sizes and materials for a unique look.
Considering Drainage and Aeration
When it comes to container vegetable gardening, one often overlooked aspect is drainage and aeration. As a gardener, you need to ensure that the soil has adequate oxygen and water circulation to prevent root rot and waterlogged soil.
A lack of drainage can lead to root rot, which can be catastrophic for your plants. Water tends to collect in containers, causing the roots to sit in stagnant water. To avoid this, make sure your containers have sufficient holes or gaps for excess water to escape. Drill a few holes at the bottom of each container or use a pre-made pot with drainage holes.
Another crucial aspect is aeration. A well-ventilated potting mix can help prevent root suffocation and promote healthy growth. Add some perlite, vermiculite, or sand to improve soil structure and increase oxygen flow.
When using self-watering containers, ensure that the built-in water reservoirs don’t trap too much water. Regularly check your plants’ moisture levels by gently sticking your finger into the soil up to the first knuckle. If it feels dry, it’s time to water.
Soil Selection and Preparation
When selecting a container mix for your vegetable garden, you’ll want to consider the specific needs of the plants you’re growing. A well-draining potting mix can make all the difference in success.
Understanding Container Soils
When it comes to container vegetable gardening, understanding what goes into those small spaces is crucial. One of the most critical components is the soil itself. You’ll typically find two options: bagged potting mixes and homemade soils.
Bagged potting mixes are a convenient choice for many gardeners. They’re designed to be self-contained and often come with added fertilizers or nutrients. However, their pH levels can vary greatly depending on the brand and type. Some may lean towards acidic (pH 5.5-6.5), while others might be more alkaline (pH 7.0-8.0). This is particularly important for vegetables like tomatoes, which thrive in slightly acidic conditions.
On the other hand, homemade soils offer more control over pH levels and nutrient content. By mixing together various ingredients – such as peat moss, vermiculite, or perlite – you can tailor your soil to suit specific plant needs. However, this approach requires some expertise and ongoing maintenance.
When selecting a container soil, consider the moisture retention capabilities of each option. Bagged mixes tend to hold more water than homemade blends, which can lead to overwatering issues if not monitored carefully.
How to Prepare the Soil for Planting
Before you start planting your container vegetables, it’s essential to prepare the soil for optimal growth. A well-prepared soil can make all the difference between a thriving garden and one that struggles to produce.
First, choose a high-quality potting mix specifically designed for containers. Avoid using regular garden soil as it can compact in containers, preventing proper drainage. If your potting mix is lacking nutrients, add a balanced fertilizer according to the manufacturer’s instructions. This will provide essential micronutrients like iron and zinc that are crucial for plant growth.
To improve drainage, consider adding perlite or vermiculite to the soil mixture. These materials will help prevent waterlogged soil and root rot. A mix of 10-20% perlite or vermiculite is a good starting point. You can also add compost or well-rotted manure to enrich the soil with beneficial microbes.
Remember, the key is to create a well-balanced and well-draining mixture that meets your plants’ specific needs. Take the time to prepare your soil properly, and you’ll be rewarded with healthy, productive plants all season long.
Vegetable Selection and Planting
When it comes to container vegetable gardening, choosing the right vegetables for your climate and containers is crucial. Selecting varieties that thrive in containers and understand their specific needs will make all the difference.
Choosing Vegetables Suitable for Containers
When selecting vegetables for container gardening, it’s essential to choose varieties that thrive in confined spaces. Consider compact or dwarf varieties of popular crops like cherry tomatoes, herbs such as basil and mint, and leafy greens like lettuce and kale. These plants are naturally adapted to grow in small containers and require minimal support.
When choosing a vegetable, keep mature size in mind. For instance, some tomato varieties can grow quite large and may need staking or pruning to prevent them from overtaking the container. On the other hand, compact varieties will stay contained within the pot and produce plenty of fruit.
Sunlight requirements are another crucial factor to consider. Some vegetables like leafy greens require partial shade, while others like tomatoes and peppers demand full sun. Make sure to choose a variety that suits your available sunlight conditions.
Lastly, growth habits can also impact container gardening success. Consider plants with bush or compact growth habits, which will take up less space and be easier to manage in small containers.
Tips for Planting in Containers
When planting vegetables in containers, it’s essential to consider the unique needs of each plant and adjust your techniques accordingly. One crucial aspect is planting depth – make sure to follow the recommended depth for each variety, as over-deep or under-deep planting can hinder growth.
For example, when planting tomatoes, which have a deeper root system, dig a hole that’s 2-3 times the width of the pot and plant the stem at the same level it was in the original container. On the other hand, delicate herbs like basil require shallower soil to prevent them from becoming waterlogged.
Another critical factor is spacing between plants – make sure to leave enough room for air circulation and sunlight penetration. A good rule of thumb is to plant vegetables 1-2 inches apart, depending on their mature size and spread. Staking or support methods can also be necessary for container-grown vegetables like peas, beans, and cucumbers. Use bamboo stakes or trellises to provide structural support and encourage vertical growth.
Proper spacing and staking will not only promote healthy growth but also prevent overcrowding, which can lead to fungal diseases and reduced yields. By taking these tips into consideration, you’ll be well on your way to growing a thriving container vegetable garden.
Container Placement and Maintenance
When it comes to getting the most out of your container garden, placement and maintenance are crucial factors that can make or break a thriving harvest. Let’s dive into some essential tips for placing and caring for your containers.
Where to Place Your Container Garden
When it comes to placing your container garden, there are a few key factors to consider. First and foremost, make sure that your containers receive adequate sunlight. Most vegetables need at least 6 hours of direct sunlight per day, so choose a location that gets plenty of sun.
Consider the direction of the sun in your yard too – if you have a north-facing wall or a spot that receives morning sun but is shaded by afternoon, this can be a good option for sensitive plants like lettuce or herbs. However, if you’re growing heat-loving crops like tomatoes or peppers, you’ll want to choose a location that gets full sun all day.
It’s also worth thinking about accessibility – you don’t want your container garden tucked away in a hard-to-reach spot where it’s difficult to water or tend to. Look for a location near a water source and with good drainage to make maintenance easier. And if possible, try to place your containers on a level surface so they’re not top-heavy and prone to tipping over.
Aim to position your containers within 6-8 feet of each other to prevent overcrowding and promote healthy growth. By considering these factors, you can create an ideal environment for your container garden to thrive.
Regular Maintenance Tasks for Containers
Regular maintenance is crucial to keep your container vegetable garden thriving. As a gardener, you’ll need to perform a series of tasks on a regular basis to ensure the health and productivity of your plants.
Watering is one of the most critical aspects of container gardening. Overwatering can be detrimental, while underwatering may hinder growth. To strike the right balance, check the soil moisture by sticking your finger into it up to the knuckle. If the top inch feels dry, it’s time for watering. Water thoroughly until you see water coming out of the drainage holes.
Fertilizing is another essential task. Use a balanced fertilizer (10-10-10 NPK) once a month during the growing season. You can also side-dress with a high-phosphorus fertilizer to promote fruiting and flowering. Pruning is vital for maintaining plant shape, encouraging new growth, and preventing pests and diseases from taking hold.
Regularly inspect your plants for signs of pests or diseases. Check the undersides of leaves, stems, and soil for aphids, whiteflies, or spider mites. Look out for fungal diseases like powdery mildew or leaf spot, which can spread quickly if left unchecked.
Tips for Extending the Growing Season
Want to squeeze every last bit of productivity out of your container garden? We’ve got some clever tips for extending the growing season and enjoying fresh veggies all year round.
Using Cold Frames or Row Covers
Using cold frames or row covers can be an effective way to extend the growing season for your container vegetable garden. These simple and affordable tools help protect plants from frost, wind, and extreme temperatures, allowing you to harvest vegetables for a longer period.
Cold frames are essentially miniature greenhouses that use transparent materials like glass or plastic to trap heat and light. They can be built using reclaimed wood or purchased as a pre-made unit. Place your cold frame over the bed or container, and it will maintain a warmer temperature than the surrounding area. This allows you to grow cool-season crops like broccoli, kale, and spinach throughout the winter.
Row covers, on the other hand, are lightweight fabrics that filter sunlight and retain heat. They come in various weights and breathability levels, making them suitable for different weather conditions. Use row covers over your plants at night or during periods of frost to protect them from damage. Combine these techniques with succession planting, where you sow seeds every 1-2 weeks, to ensure a continuous harvest throughout the growing season.
When using cold frames or row covers, remember to monitor temperature and moisture levels closely. Ensure proper ventilation to prevent overheating and fungal diseases. By incorporating these tools into your container vegetable garden, you can enjoy a longer growing season and more frequent harvests.
Overwintering Container Plants
As the temperatures drop and winter approaches, many container gardeners wonder how to protect their precious plants from frost damage. Overwintering container plants requires some special care, but with the right techniques, you can keep them healthy and thriving until spring returns.
Before the first frost, bring your containers indoors or move them to a protected area like a garage or unheated sunroom. If you can’t do that, cover the plants with burlap or a breathable fabric to shield them from wind and cold temperatures. You can also use row covers or frost blankets specifically designed for protecting plants.
In addition to protection from frost, it’s essential to prepare your container plants for the next growing season. This means giving them a break from fertilization and pruning, as this will help them conserve energy during the winter months. Instead, focus on repotting your containers with fresh potting mix and giving the plants a thorough inspection for any signs of pests or diseases.
By taking these simple steps, you can extend the life of your container plants well into the winter months and enjoy a head start on next year’s growing season.
Troubleshooting Common Issues
We’ve all been there: a drowned crop, a pest infestation, or a mysterious fungal disease that’s leaving you stumped. Let’s troubleshoot these common container garden problems together.
Identifying and Fixing Problems Early On
When growing vegetables in containers, it’s not uncommon to encounter issues like yellowing leaves or stunted growth. These problems can be frustrating and even threaten the success of your entire garden. To avoid more severe problems down the line, it’s essential to identify and address these issues early on.
One common problem is overwatering. If you notice that your plants’ leaves are turning yellow, check if the soil is waterlogged or has a strong odor. Yellowing leaves can also be a sign of nutrient deficiency, so ensure you’re providing your plants with a balanced fertilizer. Conversely, under-watered plants may exhibit stunted growth due to lack of moisture.
To fix these issues, start by adjusting your watering schedule and frequency. Make sure the top inch of soil is dry before rewatering, as this can help prevent overwatering. You can also use a moisture meter to gauge the soil’s water content accurately. Regularly inspect your plants for signs of stress or disease, and take prompt action if you notice any unusual changes.
Monitor your plants daily, taking note of any irregularities, and address them before they become major problems.
Solutions for Common Pests and Diseases
When dealing with common pests and diseases in your container vegetable garden, it’s essential to have a plan of action. Integrated Pest Management (IPM) techniques should be your first line of defense. This approach involves combining physical, cultural, biological, and chemical controls to manage pest populations.
For aphids and whiteflies, introduce beneficial insects like ladybugs or lacewings to their colonies. You can also spray soapy water on the plants to deter these pests. If infestations are severe, use neem oil as a last resort.
Diseases like powdery mildew and root rot often arise from overwatering. Improve air circulation by pruning nearby plants or relocating your containers. Reduce watering schedules and avoid getting water on leaves to prevent fungal growth.
Chemical controls should be used sparingly, as they can harm beneficial insects and contaminate soil. For severe cases of powdery mildew or root rot, apply a fungicide specifically labeled for use on vegetables. However, always read the label carefully and follow instructions to avoid harming your plants further.
Conclusion
As you wrap up your container garden, let’s take a moment to review what we’ve learned and how you can apply these tips to future gardening projects. Here’s a summary of key takeaways.
Recap of Key Takeaways
As you’ve successfully set up and maintained your container vegetable garden throughout the growing season, it’s time to recap some of the most crucial takeaways from this article. Choosing the right containers is essential for optimal growth and productivity. Ensure that your containers are at least 5-7 gallons in size and have drainage holes to prevent waterlogged soil.
Preparing the soil is another critical step in container vegetable gardening. Use a high-quality potting mix specifically designed for vegetables, and don’t forget to add organic matter like compost or well-rotted manure to improve soil fertility. Fertilize your plants regularly, but avoid over-fertilizing, which can damage the plants.
Maintaining your garden throughout the growing season requires regular watering, pruning, and pest management. Water your containers when the top 1-2 inches of soil feels dry to the touch, and prune your plants to promote healthy growth and prevent overcrowding. Keep an eye out for common pests like aphids and slugs, and take action promptly if you notice any signs of infestation. By following these tips, you’ll be well on your way to a thriving container vegetable garden.
Final Tips for Success in Container Gardening
As you embark on your container gardening journey, remember that it’s all about experimentation and adaptation. Don’t be discouraged if things don’t go as planned at first – it’s normal for plants to require adjustments in light, water, or fertilization.
To stay on track, schedule regular check-ins with your containers. This might mean watering them every other day during hot summer months or repotting the soil when necessary. By doing so, you’ll be able to catch any potential issues before they become major problems.
Another key aspect is maintaining a balanced ecosystem within your containers. This includes keeping an eye on pests and diseases that can spread quickly among plants. To prevent this, make sure to rotate your containers regularly and remove any dead or dying plant matter promptly.
Lastly, remember to enjoy the process! Container gardening is all about creativity and flexibility – don’t be afraid to try new combinations of plants or experiment with different growing mediums. By doing so, you’ll not only create thriving gardens but also develop a deeper connection with nature.
Frequently Asked Questions
What if I don’t have a suitable location with direct sunlight for my container garden?
Yes, you can still grow vegetables in containers even without direct sunlight. Choose shade-tolerant plants like lettuce, herbs, or strawberries that require at least 4-6 hours of indirect light per day. You can also consider using grow lights to supplement the natural light and provide your plants with the necessary spectrum.
Can I use regular potting soil for my container garden, or do I need a specialized mix?
While you might be tempted to use regular potting soil, it’s not always the best choice for container gardens. A well-draining potting mix specifically designed for containers is usually a better option, as it will help prevent waterlogged soil and ensure optimal root growth.
How often should I fertilize my container garden?
Fertilizing your container garden regularly can promote healthy growth and productivity. Feed your plants with a balanced fertilizer (10-10-10 NPK) once a month during the growing season. You can also use organic alternatives like compost tea or fish emulsion to provide additional nutrients.
What if I encounter pests or diseases in my container garden? Are there any natural solutions?
Yes, there are many natural solutions for common pests and diseases that can affect your container garden. For example, neem oil can help control aphids, whiteflies, and spider mites, while baking soda and water can be used to repel slugs and snails. Regularly inspecting your plants and taking prompt action will also help prevent the spread of disease.
Can I overwinter my container garden in cold climates, or do I need to start from scratch every spring?
Yes, with proper care and planning, you can overwinter your container garden in cold climates. Choose varieties that are hardy for your region and provide protection using techniques like mulching, wrapping containers with burlap, or bringing them under a cold frame or row cover. This will help extend the growing season and ensure your plants survive the winter months.