As you gaze out at your garden, do you dream of creating a more sustainable oasis without breaking the bank or harming the environment? Growing plants in straw bales is an eco-friendly solution that’s gaining popularity among gardeners looking to reduce their carbon footprint. Not only does this method eliminate the need for heavy soil and fertilizers, but it also allows for increased crop rotation and reduced waste. In this article, we’ll take you through the simple process of preparing and expanding your straw bale garden, from initial setup to long-term maintenance. We’ll cover the benefits, techniques, and tips to help you create a thriving sustainable garden that’s as kind to the earth as it is productive. Whether you’re a seasoned gardener or just starting out, you’ll find practical advice on making the most of this innovative approach to gardening.
Benefits of Using Straw Bales for Gardening
One of the most exciting benefits of straw bale gardening is that it allows you to grow a wide variety of plants in a space-saving and super sustainable way. Let’s dive into some of our favorite advantages!
Advantages Over Traditional Soil
One of the most significant advantages of using straw bales for gardening is that it eliminates many of the common issues associated with traditional soil-based gardens. For instance, soil erosion is a major problem in many parts of the world, causing nutrient loss and water pollution. With straw bale gardening, you don’t have to worry about soil erosion because the bales act as a barrier, preventing topsoil from washing away.
Another benefit of straw bale gardening is improved drainage. Traditional soils can be prone to waterlogging, which can lead to root rot and other issues. Straw bale gardens, on the other hand, allow excess water to drain quickly, reducing the risk of waterlogged soil.
Straw bale gardening also offers increased accessibility for gardeners with mobility issues or those who have difficulty bending or kneeling. The bales are typically placed at waist height, making it easier to plant and maintain your garden without having to strain yourself. This makes straw bale gardening an ideal option for people of all ages and abilities.
Comparison with Container Gardening
When it comes to gardening, there are several methods to choose from, each with its own set of benefits and drawbacks. Two popular options are straw bale gardening and container gardening. While both can be effective ways to grow plants, they have some key differences.
Straw bale gardening is a unique method that uses decomposing straw as the growing medium for your plants. This method has several advantages over traditional container gardening. For one, straw bales are typically cheaper than buying pots or planters. Additionally, straw bales can hold more weight and moisture than containers, making them ideal for larger plants.
Container gardening, on the other hand, is a more traditional method that uses pots or planters to grow plants. This method has its own set of advantages, such as being portable and easy to move around. However, it also requires more frequent watering and fertilizing due to the limited soil capacity.
Ultimately, the choice between straw bale gardening and container gardening comes down to personal preference and your specific needs. If you’re looking for a cost-effective and low-maintenance option, straw bale gardening may be the way to go.
Environmental Impact of Straw Bale Gardening
When you opt for straw bale gardening, you’re not only providing an effective and efficient way to grow your plants, but also contributing to a more environmentally friendly approach. One of the most significant eco-friendly aspects of using straw bales is that they help reduce waste.
Typically, traditional farming methods result in a substantial amount of crop residue and other organic materials being discarded as waste. In contrast, straw bale gardening utilizes this material for growing plants, thereby reducing the need to dispose of it. This not only minimizes landfill waste but also reduces the carbon footprint associated with transportation and disposal.
Another advantage is that straw bales require minimal maintenance compared to traditional soil-based gardens. Since they’re made from natural, biodegradable materials, there’s less risk of chemical contamination or pollution. Additionally, because you don’t need to till or aerate the soil in a straw bale garden, it helps preserve moisture and reduces soil erosion.
You can also repurpose old straw bales by composting them at the end of their life cycle, which further contributes to reducing waste and promoting sustainability.
Preparing Straw Bales for Planting
Before we get started, make sure you understand how to properly prepare your straw bale to ensure optimal soil quality and healthy plant growth. This process may seem daunting at first, but don’t worry, it’s easier than you think!
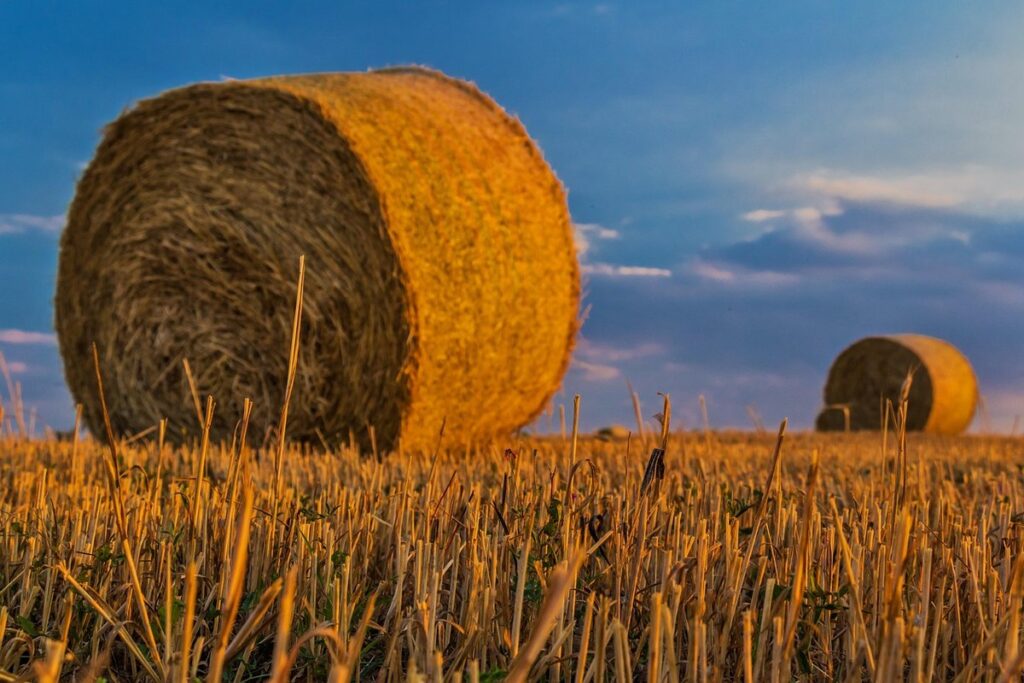
Choosing the Right Type of Straw
When selecting high-quality straw bales for planting, it’s essential to consider several factors that will impact their performance and longevity. One crucial aspect is moisture content. You want to choose bales with a low to moderate moisture level, around 10-15%. Bales that are too wet can lead to mold and mildew growth, while those that are too dry may not retain enough water for healthy plant growth.
Another factor to consider is the size of the bales. Generally, smaller bales (around 3-4 feet long) work best for most gardeners. They’re easier to handle and can be more evenly soaked with water. Larger bales can be used as well, but they may require more effort to manage.
The age of the straw is also important. Look for bales that are fresh, preferably from the current year’s harvest. Older straw can harbor weed seeds or pests, which can then spread to your garden. When selecting bales, inspect them carefully and choose ones with minimal visible debris and a uniform texture.
Conditioning the Straw Bale
To condition the straw bale properly, you’ll need to go through three crucial stages: soaking, drying, and monitoring temperature and pH levels. Start by submerging the entire bale in water for about 30 minutes to an hour. This will help loosen up any compacted fibers and make it easier for plants to grow.
Next, place the soaked bale on its side in a well-ventilated area where it can dry out completely. It’s essential to allow the bale to air-dry for at least 24 hours before using it for planting. This will help prevent any potential mold or mildew growth that might occur if the bale is still damp.
As you wait for the bale to dry, keep an eye on its temperature and pH levels. The ideal temperature for a conditioned straw bale ranges between 50°F and 70°F (10°C and 21°C). You can check the temperature by inserting a thermometer into the bale. As for pH levels, aim for a slightly acidic environment with a reading of around 6.0 to 7.0.
Monitor your bale regularly to ensure it’s not too hot or cold for planting. A well-conditioned straw bale should be able to support plant growth without causing any stress. By following these simple steps and keeping an eye on temperature and pH levels, you’ll have a healthy and thriving straw bale ready for planting in no time.
Planting in Straw Bales: Tips and Tricks
When planting in straw bales, it’s essential to consider optimal planting times to ensure healthy growth. Generally, spring and fall are ideal seasons for planting in straw bales, as the temperatures are mild and there is ample moisture in the air. If you’re planting in the summer, make sure to provide extra care, such as regular watering and mulching, to protect your plants from heat stress.
To maintain soil health in straw bales, it’s crucial to water them regularly but avoid overwatering, which can lead to rot and other issues. Aim for about 1-2 inches of water per week, either through rainfall or irrigation. Another strategy is to add organic matter like compost or well-rotted manure to the bale to improve its fertility.
In terms of spacing guidelines, plant your seedlings or seeds at a density that suits the specific variety’s requirements. A good rule of thumb is to leave about 6-8 inches between each plant for optimal growth and air circulation. By following these tips, you’ll be well on your way to successfully growing plants in straw bales.
Common Challenges and Solutions
As you begin your sustainable gardening journey with straw bales, it’s essential to be aware of common challenges that can arise, along with some practical solutions.
Pests and Diseases in Straw Bale Gardens
When growing plants in straw bale gardens, it’s essential to be aware of the potential pests and diseases that can affect them. One common issue is slugs and snails, which can cause significant damage to leaves and stems. To control these pests, you can use natural deterrents like copper tape around plant pots or crushed eggshells near the base of plants. You can also try introducing beneficial insects, such as ladybugs or lacewings, which feed on slugs and snails.
Another common problem is fungal diseases, which thrive in moist environments. To prevent these issues, ensure good air circulation around your straw bales by leaving space between them. Regularly inspect your plants for signs of disease like yellowing leaves or black spots. If you notice any problems, remove affected areas to prevent the spread of disease.
Root maggots can also be a concern in straw bale gardens, particularly when growing Brassica family members like cabbage and broccoli. To control these pests, use row covers or fine mesh bags around individual plants. Regularly inspect your plants for signs of root maggot damage and remove affected areas to prevent the spread of disease.
Keep in mind that prevention is key to maintaining a healthy straw bale garden. Use organic mulch around your straw bales to regulate moisture levels and suppress weed growth. By taking these precautions, you can minimize the risk of pests and diseases affecting your plants.
Maintaining pH Levels and Nutrient Balance
Monitoring pH levels and nutrient balance is crucial for optimal plant growth in straw bale gardens. Straw bales, being an organic and porous material, can easily absorb and retain water, which can lead to a buildup of acidity over time. If left unchecked, this acidity can stunt plant growth or even kill your plants.
To maintain a healthy pH level, it’s essential to monitor the soil regularly using a pH meter or testing kit. Aim for a slightly acidic to neutral pH range (6.0-7.0). You can adjust the pH by adding organic matter like compost or well-rotted manure to raise the pH, or sulfur-based products to lower it.
In addition to monitoring pH levels, nutrient balance is also vital. Straw bales are poor in nutrients and will need regular fertilization. Use a balanced fertilizer (10-10-10 NPK) once a month during the growing season. You can also side-dress with high-phosphorus fertilizers to promote healthy root development.
Remember, maintaining optimal pH levels and nutrient balance requires ongoing monitoring and adjustments. By doing so, you’ll ensure your straw bale garden thrives and produces abundant harvests.
Overcoming Watering Challenges
When working with straw bales for sustainable gardening, managing water absorption and retention can be a challenge. This is because straw has low water-holding capacity, making it prone to drying out quickly. To avoid overwatering, start by monitoring the moisture levels of your straw bale gardens regularly. You can do this by gently squeezing the straw; if it feels dry, it’s time to water.
To promote better water retention in straw bales, you can mix in some organic matter like compost or well-rotted manure. This will help improve the soil structure and increase its ability to hold onto moisture. Another strategy is to use a drip irrigation system, which delivers water directly to the roots of the plants, reducing evaporation and runoff.
Aim to water your straw bale gardens when the top 1-2 inches of the straw feel dry to the touch. This will help prevent overwatering while ensuring the plants receive enough moisture to thrive. By implementing these strategies, you can successfully manage water absorption and retention in your straw bale gardens and keep them healthy and productive throughout the growing season.
Designing a Sustainable Straw Bale Garden
Now that you’ve learned the basics of straw bale gardening, it’s time to dive into designing your own sustainable garden. This section will cover the key principles and techniques for crafting a thriving and eco-friendly space.
Maximizing Space and Yield
When designing a straw bale garden, maximizing space and yield is crucial to get the most out of this sustainable gardening method. One effective way to do this is by incorporating vertical gardening techniques into your design.
Consider using trellises or obelisks to support climbing plants like peas, beans, and cucumbers. These plants will not only add height but also provide shade for other plants beneath them, reducing water loss through evaporation. Make sure to leave enough space between the supports for air circulation and easy maintenance.
Companion planting is another strategy to maximize yield in a straw bale garden. By placing certain plants together, you can enhance growth, deter pests, or improve soil health. For example, plant marigolds with tomatoes to repel nematodes, or place basil alongside lettuce to improve its flavor.
To further optimize your space, try intercropping – planting multiple crops in the same bed. This will not only increase yield but also reduce waste and make the most of the limited space available in a straw bale garden. Some popular combinations include planting leafy greens like lettuce and kale with herbs like mint or parsley, which can be harvested continuously to ensure year-round productivity.
Incorporating Companion Planting Strategies
When designing a sustainable straw bale garden, incorporating companion planting strategies is a game-changer. By strategically selecting plants to grow alongside each other, you can create a thriving ecosystem that promotes pest control, pollination, and nutrient sharing.
Companion planting is all about understanding the relationships between different plant species and using this knowledge to your advantage. For example, basil repels pests like aphids and whiteflies, making it an excellent companion for tomatoes and lettuce. Marigolds, on the other hand, repel nematodes and attract beneficial insects that prey on pests. By planting these pest-repellent flowers alongside your vegetables, you can reduce the need for pesticides.
Pollination is another key benefit of companion planting. Certain plants, like borage and comfrey, are rich in nectar and pollen, making them a magnet for bees and butterflies. These beneficial insects will then pollinate nearby crops, increasing yields and improving fruit set.
Incorporating nutrient-sharing companions is also essential. Plants like legumes (beans, peas, lentils) have nodules on their roots that fix nitrogen from the air into the soil, enriching it for nearby plants. This can be especially beneficial in straw bale gardens, where nutrients may be limited due to the bales’ initial lack of soil fertility.
To get started with companion planting in your straw bale garden:
* Research plant profiles and their benefits
* Choose a mix of pest-repellent flowers, pollinator-friendly plants, and nutrient-sharing companions
* Plant these companion species around your vegetables, taking care not to overcrowd the space
* Monitor and adjust your companion planting strategy as needed, keeping an eye on which plants are working well together
Creating a Thriving Ecosystem
Creating a thriving ecosystem in a straw bale garden is crucial for its long-term health and productivity. To achieve this balance, we need to introduce beneficial insects, microorganisms, and other organisms that will help maintain the soil’s fertility and defend against pests.
Start by adding compost tea or worm casting to your straw bales. These liquid fertilizers are rich in beneficial microbes that will colonize the bale’s interior, breaking down organic matter and increasing nutrient availability. You can also introduce beneficial insects like ladybugs, lacewings, or parasitic wasps, which feed on pests and help regulate their populations.
To attract pollinators like bees and butterflies, plant a diverse range of flowers around your straw bales. These will not only provide nectar but also host plants for various beneficial insects. For example, marigolds repel nematodes and attract beneficial nematodes, while nasturtiums deter aphids and whiteflies.
Incorporating these elements into your straw bale garden will create a balanced ecosystem that promotes soil health, biodiversity, and pest resilience. By doing so, you’ll reduce the need for synthetic fertilizers and pesticides, creating a more sustainable and self-sufficient gardening system.
Expanding Your Straw Bale Garden
Now that you’ve successfully grown your first crop of straw bale garden goodness, it’s time to think about expanding your space and getting creative with new ideas! This section shares tips on how to scale up your straw bale garden.
Replicating Success with New Bales
As you begin to expand your straw bale garden, replicating the success of your original bales is crucial. To achieve consistent results with new bales, it’s essential to establish a similar setup and environment as the first ones. Start by selecting high-quality straw that has not been treated with chemicals or pesticides. This will ensure that the bales are free from contaminants and won’t harm your plants.
To replicate the initial moisture levels, begin by soaking the new bales in water for 24-48 hours before placing them in their designated location. This helps to achieve an optimal balance of water retention and aeration within the straw. Next, make sure the bales are spaced evenly apart, allowing for good air circulation between each one.
Avoid overcrowding the garden beds, as this can lead to fungal growth and reduced yields. Instead, plant companion crops that complement each other in terms of growth habits and space requirements. For example, planting a nitrogen-fixing legume like beans alongside tomatoes can improve soil fertility while reducing the need for external fertilizers.
Scaling Up: Ideas for Large-Scale Gardening
Scaling up your straw bale garden can be an exciting yet daunting prospect. As you consider expanding to larger plots or even community projects, it’s essential to weigh the benefits and challenges that come with scaling up.
One of the primary benefits of large-scale straw bale gardening is the increased yield and productivity. By using a more efficient layout and incorporating mechanized tools, you can harvest multiple crops simultaneously while reducing labor costs. For instance, a large community garden in California successfully implemented a straw bale system that produced over 10,000 pounds of produce per year.
However, scaling up also presents unique challenges. Soil erosion and water management become more pressing concerns as plots expand. Regular maintenance tasks like mulching and watering must be optimized to accommodate larger areas. To address these issues, consider implementing terracing or contour farming techniques to reduce soil runoff and improve water retention.
When transitioning to a large-scale straw bale garden, remember to plan carefully for infrastructure, including irrigation systems and tool storage. Collaborate with fellow gardeners to share resources and expertise, ensuring that your project remains sustainable and environmentally conscious.
Sharing Your Knowledge with Others
Sharing your knowledge with others is an essential part of expanding your straw bale garden. Not only does it help to spread awareness about sustainable gardening practices, but it also allows you to connect with like-minded individuals and build a community around your passion.
If you’re interested in teaching others about straw bale gardening, consider leading workshops or classes at local nurseries, community centers, or even online. You could also invite experienced gardeners to share their own tips and tricks, creating a collaborative learning environment that benefits everyone involved. To make the most of these sessions, be sure to prepare engaging materials, such as handouts, diagrams, and visual aids, to help participants understand complex concepts.
Leading garden tours is another great way to share your knowledge with others. Invite friends, family, or like-minded individuals to visit your straw bale garden and learn about its unique features, benefits, and challenges. This can be a wonderful opportunity to connect with people on a personal level, answer their questions, and showcase the beauty of sustainable gardening.
You could also create online resources, such as videos, podcasts, or blog posts, to reach a wider audience and share your expertise with gardeners around the world. By doing so, you’ll not only be spreading knowledge but also contributing to the global conversation on sustainable gardening practices.
Frequently Asked Questions
What is the ideal temperature range for conditioning straw bales?
The ideal temperature range for conditioning straw bales is between 60°F to 80°F (15°C to 27°C). This allows for optimal microbial activity and decomposition, which helps to break down the carbon in the straw. Keep in mind that temperatures outside of this range can slow down or even stop the conditioning process.
Can I use straw bales from my local farm or agricultural waste?
Yes, using straw bales from your local farm or agricultural waste is a great way to reduce waste and support sustainable practices. However, make sure the straw is free from any contaminants like pesticides, heavy metals, or weed seeds that could harm your plants.
How often should I water my straw bale garden during hot summer months?
During hot summer months, it’s essential to keep the soil consistently moist but not waterlogged. Check the top inch of the straw bale daily and water when necessary. A good rule of thumb is to provide about 1-2 gallons of water per bale per day.
Can I use companion planting strategies in a straw bale garden?
Yes, companion planting can be highly effective in a straw bale garden. Since the bales are isolated units, you can experiment with different combinations of plants that benefit from each other’s growth habits and pest-repellent properties. Research and choose compatible plant species to create a thriving ecosystem.
What is the typical lifespan of a straw bale garden?
The typical lifespan of a straw bale garden varies depending on factors like weather conditions, maintenance, and crop rotation. On average, a straw bale can support 2-3 growing seasons before it breaks down and needs to be replaced. Regular monitoring and conditioning can help extend its lifespan.