Strawberry lovers rejoice! Do you want to multiply your favorite fruit without breaking the bank? Propagating strawberries using their natural runners is a cost-effective and efficient way to expand your strawberry patch. Not only can it help you save money on new plants, but it also ensures that your homegrown berries are disease-free and tailored to your local climate. If you’re eager to learn how to propagate strawberries like a pro, you’ve come to the right place. In this article, we’ll delve into the preparation process, explore two simple propagation methods, and provide expert tips on aftercare for a bountiful harvest. From identifying healthy runners to transplanting new plants, we’ll cover everything you need to know to successfully propagate strawberries using their natural runners.
Introduction to Strawberry Runners
Welcome to our comprehensive guide on strawberry runners propagation, and let’s start by diving into what strawberry runners are and how they can be used for plant reproduction.
What are Strawberry Runners?
When it comes to growing strawberries, you may have come across terms like “strawberry runners” or “daughter plants.” But what exactly are strawberry runners? In simple terms, strawberry runners are long stems that grow from the mother plant and produce new roots at their tips. These stems can stretch out up to 3 feet (90 cm) or more, allowing the plant to spread its roots and establish itself in a new location.
Strawberry runners differ significantly from other types of strawberry propagation methods, such as seed planting or division. Runners allow you to multiply your existing strawberry plants quickly and easily, without having to purchase new seeds or seedlings. This method is not only cost-effective but also ensures that the new plants will have the same characteristics as the mother plant, including its flavor, texture, and disease resistance.
One of the key benefits of using strawberry runners for propagation is that they can be used to create a new patch of strawberries in just a few weeks. By allowing the runners to root themselves, you can establish a thriving strawberry bed without having to wait months for seeds to germinate or seedlings to mature.
Benefits of Using Runners for Propagation
Using strawberry runners for propagation offers numerous advantages that make it an attractive option for growers. One of the primary benefits is cost-effectiveness. By using existing mother plants to produce new runners, you can significantly reduce the need for purchasing new seeds or seedlings. This approach not only saves you money but also ensures a consistent quality of plants.
Another significant advantage of using strawberry runners is ease of use. The process is relatively simple and requires minimal equipment. You can easily create new plants by allowing the mother plant to produce multiple runners, which can then be separated and planted individually. This method also allows for rapid multiplication of your favorite varieties, enabling you to expand your growing operations quickly.
In addition, using strawberry runners helps reduce waste and increases efficiency in your propagation process. By reusing existing plants, you minimize the need for new soil, fertilizers, and other resources, making it an environmentally friendly option as well.
Preparing the Runners for Propagation
Now that you’ve harvested your strawberry runners, it’s time to prepare them for propagation. This step is crucial to ensure healthy roots and a successful transplant process.
Harvesting Healthy Runners
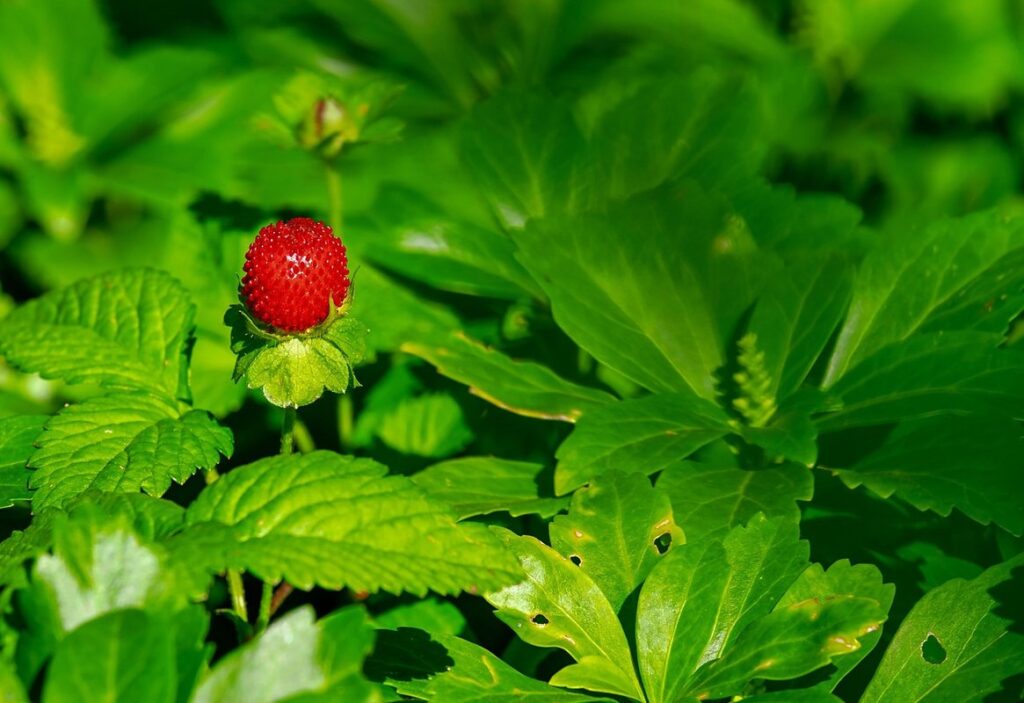
Identifying healthy strawberry runners is crucial for successful propagation. When selecting runners, look for those with at least two sets of leaves and a well-developed crown. Avoid damaged or diseased runners as they may not produce healthy plants.
The ideal time to harvest runners depends on the season and climate. In warmer climates, you can harvest year-round, while in cooler areas, it’s best to wait until late spring to early summer when the plant is actively growing. Harvest the runner by cutting it at a 45-degree angle just above a node, taking care not to damage the crown.
To prepare the harvested runners for propagation, trim any weak or spindly growth from the tips and cut the leaves back to about an inch from the crown. This will encourage new growth and help prevent water loss during rooting.
Storing Runners for Later Use
When you’re not ready to propagate your strawberry runners immediately, it’s essential to store them properly to maintain their viability. This is a crucial step in the propagation process, as improper storage can lead to reduced success rates.
One effective method for storing strawberry runners is air-drying. Begin by gently brushing off any excess soil from the stems to prevent moisture buildup. Then, tie the runners together in small bundles using twine or rubber bands, leaving enough space between each bundle for air circulation. Place the bundles in a dry, cool location away from direct sunlight. Air-dried strawberry runners can be stored for up to 2 weeks.
For longer-term storage, refrigeration is an excellent option. Wrap the strawberry runners loosely in plastic wrap or aluminum foil and place them in a sealed bag or container. Store this package in the refrigerator at temperatures between 32°F (0°C) and 40°F (4°C). This method can extend storage life to several weeks.
It’s crucial to check on stored strawberry runners regularly for signs of rot or mold, removing any affected areas promptly to maintain their viability. By following these air-drying and refrigeration techniques, you’ll be able to store your strawberry runners effectively until it’s time to propagate them.
Propagation Methods Using Strawberry Runners
To successfully propagate strawberries using runners, you’ll need to learn how to identify and separate them properly. This process will help multiply your favorite varieties.
Water Method: Rooting Strawberry Runners in Water
The water method is another popular way to root strawberry runners. This technique involves placing the cut end of the runner into a container filled with water, where it can develop roots before being transferred to soil. To prepare the cutting, simply trim off the lower leaves and dip the stem end into rooting hormone powder or liquid to enhance the chances of successful propagation.
Next, fill a clear glass or plastic container with lukewarm water (around 20-25°C). Make sure the water level is just below the node – the point where the leaf meets the stem. Place the prepared cutting into the water, ensuring that the node remains above the waterline. Roots should start to emerge within 1-3 weeks, and you’ll know they’ve developed successfully when they reach around 2-5cm in length.
For successful propagation using the water method, it’s essential to provide optimal conditions. Keep the water fresh and change it every 7-10 days to prevent bacterial growth. Also, maintain temperatures between 15°C and 25°C (59°F – 77°F), as strawberry plants prefer these temperatures for rooting. By following these steps and providing the right environment, you can successfully root your strawberry runners using the water method.
Soil Method: Planting Strawberry Runners in a Potting Mix
When planting strawberry runners using the soil method, selecting the right potting mix is crucial for successful propagation. A well-draining and fertile mix specifically designed for strawberries will provide the necessary nutrients and moisture levels for optimal growth. Avoid using regular garden soil as it may compact over time and cause root rot.
For this method, aim to maintain a consistent moisture level in the potting mix, keeping it slightly damp but not waterlogged. A good rule of thumb is to check the soil daily and add water only when the top inch feels dry to the touch. Aim for temperatures between 65°F to 70°F (18°C to 21°C) during the day and around 55°F (13°C) at night, as this will promote healthy root development.
It’s also essential to plant the strawberry runners at a depth of about an inch below the soil surface, with the crown (where the leaves meet the stem) above ground level. This allows for optimal root growth while minimizing the risk of fungal diseases that thrive in moist environments. By following these guidelines and providing suitable growing conditions, you can increase your chances of successful strawberry propagation using this method.
Aftercare and Transplanting
Now that you have successfully propagated strawberry runners, it’s time to learn how to care for them and transplant them into their new home. Proper aftercare and transplantation techniques will ensure healthy growth and maximum yields.
Providing Optimal Conditions for New Plants
After propagating strawberry runners, it’s essential to provide optimal conditions for new plants to thrive. This period is critical for establishing a strong root system and promoting healthy growth.
Watering newly propagated strawberry plants requires careful attention. Make sure the soil isn’t too wet or dry, as this can cause root rot or shock. Water gently but thoroughly, allowing excess moisture to evaporate before covering the pot with a clear plastic bag. This creates a mini-greenhouse effect, maintaining humidity and encouraging healthy growth.
Fertilize your newly propagated strawberry plants regularly, using a balanced fertilizer (10-10-10 N-P-K) during the first month after transplanting. Avoid over-fertilizing, as this can damage young roots.
Pruning techniques also play a crucial role in promoting healthy growth and fruit production. Remove any weak or damaged runners to encourage bushy growth and direct energy towards producing new flowers and fruits.
Transplanting Strawberry Runners into Outdoor Beds
When transplanting strawberry runners into outdoor beds, it’s essential to take some precautions to ensure their success. Start by selecting a location with full sun and well-draining soil, as strawberries prefer these conditions. If your outdoor bed has heavy clay or sandy soil, mix in some organic matter like compost to improve its structure.
Dig holes that are about 6-8 inches deep, spacing them 12-18 inches apart. Gently remove the strawberry runners from their pots and place them in the holes, making sure the crown (where the leaves meet the roots) is level with the soil surface. Firm the soil around the plants to secure them in place.
Keep in mind that strawberries are sensitive to extreme temperatures and wind. If you live in an area with harsh weather conditions, consider providing some protection for your transplanted runners. Water them thoroughly after transplanting and maintain consistent moisture levels during their first few weeks in the outdoor bed. This will help them establish a strong root system and ensure a bountiful harvest.
Common Challenges and Troubleshooting
As you start propagating strawberry runners, you may encounter some common issues that can hinder your progress. This section will walk you through troubleshooting these problems.
Identifying Potential Problems During Propagation
During strawberry runner propagation, several potential problems can arise that may hinder successful growth. One common issue is poor rooting, which occurs when the new plant fails to develop a robust root system. This can be caused by inadequate water supply, excessive temperatures, or insufficient light exposure. To address this challenge, ensure that your strawberry runners are receiving sufficient moisture and maintain a consistent temperature between 15-20°C (59-68°F). It’s also essential to provide enough light for the new plants, as direct sunlight for at least six hours daily is recommended.
Another issue you might encounter is pest infestations. Common pests affecting strawberry runners include aphids, spider mites, and slugs. To prevent these issues, maintain a clean environment by regularly inspecting your plants for signs of infestation. Use neem oil or insecticidal soap to treat any detected pests, following the product’s instructions carefully.
Regular monitoring and addressing potential problems promptly are crucial in ensuring successful strawberry runner propagation. By staying attentive to your plants’ needs and being prepared to tackle common issues that may arise, you’ll be better equipped to overcome challenges and achieve optimal results with your strawberry runner propagation efforts.
Preventing Diseases in Strawberry Plants
Diseases can significantly impact the health and productivity of strawberry plants, especially when propagated through runners. Two of the most common diseases affecting strawberries are powdery mildew and botrytis.
Powdery mildew is a fungal disease that causes a white or grayish coating on the leaves and stems of infected plants. To prevent this, ensure good air circulation around your strawberry plants by keeping them spaced at least 12-18 inches apart. Regularly inspect your plants for signs of powdery mildew and remove any affected areas immediately.
Botrytis is another fungal disease that can lead to a soft rot in the plant’s crown and runners. This is often caused by excess moisture, so ensure your strawberry plants are not waterlogged. Avoid overhead watering and instead use drip irrigation systems or soaker hoses to deliver water directly to the roots.
By following these simple hygiene practices, you can significantly reduce the risk of disease in your strawberry plants and promote a healthy growth environment for successful propagation.
Conclusion: Successfully Propagating Strawberry Runners
Congratulations, you’ve made it through our comprehensive guide on strawberry runners propagation! By now, you should feel confident and equipped with the knowledge to successfully propagate your own strawberry plants using this simple yet effective method. Remember to choose healthy parent plants, remove lower leaves, and plant the runners at least 1-2 inches deep in a well-draining mix. With proper care and attention, these new plants will begin to produce their own runners within a few weeks.
As you continue to propagate more strawberry plants, don’t be afraid to experiment with different varieties and growing conditions. Keep in mind that some strawberry types are more suitable for propagation using this method than others. By following the tips and techniques outlined in our guide, you’ll be able to enjoy a bountiful harvest of fresh strawberries from your very own garden. Happy propagating!
Frequently Asked Questions
Can I propagate strawberries using runners that have already produced flowers?
Yes, you can still use strawberry runners with flowers for propagation, but the new plants might take longer to mature as they’ll start their growth from a more advanced stage. Make sure to remove any excess flower buds or seed heads before planting the runner to direct the plant’s energy towards root development.
How long do I need to wait between harvesting healthy runners and transplanting them?
It’s recommended to wait at least 2-3 weeks after harvesting a healthy strawberry runner before transplanting it. This allows the new roots to establish themselves, making the plant more resilient when transplanted into its new environment.
What’s the ideal temperature for storing strawberry runners in water or soil?
For optimal storage, keep the temperature between 40°F (4°C) and 50°F (10°C). Avoid exposing stored runners to direct sunlight or extreme temperatures that might cause root damage or delay germination.
Can I use strawberry runners from plants grown using seed?
While you can propagate strawberries using runners from plants grown using seeds, it’s essential to note that the resulting new plants may not retain all the desirable traits of your original plant. Runner propagation tends to produce more consistent results when starting with established, high-quality mother plants.
How often should I check on newly planted strawberry runner seedlings for signs of disease?
Regularly inspect your newly transplanted strawberry runner seedlings every 2-3 days during the first week after planting. Look out for yellowing leaves, black spots, or unusual growth patterns that might indicate potential problems. Address any issues promptly to prevent disease from spreading and affecting your crop’s overall health.