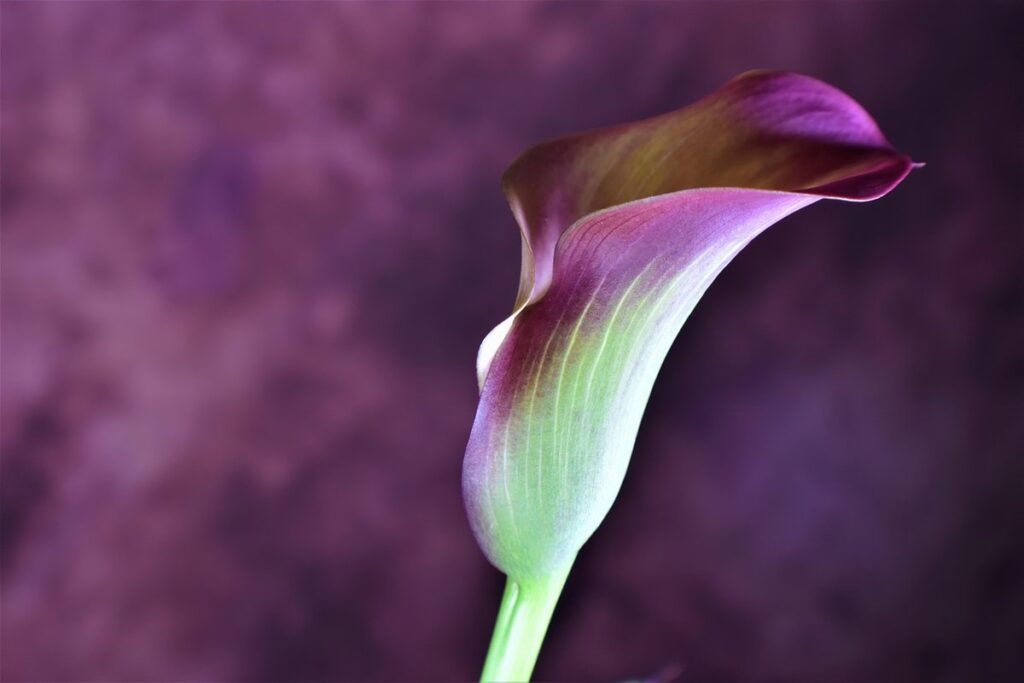
Storing calla lily bulbs over winter is a crucial step in keeping these beautiful flowers thriving year after year. Many gardeners love calla lilies for their elegant white blooms and ability to add drama to any arrangement, but few know how to properly care for them during the off-season. When not stored correctly, calla lily bulbs can rot or become damaged, making it difficult to coax new growth in the spring. In this article, we’ll walk you through a comprehensive guide on how to dry, clean, and store your calla lily bulbs over winter, ensuring they remain healthy and ready to bloom come next season.
Choosing the Right Storage Method
Now that you’ve learned how to prepare your calla lily bulbs for storage, it’s time to choose the right method to keep them safe over winter. This is where selecting a suitable container and location comes into play.
Drying vs. Not Drying the Bulbs
Drying calla lily bulbs before storage is an essential step to prevent rot and ensure their survival over winter. If you skip this process, the bulbs may develop soft spots, become vulnerable to pests, and even die. To dry the bulbs effectively, start by gently removing any excess soil from the base of the bulb, taking care not to damage the delicate scales.
Next, place the bulbs on a wire rack or paper towels in a single layer, allowing for good air circulation around each one. You can also hang them upside down in a cool, dry, dark place with a temperature between 40°F and 50°F (4°C and 10°C). Keep an eye out for any signs of moisture or mold; if you notice this, gently remove the affected bulb to prevent it from spreading.
Allow the bulbs to dry completely, which can take anywhere from two to six weeks, depending on their size and moisture level. It’s crucial not to rush this process, as forcing the drying time can cause the scales to crack and leave the bulb vulnerable to rot in storage. Once dry, your calla lily bulbs will be ready for winter storage, ensuring they remain healthy and ready for spring planting.
Using a Cool, Dark Place for Short-Term Storage
When it comes to storing calla lily bulbs over winter, using a cool, dark place is an ideal solution. This method allows you to keep the bulbs dormant and ready for spring planting. A cool, dark location slows down the metabolic processes of the bulb, reducing water loss and preventing rot.
To choose the right location, consider a spot with consistent temperatures between 40°F to 50°F (4°C to 10°C). Avoid areas near heating vents or radiators, as they can dry out the bulbs. A basement or an unheated garage is perfect for storing calla lily bulbs. If you don’t have such a space, look for a shaded area in your home, away from direct sunlight.
Make sure to store the bulbs in a breathable container, like a mesh bag or a paper bag, to maintain airflow and prevent moisture buildup. Keep them off the floor and away from any potential water sources. With proper storage in a cool, dark place, you can enjoy healthy calla lily blooms come springtime.
Preparing the Bulbs for Long-Term Storage
Now that you’ve harvested your calla lily bulbs, it’s time to prepare them for a long winter’s nap, which means drying and cleaning the tubers is essential. This process will prevent rot and ensure healthy growth come spring.
Cleaning and Disinfecting the Bulbs
Before storing calla lily bulbs over winter, it’s essential to clean and disinfect them to prevent disease and pests from damaging the bulbs. This process is crucial for maintaining the health of your calla lilies when you replant them next spring.
To start cleaning your calla lily bulbs, gently remove any soil or debris that has accumulated on their surface using a soft brush or a small, dry paintbrush. Be gentle to avoid scratching the bulb’s skin. Next, mix one part of white vinegar with nine parts water in a spray bottle. Spray the solution onto the bulb, making sure to cover all surfaces evenly.
Allow the solution to sit for about 10-15 minutes to help loosen any dirt or debris. Then, use a soft-bristled brush to gently scrub away any remaining impurities. Rinse the bulb with clean water and let it air dry completely before storing. This process not only cleans the bulbs but also helps prevent fungal diseases from developing over winter.
Trimming and Drying the Rhizomes
Trimming and drying the rhizomes is an essential step to prepare calla lily bulbs for long-term storage. This process helps prevent rot and decay, allowing the bulbs to remain healthy throughout winter. To begin, remove any dead or dying leaves from the rhizome, taking care not to damage the bulb itself.
Next, trim back the foliage to about 1-2 inches from the top of the rhizome using a sharp knife or pruning shears. This will help prevent moisture from accumulating and promote air circulation around the bulb. Then, lay the rhizomes out in a well-ventilated area, making sure they are not touching each other.
It’s crucial to allow the rhizomes to dry for 2-3 weeks before storing them. You can speed up this process by placing them in a warm, dry location with good air circulation. Monitor their progress regularly, checking on them every few days to ensure they’re drying evenly. Once the rhizomes are completely dry and hard to the touch, you can store them in a cool, dark place until spring.
Choosing the Right Storage Medium
When it comes to storing calla lily bulbs over winter, choosing the right storage medium is crucial for their survival and health. You’ll want to consider materials that are breathable, moisture-resistant, and gentle on the bulbs.
Using Potting Mix or Perlite
When it comes to storing calla lily bulbs over winter, using a potting mix or perlite as a storage medium is a common practice. Both options have their pros and cons, which are worth considering before making a decision.
Potting mix can be an effective choice for storing calla lily bulbs. It provides good aeration, retains moisture, and prevents rotting. However, it can also break down over time, releasing excess moisture that may cause mold or fungal growth. To avoid this issue, look for potting mixes specifically designed for bulb storage, which tend to be more durable.
Perlite, on the other hand, is a popular choice among gardeners due to its excellent drainage properties and ability to retain moisture without breaking down. It’s also lightweight and easy to transport. However, perlite can be too drying if used alone, potentially leading to dehydration of the bulbs. Mixing perlite with a potting mix or using it in conjunction with other materials like peat moss can help balance its effects.
In practice, a combination of both potting mix and perlite often yields the best results. For instance, you can create a 50:50 mix of potting mix and perlite to achieve optimal moisture retention while preventing excessive waterlogging.
Creating a Moisture-Controlled Environment
To create a moisture-controlled environment for storing calla lily bulbs over winter, you’ll want to use materials that can hold just the right amount of moisture. Peat moss is an excellent choice as it retains water well but also dries out relatively quickly, preventing root rot. Vermiculite is another good option, as it’s lightweight and allows for good air circulation while maintaining a consistent level of humidity.
You can mix peat moss or vermiculite with sand to create a blend that suits your needs. A general rule of thumb is to use 2/3 peat moss or vermiculite and 1/3 sand. This will provide the necessary moisture retention without causing the bulbs to rot. Make sure to moisten the medium before placing the bulbs in it, but avoid overwatering as this can lead to mold growth.
By using one of these materials, you’ll be able to create a microclimate that’s perfect for storing your calla lily bulbs over winter.
Tips for Successful Storage
To successfully store calla lily bulbs over winter, it’s essential that you follow a few key steps to prevent rot and damage. These tips will help ensure your bulbs stay healthy until spring.
Monitoring Temperature and Humidity Levels
Monitoring temperature and humidity levels is crucial when storing calla lily bulbs over winter. The ideal storage conditions for these bulbs are between 35°F to 45°F (2°C to 7°C), with a relative humidity of 40-50%. You can use a hygrometer to measure the humidity level in your storage area, ensuring it’s within this range.
Keep in mind that calla lily bulbs can be sensitive to extreme temperature fluctuations. Avoid storing them near heating or cooling vents, fireplaces, or drafty windows. Also, maintain a consistent temperature throughout the storage period to prevent any potential damage.
To maintain optimal humidity levels, you can use a humidifier or place the bulbs on a tray filled with water and pebbles. This will help maintain a stable moisture level without making the area too wet. Regularly check the storage conditions every few weeks to ensure they’re meeting the required standards. This proactive approach will help your calla lily bulbs survive the winter months and bloom beautifully in the spring.
Avoiding Overcrowding and Rot
When storing calla lily bulbs over winter, it’s essential to give them enough space to prevent overcrowding. This may seem counterintuitive, as you might think that packing the bulbs tightly together will help conserve space. However, this can lead to a buildup of moisture and increased risk of rot.
In fact, research has shown that even small increases in moisture levels can have devastating effects on bulb storage. A study by the Royal Horticultural Society found that storing bulbs at 90% humidity led to a significant increase in rot compared to 50% humidity.
To avoid overcrowding and promote healthy storage, make sure to leave about an inch of space between each bulb. You can also consider using ventilated containers or bags specifically designed for bulb storage. These will help regulate moisture levels and prevent the buildup of ethylene gas, which can contribute to rot. By giving your calla lily bulbs enough room to breathe, you’ll be taking a crucial step in ensuring their survival over winter.
Bringing the Bulbs Back to Life in Spring
As winter fades away, it’s time to bring your calla lily bulbs back to life, and we’ll walk you through a simple process to make that happen. This includes steps for prepping the soil and providing the right conditions.
Re-Hydrating the Bulbs After Storage
After several months of storage, it’s essential to re-hydrate your calla lily bulbs before planting them again. This process helps prevent shock and encourages the bulbs to grow strong and healthy.
To start, gently remove the calla lily bulbs from their storage containers or bags. Check for any signs of mold or rot – if you notice any, dispose of the bulb immediately. Gently brush off any dirt or debris from the bulbs using a soft-bristled brush. Next, submerge the bulbs in lukewarm water (around 75°F to 85°F) for several hours or overnight. This will help rehydrate the bulbs and prevent shock when you plant them.
When handling the bulbs, avoid sudden changes in temperature or humidity, as this can cause shock. It’s also essential to handle the bulbs by their base, rather than their delicate stem or leaves, to avoid damaging them.
After re-hydrating your calla lily bulbs, inspect them for any signs of damage or rot before planting. Discard any damaged bulbs and plant only those that appear healthy and vigorous.
Providing Proper Care for New Growth
When you start to see new growth emerging from your calla lily bulbs, it’s essential to provide the right conditions for them to thrive. New growth requires more light than established plants, so make sure they’re receiving at least 6 hours of direct sunlight per day. However, be cautious not to expose them to intense afternoon sun, especially if you live in a region with harsh summer conditions.
In terms of temperature, aim for daytime temperatures between 65-70°F (18-21°C) and slightly cooler nights around 55-60°F (13-15°C). Avoid placing your calla lily bulbs near heating vents or radiators, as this can cause them to dry out quickly. Watering is also crucial during this period. Allow the soil to dry slightly between waterings, but make sure not to let it become too parched.
By providing optimal light, temperature, and watering conditions, you’ll be able to encourage healthy new growth from your calla lily bulbs. Remember that young shoots are more susceptible to damage, so handle them gently when transplanting or pruning. With proper care, your calla lilies will continue to flourish throughout the growing season.
Frequently Asked Questions
What’s the ideal temperature range for storing calla lily bulbs?
Aim for a consistent temperature between 40°F (4°C) and 50°F (10°C). Avoid storing bulbs near heating vents, fireplaces, or other heat sources. If you live in an area with extreme cold snaps, consider insulating your storage container to maintain a stable temperature.
Can I store calla lily bulbs in their original potting mix?
While it’s tempting to reuse the same soil, it can harbor pests and diseases that may damage the bulbs over winter. Clean and disinfect the bulbs before storing them in a fresh medium specifically designed for bulb storage, such as perlite or vermiculite.
How often should I check on stored calla lily bulbs?
Regular monitoring is crucial to prevent overcrowding, rot, and pest infestations. Check your storage container every 4-6 weeks during the winter months to ensure the bulbs are not developing soft spots or mold. Make adjustments as needed to maintain a healthy environment.
Can I store calla lily bulbs in an unheated garage or shed?
While it’s possible to store bulbs in an unheated space, ensure it remains cool (around 40°F/4°C) and dry. Avoid areas with high humidity or where moisture accumulates. If you live in a region with freezing temperatures, consider moving the bulbs to a warmer location during extremely cold snaps.
How do I know if my calla lily bulbs have been damaged by pests?
Inspect your stored bulbs regularly for signs of pest activity, such as holes, tunnels, or frass (insect waste). If you notice any damage, isolate the affected bulb and treat it promptly with a suitable pesticide. Dispose of severely infested bulbs to prevent further contamination.