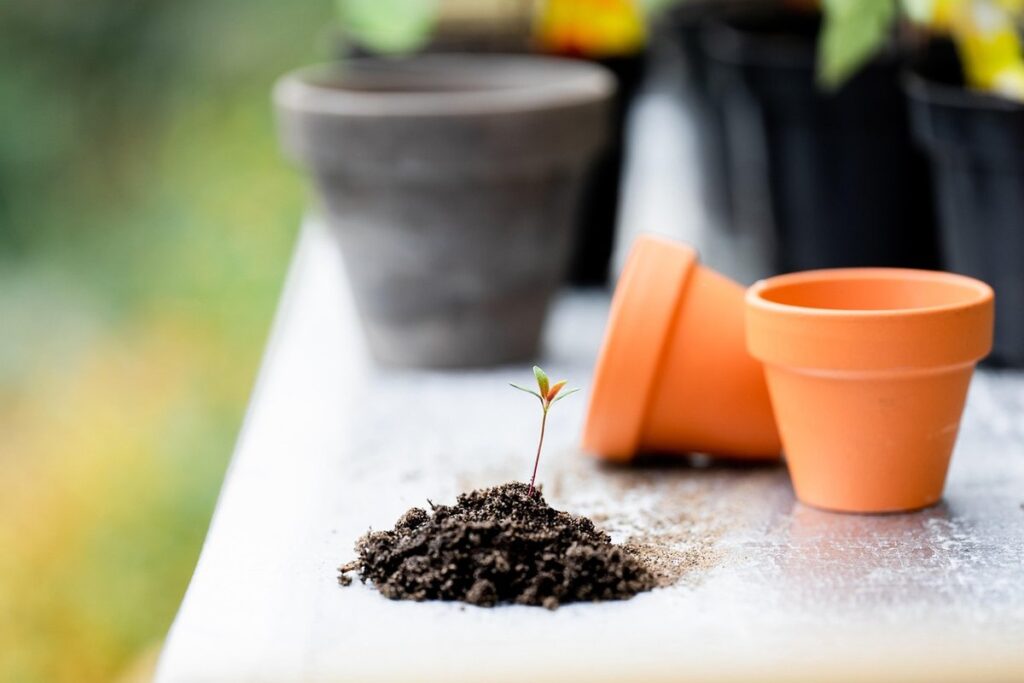
Sterilizing potting soil is an essential step in plant care, but many gardeners overlook this crucial process. Fungal diseases, root rot, and pest infestations can devastate even the healthiest-looking plants, turning a thriving garden into a disaster zone in no time. The good news is that sterilizing your potting soil can be done effectively with minimal effort. In this article, we’ll explore the best methods for heat treatment, chemical disinfection, and solar pasteurization to keep pests and diseases at bay. By learning how to properly sterilize your potting soil, you’ll be able to prevent costly mistakes and create a healthy environment for your plants to thrive in. Whether you’re a seasoned gardener or just starting out, this guide will walk you through the simple steps to ensure your potting soil is free from contaminants.
Understanding the Risks of Non-Sterile Potting Soil
Non-sterilized potting soil can harbor a multitude of microorganisms that can harm your plants and even contaminate the surrounding environment. In this section, we’ll explore these potential risks in more detail.
Contamination Sources in Potting Soil
Contaminants can lurk in potting soil from various sources. For instance, fungal spores can originate from decaying organic matter or contaminated equipment, while bacteria may come from infested insects, human touch, or unsterilized seed starting mixes. Fungi and bacteria are not just pests; they can also be pathogens that cause root rot, leaf spots, and other diseases.
Some pests like fungus gnats, spider mites, and thrips can contaminate potting soil by laying eggs in it. These tiny insects can spread plant viruses, cause nutrient deficiencies, and even transmit fungal infections to your plants. It’s not uncommon for new pots or packaging materials to harbor these micro-organisms.
To minimize contamination risks, always inspect the source of your potting mix. If you purchase a pre-mixed bag, ensure it has been properly stored in a dry place away from direct sunlight and moisture. Store excess potting soil in sealed containers or bags to prevent pests and contaminants from entering.
Effects of Unsterilized Potting Soil on Plant Health
Using unsterilized potting soil can have devastating effects on plant health. One of the most common issues is root rot, which occurs when fungi and bacteria in the soil infect the roots of your plants. This can lead to yellowing leaves, stunted growth, and eventually, the death of your plant. Fungal diseases such as damping off, leaf spot, and powdery mildew can also thrive in non-sterilized potting soil, causing significant damage to your plants.
In addition to these issues, unsterilized potting soil can harbor pests like nematodes, whiteflies, and spider mites. These pests can feed on the sap of your plants, weakening them and making them more susceptible to disease. Furthermore, non-sterilized potting soil can contain weed seeds, which can sprout in your container and compete with your desired plants for resources.
To avoid these problems, it’s essential to sterilize your potting soil before using it in your garden or indoor containers. You can do this by heating the soil to a temperature of at least 160°F (71°C) for several hours or using chemical disinfectants specifically designed for soil sterilization. By taking this simple step, you can ensure that your plants receive the best possible start in life and thrive in their new environment.
Importance of Sterilization for Sustainable Gardening
Sterilizing potting soil is not just a best practice for gardening enthusiasts; it’s also essential for sustainable gardening. When you sterilize your potting soil, you’re creating an environment that’s less conducive to the growth of weeds and pests. This reduces the need for pesticides and fungicides, which are harsh chemicals that can harm the very plants we’re trying to nurture.
By minimizing the use of these chemicals, you’re not only protecting the health of your garden but also contributing to a healthier ecosystem. Pesticides and fungicides can contaminate soil, water, and air, posing risks to humans, animals, and the environment as a whole.
To illustrate this point, consider that the US Environmental Protection Agency (EPA) estimates that more than 60% of all pesticides applied to crops are not actually needed. By using sterilized potting soil, you can significantly reduce your reliance on these chemicals and promote a more balanced gardening approach.
Methods for Sterilizing Potting Soil
To sterilize potting soil effectively, you’ll want to explore methods that involve heat, chemical treatment, and even solarization – we’ll break it down step by step.
Heat Treatment: Pasteurization and Autoclaving
When it comes to heat treatment for sterilizing potting soil, two popular methods are pasteurization and autoclaving. These processes involve exposing the soil to high temperatures to kill off pathogens and weed seeds.
Pasteurization involves heating the potting soil to a temperature of around 140°F (60°C) for at least 30 minutes. This process is often used for small batches or for materials that cannot withstand higher temperatures. For example, if you’re using a mixture of peat moss and perlite, pasteurizing might be a better option.
Autoclaving is more intense and involves heating the potting soil to temperatures between 270°F (130°C) and 300°F (150°C). This process can take anywhere from 30 minutes to an hour. Autoclaving is often used for larger batches or for materials that are more resistant to heat, such as coconut coir.
To give you a better idea of the effectiveness of these methods, studies have shown that autoclaving can reduce weed seeds by up to 99% and pasteurization by around 95%. Keep in mind that both methods require proper equipment and monitoring to ensure the soil reaches the required temperature.
Chemical Sterilization: Using Disinfectants and Fungicides
When it comes to chemical sterilization, disinfectants and fungicides can be effective tools for killing pathogens and fungi in potting soil. However, this method requires careful consideration and attention to potential risks.
Some popular disinfectants used for sterilizing potting soil include bleach, hydrogen peroxide, and quaternary ammonium compounds (quats). When using these chemicals, it’s essential to follow the recommended dilution ratios and application times to avoid overexposure. For instance, a 1:10 ratio of bleach to water is often effective against many pathogens.
However, chemical disinfection also poses some risks. Overuse or improper use can lead to soil degradation, reduced fertility, and even toxicity for plants. Additionally, chemicals may not penetrate the entire potting mix, leaving behind pockets of contamination.
To mitigate these risks, it’s crucial to choose a suitable disinfectant based on the type of pathogens present in your soil. For example, bleach is effective against bacteria and viruses but may not be as potent against fungi. Always read the product label carefully and follow safety guidelines when handling chemicals.
Solar Sterilization: Using the Sun’s Heat
Using the sun’s heat to sterilize potting soil is a simple and effective method that can be employed when you’re outdoors. This technique is known as solar pasteurization. To do this, place the potting soil in shallow containers, making sure they are uncovered and exposed to direct sunlight.
The sun’s UV rays will break down the microorganisms present in the soil, effectively sterilizing it. The duration of exposure depends on several factors such as temperature, humidity, and the type of pathogens you’re trying to eliminate. As a general rule, it’s recommended that the potting soil be exposed to direct sunlight for at least 4-6 hours.
It’s essential to keep in mind that this method may not be suitable for large quantities of soil or when you need quick results. However, if you’re working with small batches and have time to spare, solar pasteurization is an excellent option for sterilizing potting soil while also being eco-friendly.
Choosing the Right Sterilization Method
When it comes time to sterilize your potting soil, you need to consider a few factors to choose the right method for the job. This section will help guide you through that process.
Factors to Consider When Selecting a Sterilization Method
When selecting an appropriate sterilization method for potting soil, there are several key factors to consider. The availability and cost of equipment can be significant deciding factors. For instance, if you’re a small-scale gardener, investing in a large autoclave may not be feasible. In such cases, using a pressure cooker or a microwave-safe container with a sterilization cycle can be a more practical option.
Another crucial factor is the type and quantity of soil being treated. Larger quantities require specialized equipment, while smaller batches can often be handled by more accessible methods like solar drying or hot water baths. Additionally, consider the risk of contamination in your specific environment – if you’re dealing with high-risk pathogens, it may be necessary to invest in a more robust sterilization method.
Lastly, think about the compatibility of the soil type with different sterilization techniques. Some methods are better suited for certain types of soil or plant materials than others. For example, peat-based soils can be sensitive to heat sterilization and may break down during the process. Research the specific requirements of your potting soil and select a method that minimizes damage while ensuring effective sterilization.
Comparison of Heat Treatment and Chemical Sterilization
When it comes to sterilizing potting soil, you have two primary options: heat treatment and chemical sterilization. Both methods have their advantages and disadvantages, which are crucial to understand before making a decision.
Heat treatment involves using high temperatures to kill off pathogens and weed seeds in the soil. This method is effective against a wide range of microorganisms and can be done on-site or in a laboratory setting. However, it requires specialized equipment and can be energy-intensive, increasing your carbon footprint. Additionally, heat treatment may alter the chemical composition of the soil, which could impact plant growth.
Chemical sterilization, on the other hand, involves using chemicals to kill off pathogens and weed seeds in the soil. This method is often faster and more convenient than heat treatment but can be hazardous if not handled properly. Some common chemicals used for sterilization include methyl bromide, chloropicrin, and hydrogen peroxide. However, these chemicals can persist in the environment and contaminate water sources.
When choosing between heat treatment and chemical sterilization, consider the level of contamination, your available resources, and the potential environmental impact. If you have a large quantity of soil to sterilize or want a more environmentally friendly option, heat treatment might be the better choice. However, if you’re short on time or need a more portable solution, chemical sterilization could work for you. Ultimately, it’s essential to weigh the pros and cons of each method and choose the one that best suits your needs.
Best Practices for Maintaining Sterile Potting Soil
To maintain sterile potting soil, it’s essential to follow a few key best practices that will keep your plants healthy and your soil free from contamination. By following these simple steps, you can ensure your soil remains sterile for optimal growth.
Handling and Storage of Sterilized Potting Soil
Proper handling and storage of sterilized potting soil is crucial to prevent re-contamination. When handling sterilized potting soil, it’s essential to wear gloves to prevent the introduction of bacteria from your skin. Also, avoid touching other areas of your workspace that may not be clean.
To minimize contamination risk, store sterilized potting soil in a cool, dry place away from direct sunlight and moisture. A dedicated container or bin with a lid can help keep the soil fresh. Be sure to label the container clearly so you know what’s inside.
When storing large quantities of sterilized potting soil, consider organizing it into smaller portions and labeling each one. This makes it easier to manage and use only what you need, reducing the likelihood of contamination from unused portions. Consider using airtight containers or bags to further minimize exposure to contaminants. Keep in mind that even with proper handling and storage, sterilized potting soil will eventually degrade over time. Regularly inspect stored soil for signs of spoilage or re-contamination and use your best judgment on whether it’s still safe to use.
By following these guidelines, you can maintain the integrity of your sterilized potting soil and ensure optimal results in your plant growth.
Monitoring and Controlling for Re-Contamination
Monitoring and controlling for re-contamination is crucial to maintaining the sterility of potting soil over time. One way to do this is by regularly testing the soil’s microbial load using a sterile sampling technique. This involves taking small samples from different areas of the soil, placing them in sealed containers, and sending them off to a lab for analysis.
You can also implement visual checks on the soil itself, such as looking for signs of mold or fungal growth. For example, if you notice a patch of white cotton-like growth on the surface of your potting mix, it’s likely a sign that re-contamination has occurred and you’ll need to take action.
To prevent re-contamination from happening in the first place, consider implementing a strict hygiene protocol when handling the sterilized soil. This might include washing your hands thoroughly before touching the soil, wearing gloves, or even using a sterile trowel to scoop out small amounts of the mix for planting.
By combining regular testing and monitoring with good hygiene practices, you can minimize the risk of re-contamination and ensure that your potting soil remains sterile for as long as possible.
Frequently Asked Questions
Can I reuse sterilized potting soil for multiple plantings without re-sterilizing it?
Yes, you can reuse sterilized potting soil for multiple plantings without re-sterilizing it, but it’s essential to monitor the soil regularly for signs of re-contamination. Simply inspect the soil for any visible pests or fungal growth before repotting new plants.
How long does it take for solar pasteurization to be effective in killing off microorganisms?
Solar pasteurization can take anywhere from a few days to a week, depending on the temperature and sunlight exposure. Typically, you’ll want to leave the soil exposed to direct sunlight for at least 3-4 days before repotting.
Can I mix sterilized potting soil with non-sterilized soil without compromising its integrity?
No, mixing sterilized potting soil with non-sterilized soil can compromise its integrity and allow contaminants to re-enter the soil. It’s best to use completely sterilized potting soil for optimal plant health.
How do I maintain sterile conditions when handling sterilized potting soil in a garden setting?
To maintain sterile conditions, handle the sterilized potting soil with clean tools, wear gloves, and avoid touching other plants or garden surfaces after handling the sterilized soil. This will help prevent re-contamination and ensure optimal plant growth.
Can I use heat-treated potting soil for seed starting without additional disinfection?
Yes, heat-treated potting soil is suitable for seed starting without additional disinfection. However, it’s essential to follow proper seed starting procedures and monitor the seeds closely for signs of infection or disease.