Composting at home is one of the simplest ways to reduce your waste, create nutrient-rich soil for your garden, and do your part for the environment. But if you’re new to composting, it can be overwhelming to know where to start. Choosing the right bin, balancing the “green” and “brown” materials, and figuring out when your compost is ready – it’s a lot to take in. That’s why we’ve put together this comprehensive guide on step by step composting. In this article, we’ll walk you through everything from setting up your composting system to harvesting your finished product. Whether you’re looking to create a thriving garden or simply reduce your household waste, learning how to compost is an essential skill that will have you enjoying the benefits of composting in no time.
Understanding the Basics of Composting
To get started on your composting journey, it’s essential to understand the basics of what makes a good compost and how to create an ideal environment for decomposition. We’ll break down these fundamental concepts in this section.
What is Composting and Why is it Important?
Composting is a natural process of breaking down organic materials into a nutrient-rich soil amendment that can help improve soil structure, fertility, and overall health. It’s essentially recycling food scraps, yard trimmings, and other biodegradable waste to create a valuable resource for gardening and agriculture.
The benefits of composting are numerous and far-reaching. For one, it reduces the amount of waste sent to landfills, where it can contribute to greenhouse gas emissions and pollution. By composting your organic waste, you’re diverting it from the landfill and turning it into a valuable resource instead. Additionally, compost acts as a natural fertilizer, reducing the need for synthetic fertilizers and promoting healthy plant growth.
To make composting even more attractive, consider this: by composting just one ton of food scraps, you can save up to 2.5 tons of greenhouse gas emissions. With these impressive benefits in mind, it’s no wonder that composting has become a staple practice for environmentally conscious gardeners and households worldwide.
Choosing the Right Compost Bin
When it comes to choosing the right compost bin for your backyard or kitchen, you’ve got plenty of options. Let’s take a closer look at some popular types of compost bins and their pros and cons.
One option is wire mesh compost bins. These are often easy to set up and provide good airflow, which can help speed up the decomposition process. However, they may not be as sturdy as other options and can attract pests if not secured properly. On the other hand, wooden compost bins offer a more attractive and durable option, but they might require regular maintenance to prevent rot and insect infestations.
Plastic compost bins are another popular choice, often being affordable and easy to clean. However, some users complain about limited ventilation and potential odors. When selecting a bin, consider your specific needs: how much space do you have available? Do you live in an area with extreme weather conditions? How much maintenance are you willing to perform?
Ultimately, the right compost bin for you will depend on your lifestyle and preferences. Take into account factors like durability, ease of use, and ventilation when making your decision.
Selecting the Right Materials for Composting
When it comes to composting, choosing the right materials is crucial for creating nutrient-rich soil. Let’s dive into what types of materials you should and shouldn’t include in your compost pile.
What Can Be Composted?
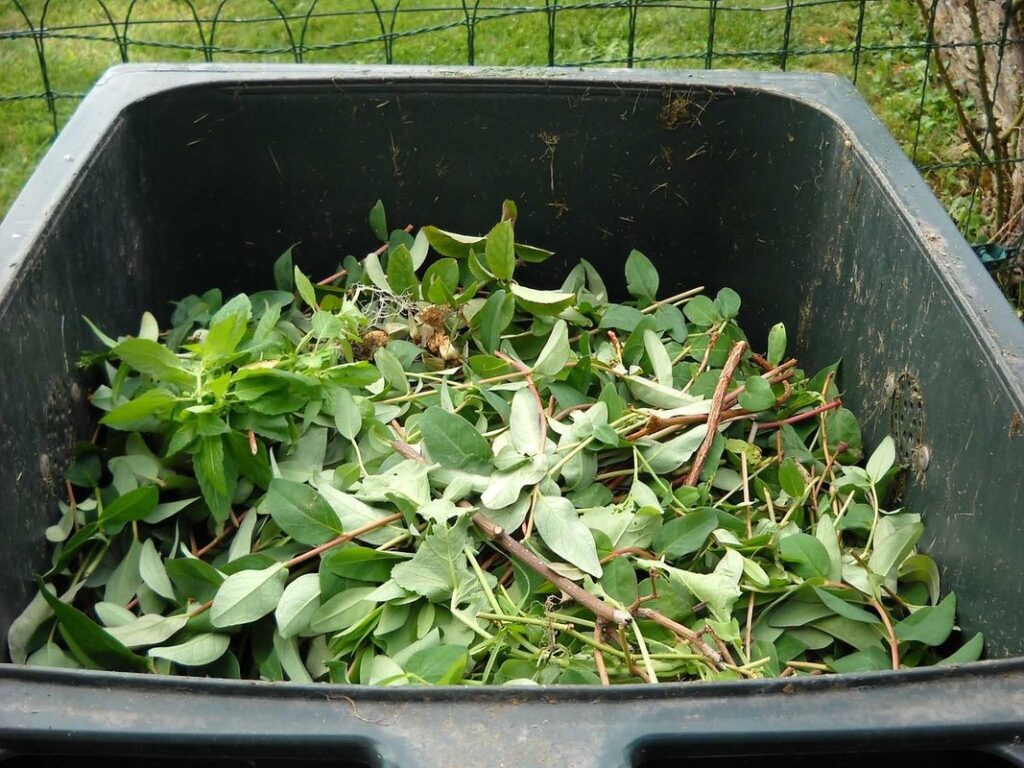
Composting is all about turning unwanted materials into a valuable resource for your garden. To make this process successful, you need to know what can be composted and what should be avoided. Common household materials that can be composted include food waste like fruit and vegetable scraps, tea bags, coffee grounds, and eggshells.
Leaves, grass clippings, and paper products such as newspaper and cardboard are also great additions to your compost pile. Even shredded documents and old books can find a new home in the compost bin. However, there are some materials that should be kept out of your compost. Meat, dairy, oils, and pet waste contain high levels of nitrogen and pathogens that can create unpleasant odors and attract pests.
To avoid contamination, it’s essential to separate these materials from the rest of the compost pile. If you’re unsure about what can be composted, start by creating a list of accepted items for your bin. This will help ensure your compost remains healthy and beneficial for your garden. By making informed choices about what goes into your compost, you’ll be well on your way to creating rich soil that’s perfect for planting.
Brown Materials vs. Green Materials
When it comes to composting, understanding the difference between brown and green materials is crucial for creating a balanced pile. Brown materials are dry, carbon-rich ingredients like straw, shredded newspaper, or cardboard that provide energy for microorganisms to break down organic matter. On the other hand, green materials are wet, nitrogen-rich ingredients such as food waste, grass clippings, or manure that supply the necessary nutrients.
To create a thriving compost pile, you need to balance these two types of materials. A general rule of thumb is to aim for 2/3 brown materials and 1/3 green materials. This will help prevent anaerobic conditions from developing and promote efficient decomposition. For example, if you add a bucket of food waste (green material), follow it up with a layer of straw or shredded newspaper (brown material). Keep in mind that both types of materials are essential for creating nutrient-rich compost.
Remember to monitor the moisture level and texture of your pile regularly to ensure it’s not too wet or dry. A well-balanced compost pile will be rich in carbon, nitrogen, and oxygen, making it perfect for adding nutrients to your garden soil.
Building Your Compost Pile
Now that you’ve got a solid understanding of what composting is all about, it’s time to learn how to build your very own compost pile from scratch. This section will guide you through selecting the right bin and materials.
Layering Materials Correctly
When building your compost pile, layering materials correctly is crucial for creating a balanced and thriving ecosystem. This involves alternating between brown and green materials, maintaining the ideal ratio of carbon to nitrogen.
Start by adding a 4-6 inch layer of brown materials such as dried leaves, shredded newspaper, or cardboard at the base of the bin. These materials provide carbon and help with structure and airflow. Next, add a 2-3 inch layer of green materials like kitchen scraps, grass clippings, or fresh leaves. Green materials are high in nitrogen, which fuels microbial activity.
Continue this pattern, alternating between brown and green layers, aiming for a mix that’s roughly 2/3 carbon-rich brown materials to 1/3 nitrogen-rich green materials. For example, if you’re using a bin with a capacity of 4 cubic feet, you might aim for 8-12 inches of brown material followed by 4-6 inches of green.
Keep in mind that this is just a rough guideline – the key is to find a balance that works for your specific composting setup.
Maintaining Proper Moisture Levels
Maintaining proper moisture levels is crucial for effective composting. Too little moisture can slow down decomposition, while excessive moisture can lead to anaerobic conditions and unpleasant odors. Aim for a mix that’s like a damp sponge – not soaking wet, but neither dry.
To monitor moisture levels, stick your hand into the pile, about 6-8 inches deep. If the compost feels dry or crumbly, it needs more water. Conversely, if it’s soggy or drips water when you lift it, it’s too wet. Check the pile at least once a week to ensure moisture levels are within the optimal range.
In general, add about 1-2 inches of water per month for a standard compost bin (about 3x3x3 feet). You can also use the “squeeze test”: if you squeeze a handful of compost and it crumbles easily, it’s dry. If it forms a ball that doesn’t fall apart when you release pressure, it’s likely too wet.
Remember, composting is an ongoing process – adjust your watering schedule accordingly based on seasonal changes in temperature and precipitation. This will help maintain the perfect balance for nutrient-rich compost to form.
Composting Process: What Happens Inside the Pile
As you build your compost pile, let’s take a closer look at what’s happening inside as microorganisms break down organic matter into nutrient-rich fertilizer. This process is where magic happens!
Decomposition and Microbial Activity
As organic matter breaks down within the compost pile, decomposition begins to occur. This process is driven by microorganisms such as bacteria and fungi that feed on the available carbon and nitrogen sources. These microbes play a crucial role in breaking down complex organic compounds into simpler nutrients.
Bacteria are responsible for decomposing proteins and fats, while fungi break down cellulose and other plant-based materials. The combination of these microbial activities creates heat within the pile, often reaching temperatures up to 160°F (71°C). This heat sterilizes weed seeds and pathogens, making the final compost product safe for use in gardening.
The decomposition process can be divided into several stages: initial carbon-to-nitrogen ratio stabilization, microbial growth, and nutrient release. Maintaining a balanced carbon-to-nitrogen ratio is essential to support optimal microbial activity. A mix of 2/3 “brown” materials (high in carbon) with 1/3 “green” materials (high in nitrogen) will promote efficient decomposition.
Regular turning of the pile also aids in this process, allowing oxygen to penetrate and further facilitating microbial growth. As decomposition progresses, the compost pile will begin to resemble a uniform, earthy-smelling material – a clear indication that it’s time to turn it into nutrient-rich soil amendment for your garden.
Temperature and Turning the Pile
Monitoring temperature levels is crucial in the composting process. A healthy compost pile should have temperatures ranging from 130°F to 140°F (54°C to 60°C) during the decomposition phase. To check the temperature, use a compost thermometer or even a regular meat thermometer. Insert it into the center of the pile, being careful not to touch any metal parts to prevent interference with the readings.
As the temperatures rise and fall, you’ll know when to turn the pile. Typically, this is when the temperature drops below 100°F (38°C). Turning the pile allows for aeration, which speeds up decomposition by introducing oxygen and mixing carbon-rich materials with nitrogen-rich ones. This process can be compared to kneading dough – it breaks down clumps, increases surface area, and facilitates the breakdown of organic matter.
Aim to turn your compost pile every 7-10 days during active decomposition. Keep in mind that excessive turning can be counterproductive, as this can introduce oxygen too quickly, slowing down decomposition. By monitoring temperatures and turning the pile at the right time, you’ll maintain a healthy balance and ensure a speedy composting process.
Troubleshooting Common Composting Issues
Even experienced composters encounter problems, which is why we’ve put together some practical solutions to common issues you might be facing with your composting process. We’ll guide you through fixing common mistakes and getting your pile back on track.
Odors and Pest Problems
One of the most common complaints about composting is that it smells bad. However, unpleasant odors are often a sign that something’s gone wrong with the process. To avoid strong smells, make sure to balance “green” and “brown” materials in your pile. Green materials like food scraps and grass clippings are high in nitrogen, while brown materials like leaves and straw are high in carbon.
If you notice an unpleasant odor, try turning your compost pile more frequently. This helps aerate the pile and speed up decomposition, reducing the likelihood of anaerobic conditions that can cause odors. You can also add a 2-3 inch layer of brown materials to absorb excess moisture and neutralize odors. Additionally, be mindful of what you’re adding to your compost – meat, dairy, and oily foods can attract pests and create unpleasant odors.
Pests like rodents, ants, and flies are often attracted to the moisture and nutrients in compost piles. To deter them, keep your pile covered with a lid or tarp, and make sure it’s not too wet. Regularly turning the pile will also help prevent pest infestations.
Temperature and pH Imbalances
Identifying temperature imbalances in your compost pile is crucial for maintaining optimal decomposition rates. Temperatures above 160°F (71°C) can lead to the death of beneficial microorganisms and the production of unpleasant odors. Conversely, temperatures below 130°F (54°C) slow down the decomposition process significantly.
On the other hand, pH imbalances in your compost pile can have a detrimental effect on its final quality. A pH range between 6.5 and 7.5 is ideal for most microorganisms to thrive. If your compost’s pH falls outside this range, it may hinder microbial activity or even lead to ammonia production.
To address temperature issues, monitor your compost pile’s temperature daily using a thermometer and turn the pile if temperatures rise too high. A general rule of thumb is to turn the pile when temperatures exceed 140°F (60°C).
For pH imbalances, incorporate acidic or alkaline materials in moderation. For example, adding crushed eggshells can help increase the pH level if it’s too low.
Regularly monitoring your compost’s temperature and pH levels will help you prevent potential problems and ensure a balanced decomposition process.
Harvesting Your Compost: Tips and Tricks
Now that you’ve created your nutrient-rich compost, let’s talk about how to harvest it for use in your garden, and I’ll share some valuable tips along the way.
Recognizing Finished Compost
When you’ve added all the necessary ingredients and given it time to break down, it’s essential to recognize when your compost is finished. This can be a bit tricky, but there are some clear signs that indicate whether your compost has reached its full potential.
To check if your compost is fully decomposed, start by examining its texture. A finished compost should crumble easily between your fingers or with a gentle squeeze in your hands. If it still feels lumpy or holds together when you try to break it apart, give it more time – it’s not yet done.
Another way to verify completion is through its aroma. Fresh compost can smell earthy and slightly sweet, but if it has an unpleasant odor, that’s a sign something’s gone wrong. Finished compost, on the other hand, typically smells like damp soil. This indicates all volatile materials have been broken down, leaving you with nutrient-rich matter for your garden.
Fineness is another key indicator of a finished compost. Look for small particles that resemble dark brown soil or even coffee grounds in texture. If it still contains recognizable items from its original state – such as leaves or branches – it’s not yet ready to use.
You can also perform the ‘squeeze test’ by compressing a handful of compost into a ball and then releasing it. A finished compost will hold its shape but break apart easily, rather than crumbling immediately when you release your grip.
Using Your Freshly Milled Compost
Now that you have your freshly milled compost, it’s time to put it to good use. Incorporating finished compost into your garden beds is a game-changer for soil structure and plant growth. Start by loosening the top 6-8 inches of soil with a fork or spade. This will help the compost mix evenly throughout the bed.
Begin adding a 2-3 inch layer of compost, mixing it in as you go to avoid any clumps. You can also use a garden rake to spread the compost evenly. If your soil is heavy clay or sandy, add an extra layer of compost to improve its structure and water-holding capacity.
To enhance plant growth, top-dress around established plants with a 1-2 inch layer of compost. This will provide a boost of nutrients and microorganisms that will help feed the plants. You can also mix compost into potting soil for indoor plants or containers.
Remember to reuse your compost bin or container as a planter for new seedlings, providing them with an instant nutrient-rich start.
Advanced Composting Techniques: Tips for Experienced Gardeners
If you’re already familiar with the basics of composting, this next part is perfect for you – we’ll dive into more advanced techniques to take your skills to the next level.
Vermicomposting (Worm Composting)
Vermicomposting is an advanced composting technique that’s perfect for experienced gardeners looking to take their composting game to the next level. This method involves using worms to break down organic matter at a much faster rate than traditional composting methods, resulting in a nutrient-rich fertilizer in just a few weeks.
To set up a worm composting bin, you’ll need a container with drainage holes and a lid that allows for airflow. You can use a specialized worm composter or create your own using a plastic bin or a wooden pallet. Add 4-6 inches of bedding material such as coconut coir or shredded newspaper to the bottom of the bin, followed by a layer of worms (red wigglers are ideal). Feed them kitchen scraps and other organic matter, making sure not to overfeed – a general rule is to add about 1/2 cup of food waste per pound of worms. Keep the bin moist but not soggy, and your worms will get to work breaking down the material into a rich, earthy compost that’s perfect for indoor plants or as a soil amendment.
By vermicomposting, you can reduce your carbon footprint by minimizing the need for synthetic fertilizers and reducing greenhouse gas emissions from transportation. Plus, with faster decomposition rates, you’ll have more time to focus on other gardening projects – a win-win for both the environment and your garden’s health!
Bokashi Composting
Bokashi composting offers an alternative approach to traditional composting methods by utilizing microorganisms to ferment food waste into a nutrient-rich liquid fertilizer. This process is particularly appealing for gardeners who want to create a sustainable and efficient solution for their kitchen scraps.
At its core, bokashi composting relies on the use of beneficial microorganisms that break down organic matter in an anaerobic environment. This means that instead of aerating the mixture like traditional composting methods, you’ll be sealing it away to allow the microorganisms to work their magic. The resulting liquid fertilizer is teeming with nutrients and can be used as a soil amendment or diluted for use on seedlings.
To get started with bokashi composting, choose an appropriate bin that allows for easy addition of ingredients and has a tap at the bottom for accessing the liquid fertilizer. Add 1-2 cups of microbe-rich bokashi powder to your waste before sealing it away, allowing the mixture to ferment for several days or weeks. The longer you let it sit, the more potent the fertilizer will be.
Regularly tapping into the liquid fertilizer will help maintain its potency and prevent over-saturation. Some gardeners even use a second bin as a “holding tank” for the finished compost, allowing them to harvest the liquid fertilizer at their convenience. With proper setup and care, bokashi composting can become an invaluable addition to your gardening routine.
Frequently Asked Questions
How Do I Know If My Compost Bin Is Sufficiently Ventilated?
A well-ventilated compost bin helps to prevent the buildup of odors and heat. To check if your compost bin is sufficiently ventilated, look for features like mesh panels or slats that allow airflow. You should also ensure that the bin is not too tightly sealed, allowing oxygen to circulate and microorganisms to breathe.
What Happens If My Compost Becomes Too Wet?
If your compost becomes too wet, it can lead to anaerobic conditions, causing unpleasant odors and slowing down decomposition. To fix this issue, add more brown materials like dry leaves or shredded newspaper to absorb excess moisture. You can also turn the pile to improve airflow and speed up drying.
Can I Add Weeds with Seeds to My Compost Pile?
It’s generally recommended not to add weeds with seeds to your compost pile, as they can potentially sprout in your finished compost and cause problems in your garden. If you do accidentally add weeds with seeds, make sure to bury them deep within the pile or use a high-temperature composting method like vermicomposting to kill off any potential weeds.
How Do I Monitor Temperature Levels in My Compost Pile?
Temperature levels are an essential aspect of the composting process. To monitor temperature levels, insert a food-grade thermometer into your compost pile at various depths. Aim for temperatures between 130°F and 140°F (54°C to 60°C) to ensure optimal decomposition.
Can I Use My Compost on Acid-Loving Plants Like Azaleas or Rhododendrons?
Yes, you can use your finished compost on acid-loving plants like azaleas or rhododendrons. However, make sure to balance the pH of your compost by adding materials like peat moss or sulfur to create an acidic environment suitable for these plant species.