Are you ready to unlock the secrets of growing your very own avocado tree from a tiny seed? With over 3,000 varieties to choose from, avocados are one of the most diverse and exciting fruits to grow at home. But did you know that an avocado seed can actually produce a healthy, thriving tree with proper care? In this step-by-step guide, we’ll walk you through the process of selecting, preparing, and caring for your avocado seed from germination to transplanting. You’ll learn everything you need to know about how to successfully sprout an avocado seed, including the ideal conditions for germination, signs of healthy growth, and tips for transitioning your young tree into a container or directly into the ground. By following our simple guide, you’ll be enjoying fresh avocados from your very own tree in no time!
Choosing the Right Avocado Seed
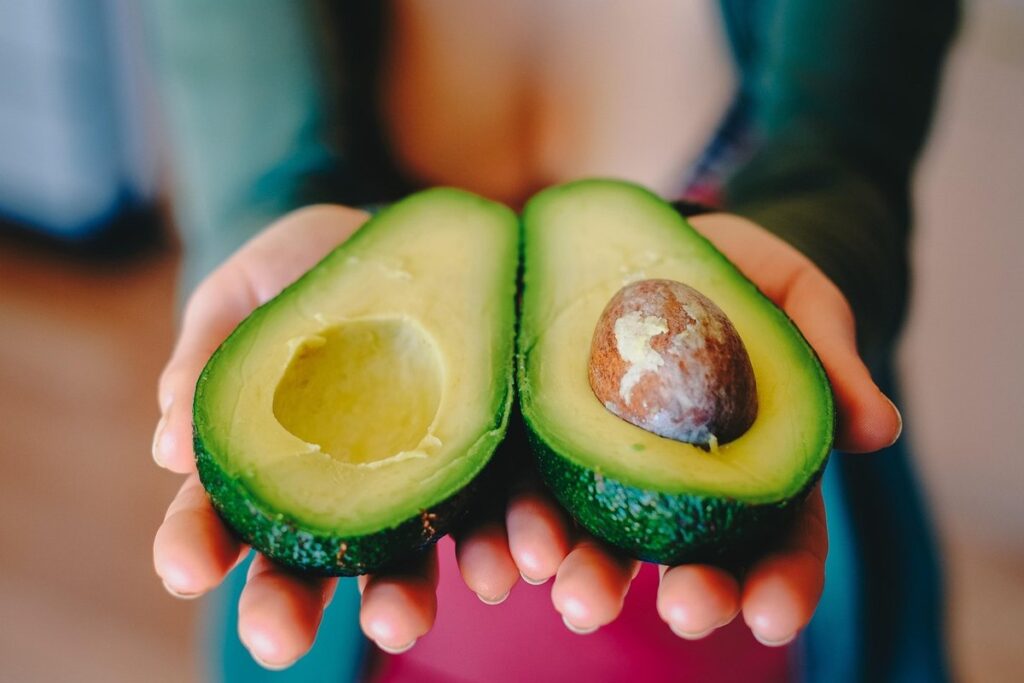
When it comes to sprouting an avocado seed, selecting the right one is crucial for a healthy and thriving plant. Here’s how to choose a viable seed from your ripe avocado.
Selecting a Healthy Seed
When it comes to choosing an avocado seed for sprouting, selecting a healthy one is crucial. A viable seed will give you a better chance of successfully growing a strong and healthy tree.
Look for signs of a healthy seed by gently squeezing it between your fingers. A good seed should be slightly soft to the touch but still firm enough to hold its shape. Avoid seeds that are too hard or rock-like, as they may not have absorbed enough nutrients from the fruit. On the other hand, seeds that are too soft and mushy are likely past their prime.
Check the color of the seed as well. A healthy avocado seed should have a uniform brown or dark green color with no visible mold or discoloration. Avoid seeds with white or light-colored spots, as these can be signs of fungal infections. Also, make sure the seed is free from any visible damage or cracks.
If you’re still unsure about the health of the seed, try this simple test: weigh it. Healthy avocado seeds should have a noticeable weight to them due to their high water content. If the seed feels extremely light for its size, it’s likely not viable.
Preparing the Seed for Germination
Before you can even think about planting that avocado seed, it needs to be prepared for germination. This process is crucial, as it helps to remove any dirt, bacteria, and other impurities that may be clinging to the seed.
First, wash the avocado seed gently with mild soap and warm water. Be sure to scrub away any stubborn bits of fruit or debris that might still be attached. Rinse thoroughly under running water to remove any remaining soap residue. This step is essential in preventing fungal growth and ensuring the seed has a clean start.
Next, dry the seed completely with a soft cloth or paper towel. Pat it dry rather than rubbing vigorously, which can damage the delicate skin of the seed. You want to ensure that there’s no excess moisture left on the surface to encourage mold or rot.
Now your avocado seed is ready for planting! Make sure to store it in a cool, dry place until you’re ready to plant it in well-draining soil and provide the right conditions for germination.
Creating an Optimal Sprouting Environment
To successfully sprout an avocado seed, it’s crucial you create a stable and humid environment that mimics its natural conditions. We’ll walk you through setting up this perfect ecosystem in the following steps.
Providing Sufficient Light
Light plays a crucial role in the sprouting process of avocado seeds. Adequate lighting helps trigger photosynthesis, which is essential for seed germination and growth. Most people underestimate the importance of sufficient light when attempting to sprout an avocado seed, but it can make all the difference.
When choosing a location for your sprouted avocado seed, ensure that it receives plenty of natural sunlight or invest in grow lights if direct sunlight isn’t feasible. A south-facing window is ideal, as it allows direct sunlight throughout the day. However, be cautious not to expose your seedling to too much heat, which can cause scorching.
As a general guideline, provide 12-14 hours of light per day for optimal growth. You can also experiment with different lighting schedules to see what works best for your specific environment. When using grow lights, ensure they are at least 6-8 inches away from the seedling to prevent burning. By providing sufficient light, you’ll be well on your way to successfully sprouting an avocado seed.
Maintaining Proper Temperature and Humidity
Maintaining proper temperature and humidity levels is crucial for creating an optimal sprouting environment. Temperature fluctuations can slow down or even halt the germination process, while excessive humidity can lead to fungal growth and root rot. Ideally, you want to maintain a consistent temperature between 65°F to 75°F (18°C to 24°C), with a relative humidity of 50-60%.
To create an ideal environment, place your avocado seed in a spot with bright indirect light but avoid direct sunlight, which can cause overheating. You can also use a thermometer and hygrometer to monitor the temperature and humidity levels. If you live in a dry climate, consider placing the container on a tray filled with water and pebbles to maintain the desired humidity.
Remember that avocado seeds require some moisture to germinate, but excessive watering can be detrimental. Check the soil daily, and only water when it feels dry to the touch. By maintaining the right temperature and humidity levels, you’ll be well on your way to successfully sprouting your avocado seed.
Starting the Sprouting Process
Now that you have your avocado seed prepared, let’s get started on creating a conducive environment for sprouting to occur naturally. This is where things can get a bit tricky, but don’t worry, I’ve got you covered!
Planting the Seed in Water or Soil
When it comes to planting your avocado seed, you have two main options: water or soil. Both methods can be effective, but they also come with their own set of advantages and disadvantages.
Planting in water is a popular method for sprouting avocado seeds because it’s easy to observe the progress without having to disturb the seedling. Simply place the seed in a glass or jar filled with water, making sure the “eyes” (the small indentations on top of the seed) are facing upwards. Change the water every few days to keep it fresh and prevent bacterial growth. This method is ideal for those who want to monitor their seed’s progress closely.
On the other hand, planting in soil offers a more stable environment for your seedling to grow. Fill a small pot or container with well-draining soil, leaving enough space for the root system to develop. Plant the seed about 1-2 inches deep, making sure the “eyes” are facing upwards. Keep the soil consistently moist but not waterlogged. While it may take longer to see progress, planting in soil can lead to a stronger and more resilient seedling.
Consider your personal preference and growing conditions when deciding between these two methods. If you’re new to sprouting avocado seeds, starting with the water method might be a better option as it allows for easier monitoring and adjustments.
Creating a Root Hopping System (Optional)
If you’re growing multiple avocado seeds at once and want to create a more efficient sprouting process, consider setting up a root hopping system. This optional method allows you to grow the roots of each seed in water before transferring them to soil.
To start, fill a container with lukewarm water, making sure it’s deep enough for the roots to develop freely. Gently submerge an avocado seed into the water, ensuring its pointed end is facing downwards. Secure the seed with a toothpick or small rock if needed, preventing it from floating away.
As the root system begins to grow, use a fork to gently separate and transfer the roots of each seed into individual containers filled with water. This process is called “root hopping.” It’s essential to handle the delicate roots carefully to avoid damaging them.
Monitor your seeds’ progress closely, as this method requires regular attention to prevent overgrowth or root rot. Once the taproots have reached 1-2 inches in length and are showing visible signs of growth, it’s time to transfer the seedlings into individual pots filled with well-draining soil.
Monitoring Progress and Addressing Challenges
Now that you’ve successfully germinated your avocado seed, it’s time to keep track of its progress and troubleshoot any potential issues that may arise. Here, we’ll walk you through how to monitor growth and overcome common challenges.
Recognizing Early Signs of Sprouting
As you monitor the progress of your avocado seed, it’s essential to recognize early signs of sprouting. This can be an exciting time, as you watch your seedling grow into a thriving plant. So, what should you look for? First, check for signs of germination. This is usually indicated by a tiny white root emerging from the bottom of the seed or a small green shoot poking out from the top.
If you’re not sure if it’s just a bud or actual growth, observe your seed closely over the next few days. You’ll likely notice the tip of the sprout becoming slightly soft to the touch, indicating new life is unfolding. Keep in mind that this process can take anywhere from 3-14 days, depending on factors like temperature and humidity.
Don’t be surprised if you see some slight wilting or drooping; this is normal during the germination phase. To encourage healthy growth, ensure your seed is consistently moist but not waterlogged, with adequate light exposure. By paying attention to these early signs of sprouting, you’ll be well on your way to nurturing a robust and resilient avocado tree.
Troubleshooting Common Issues
As you embark on the journey of sprouting an avocado seed, you may encounter some common issues that can hinder its progress. One of the most frequent problems is mold growth, which can be caused by excessive moisture or poor air circulation. If you notice a white, fuzzy patch forming on the surface of the water or soil, don’t panic! Simply remove the affected area with a clean tool, and ensure that the seed is placed in a well-ventilated spot to promote healthy growth.
Another issue you might encounter is root bound conditions, where the roots become tangled and restricted. To prevent this, use a deeper container to give the roots room to expand, or transfer the seedling into a larger pot once it reaches 2-3 inches tall. Be sure to gently loosen any compacted soil around the roots to encourage new growth.
If you’re experiencing slow or stunted growth, check that your water is fresh and free from bacteria, which can be detrimental to the seed’s development.
Transplanting the Seedling
Now that you’ve successfully germinated your avocado seed, it’s time to transplant it into a larger container where it can continue to grow and thrive. This is an exciting step in your journey to growing a healthy new tree!
Preparing the Soil and Pot
When transplanting your avocado seedling into a new pot, it’s essential to use a well-draining potting mix. This may seem like a trivial detail, but trust us – it can make all the difference between a thriving plant and one that’s prone to root rot. Think about it: water can’t drain properly if the soil is too dense or heavy.
So what makes for good drainage? Look for a potting mix that contains perlite, vermiculite, or sand – these ingredients will help break up clumps and allow excess moisture to escape. You can also create your own well-draining mix using a combination of peat moss, compost, and perlite.
To prepare the soil, gently remove the seedling from its original pot and inspect the roots. If they’re circling or tangled, take this opportunity to tease them apart with your fingers. Next, trim any weak or damaged roots to encourage healthy growth. Finally, place a small amount of fresh potting mix at the bottom of the new pot – just enough to create a shallow layer for the roots to settle into.
Caring for the Young Tree
Caring for the newly transplanted avocado tree requires attention to its basic needs. Watering is crucial during this period, but be cautious not to overwater, as this can lead to root rot and kill the young tree. Check the soil daily by sticking your finger into it up to the knuckle – if it’s dry, it’s time for a drink. Water thoroughly until water drains from the bottom of the pot.
Fertilization is also essential during this phase. Feed your avocado tree with a balanced fertilizer (10-10-10) once a month. Dilute the fertilizer according to the manufacturer’s instructions to avoid burning the roots. You can also use compost or worm casting for added nutrients.
Pruning is another vital aspect of young tree care. Remove any weak or damaged branches to encourage growth and prevent disease. Cut back the taproot to encourage a stronger, more extensive root system. Regular pruning will also help control the shape of your avocado tree and promote fruiting later on.
Conclusion
Now that you’ve successfully sprouted your avocado seed, let’s summarize the key takeaways from our journey together.
Recap of Key Takeaways
Now that you’ve learned the art of sprouting an avocado seed, let’s recap the key takeaways to ensure your success.
To begin with, it’s essential to choose a healthy and ripe avocado with a well-developed stone at its center. This will significantly increase the chances of germination. Make sure to store the seed in a dry place for about two weeks before starting the sprouting process.
Once you’ve selected the right seed, you’ll need to prepare it for germination by gently scratching the surface and then placing it in water. The optimal depth for this should be around 1-2 inches below the surface, allowing enough room for the root to develop. Keep an eye on the seed’s progress and make adjustments as necessary.
A crucial point to note is that temperature plays a significant role in successful sprouting. Aim for temperatures between 65°F to 75°F (18°C to 24°C) during the day and no lower than 55°F (13°C) at night. Avoid placing your seedling near drafts or air conditioning vents, as this can cause stress.
Regular maintenance includes changing the water every two days, monitoring the seed’s growth, and providing enough light. For optimal results, keep it in a sunny spot with direct sunlight for about four hours a day.
To avoid common mistakes, ensure you’re not over-watering your avocado seedling. The ideal ratio is to maintain moist soil, but avoid waterlogged conditions that can lead to root rot.
With these takeaways in mind, you’ll be well on your way to successfully sprouting an avocado seed and enjoying the benefits of homegrown nutrient-rich produce.
Frequently Asked Questions
How long does it take for an avocado seed to sprout?
After planting the seed in water or soil, you can expect to see signs of germination within 3-12 weeks, depending on factors like temperature, humidity, and light. Keep in mind that some seeds may take longer to sprout, so be patient and observe your seedling regularly.
What if my avocado seed doesn’t sprout at all?
If your seed fails to sprout after 3-4 months, it’s likely due to a poor quality or damaged seed. You can try using another seed from a different avocado, but make sure it’s healthy and plump before planting.
Can I speed up the germination process with special techniques or equipment?
Yes, there are various methods you can use to enhance germination rates, such as using grow lights, maintaining optimal temperature ranges (around 65-75°F), and providing a consistent humidity level. These measures can help your seedling develop faster.
How do I know when it’s time to transplant my avocado seedling into a larger pot or directly into the ground?
Look for signs of overgrowth, such as roots visible through the drainage holes or a robust stem that requires more space to support new growth. Transplanting usually happens 6-12 months after germination, but this can vary depending on your tree’s development.
Can I use any type of potting soil for my avocado seedling?
While most potting soils will work, choose a well-draining mix specifically designed for tropical plants like avocados. This will help prevent waterlogged roots and promote healthy growth.