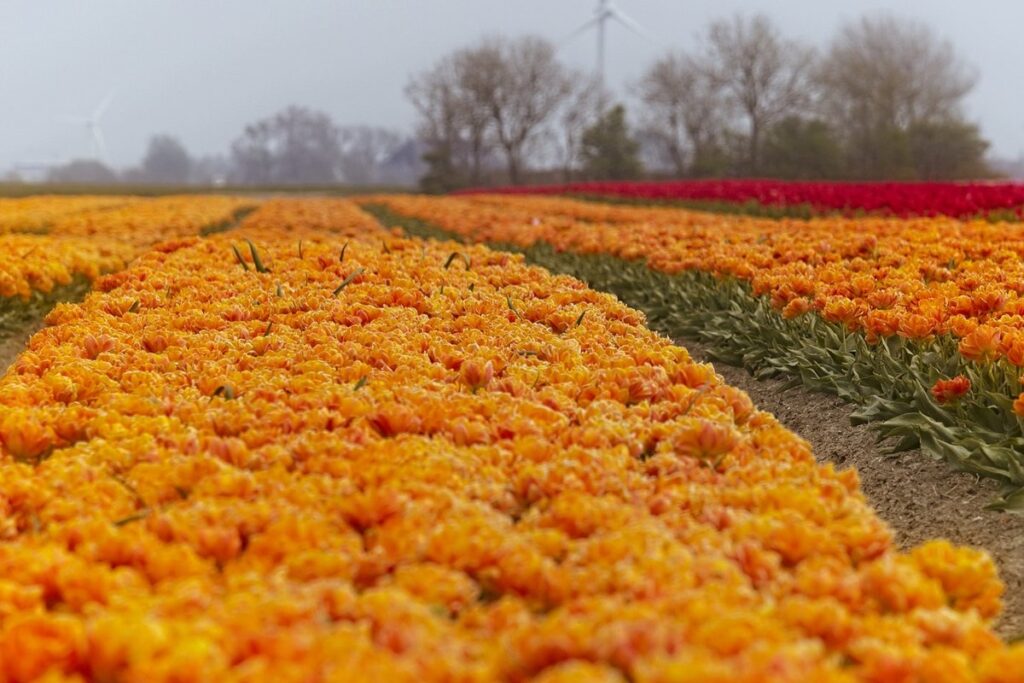
Spring is just around the corner, and with it comes a burst of vibrant color as our beloved spring flowering bulbs start to bloom. Whether you’re a seasoned gardener or a newcomer to the world of horticulture, creating a stunning display of color in your garden can be a truly rewarding experience. But let’s face it – growing gorgeous spring flowers isn’t always easy. Choosing the right bulbs for your climate and soil type, planting them at the right time, and providing the perfect care conditions can all be daunting tasks. In this ultimate guide to spring flowering bulbs, we’ll walk you through everything you need to know to get started, from choosing the best varieties to troubleshooting common issues like poor blooms or pest infestations.
Choosing the Right Bulbs
When it comes to choosing spring flowering bulbs, selecting the right ones can make all the difference in a vibrant and thriving garden. Let’s take a closer look at some key factors to consider.
Selecting Bulb Varieties
When it comes to selecting the right bulb varieties for your garden, you’re spoiled for choice. Spring flowering bulbs come in a stunning array of shapes, sizes, and colors. Take tulips, for instance – with over 150 species, they offer an incredible range of bloom times, from early spring to late summer. Some popular varieties include ‘Fosteriana’, which blooms in mid-spring, and the vibrant ‘Lily Flowering’ type.
Daffodils are another favorite, with their golden trumpet-shaped blooms that signal the start of spring. Hyacinths add a sweet fragrance to your garden, while crocuses provide some of the earliest blooms. When choosing bulb varieties, consider factors like bloom time – do you want them to flower simultaneously or staggered over several weeks? Think about flower color: will they complement existing plants, or create a bold statement?
Growth habits are also essential: some bulbs naturalize easily and spread quickly, while others require more maintenance. For example, daffodils can be divided and replanted elsewhere in the garden once they’ve finished blooming. By considering these characteristics, you’ll find the perfect bulb varieties to suit your garden’s needs and provide a stunning display of color each spring.
Factors Affecting Bulb Selection
When selecting spring flowering bulbs, it’s essential to consider the specific conditions of your garden or region. Climate plays a significant role in determining which bulbs will thrive. For example, if you live in an area with harsh winters and hot summers, choose bulbs that can withstand extreme temperatures, such as tulips or daffodils.
Soil type is another critical factor. Different bulbs have varying preferences for soil pH levels and moisture retention. For instance, hyacinths prefer well-draining soil, while fritillaries thrive in moist, woodland-like conditions. Ensure the bulb’s requirements match your garden’s characteristics to ensure optimal growth.
Sunlight exposure also affects bulb performance. Some bulbs, like crocuses, can tolerate partial shade, while others, such as tulips and daffodils, require full sun. Consider the amount of sunlight your garden receives when selecting bulbs. By taking these factors into account, you’ll be able to choose spring flowering bulbs that will bloom beautifully in their new environment.
To make informed decisions, research the specific needs of each bulb type or consult with a local nursery expert for tailored advice. This ensures you’re planting the right bulbs for your garden’s unique conditions.
Planting and Caring for Spring Flowering Bulbs
To get the most out of your spring flowering bulbs, it’s essential to choose the right variety, plant them at the right time, and provide proper care. This section will cover those critical steps in detail.
Preparing the Soil
Proper soil preparation is essential for spring flowering bulbs to thrive. When you plant bulbs, they’ll be drawing nutrients from the soil to fuel their growth and bloom. If the soil lacks these essential nutrients, it can affect the bulb’s ability to produce flowers.
Before planting, take some time to prepare your soil by removing any debris or weeds that may be present. Add a 2-inch layer of compost or well-rotted manure to improve the soil‘s fertility and drainage. You can also use fertilizer specifically designed for bulb growth, which typically contains higher levels of phosphorus to promote root development.
For example, if you’re planting tulips in a spot with heavy clay soil, add some organic matter like peat moss or perlite to help loosen the soil and improve drainage. This will ensure that your bulbs receive the right balance of nutrients and moisture, promoting healthy growth and blooming.
Planting Techniques
When planting spring flowering bulbs, getting it right from the start is crucial for their health and optimal blooming performance. To ensure a beautiful display of color next year, let’s dive into the step-by-step process of planting these gorgeous bulbs.
Firstly, gently dig a hole that’s about two to three times as deep as the height of the bulb. For example, if you’re planting tulips or daffodils, which can grow up to 12-18 inches tall, your hole should be around 6-9 inches deep. Place the bulb in the hole, making sure the pointed end is facing upwards and the flat base is resting on the bottom of the hole.
When it comes to spacing, a general rule of thumb is to plant bulbs about three times their height apart from each other. This allows for proper growth and prevents overcrowding, which can lead to disease and pest issues. To minimize damage during planting, handle the bulbs gently by the neck or shoulder area, rather than holding them by the base.
The depth of the hole also depends on the type of bulb you’re planting. For example, small bulbs like grape hyacinths can be planted much shallower, around 2-3 inches deep. Larger bulbs like alliums and lilies require a deeper hole, about 4-6 inches deep.
Spring Flowering Bulb Maintenance
Now that you’ve planted and enjoyed your spring flowering bulbs, it’s time to give them a little TLC to ensure they thrive for years to come. In this section, we’ll cover essential maintenance tips.
Watering and Mulching
Water is essential for spring flowering bulbs to thrive, especially during their first growing season. When planting bulbs, it’s crucial to water them well after planting and during dry spells. Aim to provide about 1-2 inches of water per week, either through rainfall or irrigation. Avoid overwatering, as this can lead to rot and other issues.
Mulching around bulb plantings is another vital step in maintaining these beautiful flowers. Mulch helps retain moisture in the soil, reducing the need for frequent watering. It also suppresses weeds that might compete with your bulbs for nutrients. Organic mulches like wood chips or bark work well, as they break down slowly and won’t harm the bulbs.
When applying mulch, keep it a few inches away from the base of the bulb stems to prevent rot. A 2-3 inch layer is usually sufficient. As you mulch, consider incorporating compost or well-rotted manure for added nutrients. Remember to reapply mulch after blooming has finished and foliage has died back, as this helps retain moisture during summer dormancy.
Deadheading and Aftercare
Deadheading spent flowers is an essential step in encouraging repeat blooming from spring flowering bulbs. This process involves removing the faded blooms to direct the bulb’s energy towards producing new flowers rather than seed production. To deadhead, simply snip off the wilted flower head at its base, leaving as much stem intact as possible. This will help promote a second bloom or extend the blooming period.
After the blooming period has finished, it’s time to think about aftercare for your bulbs. Most spring flowering bulbs need to be lifted and stored during the summer months when they go dormant. The exact timing will depend on the specific variety of bulb, but as a general rule, wait until the foliage has yellowed and begun to die back. Carefully dig around the bulb with a fork, taking care not to damage any remaining roots. Lift the bulbs from the ground and allow them to dry for a few days in a cool, dark place before storing them in a breathable container or bag. This will help prevent rot and ensure they’re ready to bloom again next spring.
Troubleshooting Common Issues
We know that even with careful planning, things can go wrong when planting spring flowering bulbs. Don’t worry, we’ve got you covered with common issues and their easy solutions.
Dealing with Pests and Diseases
As you tend to your spring flowering bulbs, it’s essential to keep an eye out for common pests and diseases that can quickly spread and damage your plants. Rodents, such as mice and voles, may nibble on bulb scales or underground stems, while aphids and other insects feed on sap, causing curled or distorted leaves.
Bulb rot is a fungal disease that causes bulbs to soften and decay, often resulting in the death of the plant. To prevent infestations and treat affected areas, inspect your bulbs regularly for signs of pest damage or disease. If you notice any issues, isolate infected plants immediately and remove them from your garden bed.
For preventative measures, use physical barriers like mesh or fine-netting to keep rodents out, or apply insecticidal soap or neem oil to repel aphids and other insects. To treat fungal diseases, apply fungicides specifically designed for bulb rot, following the product’s instructions carefully.
By being proactive and taking prompt action when you notice any issues, you can minimize damage and enjoy a vibrant display of spring flowering bulbs in your garden.
Bulb Failure or Poor Growth
If you’ve noticed that your spring flowering bulbs are failing to thrive or simply not growing as expected, there could be several reasons behind it. Inadequate soil preparation is one common issue, where the bulb’s root system may be struggling to establish itself due to poor drainage or inadequate nutrient supply. This can lead to weak and spindly growth, making the plant more susceptible to disease and pests.
Another possible reason for poor growth or bulb failure could be insufficient sunlight. Many spring flowering bulbs require at least six hours of direct sunlight per day to photosynthesize and grow properly. If your bulbs are not getting enough light, it may lead to stunted growth and reduced blooming potential.
To promote healthy bulb development, make sure to choose a location with suitable soil conditions and adequate sunlight. Add organic matter like compost or well-rotted manure to improve soil fertility and drainage. Water the bulbs regularly during their growing season but avoid overwatering, which can lead to root rot and other problems. By addressing these common issues, you should be able to give your spring flowering bulbs the best chance of success and enjoy vibrant blooms in the years to come.
Seasonal Care and Timing
Now that you’ve planted your spring flowering bulbs, it’s time to think about when and how to care for them throughout their growth cycle. This is where seasonal timing comes into play.
Planning Ahead for Next Year’s Bloom
Planning ahead is crucial when it comes to spring flowering bulbs. This allows you to enjoy their beauty for years to come, rather than just a single blooming season. One key aspect of planning ahead is selecting bulbs that will naturalize or return year after year.
To do this, look for bulbs that are specifically labeled as “perennial” or “naturalizing”. These types of bulbs have a tendency to multiply and spread over time, creating a beautiful display of color in your garden each spring. Some examples of perennial bulbs include grape hyacinth (Muscari), snowdrops (Galanthus), and winter aconite (Eranthis).
When selecting these types of bulbs, be sure to choose varieties that are suitable for your climate and hardiness zone. This will ensure they thrive in your garden year after year. Additionally, consider planting them in a location where they can spread freely, such as under trees or along a walkway.
Some popular perennial bulbs include:
* Grape hyacinth (Muscari), which naturalizes quickly and produces vibrant blue flowers
* Snowdrops (Galanthus), which bloom early in the spring and are often one of the first signs of life in your garden
* Winter aconite (Eranthis), which produces bright yellow flowers in late winter to early spring
By selecting the right bulbs for your garden, you can enjoy their beauty for years to come.
Spring and Fall Tasks for Bulb Care
As the growing season comes to an end, it’s essential to perform some critical tasks to ensure your bulb plantings remain healthy and thrive for years to come. During the fall season, one of the most crucial tasks is pruning dead foliage. This may seem like a minor task, but it plays a significant role in preventing disease and pest issues.
To prune dead foliage effectively, start by gently removing any brown or yellow leaves from the plant, taking care not to damage the bulb itself. Cut off the stems at an angle, just above a node (where a leaf meets the stem), using clean, sharp tools. This will help prevent water from collecting on the cut surface and reduce the risk of rot.
In the spring and fall, it’s also essential to lift and store bulbs during their summer dormancy period. After blooming has finished, wait for the foliage to die back naturally, then carefully dig around the bulb with a fork to avoid damaging any surrounding plants. Gently lift the bulb out of the ground, taking care not to damage its delicate roots.
Additional Tips and Considerations
As you’re getting ready to plant your spring flowering bulbs, let’s take a closer look at some essential additional tips to ensure their success in your garden. From soil prep to aftercare, these considerations will give your blooms an extra boost.
Companion Planting
Companion planting with spring flowering bulbs is a simple yet effective way to enhance their growth and reduce maintenance. By pairing these bulbs with perennials or groundcovers, you can create a thriving garden ecosystem that requires less upkeep. For instance, plant daffodils alongside creeping thyme, which will help suppress weeds and retain moisture in the soil.
Consider combining tulips with low-maintenance groundcovers like sedum or vinca minor. These companion plants will not only add color and texture to your garden but also provide a natural barrier against pests and diseases that can affect spring flowering bulbs. Some other examples of complementary plant combinations include pairing hyacinths with boxwood or grape hyacinth with sweet woodruff.
When selecting companion plants, choose species that have similar growing conditions and sunlight requirements as your spring flowering bulbs. This will ensure they thrive together and create a harmonious garden environment. With a little planning and experimentation, you can enjoy a vibrant and low-maintenance garden bed filled with beautiful spring flowers.
Bulb Storage and Handling
When storing and handling spring flowering bulbs, it’s essential to follow some specific guidelines to minimize damage and ensure optimal growth. First, make sure to handle the bulbs gently, as rough handling can cause physical damage to the bulb itself or its roots.
When shipping or transporting bulbs, consider using specialized packaging materials that provide adequate support and protection for each bulb. A layer of paper or a breathable cloth between the bulbs can help prevent moisture from accumulating and causing rot.
During storage, keep the bulbs in a cool, dark place with consistent temperatures between 35°F to 45°F (2°C to 7°C). Avoid storing bulbs near heating vents, radiators, or direct sunlight. Also, maintain humidity levels around 60-70% to prevent drying out.
Remember to store bulbs in a way that allows for air circulation to prevent moisture buildup. If you’re planning to plant the bulbs immediately after storage, make sure they’ve been acclimated to outdoor conditions by placing them in a shaded area for 1-2 days before planting.
Frequently Asked Questions
What if I’m new to gardening – how can I ensure my spring flowering bulbs get the right care?
As a beginner, it’s essential to start with the basics. Make sure you’re planting your bulbs at the correct depth and spacing for their specific variety. Water them well after planting, and apply a layer of mulch to retain moisture and suppress weeds.
Can I plant spring flowering bulbs in containers or do they only thrive in garden beds?
Yes, many types of spring flowering bulbs can be grown in containers, providing you choose a container with good drainage and use a high-quality potting mix. This is especially useful for small spaces or areas with poor soil quality. Just ensure the container is at least 6-8 inches deep to accommodate the bulb’s growth.
How long do I need to wait before harvesting spring flowering bulbs after planting?
The waiting period varies depending on the type of bulb and its growing conditions. Generally, you can expect to harvest daffodils in late spring, while tulips take a bit longer (early to mid-spring). For most varieties, it’s best to wait until the foliage has yellowed and died back before digging up the bulbs for replanting or storage.
Can I plant multiple types of spring flowering bulbs together in the same bed?
Yes, you can definitely mix and match different bulb varieties to create a vibrant display. However, consider their growing conditions, bloom times, and mature heights to ensure they don’t compete with each other. Plant taller varieties towards the north or west side of your bed to avoid shading smaller plants.
How do I protect my spring flowering bulbs from pests like deer and rodents?
No, unfortunately, there’s no foolproof way to completely prevent pest damage. However, you can deter them by using physical barriers (e.g., chicken wire) around the planting area or applying repellents containing predator scents (e.g., coyote urine). Planting bulbs in a location with good visibility and using motion-activated sprinklers can also help scare off unwanted visitors.