Are you ready to take your organic garden to the next level? Sowing seeds is an art that requires patience, practice, and a little bit of know-how. Choosing the right seeds for your climate and soil type can make all the difference between a bountiful harvest and a disappointing crop. In this comprehensive guide, we’ll walk you through the process of sowing seeds with maximum success in organic gardening. From preparing your soil to selecting the perfect variety, we’ll cover it all. Whether you’re a seasoned gardener or just starting out, our expert tips will help you overcome common challenges and achieve optimal results. With these simple yet effective techniques, you’ll be well on your way to growing vibrant, healthy plants that bring joy and nourishment to your family.
Choosing the Right Seeds
When it comes to sowing seeds, selecting the right variety is crucial for a healthy and thriving garden. In this section, we’ll guide you through the process of choosing the perfect seeds for your organic gardening needs.
Selecting Varieties Suitable for Your Climate
When selecting seeds for your organic garden, it’s essential to choose varieties that are compatible with your region’s climate and weather patterns. This will ensure optimal growth, health, and productivity of your plants.
To determine the suitable seed variety for your area, you need to consider factors such as temperature, humidity, sunlight, and precipitation levels. For instance, if you live in a hot and dry region, look for seeds that are resistant to drought and heat stress. On the other hand, if you’re in an area with frequent rainfall and high humidity, choose varieties that can tolerate excess moisture.
You can check the seed package or consult with local nurseries to determine which varieties have performed well in your specific climate. Some plants are also bred specifically for certain regions, so be sure to look for these ‘zone-specific’ seeds.
Another crucial factor is the length of your growing season. If you live in an area with a short growing season, choose varieties that mature quickly or have a shorter growth period. By selecting the right seed variety for your climate, you’ll be able to enjoy a thriving and productive organic garden all year round.
Understanding Seed Labels and Certifications
When it comes to choosing seeds for your organic garden, understanding what different labels and certifications mean is crucial. You’ll often come across terms like “non-GMO,” “heirloom,” and “open-pollinated.” Let’s break down these labels and their implications.
Non-GMO (genetically modified organism) seeds are those that have not been altered through genetic engineering. This label ensures that the seed has not been manipulated to introduce foreign genes from other species, making it a popular choice for organic gardeners. On the other hand, heirloom seeds come from traditional varieties that have been saved and handed down through generations, often carrying unique characteristics and flavors.
When selecting non-GMO or heirloom seeds, look for certifications like “Certified Organic” or “Non-GMO Project Verified.” These stamps of approval guarantee that the seed has met rigorous standards. If you’re new to organic gardening, consider starting with open-pollinated varieties, which can be saved and replanted without losing their characteristics.
When shopping for seeds, take note of the label’s fine print. Some terms may overlap or have specific requirements. For example, “organic” refers only to the growing conditions of the seed, not necessarily its genetic makeup.
Sourcing High-Quality Seeds
When it comes to sowing seeds for organic gardening, sourcing high-quality seeds is crucial for a successful harvest. Buying from reputable seed suppliers ensures that you get the best possible results. But how do you evaluate seed quality? Start by checking the supplier’s reputation and reviews from other customers. Look for suppliers who specialize in heirloom or non-GMO seeds, as these tend to be of higher quality.
Check the seed packet itself for any signs of moisture, damage, or tampering. A reputable supplier will provide clear instructions on how to store and sow the seeds. Be wary of very cheap seeds, as they may be old stock or of lower quality.
When in doubt, choose open-pollinated varieties, which can be saved and replanted year after year, reducing reliance on commercial seed companies. Look for certifications like USDA Organic or Botanical Interest’s Certified Organic Seed to ensure the seeds meet strict standards. By doing your research and choosing a reputable supplier, you’ll set yourself up for success in your organic gardening endeavors.
Preparing the Soil for Seed Sowing
Before sowing seeds, it’s essential to prepare your soil properly, and that starts with understanding the unique needs of different plants. This section will guide you through the simple steps to create a healthy foundation for optimal growth.
Testing and Amending Your Soil
Soil testing is an essential step before seed sowing to ensure you’re working with healthy and fertile soil. You can perform a simple pH test using pH paper or buy a digital pH meter for more accurate results. The ideal pH range for most vegetables and fruits falls between 6.0 and 7.0. If your soil’s pH is too high or too low, it may affect nutrient availability and plant growth.
Common soil amendments include compost, manure, and lime. Compost adds organic matter, improves drainage, and provides beneficial microbes. Use a 2-3 inch layer of compost as a top dressing before sowing seeds. Manure, particularly well-aged chicken or cow manure, acts as a natural fertilizer, providing essential nutrients like nitrogen, phosphorus, and potassium. Mix in about 10% of the recommended amount for optimal results.
Lime helps raise low pH levels and supply calcium to plants. Dolomitic lime is best suited for acidic soils, while calcitic lime is more effective in alkaline environments. Start with a small application (about 1-2 cups per 100 square feet) and retest after six months to adjust as needed.
Remember that excessive use of amendments can lead to nutrient imbalances or contamination risks. Always test your soil before adding any amendments, following the recommended guidelines for safe usage rates.
Creating a Seed-Specific Soil Mix
When sowing seeds for organic gardening, it’s essential to create a seed-specific soil mix that caters to their unique needs. Different types of seeds have varying requirements when it comes to drainage, moisture retention, and nutrient content. For instance, seeds that prefer well-draining soil, such as lettuce or herbs, will not thrive in clay-heavy mixes.
To create a tailored mix, consider the seed type’s specific requirements. If you’re sowing seeds that require a lot of water, like beans or squash, choose a mix with high moisture retention capacity. On the other hand, for seeds that prefer dry conditions, such as succulents or cacti, opt for a well-draining mix.
You can create your own seed-specific soil mix by blending different components. For example, combine 2 parts of peat moss (for moisture retention) with 1 part perlite (for improved drainage). Add a dash of vermiculite to enhance water absorption and root growth. This blend will be perfect for seeds that need consistent moisture levels.
Consider consulting the seed packet or researching online to determine the ideal mix for your specific seeds. With this approach, you’ll ensure optimal germination rates and healthy seedling development.
Incorporating Organic Matter into Your Soil
Adding organic matter to your soil is one of the most effective ways to improve its structure and fertility. This process is often referred to as “conditioning” the soil. Organic matter can take many forms, including compost, well-rotted manure, peat moss, or even leaf mold.
When you incorporate these materials into your soil, they release a cocktail of beneficial nutrients that plants crave. Compost, for instance, is rich in nitrogen, phosphorus, and potassium – the three primary macronutrients required by most plant species. By adding compost to your soil, you’re essentially providing your seedlings with a nutritional boost.
To get started, aim to add 2-3 inches of organic matter to the top 6-8 inches of your soil bed. You can do this by mixing it in thoroughly or spreading it evenly across the surface. Some gardeners even choose to create their own compost piles using kitchen scraps and yard waste. This DIY approach not only saves you money but also allows for complete control over the quality of your finished product.
Remember, conditioning your soil takes time and patience. The more organic matter you add, the healthier your plants will be.
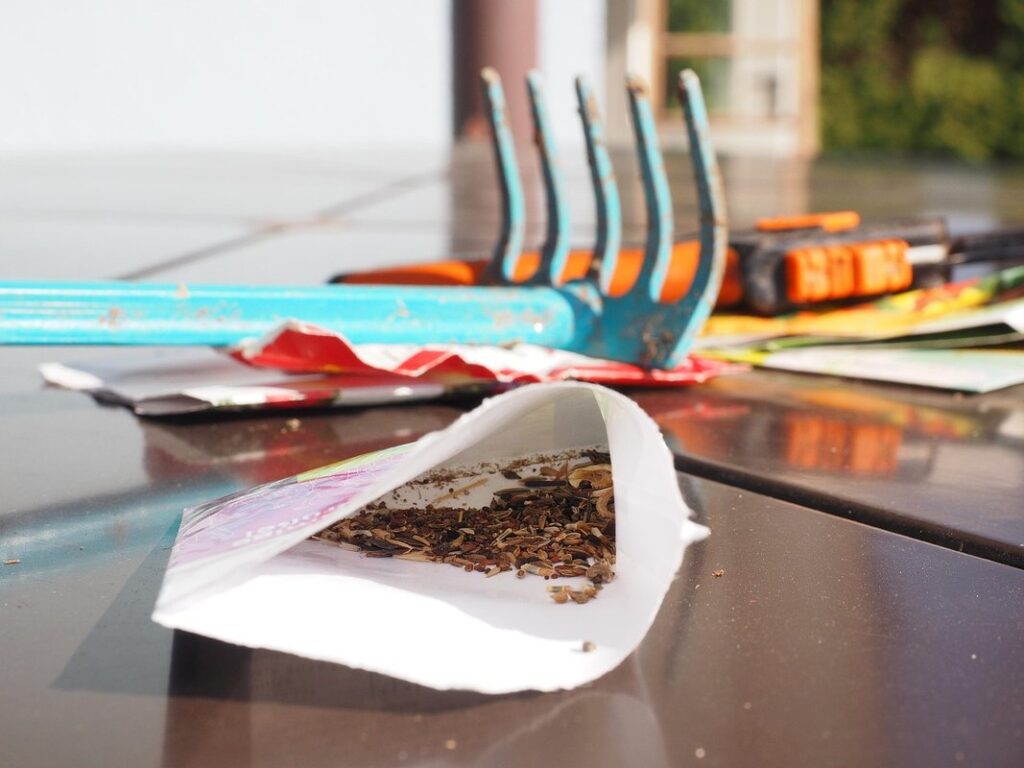
Sowing Seeds for Maximum Success
Now that you’ve got a plan, it’s time to focus on sowing seeds the right way to set yourself up for maximum success in your organic garden. We’ll walk through some essential steps to get started.
Techniques for Direct Seeding and Transplanting
When it comes to sowing seeds for organic gardening, two popular methods stand out: direct seeding and transplanting. While both techniques have their advantages, understanding when and how to use each can make all the difference in achieving maximum success.
Direct seeding involves sowing seeds directly into the garden bed where they will mature. This method is ideal for fast-growing plants like radishes, lettuce, and spinach, which germinate quickly and don’t require much care before harvest. To optimize direct seeding results, choose a spot with well-draining soil and adequate sunlight, and sow seeds at the correct depth according to the package instructions.
Transplanting, on the other hand, involves starting seeds indoors or in seed trays and then transferring them to the garden when they’ve reached a certain size. This method is perfect for plants that take longer to mature, like tomatoes, peppers, and eggplants, which benefit from a head start before being exposed to harsh outdoor conditions. To ensure successful transplanting, handle seedlings gently by their leaves, avoid exposing them to intense sunlight initially, and water thoroughly after planting.
When deciding between direct seeding or transplanting, consider the specific needs of each plant variety and choose the method that suits it best. By doing so, you’ll be well on your way to enjoying a bountiful harvest from your organic garden.
Timing Your Seed Plantings for Optimal Growth
When it comes to sowing seeds for maximum success, timing is everything. As an organic gardener, you know that your region’s climate and weather patterns play a significant role in determining the optimal time for planting seeds. This is because different regions have unique temperature ranges, precipitation levels, and daylight hours that can impact seed germination and growth.
To get it right, research the average last frost date and first freeze date for your area to determine when to plant cool-season crops like broccoli, kale, and carrots. For warm-season crops like tomatoes, peppers, and eggplants, wait until the soil has warmed up to at least 60°F (15°C). Additionally, consider planting seeds in succession, where you sow small batches every 1-2 weeks to ensure a continuous harvest.
Consider using frost blankets or row covers to extend your growing season. By timing your seed plantings according to your region’s climate and weather patterns, you’ll set yourself up for success and enjoy a bountiful harvest of healthy, organic produce.
Using Mulch and Other Soil Covers for Seed Protection
Mulch and other soil covers are valuable tools for seed protection. They help shield seeds from pests, diseases, and environmental stressors that can lead to reduced germination rates and poor growth.
One of the primary benefits of using mulch is its ability to regulate soil temperature. Mulch keeps the soil cool in the summer and warm in the winter, creating a stable environment for seeds to germinate and grow. For example, straw or bark chips can be used to keep the soil from getting too hot during the summer months.
In addition to regulating soil temperature, mulch also helps retain moisture and suppress weeds. This reduces the need for frequent watering and prevents competition for resources between seedlings and weeds. Some gardeners swear by using a combination of organic mulches like wood chips or leaves with natural repellents like garlic or hot peppers to deter pests.
To apply mulch effectively, start by laying down a 2-3 inch layer around the sown seeds. Keep in mind that too much mulch can be detrimental to seedlings, so monitor the situation closely and adjust as needed.
Caring for Your Seedlings
Now that you’ve sown your seeds, it’s time to give them the TLC they need to thrive. This next step is crucial in ensuring a healthy and robust harvest from your organic garden.
Monitoring for Common Pests and Diseases
As you continue to care for your seedlings, it’s essential to monitor them regularly for common pests and diseases. These issues can quickly spread and cause significant damage if left unchecked. One of the most common pests affecting seedlings is aphids. These tiny insects feed on plant sap, causing curled or distorted leaves.
To manage aphid infestations, inspect your seedlings daily for any signs of aphids. Use neem oil or insecticidal soap to control infestations. Spray these solutions in the early morning or evening when the plants are most susceptible.
Another issue you may encounter is powdery mildew, a fungal disease that causes white powder to form on leaves. This can be caused by high humidity and temperatures above 60°F (15°C). To prevent powdery mildew, ensure good air circulation around your seedlings and water them at the base rather than overhead.
Regularly inspecting your seedlings will help you catch any issues early, preventing them from becoming more serious problems.
Providing Adequate Water and Nutrients
Maintaining consistent moisture levels is crucial for seedling growth, as it helps prevent shock and promotes healthy development. Overwatering can lead to root rot, while underwatering causes stunted growth and increased susceptibility to pests. To maintain the right balance, check the soil daily by inserting your finger into it up to the first knuckle. If the soil feels dry, it’s time for watering.
Providing necessary nutrients is equally important for seedling growth. Start with a balanced, water-soluble fertilizer (20-20-20) and follow the instructions on the label for dilution rates. Water your seedlings gently but thoroughly after fertilizing to prevent burning their tender roots. As seedlings grow, switch to a more targeted fertilizer like a bloom booster or a high-phosphorus formula to promote healthy root development.
Some gardeners prefer using compost tea as an alternative to synthetic fertilizers. This liquid solution is made by steeping compost in water and can provide a broad spectrum of beneficial microbes that aid in nutrient uptake. When using compost tea, start with small amounts (1-2 tablespoons per gallon) and observe your seedlings for any adverse reactions before increasing the dose.
Thin Seedlings to Promote Healthy Growth
Thinning seedlings is a crucial step in organic gardening that often gets overlooked. It’s essential to thin out your seedlings regularly to prevent overcrowding, which can lead to weak and spindly growth. When seedlings are too close together, they compete for resources like light, water, and nutrients. This can cause them to become stressed, making them more susceptible to disease and pests.
To avoid this, gently remove the weaker seedlings when they have 2-3 sets of leaves. You can either use scissors or your fingers to carefully lift out the smaller plants, taking care not to damage the remaining ones. For example, if you’re growing lettuce, thinning them out to about 6-8 inches apart will give each plant room to breathe and grow robustly.
Remember, it’s better to err on the side of caution and remove more seedlings than necessary, rather than leaving too many weak plants that won’t thrive. Regular thinning also allows you to inspect your seedlings for any signs of disease or pests, giving you a chance to address issues before they become serious problems.
Troubleshooting Common Issues
When things don’t go as planned, we’ve got you covered! This section will walk you through common problems and their organic gardening solutions.
Dealing with Poor Germination Rates
When it comes to sowing seeds for organic gardening, dealing with poor germination rates can be frustrating and discouraging. But don’t worry, it’s a common issue that many gardeners face. To tackle this problem, let’s first identify the potential causes of low germination rates.
Inadequate moisture is one of the most common reasons for poor germination. Seeds need consistent moisture to germinate, but excessive watering can be just as detrimental. Make sure you’re providing enough water, but avoid overwatering by checking the soil daily. Seed quality is another factor to consider. Old or low-quality seeds may not germinate well, so it’s essential to use fresh seeds.
To improve your chances of successful germination, start by testing the pH level of your soil and adjusting it if necessary. This will ensure that your seeds have optimal growing conditions. Also, be mindful of sowing depth – seeds should be planted at a depth 2-3 times their diameter. By addressing these potential causes and taking preventative measures, you can significantly improve your seed germination rates and set yourself up for success in your organic garden.
Managing Weeds in Your Seedlings
As you nurture your seedlings, weeds can quickly become an unwelcome companion. Effective weed control is crucial to prevent competition for resources and reduce stress on your young plants. One method is to use mulch around your seedlings, suppressing weeds while retaining moisture and regulating soil temperature.
Another approach is hand-weeding, where you gently remove weeds by their roots to avoid damaging your seedlings’ delicate root systems. To make this process more efficient, consider using a tool like a hoe or cultivator with a shallow blade. This will allow you to quickly remove weeds without disturbing the surrounding soil.
Organic herbicides can also be an option, but choose products that are specifically labeled as safe for use around seedlings and in organic gardening. For example, cornmeal-based herbicides work by inhibiting weed growth while posing little risk to your young plants.
Timing is everything when it comes to weed control. Regularly inspect your soil and remove weeds before they reach maturity, taking care not to disturb the surrounding seedlings’ roots. By implementing these strategies, you can keep weeds under control without harming your environment or seedlings.
Addressing Sowing Errors and Improvising Solutions
We’ve all been there – planting seeds with the best of intentions only to realize we’ve made a critical mistake. Perhaps you planted them too deep, or maybe they’re sown just a hair’s breadth above the soil surface. Whatever the error, don’t panic! Addressing sowing errors is an opportunity to learn and improve your organic gardening skills.
If you find that your seeds are planted too deeply, gently dig around them with a fork and carefully bring them up to the correct depth. This might seem like a bit of a fiasco, but it’s better than risking root rot or poor germination due to inadequate light penetration. Conversely, if you’ve sown seeds at the surface, don’t be afraid to cover them lightly with a layer of fine soil – this will help prevent moisture loss and stabilize the seedling as it emerges.
In both cases, it’s essential to water your seedlings thoroughly after correction. This ensures they have enough moisture to continue growing while you’ve taken steps to rectify the initial mistake. By adapting to these errors in real-time, you can salvage a potentially disastrous situation and ultimately produce healthier, more resilient plants.
Frequently Asked Questions
What are the key factors to consider when selecting seeds for my organic garden’s specific climate and soil type?
When choosing seeds, remember that compatibility with your region’s temperature, humidity, sunlight, and precipitation levels is crucial. Consider consulting local nurseries or gardening experts to gain insight into which varieties thrive in your area. You can also research online resources or consult seed catalogs to find suitable options. Make sure to read the seed package labels for specific growing instructions.
How do I know if my soil needs additional amendments before sowing seeds, and what are some effective organic matter additions?
Before sowing seeds, test your soil pH and nutrient levels to determine its overall health. If it’s lacking essential nutrients or has poor drainage, incorporate organic matter such as compost, manure, or peat moss into the soil. These additions will improve soil structure, fertility, and overall growth conditions for your seedlings.
What are some common mistakes I should avoid when transplanting seedlings from pots to the garden?
When transplanting seedlings, be mindful of handling their roots gently to prevent damage. Also, ensure that you’re planting them at the same depth as they were in the pot, and water thoroughly after transplanting. Avoid exposing your seedlings to extreme weather conditions like direct sunlight or heavy rain for a few days following transplant.
How do I protect my seeds from pests and diseases in the garden?
To safeguard your seeds from common pests and diseases, maintain good hygiene practices such as disinfecting tools between uses. Keep an eye out for early signs of issues like aphids, whiteflies, or fungal growths on seedlings. Use natural deterrents like neem oil or garlic spray to control pest infestations.
Can I use seeds from last year’s harvest for this year’s planting, or do they lose their viability over time?
Yes, you can reuse seeds from previous harvests if stored properly in a cool, dry place. However, be aware that seed viability decreases with each passing year. For optimal results, purchase fresh seeds every 2-3 years to ensure high germination rates and vigorous plant growth.