Sowing broad beans can be a bit daunting, especially if you’re new to gardening. But don’t worry, with the right guidance, you’ll be growing these delicious and nutritious legumes in no time. Not only are they packed with protein and fiber, but they’re also relatively easy to grow, making them a perfect choice for gardeners of all levels.
In this comprehensive guide, we’ll walk you through everything you need to know to sow broad beans successfully. From selecting the right variety for your climate and soil type, to preparing the soil and sowing techniques, we’ve got you covered. We’ll also share expert tips on how to keep your broad bean plants healthy and thriving throughout the growing season. Whether you’re a seasoned gardener or just starting out, this article will provide you with all the information you need to grow delicious and bountiful broad beans in your garden.
Choosing the Right Variety
Choosing the right variety of broad beans is crucial for success, so let’s explore the different options and choose one that suits your climate and growing conditions.
Understanding Broad Bean Types
Broad beans come in various shapes, sizes, and colors, each with its unique characteristics and growing requirements. As you plan to sow broad beans, it’s essential to choose a variety that suits your climate, soil type, and desired harvest period.
The most common types of broad beans are:
* Dwarf varieties: These compact plants grow up to 60-90 cm tall and are ideal for small gardens or containers. They mature quickly, usually within 50-60 days.
* Tall varieties: These vigorous plants can reach heights of over 1.8 meters and require staking for support. They take longer to mature, typically around 70-80 days.
* Heritage varieties: These heirloom types offer unique characteristics like different bean colors or shapes. They often have a slower maturation period, but their flavor and texture are unmatched.
When selecting broad beans, consider the days to maturity, disease resistance, and growth habits. Some popular varieties include ‘Aquadulce’, ‘Blue Lake’, and ‘The Sutton’. Research these and other varieties to find the best fit for your garden conditions. By understanding the different types of broad beans, you can make informed decisions and grow a bountiful harvest.
Factors to Consider When Selecting a Variety
When selecting a broad bean variety for sowing, there are several key factors to consider. Climate is a crucial factor, as different varieties perform better in different conditions. For example, if you live in an area with hot summers, look for varieties that are heat-tolerant and drought-resistant, such as ‘Aquadulce Claudia’ or ‘Hestia’. On the other hand, if your region has cool winters, opt for varieties like ‘Robin Hood’ or ‘Witkiem’, which thrive in cooler temperatures.
Another important consideration is soil type. Broad beans prefer well-draining, fertile soil with a pH between 6 and 7. If you have heavy clay or sandy soils, choose varieties that are more adaptable, such as ‘Aubisque d’Albigeois’ or ‘Imperial Green’. Additionally, consider disease resistance when selecting a variety. Some common diseases affecting broad beans include powdery mildew and rust. Look for varieties with built-in resistance to these diseases, like ‘Roma’ or ‘Crimson Flowered’.
Ultimately, the right variety will depend on your specific growing conditions and preferences. By considering climate, soil type, and disease resistance, you can choose a broad bean variety that will thrive in your garden and provide a bountiful harvest.
Preparing the Soil
Before you start sowing, it’s essential to prepare your soil to give your broad beans the best chance of success and a healthy harvest. This involves removing weeds and debris.
Understanding Soil Requirements
When it comes to growing broad beans, having the right soil conditions is crucial for their health and productivity. The ideal pH level for broad beans is slightly acidic to neutral, ranging from 6.0 to 7.0 on the pH scale. If your soil is too alkaline or acidic, it can affect nutrient availability and plant growth.
In terms of nutrient requirements, broad beans need a balanced diet of nitrogen (N), phosphorus (P), and potassium (K). A general rule of thumb is to add a mix of compost, well-rotted manure, or organic fertilizers to provide essential nutrients. For example, you can incorporate 2-3 inches of compost into the top 6-8 inches of soil before sowing.
The structure of your soil also plays a significant role in broad bean growth. Aim for a well-draining and friable soil with adequate aeration. You can achieve this by incorporating organic matter like peat moss or perlite to improve drainage and reduce waterlogging.
How to Test and Prepare Your Soil
Before sowing broad beans, it’s essential to test and prepare your soil for optimal growth. You can start by taking a small sample of your soil from the area where you plan to sow the beans. Send this sample to a laboratory for analysis or use a DIY kit to determine its pH level and nutrient content.
The ideal pH range for broad beans is between 6.0 and 7.0, slightly acidic to neutral. If your soil test reveals that it’s too alkaline (high pH), you may need to add sulfur or aluminum sulfate to lower the pH. Conversely, if it’s too acidic (low pH), you can mix in some lime to raise it.
Additionally, consider testing for nutrient deficiencies such as nitrogen, phosphorus, and potassium. Based on your soil analysis results, apply necessary amendments like compost, well-rotted manure, or balanced fertilizers. Remember that over-fertilizing can harm your broad beans, so start with small amounts and gradually adjust according to the plant’s growth.
By taking these initial steps to test and prepare your soil, you’ll create a strong foundation for healthy and productive broad bean plants.
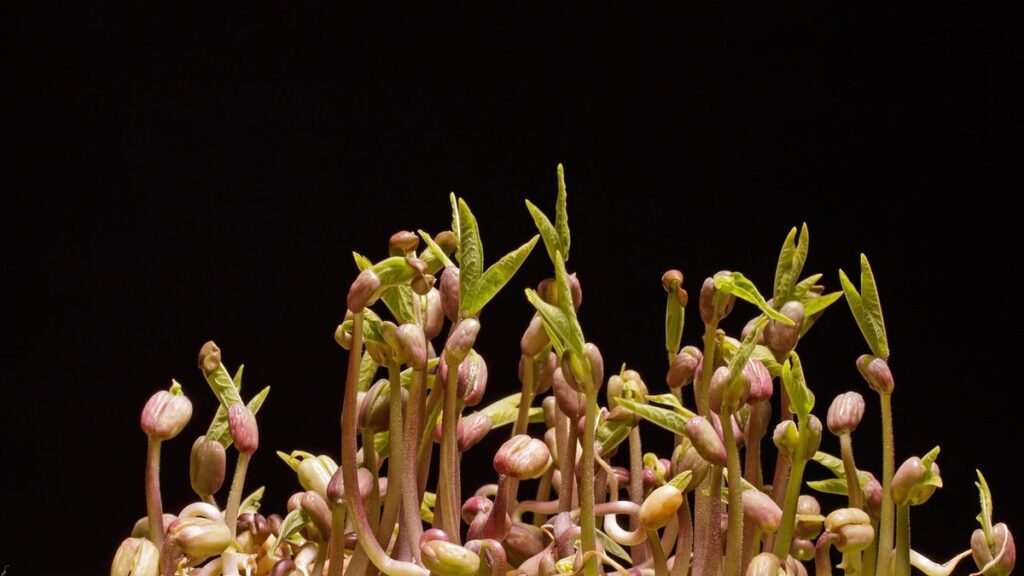
Sowing Broad Beans
Now that you have prepared your soil and seeds, it’s time to focus on sowing broad beans directly into the ground or seed trays for a strong start. Let’s dive into the specifics of this process.
Understanding the Optimal Sowing Time
When it comes to sowing broad beans, timing is everything. The optimal sowing time varies depending on your region and climate, taking into account frost tolerance and growth rates.
In areas with mild winters, such as the southern United States or parts of Australia, you can sow broad beans from late winter to early spring, around February or March. This allows for a head start before the heat sets in during summer.
For regions with cooler springs or harsher winters, it’s best to wait until the soil has warmed up and the danger of frost has passed. In these areas, sowing typically occurs from late April to early May. It’s essential to check the local weather forecast and plant at a time when the soil temperature is around 10-15°C (50-59°F) for optimal germination.
In regions with short growing seasons or cool summers, such as northern Europe or parts of Canada, it’s recommended to sow broad beans in late spring to early summer. This ensures that they mature before the first frost sets in during autumn. Keep an eye on your local climate and adjust the sowing time accordingly for optimal results.
Sowing Methods: Direct Sowing vs. Seed Raising
When it comes to sowing broad beans, you have two main options: direct sowing and seed raising. Both methods have their advantages and disadvantages, which we’ll explore in this section.
Direct sowing involves planting the broad bean seeds directly into the ground at the right time for your area. This method is straightforward and requires minimal equipment. The seeds are sown 2-3 inches deep and 1-2 inches apart in rows that are spaced about 18 inches apart. Direct sowing allows the beans to develop their root system before being transplanted, which can lead to healthier plants. However, it’s essential to ensure that you’re planting at the right time for your climate, as this method is more vulnerable to weather conditions.
Seed raising involves starting broad bean seeds in seed trays or pots and then transplanting them into larger containers once they’ve reached 2-3 inches tall. This method allows you to get a head start on the growing season, as you can begin sowing seeds indoors 4-6 weeks before the last frost date for your area. Seed raising also enables you to control the soil conditions and temperature more precisely, which can lead to better germination rates. However, this method requires more equipment and effort, and the seedlings may need to be hardened off before being transplanted outside.
It’s worth noting that both methods have their own set of challenges. Direct sowing can be affected by weather conditions, while seed raising requires careful handling and transplantation to avoid shocking the young plants.
Planting and Spacing
When it comes to sowing broad beans, getting the planting and spacing just right is crucial for a bountiful harvest. Let’s take a closer look at how to prepare your soil and plant your seeds correctly.
Understanding the Importance of Plant Spacing
When it comes to sowing broad beans, many gardeners overlook one of the most critical factors for their success: plant spacing. Properly spaced broad bean plants are essential for healthy growth and development, and can make all the difference between a mediocre harvest and an abundant one.
If your broad bean plants are too close together, they’ll be competing with each other for water, nutrients, and light. This can lead to weakened plants that are more susceptible to disease and pests. On the other hand, if you leave too much space between them, you may not get a full crop. The ideal spacing for broad beans is about 6-8 inches (15-20 cm) apart in rows that are 2-3 feet (60-90 cm) apart.
To give your broad bean plants enough room to grow, consider planting them in blocks or squares instead of rows. This will also help with air circulation and reduce the risk of fungal diseases. As a general rule, plant seeds about 1 inch (2.5 cm) deep and 3-4 inches (7.5-10 cm) apart. Remember, proper plant spacing is crucial for the health and productivity of your broad bean plants, so take your time to get it right!
How to Plant Broad Beans
When planting broad beans, it’s essential to follow these steps for optimal growth and yield. First, prepare the soil by loosening it to a depth of about 12-15 inches. This will help the roots grow deep into the earth. If you’re sowing in a bed, create a trench that’s about 2-3 inches deep.
Next, place two to three broad beans seeds in each trench, spaced about 1 inch apart. Cover them with soil, firming it gently as you go. Make sure the soil is moist but not waterlogged. If direct sowing isn’t possible due to poor drainage or extreme weather conditions, consider growing your broad beans in pots or containers.
As the plants grow, they’ll need support to prevent them from toppling over. You can use a trellis or a stake for this purpose. Simply drive the stake into the ground near the plant and tie the stem to it using twine or wire. Make sure not to damage the roots when tying the stem.
Some gardeners also prefer to use a cage or a fence to provide support for their broad beans. This is particularly useful if you’re growing multiple plants together. Just be sure to leave enough space between each plant and the supporting structure to allow for proper air circulation.
Regularly inspect your broad bean plants for signs of pests or diseases, and take action promptly if you notice any issues. Keep in mind that different varieties of broad beans have varying growth habits, so research specific advice for your chosen variety.
Caring for Your Crop
Now that you’ve sown your broad beans, it’s essential to provide them with the right care to ensure a healthy and bountiful harvest. Here’s how to care for your crop from seedling to mature bean.
Watering Requirements
Watering your broad bean plants is one of the most crucial aspects of their care. Adequate watering helps them develop a strong root system, promotes healthy growth, and increases yields. On the other hand, underwatering can cause stress, reduce plant vigor, and even lead to premature flowering.
To determine when your broad beans need water, stick your finger into the soil up to the first knuckle. If the soil feels dry, it’s time to give them a good soaking. Make sure the pot or bed has good drainage holes to prevent waterlogged soil. Water them in the morning or early afternoon so that the plants have the entire day to absorb the moisture.
Check the top 1-2 inches of soil for moisture by gently digging with your fingers. If it’s dry, give them a thorough watering, aiming to provide about an inch of water per week. Avoid overwatering, which can lead to root rot and other issues. Keep in mind that broad beans prefer moist but well-drained soil, especially when they’re producing pods.
Common Pests and Diseases
When it comes to growing broad beans, it’s essential to be aware of common pests and diseases that can affect them. Some of the most common issues you may encounter are aphids, bean weevils, and powdery mildew.
Aphids can cause curled or distorted leaves, while bean weevils can damage pods and seeds. To prevent these issues, ensure your plants receive adequate sunlight and water, as stress can make them more susceptible to pests. Use neem oil or insecticidal soap to control infestations.
Powdery mildew is a fungal disease that can cause white powdery patches on leaves. It thrives in humid conditions, so improve air circulation around your plants by providing enough space between rows. Remove any infected leaves and treat the affected areas with a fungicide specifically designed for broad beans.
Regular monitoring of your crop will help you catch problems early on, making it easier to implement control methods. Keep an eye out for signs of pests or diseases and act promptly to prevent them from spreading. With these simple prevention measures in place, you can enjoy a healthy and productive harvest of delicious broad beans.
Harvesting and Storage
Now that your broad beans are growing, it’s essential to know when they’re ready to be harvested and how to store them properly for maximum freshness. We’ll guide you through these crucial steps.
Understanding Broad Bean Maturity
When you’re waiting for your broad beans to mature, it’s essential to know exactly when they’re ready to harvest. This can be a bit tricky, as the pods may look and feel mature before the actual beans inside are fully developed.
One way to determine if your broad beans are ripe is to check their color. Typically, the pods turn from a vibrant green to a lighter green or cream-colored hue as they ripen. You should also gently squeeze the pods; if they’re soft and have a slight give, it’s likely that the beans inside are mature.
It’s also worth checking the size of the pods. Most broad bean varieties are ready for harvest when their pods are around 5-6 inches (13-15 cm) long. However, be careful not to wait too long, as over-maturity can cause the beans to become tough and fibrous.
When you’re unsure, it’s always better to err on the side of caution and give them a little more time. Remember that broad beans are ready when the pods are almost fully filled with beans, but still slightly firm. If you wait until they’re too ripe, you’ll miss out on some delicious beans.
How to Store Fresh Broad Beans
Proper storage of fresh broad beans is crucial to maintaining their quality and extending their shelf life. To keep them fresh for a longer period, store them in the refrigerator at a temperature below 4°C (39°F). It’s essential to avoid storing them with strong-smelling vegetables like onions or garlic as these can transfer their odors to the broad beans.
When storing, trim off any damaged or bruised pods to prevent the spread of decay. Place the trimmed broad beans in an airtight container lined with paper towels or cloth to maintain humidity and absorb excess moisture. If you plan to store them for an extended period, consider blanching them first by submerging them in boiling water for 2-3 minutes before cooling them immediately in ice-cold water.
This process will help preserve their color and texture. Always check on the stored broad beans regularly for any signs of spoilage or decay.
Troubleshooting Common Issues
Don’t worry if things don’t go according to plan, we’ll walk you through some common problems and solutions that can help get your broad bean crop back on track.
Identifying and Addressing Root Problems
Broad beans are a hardy and nutritious addition to any garden, but like all plants, they’re not immune to common root problems. One of the most significant issues you might encounter is poor soil quality, which can lead to shallow root systems and stunted growth. To address this, ensure your soil has good drainage and is rich in organic matter.
Another common problem is overwatering, which can cause roots to rot and kill the plant. Monitor the moisture levels closely, and avoid getting water on the leaves or crown of the plant. Instead, focus on soaking the soil around the base of the plant to encourage deep root growth.
Root aphids and fungal diseases are also potential threats to your broad bean crop. Regularly inspect your plants for signs of infestation or infection, such as distorted leaves or white powdery patches. If you do spot a problem, treat it promptly with organic pest control methods or fungicides specifically designed for beans.
Overcoming Climate-Related Challenges
When it comes to growing broad beans, unpredictable weather patterns and soil moisture fluctuations can be major concerns. In this section, we’ll address some climate-related challenges you might face and offer practical solutions.
In areas prone to droughts or heatwaves, it’s essential to ensure the soil has adequate moisture for your broad beans’ germination and growth stages. You can do this by incorporating organic matter like compost into the soil before planting. This will help retain water and regulate its release throughout the growing season. For example, during dry spells, consider providing your plants with mulch or a shallow irrigation system to conserve water.
Another common challenge is extreme weather conditions like heavy rainfall or intense cold snaps. If you’re expecting prolonged periods of rain, make sure your broad bean rows are spaced far enough apart to prevent fungal diseases from spreading. In areas where frosts are frequent, choose a cold-hardy variety and provide protection using row covers or individual plant cloches.
Keep in mind that some climate-related challenges can be unavoidable, but with the right planning and preparation, you’ll minimize risks and ensure your broad beans thrive despite these conditions.
Frequently Asked Questions
Can I sow broad beans in containers or must they be grown in the ground?
Yes, you can grow broad beans in containers, but make sure to choose a dwarf variety that is specifically bred for container growing. Use a large pot (at least 30-40 cm deep) with good drainage and well-draining potting mix. This will help prevent root problems and ensure healthy growth.
What if I’ve already sown broad beans in the wrong spot? Can I move them?
No, it’s not recommended to transplant broad beans as they are sensitive to disturbance during their early growth stages. If you’ve made a mistake with the initial planting location, consider starting over rather than risking damage to your plants.
How often should I water my broad bean plants, especially in dry weather conditions?
Broad beans require consistent moisture, but overwatering can lead to root rot and other problems. Water your plants when the top 5-7 cm of soil feels dry to the touch. During hot, dry spells, increase watering frequency to every 2-3 days.
Can I grow broad beans in a shaded area or do they need full sun?
Broad beans prefer full sun (at least 6 hours of direct sunlight) for optimal growth and flavor development. If you must grow them in a partially shaded area, choose a variety that is tolerant of shade, such as ‘Aquadulce’ or ‘Super Aquadulce’.
What are some common pests to watch out for when growing broad beans?
Common pests that can affect broad bean plants include aphids, slugs, and snails. Regularly inspect your plants for signs of infestation and use organic pest control methods whenever possible to minimize harm to the environment and promote healthy plant growth.