When it comes to maintaining a healthy garden or lawn, one crucial step often gets overlooked: soil preparation. But did you know that choosing the right plants can not only improve soil fertility but also reduce erosion and promote biodiversity? White clover and red clover are two popular species that excel in this department. By incorporating these nitrogen-fixing superstars into your soil care routine, you’ll be amazed at how quickly they get to work improving the health of your soil. In this article, we’ll explore the benefits of using clover for soil preparation, including choosing the right type, preparing the soil, sowing seeds, and maintaining a thriving stand. Whether you’re a seasoned gardener or just starting out, this is an essential read for anyone looking to take their soil care game to the next level.
Benefits of Using Clover in Soil Preparation
Using clover in soil preparation can bring a range of benefits, including improved fertility and reduced erosion. Let’s take a closer look at what these advantages are.
Improving Soil Fertility
Improving soil fertility is one of the most significant benefits of using clover in soil preparation. As we discussed earlier, clover’s ability to fix nitrogen in the soil makes it an attractive option for gardeners and farmers looking to reduce their reliance on synthetic fertilizers.
But how exactly does clover improve soil fertility? Well, when clover is added to the soil, its roots absorb atmospheric nitrogen and convert it into a form that’s usable by plants. This process is called nitrogen fixation, and it’s essential for plant growth. As a result of this process, the soil becomes richer in nutrients, which can lead to healthier, more robust crops.
By incorporating clover into your soil preparation routine, you’ll be able to reduce the amount of synthetic fertilizers needed, saving money and minimizing environmental harm. A single acre of clover can fix up to 200 pounds of nitrogen per year, making it an incredibly efficient way to improve soil fertility. With its many benefits, it’s no wonder that clover is becoming a popular choice for gardeners and farmers looking to create a more sustainable growing environment.
Enhancing Biodiversity
When you introduce clover into your soil preparation routine, one of the most significant benefits is its ability to enhance biodiversity. This might seem like a niche concern for gardeners and farmers, but trust us – it’s crucial for maintaining healthy ecosystems.
Pollinators like bees and butterflies are essential for plant reproduction, yet their populations have been declining at an alarming rate due to habitat loss and pesticide use. Clover, on the other hand, is a magnet for these creatures. Its vibrant flowers attract pollinators from far and wide, providing them with much-needed nectar and pollen.
But clover’s benefits don’t stop there. By creating a welcoming environment for beneficial insects like ladybugs and lacewings, you’re also supporting their populations. These insects play a vital role in controlling pests that can damage your crops, reducing the need for pesticides and minimizing harm to the ecosystem.
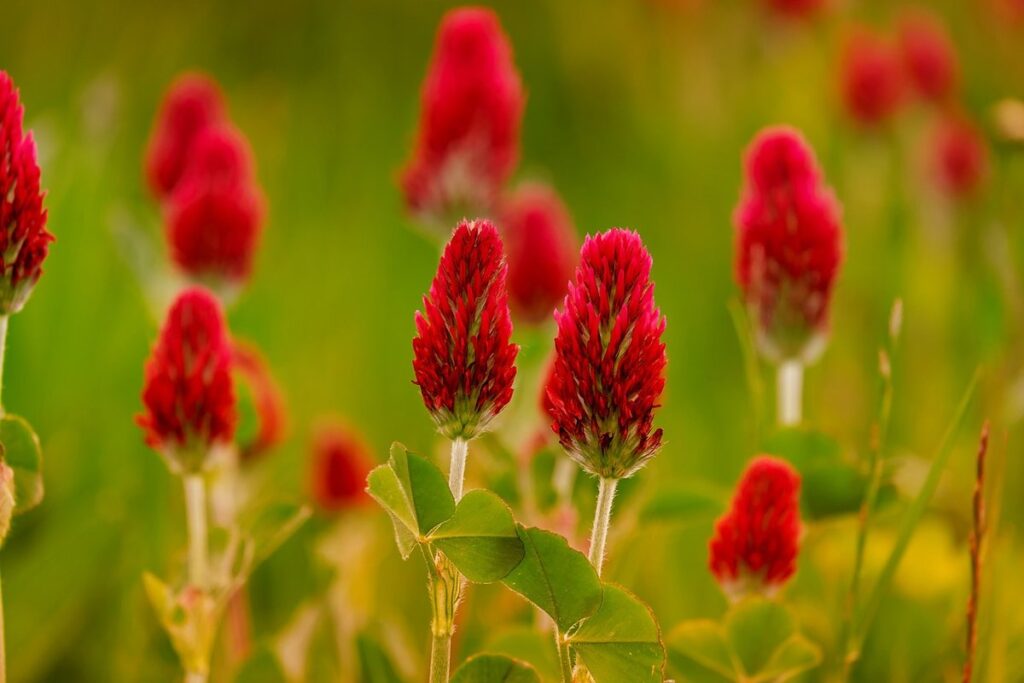
To make the most of clover’s biodiversity-enhancing properties, consider planting a mix of species, including white clover (Trifolium repens) and red clover (Trifolium pratense). By incorporating these beneficial plants into your soil preparation routine, you’ll be taking a significant step towards creating a more resilient and diverse ecosystem.
Reducing Erosion
When you introduce clover into your soil preparation routine, one of the most significant benefits is its ability to reduce erosion. Clover’s extensive root system works like a network of underground anchors, holding the soil firmly in place and preventing it from being washed or blown away.
This is particularly important for areas with heavy rainfall or irrigation, where water can quickly become a major contributor to soil erosion. By stabilizing the soil, clover helps to reduce runoff and prevent sedimentation in nearby waterways. In fact, studies have shown that clover-covered slopes can be up to 80% less susceptible to erosion compared to bare ground.
To take advantage of this benefit, try incorporating clover into areas prone to erosion on your property. Whether it’s a hillside, slope, or other vulnerable area, clover can help hold the soil in place and prevent damage. With its deep roots and ability to thrive in poor soil conditions, clover is an effective and low-maintenance solution for reducing erosion and protecting your soil.
Choosing the Right Clover Species
When selecting a clover species for your garden, it’s essential to consider factors such as climate, soil type, and desired uses. Let’s explore the most suitable options for you.
Understanding White Clover and Red Clover
When it comes to choosing the right clover species for your soil preparation needs, understanding the differences between White Clover and Red Clover is crucial. These two popular clover varieties have distinct preferences when it comes to soil pH and drainage.
White Clover (Trifolium repens) is a great option for acidic soils with a pH level between 5.0 and 6.0. It’s known for its ability to thrive in poor, sandy, or gravelly soils, making it an excellent choice for areas with low nutrient levels. If your soil tests have shown high acidity, White Clover can help bring some balance to the ecosystem.
On the other hand, Red Clover (Trifolium pratense) prefers well-drained soils with a pH between 6.0 and 7.0. It requires slightly more care in terms of soil conditions but is generally easier to establish than White Clover. When planting Red Clover, ensure your soil has sufficient drainage to prevent waterlogging.
By choosing the right clover species for your specific soil type, you’ll be able to maximize its benefits as a cover crop or lawn alternative. Remember to test your soil pH and adjust accordingly to get the best results from either White Clover or Red Clover.
Other Types of Clover
While white clover and red clover are the most commonly used species for soil preparation, there are other types of clover that may be better suited to specific soil conditions. Microclover, for example, is a low-growing, nitrogen-fixing legume that thrives in poor soil with low fertility. Its smaller leaves and stems make it an excellent choice for areas with limited space or where tall vegetation might interfere with crops.
Subterranean clover is another option for challenging soil conditions. This species has a deep taproot that allows it to access moisture deep within the soil, making it ideal for drought-prone areas. It’s also tolerant of acidic soils and can grow in a wide range of pH levels. Both microclover and subterranean clover are excellent choices for areas with poor soil structure or low fertility.
If you’re considering using one of these alternative species, be sure to assess your soil conditions carefully before making a decision. Test your soil’s pH level and nutrient content to determine the best choice for your specific needs.
Preparing the Soil for Clover
Before planting clover, it’s essential to prepare your soil properly, and that starts with loosening compacted areas and incorporating organic matter for optimal growth. This section will guide you through the steps to achieve a healthy clover-friendly environment.
Testing Soil pH and Nutrient Levels
When it comes to preparing the soil for clover, understanding the current soil conditions is crucial. This includes testing both the pH levels and nutrient content of your soil. The ideal pH range for clover growth is between 6.0 and 7.0, although some varieties can tolerate more acidic or alkaline conditions.
To determine the pH level of your soil, you can purchase a DIY soil testing kit or send a sample to a laboratory for analysis. These tests will provide you with an accurate reading of your soil’s acidity or alkalinity. If your soil is too far off from the ideal range, it may be necessary to make adjustments by adding lime to raise the pH or sulfur to lower it.
It’s also essential to test nutrient levels, particularly nitrogen, phosphorus, and potassium (NPK). Clover has a moderate requirement for these nutrients, so you’ll want to ensure they’re available in the right amounts. A soil testing kit will typically provide information on NPK levels, which can be used to guide fertilizer applications or other amendments as needed. By taking the time to test your soil conditions, you’ll be able to create an optimal environment for clover growth and set it up for success.
Removing Debris and Tillage
Removing debris and tilling the soil are crucial steps in preparing your land for clover growth. By removing any obstacles, you’ll be creating an environment that’s conducive to healthy root development and optimal water absorption.
The first step is to clear the area of any debris, whether it’s branches, rocks, or weeds. This will not only prevent damage to your clover seeds but also help control pests and diseases that can spread through decaying matter. Use a rake or a tiller to break up clumps of soil and loosen compacted areas.
Once you’ve removed the debris, it’s time to till the soil. Tillage breaks up compacted layers, allowing air and water to penetrate more easily. This process also helps kill any existing weeds that could compete with your clover for resources. Aim to till at least 8-10 inches deep to loosen the subsoil, which will improve drainage and aeration.
Regular tilling can be time-consuming, but it’s essential in creating an environment where your clover seeds can germinate and thrive.
Sowing Clover Seeds
To get started, let’s dive into the specifics of sowing clover seeds, including choosing the right location and preparing the soil for optimal growth.
Timing of Planting
When it comes to sowing clover seeds, timing is everything. The ideal time for planting depends on your climate and region. In general, it’s best to plant clover during the fall or early spring.
In temperate climates with mild winters, fall is an excellent time to sow clover seeds. This allows them to establish themselves before winter, making them more resilient to frost and cold temperatures. For example, in regions like the Pacific Northwest, planting in September or October gives the clover a head start on the growing season.
In areas with harsh winters or extreme temperature fluctuations, early spring is a better option. Planting around late March or early April allows the seeds to germinate as soon as the soil has warmed up and the threat of frost has passed. This approach works particularly well in regions like the Northeastern United States.
Regardless of when you plant, make sure the soil is prepared and suitable for clover growth before sowing your seeds. A mix of sand, clay, and organic matter will provide a fertile base for your clover to thrive.
Sowing Rates and Seed Depth
When sowing clover seeds, it’s crucial to get the sowing rates and seed depth just right. If you sow too much or too little, it can lead to uneven germination and establishment, which can ultimately affect the health and productivity of your soil.
The ideal sowing rate for clover depends on the specific variety and intended use of the crop. Generally, a good starting point is to sow 1-2 pounds per acre, with some varieties requiring more or less depending on their growth habits. It’s also essential to consider the seed-to-soil ratio, as too much seed can lead to overcrowding and competition for resources.
When it comes to seed depth, clover seeds typically require a shallow sowing depth of about 1/8 inch. This allows them to germinate quickly and establish themselves in the soil before becoming crowded out by other vegetation. Over-sowing or planting too deep can result in poor germination rates and weak root systems.
To ensure accurate sowing rates and seed depth, it’s a good idea to consult with local experts or check the specific guidelines for your chosen clover variety.
Establishing a Mature Clover Stand
To establish a mature clover stand, you’ll want to focus on creating an ideal environment for growth and maximizing seed germination. This involves careful planning and attention to detail.
Allowing for Establishment Period
Allowing for Establishment Period can take several months to a year, depending on climate and soil conditions. It’s essential to be patient during this time as it’s crucial for the clover stand to establish itself properly.
When planting clover, it’s common for it to germinate quickly, but then slow down significantly after a few weeks. This is because the initial growth phase is fueled by seed energy, and once that runs out, the plants rely on soil nutrients and establishment of their root system. In ideal conditions with ample moisture and optimal temperatures, a clover stand can take anywhere from 6 to 9 months to mature.
However, if your climate is cooler or drier than average, this process may take longer. In such cases, it’s not uncommon for it to take up to a year or more for the clover to fully establish itself. Be sure to monitor soil moisture and nutrient levels closely during this time to provide the best possible conditions for establishment.
As you wait for your clover stand to mature, maintain good soil health by adding organic matter such as compost or manure to promote healthy microbial activity. This will aid in establishing a robust root system and ensure a strong, resilient clover stand that can withstand various environmental stresses.
Maintaining Soil Health Through Regular Mowing and Fertilization
When it comes to maintaining soil health through regular mowing and fertilization, there’s more to consider than just cutting back the clover. This is especially true as your stand matures. By incorporating these practices into your routine, you’ll promote healthy growth while preventing weed competition.
Regular mowing can help control weeds by removing seed heads that would otherwise drop and propagate unwanted species. However, be mindful not to scalp or over-mow your clover stand. Aim for a height of 2-3 inches for maximum health benefits. This will also encourage the development of deeper roots, reducing soil erosion and improving water retention.
Fertilization is another crucial aspect of maintaining healthy soil. Clover has a unique ability to fix nitrogen from the air into the soil through its root system, making it an excellent choice for low-fertility soils. However, as your stand matures, it’s essential to replenish depleted nutrients with regular applications of balanced fertilizer. A general rule of thumb is to apply 1-2 pounds per 1000 square feet annually, or according to soil test results.
Frequently Asked Questions
How soon can I expect to see improvements in my soil fertility after planting clover?
You can start noticing improvements in your soil fertility within a few weeks of planting clover. However, it may take several months for the full benefits to manifest. Regular mowing and fertilization will help promote healthy growth and maximize nitrogen fixation.
Can I mix clover with other plants or grasses in my garden, or should I use it as a standalone solution?
Yes, you can definitely mix clover with other plants or grasses in your garden. In fact, this is often referred to as a “cover crop” system. By combining clover with other beneficial plants, you can create a more diverse and resilient ecosystem that promotes soil health.
How do I handle situations where my clover stand is being outcompeted by weeds?
If you notice that your clover stand is being outcompeted by weeds, try reducing the frequency of mowing or using a shallow mower to minimize damage to the clover. You can also use targeted herbicides or mulching techniques to control weed growth.
Can I use clover as a solution for poor soil pH levels, and if so, how?
While clover is an excellent option for improving soil fertility, it’s not directly responsible for adjusting soil pH levels. However, by promoting overall soil health through regular mowing and fertilization, you can create a more favorable environment for beneficial microorganisms to thrive – which in turn can help stabilize pH levels.
Are there any specific tools or equipment I should have on hand when preparing my soil for clover planting?
When preparing your soil for clover planting, it’s essential to have the right tools and equipment at hand. This includes a soil test kit for assessing nutrient levels and pH, a tiller or rototiller for loosening compacted soil, and a broadcast seeder for efficient seed distribution.
What are some common mistakes people make when trying to establish a clover stand, and how can I avoid them?
Some common mistakes include over-mowing the clover, failing to provide adequate water during establishment, and neglecting to maintain proper soil pH levels. To avoid these pitfalls, make sure to regularly monitor your soil conditions, provide sufficient water during the initial growth phase, and adjust mowing schedules accordingly.