Are you tired of tedious garden watering routines? Do you want to save time, water efficiently, and ensure your plants receive exactly what they need? A soaker hose system is just what you’ve been looking for. By strategically designing, installing, and maintaining a soaker hose layout, you can take your gardening game to the next level.
With the right approach, soaker hoses offer numerous benefits – like reduced water waste, healthier plant growth, and a lower environmental impact. But where do you start? This comprehensive guide will walk you through choosing the perfect soaker hose for your garden, designing an effective layout, and troubleshooting common issues that may arise. Whether you’re a seasoned gardener or just starting out, this article will provide you with the knowledge to create a thriving and water-efficient oasis in your own backyard.
Understanding Soaker Hoses and Their Benefits
To make the most of your soaker hose, it’s essential to understand how they work and what benefits they can bring to your garden, making them a valuable investment for any gardener.
What is a Soaker Hose?
A soaker hose is a type of irrigation system specifically designed for watering gardens and landscapes. It’s typically made of flexible, permeable material such as polypropylene or polyethylene that allows water to flow through tiny pores, providing uniform moisture distribution throughout the soil.
The design of a soaker hose is usually long and slender, often coiled or spiraled, making it easy to wrap around plants, trees, and garden beds. This versatility in layout makes it an ideal choice for gardens with varying terrain and plant layouts. When connected to a water source and timer, the soaker hose works by slowly releasing water over a set period, typically through small holes or emitters along its length.
Soaker hoses have several advantages over traditional irrigation methods. For one, they reduce evaporation and runoff, conserving up to 50% more water than sprinkler systems. They also minimize soil compaction, which can damage plant roots, and are gentler on plants compared to overhead watering methods.
Choosing the Right Soaker Hose for Your Garden
When it comes to choosing the right soaker hose for your garden, there are several factors to consider. The material of the hose is one crucial aspect – you can opt for a durable and long-lasting PVC or rubber soaker hose, or go for a more eco-friendly option like recycled plastic. Consider the length of the hose as well; a longer hose might be more convenient but could also increase pressure loss.
Diameter is another essential factor to consider. A wider diameter hose will have higher flow rates but may not fit through smaller garden areas. Conversely, narrower diameters reduce water waste and are ideal for smaller spaces.
Lastly, think about the flow rate of your soaker hose. This refers to how much water it can supply in a given amount of time. A higher flow rate is essential for larger gardens or lawns that require more watering, while smaller gardens can benefit from lower flow rates.
To determine which soaker hose is right for you, consider the size and layout of your garden. Measure out the areas you need to water and choose a hose with sufficient length and flow rate to meet those needs. By taking these factors into account, you’ll be able to find a soaker hose that efficiently waters your entire garden without wasting resources.
Planning Your Soaker Hose Layout
To plan a successful soaker hose layout, consider the garden’s specific needs and space constraints when deciding where to place your hoses. This will ensure optimal water distribution.
Assessing Your Garden’s Irrigation Needs
Before designing your soaker hose layout, it’s essential to assess your garden’s water requirements. This step is crucial to ensure that you’re providing the right amount of water to your plants without wasting a single drop. To determine your garden’s irrigation needs, start by considering the soil type in your garden. Different soils have varying levels of water-holding capacity, with clay soils being more retentive than sandy soils.
Next, evaluate the plant requirements for each section of your garden. Some plants, like vegetables and fruits, need consistent moisture to produce well, while others, such as succulents and cacti, are drought-tolerant and require less water. You can find this information on the plant labels or by consulting a gardening expert.
For example, if you have a section with clay soil and plants that prefer moist conditions, you’ll need to design your soaker hose layout accordingly. This might involve installing more soaker hoses in areas with clay soil to ensure sufficient water supply. By understanding your garden’s unique water requirements, you can create an efficient soaker hose layout that meets the needs of each plant and saves you time, money, and resources.
Designing a Efficient Soaker Hose Layout
When designing an efficient soaker hose layout, it’s essential to consider three critical factors: water pressure, flow rate, and coverage area. A proper understanding of these elements will help you create a system that effectively waters your garden without wasting a single drop.
Start by checking the water pressure in your home or property. Aim for at least 30 pounds per square inch (PSI) to ensure optimal performance from your soaker hose. Next, calculate the flow rate required for your garden based on its size and plant density. A general rule of thumb is to allocate 1-2 gallons per minute (GPM) per 100 feet of soaker hose.
Minimizing overwatering and underwatering zones is crucial in a well-designed layout. To achieve this, divide your garden into sections or “zones” based on the plants’ watering requirements. This will allow you to tailor water distribution to each zone’s specific needs, reducing waste and ensuring every plant receives the right amount of moisture.
When planning your soaker hose layout, keep these zones in mind and use them to guide your placement of the soaker hoses.
Installing Your Soaker Hose System
Now that you’ve carefully planned your soaker hose layout, it’s time to physically install the system. This involves setting up and connecting the hoses, fittings, and sprinklers for a hassle-free watering experience.
Preparing the Garden Bed for Installation
Before installing your soaker hose system, it’s essential to prepare the garden bed properly. This step will ensure that your new irrigation system functions efficiently and effectively.
Start by clearing any debris from the area. Remove weeds, rocks, and other obstacles that could interfere with the soaker hose or block water flow. Take a moment to inspect the soil quality as well; if it’s compacted or hard, you may need to loosen it up before proceeding.
Next, mark out the irrigation route using a hose or rope to guide where your soaker hose will go. This is also an excellent time to plan and adjust the layout as needed. Make sure the path isn’t too tight or constricted, which could cause kinking or tangles. When possible, try to keep the hose as straight as feasible.
After clearing debris and marking out the route, loosen the soil slightly with a fork or tiller. This will make it easier for water to penetrate the soil, reducing runoff and promoting healthy root growth.
Connecting the Soaker Hose to a Water Source
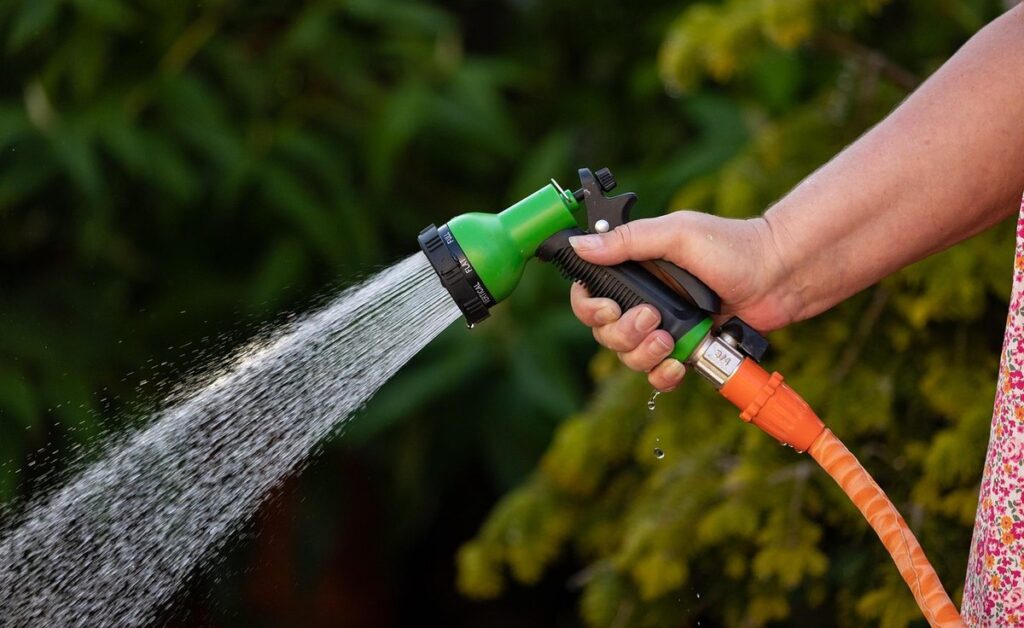
When connecting your soaker hose to a water source, it’s essential to ensure a reliable and efficient watering system. You’ll need to attach the soaker hose to a faucet, which can be done using various attachments available on the market.
One popular option is the 1/2″ male adapter, which fits snugly onto the end of your soaker hose. This attachment screws directly into your outdoor faucet’s 1/2″ threaded inlet. Make sure to choose an adapter that matches your faucet’s thread type and size to avoid any leaks or damage.
Another consideration is installing a pressure regulator. Soaker hoses operate optimally between 10-40 PSI, but most household faucets deliver pressures well above this range. A pressure regulator helps reduce the water pressure to a safe level for your soaker hose, preventing damage and ensuring even watering.
You can also install a flow control device, which allows you to adjust the water flow rate from your faucet to match your soaker hose’s needs. This is particularly useful if you have multiple outlets or branches on your system.
Operating and Maintaining Your Soaker Hose System
Now that you’ve designed and installed your soaker hose system, it’s time to focus on operating and maintaining it for optimal performance and longevity. Proper care will ensure a healthy garden all season long.
Adjusting Water Pressure and Flow Rate
Adjusting water pressure and flow rate is crucial for optimal irrigation performance with your soaker hose system. When the water pressure is too high, it can lead to excessive runoff and waste of precious water resources. Conversely, low water pressure may result in inadequate watering of your plants.
To adjust water pressure, check your outdoor faucet or spigot for a pressure regulator valve. If you don’t have one installed, consider adding it to maintain a consistent flow rate between 10-20 gallons per minute (GPM). A pressure gauge will also help you monitor the pressure levels and make adjustments accordingly.
Common issues related to low or high water pressure include:
• Low pressure: plants may not receive enough moisture, resulting in under-watered leaves and flowers
• High pressure: excessive runoff can lead to wasted water and erosion
To troubleshoot these issues, check your soaker hose layout for any kinks or blockages that might be restricting flow. Regularly inspecting and maintaining your system will help ensure optimal performance and efficient watering of your garden.
Regular Maintenance Tasks
Regular maintenance is crucial to ensure your soaker hose system continues to function efficiently and effectively. Inspect your soaker hose regularly for signs of leaks, which can be indicated by a decrease in water pressure or uneven watering patterns. Check the entire length of the hose, including any elbows, tees, or couplers, for cracks or damage.
Cleaning your soaker hose is also an essential maintenance task. Remove any debris, dirt, or mineral buildup that may be clogging the emitters or reducing water flow. Use a soft-bristled brush to gently scrub away any blockages and then rinse with clean water.
Another critical aspect of regular maintenance is replacing worn-out sections of your soaker hose. Over time, the UV-resistant material can degrade, leading to cracks and leaks. Inspect the entire system annually and replace any damaged or degraded sections before they cause further problems.
By performing these regular maintenance tasks, you’ll be able to extend the lifespan of your soaker hose system and ensure it continues to deliver efficient and effective watering to your garden.
Troubleshooting Common Issues with Soaker Hoses
Don’t let soaker hose problems get in the way of a lush garden – we’ve got you covered. Learn how to troubleshoot common issues and get back on track!
Identifying Causes of Overwatering or Underwatering
When using soaker hoses in your garden, it’s not uncommon to encounter issues with overwatering or underwatering. These problems can be caused by a variety of factors, including blockages within the hose itself.
One common culprit is kinked hoses, which can restrict water flow and lead to under-watered plants. To prevent this issue, make sure to inspect your soaker hoses regularly for any kinks or twists that could interfere with water circulation. If you find a kinked section, simply remove it by gently tugging on the hose.
Another potential cause of overwatering is an incorrect flow rate. Soaker hoses are designed to deliver water directly to plant roots at a slow and steady pace. However, if the flow rate is too high, excess water can accumulate in the soil, leading to root rot and other problems. To correct this issue, check your soaker hose’s manufacturer instructions for recommended flow rates, or consult with a local gardening expert.
Regular maintenance and monitoring of your soaker hoses can go a long way in preventing overwatering and underwatering issues.
Addressing Other Common Problems
While soaker hoses are generally low-maintenance, they can be prone to some common issues that may hinder their performance. Clogged nozzles are a frequent problem, often caused by mineral buildup from hard water or debris accumulation over time. To address this issue, simply disconnect the nozzle and soak it in vinegar for several hours before rinsing with warm water.
Frozen pipes during winter months can also be a concern in colder climates. Prevent this by insulating exposed sections of the hose or using freeze-resistant materials for areas prone to freezing temperatures.
Another common issue is root damage from nearby plant growth. To mitigate this, ensure the soaker hose is at least 12 inches away from any plants with invasive roots and avoid placing it near trees or shrubs that tend to grow extensive root systems.
Regular maintenance and inspections can help prevent these problems from arising in the first place. Regularly check for kinks and blockages, and replace worn-out sections of the hose as needed.
Tips for Extending the Lifespan of Your Soaker Hose System
To get the most out of your soaker hose system, it’s essential to know how to extend its lifespan and ensure it continues to provide optimal watering results for years to come. Regular maintenance is key.
Regular Inspection and Replacement
Regular inspections are crucial to identifying potential problems before they escalate into major issues. It’s essential to check your soaker hose system regularly for signs of wear and tear, such as cracks, cuts, or kinks. These imperfections can reduce the water pressure and flow rate, ultimately affecting the health of your plants.
To perform a thorough inspection, walk along your soaker hose layout and feel for any soft spots or weak points. Check for mineral buildup, which can clog the tiny holes in the soaker hose, reducing its efficiency. If you notice any damage, replace the affected section immediately to prevent further issues. When replacing worn-out sections, ensure that the new material is compatible with your existing system and has a similar pressure rating.
As a general rule of thumb, consider replacing your soaker hose every 5-7 years or when you notice a significant decline in performance.
Upgrading or Expanding Your System
When it’s time to upgrade or expand your soaker hose system, there are several key considerations to keep in mind. First and foremost, you’ll need to assess whether your current water source is sufficient for the increased irrigation area. This might involve installing a new well or connecting to a municipal water supply. Consider factors such as flow rate, pressure, and distance from the garden.
Next, think about how you can improve your timer system. Are you using a manual timer that requires daily adjustments? Or do you have an automated system in place? If not, investing in a smart irrigation controller can save you time and energy while ensuring your plants receive the right amount of water.
Another crucial aspect is scaling up your soaker hose setup to accommodate larger areas or more complex layouts. This may involve purchasing additional hoses, adding new emitters or sprinklers, or installing a more efficient drip irrigation system.
Conclusion: Maximizing the Benefits of Soaker Hoses in Your Garden
By following the soaker hose layout guide provided in this comprehensive manual, you can create an efficient and effective watering system for your garden. To maximize the benefits of soaker hoses, make sure to regularly inspect and maintain them by checking for kinks or blockages that could be restricting water flow. Also, ensure that the soaker hoses are correctly installed and laid out to cover all areas of your garden. This will not only save you time and effort but also promote healthy plant growth and reduce water waste. With proper care and maintenance, soaker hoses can become an essential tool in your gardening arsenal, providing a reliable and efficient way to keep your plants hydrated throughout the growing season.
Frequently Asked Questions
What are some key factors to consider when designing my soaker hose layout?
When designing your soaker hose layout, consider the size of your garden, the type of plants you’re growing, and the water pressure available. You’ll also want to think about how to evenly distribute water throughout the garden, including any slopes or uneven terrain. This will help ensure that every plant receives the right amount of moisture.
Can I use soaker hoses in areas with low water pressure?
Yes, soaker hoses can be used in areas with low water pressure. In fact, they’re often ideal for areas where water pressure is limited, as they allow for efficient watering even at lower pressures. When using soaker hoses in low-pressure areas, make sure to choose a hose with the correct diameter and material for optimal performance.
How do I adjust the flow rate of my soaker hose system?
To adjust the flow rate of your soaker hose system, you’ll typically need to adjust the water pressure at the source. This can usually be done by turning a valve or adjusting a regulator. The specific process will depend on your system’s design and components. Be sure to consult your manufacturer’s instructions for guidance.
Can I use soaker hoses with drip irrigation systems?
Yes, soaker hoses can be used in conjunction with drip irrigation systems. In fact, combining the two can provide even more efficient watering and increased crop yields. When integrating soaker hoses with drip irrigation, make sure to space them correctly to avoid competition for water between different irrigation types.
How often should I inspect my soaker hose system?
Regular inspection of your soaker hose system is crucial to maintaining its effectiveness and extending its lifespan. Aim to inspect the system every 2-3 months during peak watering seasons, checking for signs of wear, damage, or clogs. This will help you catch any issues early on and make necessary repairs before they cause problems.