Are you tired of constantly checking on your herb plants, worried they’ll wither away from neglect? Do you want to grow fresh, fragrant herbs like basil and mint year-round without breaking a sweat? Self-watering planters are here to save the day! With these clever containers, you can enjoy the benefits of indoor gardening while minimizing the effort. In this comprehensive guide, we’ll walk you through everything you need to know about setting up self-watering planters for herbs. We’ll explore the pros and cons of different types, key features to consider when choosing a planter, and advanced techniques for maximizing yields. By the end of this article, you’ll be equipped with the knowledge to create a thriving herb garden that’s low maintenance and high reward – perfect for any gardening enthusiast!
Choosing the Right Self-Watering Planter
When selecting a self-watering planter for your herbs, consider factors such as plant size, soil type, and desired level of automation to ensure a harmonious setup. Choose wisely!
Types of Self-Watering Planters
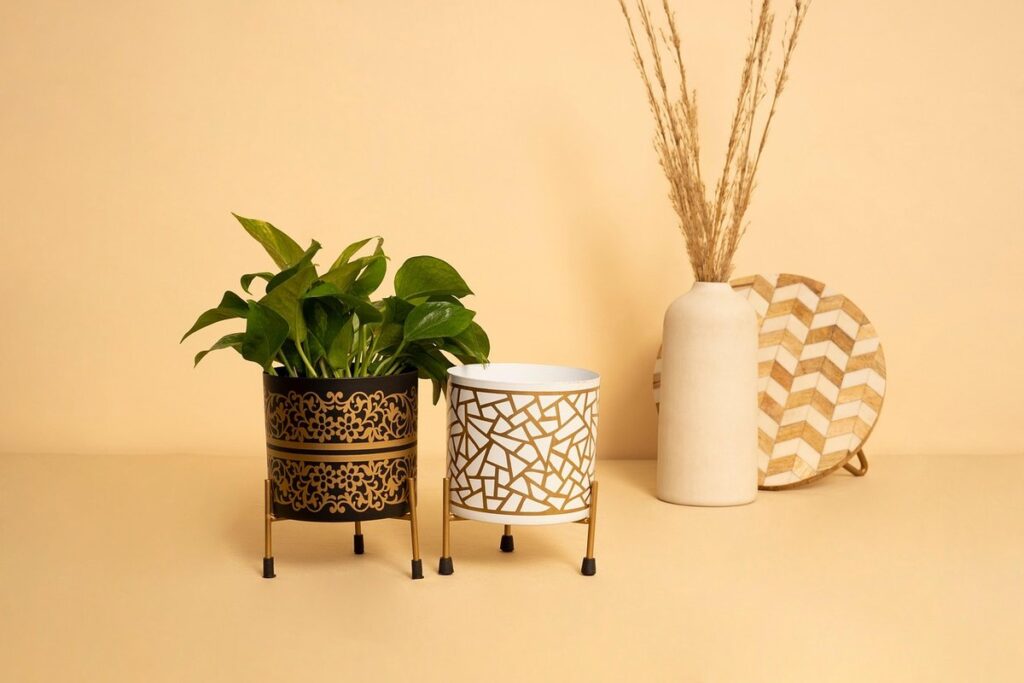
When selecting a self-watering planter for your herbs, you’ll encounter various options made from different materials. The most common types of self-watering planters are ceramic, plastic, and fabric planters.
Ceramic planters offer excellent insulation properties, keeping the soil at a consistent temperature. They’re also aesthetically pleasing, making them a great choice for indoor herb gardens. However, they can be heavy and may require more frequent watering due to their high water-holding capacity. Additionally, ceramic planters are prone to cracking if exposed to extreme temperatures or dropped.
Plastic planters, on the other hand, are lightweight and easy to clean. They’re often less expensive than ceramic planters but may lack the visual appeal of a ceramic planter. However, they come in a variety of colors and shapes, making them suitable for outdoor herb gardens or indoor spaces where style is important.
Fabric planters offer an eco-friendly alternative, using breathable materials that allow excess water to drain back into the reservoir. They’re also relatively inexpensive and lightweight, making them perfect for hanging baskets or tiered planters. However, fabric planters may require more frequent watering due to their high water permeability.
Key Features to Consider
When selecting a self-watering planter, there are several key features to consider that will ensure your herbs receive the right amount of moisture. First and foremost, look for a planter with an adequate water reservoir capacity. This is typically measured in ounces or liters and should be sufficient to hold at least 1-2 quarts of water. A larger reservoir allows you to go longer between watering sessions, reducing maintenance time.
Another crucial feature is the drainage system. A good self-watering planter should have a built-in mechanism for excess water to escape, preventing root rot and other issues. Some planters may feature a separate drain pot or a porous material that allows for airflow. Consider your herb’s specific needs – for example, basil prefers well-draining soil.
Lastly, ensure the planter is compatible with your herb size. Small herbs like thyme or rosemary require less water than larger varieties like mint or lemongrass. A self-watering planter with adjustable water levels can be beneficial in this regard, allowing you to customize the amount of moisture for different plants.
Setting Up Your Self-Watering Planter for Herbs
Now that your self-watering planter is assembled, let’s move on to setting it up specifically for herbs, ensuring you get optimal results from its unique watering system. This section walks you through the essential steps.
Preparation is Key
Before diving into setting up your self-watering planter for herbs, it’s essential to take some time to prepare and plan carefully. This may seem obvious, but proper planning can make all the difference between a thriving herb garden and one that struggles to survive.
To begin with, choose a location for your self-watering planter that receives the right amount of sunlight for your chosen herb variety. Some herbs like basil and mint require full sun, while others like parsley and cilantro prefer partial shade. Make sure you’ve selected an area with sufficient light hours to support the growth of your herbs.
Next, prepare your soil by selecting a high-quality potting mix specifically designed for indoor plants. This will ensure good drainage and prevent waterlogged soil, which can be detrimental to herbs. Consider adding organic matter like compost or worm castings to improve soil fertility and structure.
When selecting your herb variety, consider factors like climate, pest resistance, and growth habits. Some popular herb options for self-watering planters include mint, basil, parsley, and cilantro. Make sure you’ve chosen a variety that suits your local climate and growing conditions.
Planting Herb Seeds or Seedlings
When planting herb seeds or seedlings in your self-watering planter, follow these steps for optimal growth. Begin by filling the water reservoir to the recommended level, usually about 2-3 inches deep. This will give your herbs a good starting point and prevent root rot.
Next, gently remove any seedlings from their pots or plant seeds directly into the soil in the self-watering planter. For seedlings, dig a shallow hole that’s about twice as wide as the pot, making sure not to damage any roots. Plant them at the same depth they were previously and firm the soil around them.
When planting seeds, sow them about 1-2 inches deep and 2-3 inches apart, depending on the type of herb. Some popular herbs like basil and mint can be planted closer together, while others like rosemary and thyme prefer more space. Water the soil gently but thoroughly after planting to settle any compacted soil. As the plants grow, ensure they have enough space to spread out by trimming or dividing them as necessary.
Understanding How Self-Watering Planters Work
Self-watering planters use a clever system of water reservoirs and wicking materials to deliver moisture directly to your herb’s roots as needed. Let’s dive into how this technology works its magic!
The Science Behind Water Reservoirs
A self-watering planter’s secret to success lies within its water reservoir. This innovative feature allows for consistent moisture levels in the soil, perfect for herb plants that prefer well-drained yet humid conditions. Essentially, a water reservoir is a built-in compartment at the bottom of the planter that stores excess water. As the soil above dries out, the plant draws upon this stored water to maintain its optimal moisture level.
This concept has several benefits for herb plants. Firstly, it eliminates the need for frequent watering, reducing the risk of overwatering and associated root rot. Secondly, it helps maintain a stable pH level in the soil, which is crucial for herbs that require specific acidity levels to thrive. For instance, basil prefers slightly acidic to neutral soil (pH 6.0-7.0), while mint can tolerate more alkaline conditions (pH 6.5-8.0).
By incorporating a water reservoir into your self-watering planter, you’ll enjoy healthier herb plants with reduced maintenance needs.
How to Monitor and Adjust Water Levels
Monitoring water levels is crucial to ensure that your herbs receive the right amount of moisture. To do this, you’ll need to check the water level regularly, ideally once a day. Start by gently feeling the weight of the planter to determine if it feels light or heavy. A self-watering planter’s built-in water reservoir will make the container feel heavier when full.
To monitor the water level more accurately, look for signs that indicate the water is low. These can include droopy leaves, a decrease in growth rate, or visible cracks in the soil. If you notice any of these symptoms, it’s time to adjust the water level.
Adjusting the water level involves adding more water to the reservoir when necessary. Remove any excess herbs from the planter and carefully pour water into the reservoir until you reach the desired level. Make sure not to overfill the reservoir as this can cause water to spill out of the pot. If you’re still unsure, start with small increments (about 1/4 inch) and check the soil moisture again before adding more water.
Remember that herbs require different amounts of water depending on their type, climate, and growing conditions. Be prepared to make adjustments based on your specific herb plants’ needs.
Common Issues with Self-Watering Planters for Herbs
As you’re getting started with your self-watering planter setup, it’s essential to be aware of some common issues that can arise and how to troubleshoot them for a healthy herb garden. Let’s explore these potential pitfalls together.
Identifying and Troubleshooting Problems
When using self-watering planters for herbs, you may encounter some common issues that can affect the health and well-being of your plants. One of the most common problems is clogging of the drainage system. This occurs when the soil particles or debris accumulate inside the tubes or pipes, preventing water from draining properly.
To prevent this issue, make sure to clean the drainage system regularly by flushing it with water. You can also use a soft brush to scrub away any stubborn particles. It’s also essential to check the tubes and pipes for blockages before adding soil or plants.
Another common problem is incorrect water levels in the reservoir. This can lead to either underwatering or overwatering, which can be detrimental to your herbs. To avoid this issue, ensure that you monitor the water level regularly and adjust it according to the needs of your plants.
To troubleshoot problems with water levels, check the following:
* Make sure the float valve is functioning correctly
* Check for any leaks in the system
* Ensure the reservoir is filled with enough water to meet the needs of your plants
You can also use a hygrometer to monitor the soil moisture levels and adjust the water level accordingly. By regularly checking and maintaining the self-watering planter, you can prevent common issues and ensure that your herbs receive the right amount of water.
It’s also worth noting that some self-watering planters come with specific instructions for maintenance and troubleshooting. Always follow these guidelines to get the most out of your planter.
Tips for Maintaining Your Self-Watering Planter
Now that your self-watering planter is up and running, let’s cover some essential tips to keep it thriving and your herbs happy. With these simple tricks, you’ll be enjoying fresh herbs all season long.
Regular Maintenance for Optimal Growth
Regular maintenance is crucial to keep your self-watering planter clean and functional. It’s essential to check the water reservoir regularly to ensure it’s not overflowing or clogged. A clogged reservoir can lead to reduced water flow, causing your herbs to suffer from root rot.
To prevent pest infestations, inspect your plants regularly for signs of insects, such as whiteflies, spider mites, or mealybugs. You can use neem oil or insecticidal soap to control the infestation. Regularly clean the planter’s surface with mild soap and water to remove any debris or dirt.
Check your herbs regularly for diseases like powdery mildew or root rot. Remove any affected leaves or stems, and treat the plant with a fungicide if necessary. Also, ensure good air circulation around your plants by placing them at least 6-8 inches apart.
Remember to clean your self-watering planter every 2-3 months to maintain optimal performance. This will help prevent bacterial growth in the water reservoir, ensuring a healthy environment for your herbs to thrive.
Maximizing Herb Yields with Proper Care
Proper care of herbs in self-watering planters is crucial to maximize their yields and extend their lifespan. One key aspect of herb care is pruning. Regular pruning encourages bushy growth, prevents the herb from flowering prematurely, and promotes healthy roots. Pinch off flower buds as they form to direct the plant’s energy towards leaf production.
Fertilization is another essential aspect of herb care in self-watering planters. Use a balanced, water-soluble fertilizer (20-20-20) during the growing season (spring-fall). Dilute the fertilizer to half the recommended strength to prevent burning your herbs’ roots. For example, if you’re using Miracle-Gro as your fertilizer, mix 1 teaspoon of it with 1 quart of water.
To maintain a pest-free environment in your self-watering planter, inspect your herbs regularly for signs of pests like aphids, whiteflies, and spider mites. Use neem oil or insecticidal soap to control infestations. By implementing these care tips, you’ll enjoy an abundance of fresh herbs from your self-watering planter throughout the growing season.
Advanced Techniques for Self-Watering Planter Use
Once you’ve mastered the basics, it’s time to take your self-watering planter game to the next level by experimenting with advanced techniques that maximize water efficiency and promote healthy herb growth.
Experimenting with Different Water Reservoirs
Experimenting with different water reservoir materials or designs can be an exciting step to optimize plant growth. As you’ve mastered the basics of self-watering planters for herbs, it’s time to explore new possibilities. Let’s dive into some innovative approaches.
Consider swapping traditional plastic or metal water reservoirs for more sustainable options like food-grade silicone, BPA-free glass containers, or even repurposed materials like old plastic bottles. These alternatives not only reduce waste but also provide a unique aesthetic to your herb garden. For instance, transparent glass reservoirs allow you to monitor the water level and observe root growth.
Another approach is to experiment with different shapes and designs. For example, a curved or angled reservoir can accommodate more herbs while reducing space. Alternatively, a compact, narrow design can fit snugly into tight spaces like balconies or small kitchens. Remember to consider the plant’s specific needs when choosing a water reservoir design. This might involve adjusting the size, shape, or material based on factors like moisture retention and evaporation rates.
When experimenting with new materials or designs, keep an eye out for any changes in water usage, temperature, or humidity levels within your planter. This will help you identify potential areas for improvement and refine your setup for optimal results.
Using Self-Watering Planters in Hydroponic Systems
When it comes to creating a high-yielding and low-maintenance hydroponic system for herb cultivation, integrating self-watering planters can be a game-changer. These innovative containers are designed to optimize water retention and minimize evaporation, allowing plants to absorb exactly what they need when they need it.
In a hydroponic system, self-watering planters can be used as a supplement or even as the primary means of nutrient delivery. By placing them within the larger system, you can create a hybrid setup that leverages the strengths of both methods. This approach is especially beneficial for herb cultivation, as many herbs require precise control over moisture levels to prevent root rot and promote healthy growth.
To incorporate self-watering planters into your hydroponic system, start by selecting containers with built-in water reservoirs or a unique water-storing design. Position the planters within the larger system, making sure they’re securely fastened to prevent accidental tipping. As with any hydroponic setup, ensure that the nutrient solution is pH-balanced and tailored to your specific herb variety’s needs. With proper care and attention, self-watering planters can significantly enhance your herb yields while minimizing water waste and manual intervention.
Conclusion and Next Steps
Now that you’ve set up your self-watering planters for herbs, let’s summarize what we’ve covered so far and explore next steps to keep your plants thriving.
Recap and Final Tips
As you’ve reached the end of this comprehensive setup guide, let’s recap the key takeaways and provide some final tips for setting up and maintaining a self-watering planter for herbs.
In this article, we explored the benefits of using self-watering planters for herbs, including reduced watering frequency, improved herb quality, and increased yields. We also discussed the different types of self-watering planters available, such as ceramic, plastic, and hydroponic systems. Additionally, we provided step-by-step instructions on how to set up a self-watering planter for herbs, including selecting the right location, preparing the soil, and calibrating the watering system.
To ensure your self-watering planter for herbs runs smoothly, remember to monitor the water level regularly, adjust the watering schedule as needed, and keep an eye out for signs of overwatering or underwatering. Also, don’t forget to fertilize your herbs regularly, as they will continue to grow and thrive in their new self-watering environment. By following these final tips, you’ll be well on your way to enjoying a bountiful harvest of fresh, delicious herbs all year round.
Getting Started with Your New Planter
Now that you’ve learned about self-watering planters and how to set them up for your herbs, it’s time to get started on creating your very own herb garden. Don’t let the knowledge sit idle – apply what you’ve learned today! Choose a spot with plenty of natural light and select a few herb varieties that will thrive in a self-watering planter.
When selecting plants, keep in mind that herbs like basil and mint can be quite aggressive and may need to be contained within their own pot or planter. Some popular options for self-watering planters include small succulents, chives, and parsley – these are all relatively low-maintenance and will do well with the built-in water reservoir.
As you begin planting, make sure to follow the manufacturer’s instructions for your specific self-watering planter. This may involve adjusting the soil level or adding a layer of perlite to enhance drainage. With your planter in place and your herbs planted, sit back and enjoy the ease of having a consistent water supply – no more worrying about overwatering or underwatering!
Frequently Asked Questions
Can I use self-watering planters for herbs in areas with low light conditions?
Yes, many self-watering planter designs are suitable for low-light conditions, but it’s essential to choose plants that thrive in such environments, like mint or parsley. Ensure your planter has sufficient insulation properties to maintain a consistent temperature.
How do I prevent overwatering when using self-watering planters with built-in water reservoirs?
Regularly monitor the water level and adjust as needed. Most self-watering planters have adjustable valves or overflow sensors to prevent overwatering. Be cautious not to overcrowd your planter, as this can lead to excessive moisture.
Can I use self-watering planters for both indoor and outdoor herb gardens?
While self-watering planters are designed for versatility, it’s crucial to consider the specific needs of each environment. For outdoor use, choose planters with UV-resistant materials and adequate drainage systems to prevent waterlogging. Indoors, focus on temperature control and air circulation.
How do I optimize my self-watering planter’s performance in extreme temperatures?
To mitigate temperature fluctuations, ensure your planter is placed away from direct sunlight and heating/cooling vents. Use a thermometer to monitor the soil temperature, and adjust the water level accordingly. In extremely hot conditions, consider adding a layer of insulation around the planter.
Can I repurpose or recycle my old self-watering planters?
Many self-watering planters are made from recyclable materials like plastic or ceramic. Consider repurposing or upcycling your old planters to create new containers for your herb garden or other plants. This can be a creative way to minimize waste and reduce your environmental impact.