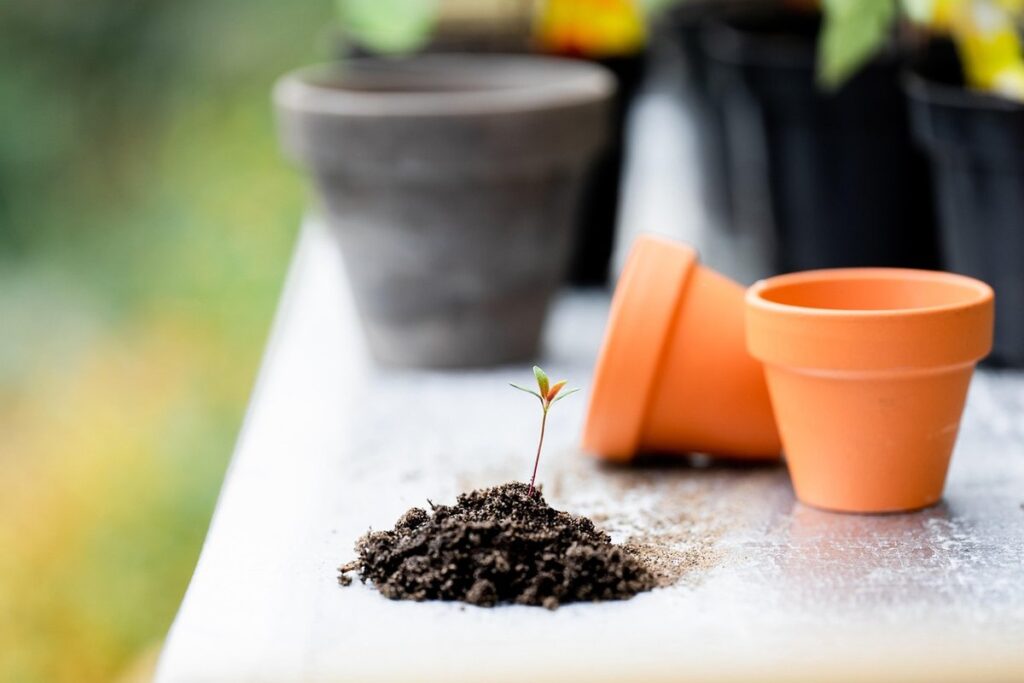
Do you ever find yourself wondering if there’s more to gardening than throwing away perfectly good potting soil every season? You’re not alone! Reusing potting soil is a simple yet effective way to reduce waste, save money, and create a more sustainable garden or indoor space. Not only will it minimize your environmental footprint, but it’ll also make you a more frugal gardener. In this article, we’ll explore the benefits of reusing potting soil, common mistakes to avoid, and expert tips for doing it right. From understanding the importance of sterilization to knowing when to replace your potting mix, we’ve got everything you need to reuse potting soil successfully and create a thriving garden or indoor plants on a budget. Let’s get started!
The Importance of Reusing Potting Soil
Reducing waste and saving money is just one reason to reuse potting soil, but there are several other benefits you’ll want to consider. We’ll dive into these advantages next.
Benefits of Reusing Potting Soil
Reusing potting soil is not only an environmentally friendly choice, but it’s also a cost-effective one. By reusing potting soil, you can save money that would have been spent on purchasing new bags of soil. The average price of a bag of potting soil can range from $3 to $10, depending on the brand and quality. If you reuse your soil just once, you could be saving anywhere from $3 to $30.
Reusing potting soil also helps reduce waste. According to the Environmental Protection Agency (EPA), millions of tons of soil are discarded each year in the United States alone. By reusing your soil, you’re reducing the amount of waste sent to landfills and conserving natural resources. Moreover, reusing potting soil is a simple way to promote sustainability in your garden.
To get started with reusing your potting soil, simply save it after harvesting your plants and let it dry out completely. This will help kill any pests or diseases that may be present. Once it’s dry, you can reuse it in your next project, or even donate it to a fellow gardener. With a little creativity and resourcefulness, you can make the most of your potting soil and reduce waste at the same time.
Common Pitfalls When Reusing Potting Soil
When reusing potting soil, it’s easy to fall into common pitfalls that can compromise the health of your plants. One major mistake is not properly cleaning and sanitizing the reused soil. This can lead to the spread of plant diseases, which can be devastating for your garden.
Not all contaminants are visible to the naked eye, so make sure to inspect the soil thoroughly before reuse. Check for signs of pests like fungus gnats or mealybugs, as well as fungal growths that can indicate the presence of disease-causing pathogens. To sanitize the soil, mix in a 10% solution of water and bleach (1 part bleach to 9 parts water) and let it sit for at least 24 hours before replanting.
Another mistake is not removing debris and roots from the reused soil. This can harbor pests and diseases that will continue to spread even after sanitizing. To avoid this, thoroughly sift through the soil with your hands or a tool, removing any visible roots or debris. By taking these simple steps, you can ensure that your reused potting soil is healthy and safe for replanting.
Preparing Your Old Potting Soil for Reuse
Before you throw away your old potting soil, let’s take a closer look at how to prepare it for reuse by breaking down any existing debris and pathogens.
Cleaning and Sanitizing the Soil
Cleaning old potting soil before reusing it is essential to remove debris, pathogens, and other contaminants that can harm your plants. Start by removing any visible debris such as dead roots, weeds, or rotting plant material using a fork or a garden claw. Rinse the soil thoroughly with water to loosen any remaining particles.
Next, use a sterilization method to kill bacteria, fungi, and other microorganisms. One effective method is to mix 1 tablespoon of baking soda per gallon of water and soak the soil for 24-48 hours. The baking soda will raise the pH level, making it difficult for pathogens to survive. Alternatively, you can use a solution of 1 part white vinegar to 10 parts water as a natural disinfectant.
After sterilizing the soil, let it air dry completely before reusing it in your garden or containers. This step is crucial to prevent the growth of new microorganisms that can harm your plants. Remember to store your cleaned and sanitized potting soil in a well-ventilated area to maintain its quality and effectiveness.
Adding Organic Matter to Revitalize the Soil
When it comes to reviving old potting soil, one of the most effective ways to give it new life is by adding organic matter. This simple yet powerful technique can transform stale, depleted soil into a thriving ecosystem that’s bursting with nutrients and beneficial microbes.
Organic matter such as compost, worm castings, or peat moss acts like a superfood for your potting soil, replenishing its fertility and improving its structure. Compost, in particular, is an excellent choice as it’s rich in humus – a natural substance that helps retain moisture, suppress weeds, and support beneficial microbial life.
To incorporate organic matter into your reused potting soil, simply mix 10-20% of the material into the existing soil blend. You can also use it to create a compost tea by steeping it in water for 24 hours before applying it as a fertilizer. By doing so, you’ll be creating a nutrient-rich environment that encourages healthy root growth and promotes vibrant plant development.
Some popular alternatives to compost include worm castings, which are rich in nitrogen, phosphorus, and potassium; and peat moss, which helps retain moisture while aerating the soil.
Choosing the Right Plants for Reused Potting Soil
When it comes to reusing potting soil, choosing the right plants is crucial. Selecting low-maintenance and adaptable plants will help your reused potting soil thrive.
Selecting Plants That Thrive in Poor Conditions
When it comes to reusing potting soil, selecting plants that thrive in poor conditions is crucial for their success. While regular potting soil can be nutrient-rich and well-draining, reused potting soil may not provide the same level of support for plant growth.
To identify plants that are more tolerant of poor soil conditions, look for species with deep root systems or those adapted to low-nutrient environments. These plants have evolved to survive in areas with limited water and nutrient availability. Some examples include succulents like aloe vera and agave, as well as herbs such as rosemary and thyme.
Consider the following factors when choosing plants:
* Select species native to your region or those commonly found in poor soil conditions.
* Choose plants with deep taproots that can access nutrients deeper in the soil profile.
* Avoid plants with shallow root systems, which may not be able to thrive in reused potting soil.
By selecting the right plants for reused potting soil, you’ll increase its potential for success and set yourself up for a sustainable gardening practice.
Considerations When Planting in Reused Potting Soil
When planting in reused potting soil, it’s essential to be aware of potential risks. One major concern is the increased risk of disease transmission. This can occur when fungal pathogens and other microorganisms from decomposing organic matter in the reused soil infect healthy roots. To put this into perspective, research suggests that a single teaspoon of reused potting soil can contain up to 3 billion fungal spores – a staggering number that can easily lead to root rot and other diseases.
To mitigate these risks, consider using plant varieties that are resistant to common diseases in your region. For example, if you’re dealing with a high risk of powdery mildew, opt for plants like succulents or cacti that are naturally resistant. You can also take steps to sterilize the reused potting soil by baking it in a 200°F oven (90°C) for an hour or by using a pasteurization method.
Keep in mind that some pathogens may not be killed off even with these precautions, so it’s crucial to monitor your plants closely and be prepared to intervene if you notice any signs of disease. By being aware of the potential risks and taking proactive steps, you can safely reuse potting soil while minimizing the risk of disease transmission.
Tips for Maximizing the Lifespan of Reused Potting Soil
To get the most out of your reused potting soil, it’s essential to take steps that extend its lifespan and keep it fresh for future gardening projects. Here are some key tips to follow.
How Often to Change Reused Potting Soil
When it comes to reusing potting soil, one of the most common questions is how often you should replace it. The answer depends on several factors, including the type of plants you’re growing, the condition of the soil, and the desired crop yield.
For example, if you’re growing vegetables like lettuce or herbs that have a fast growth cycle, you may need to change the potting soil every 1-2 months. This is because these plants are more prone to nutrient deficiencies and can quickly deplete the soil’s resources. On the other hand, slower-growing plants like succulents or cacti can thrive in reused potting soil for several months without needing a replacement.
In general, it’s recommended to change the potting soil every 3-6 months, depending on the condition of the soil and the plants’ needs. You should look out for signs such as compacted or waterlogged soil, mold growth, or reduced plant growth. To extend the lifespan of your reused potting soil, make sure to add fresh compost or fertilizers regularly, and repot the plants when necessary.
Maintaining Optimal pH Levels in Reused Potting Soil
Maintaining optimal pH levels is crucial for reused potting soil, as it can significantly impact plant growth and health. If left unattended, the pH level of the soil can become imbalanced, leading to nutrient deficiencies and even plant death.
Neglecting to monitor pH levels can have severe consequences, including reduced crop yields, stunted root growth, and increased susceptibility to diseases. For instance, if the soil becomes too acidic (pH below 6), essential nutrients like iron and manganese may become unavailable to plants, causing chlorosis and other nutrient deficiencies. Conversely, if the soil is too alkaline (pH above 7), nutrient uptake can be reduced, leading to slow growth rates.
To maintain optimal pH levels in reused potting soil, it’s recommended to test the soil regularly using a pH meter or kit. Based on the results, you can adjust the pH by adding lime to raise it or sulfur to lower it. Aim for a balanced pH between 6 and 7 for most plants. Remember, maintaining optimal pH levels is an ongoing process that requires regular monitoring and adjustments throughout the growing season.
Alternatives to Reusing Potting Soil
While reusing potting soil can be beneficial, there are other eco-friendly options you can consider when your soil is spent. Let’s explore some alternatives to get you started.
Composting and Making New Potting Mix
If you’ve already used up all the nutrients from your old potting soil and can’t reuse it as-is, don’t worry – there are still plenty of ways to give it a new lease on life. One option is to compost it, breaking down the organic matter into a nutrient-rich fertilizer that’ll make your plants thrive.
To compost old potting soil, mix it with other brown materials like dried leaves or shredded newspaper, and add some green ingredients like vegetable scraps or grass clippings. The key ratio is 2/3 brown to 1/3 green – this will create an ideal balance of carbon and nitrogen for decomposition to occur efficiently.
Another way to breathe new life into old potting soil is to mix it with other materials to create a fresh potting mix. Combine it with perlite or vermiculite for improved drainage, or add some peat moss or coconut coir to retain moisture. You can also blend it with worm castings (vermicompost) – these contain all the necessary nutrients and beneficial microbes to give your plants a strong start.
These alternative methods not only reduce waste but also help you save money by giving new life to materials that would otherwise end up in the trash. By getting creative with your potting soil, you’ll be well on your way to becoming a more sustainable gardener.
Commercial Options for Reused Potting Soil
If you’re considering alternatives to reused potting soil, there are several commercial products on the market that can help. One popular option is bagged potting mix, which is specifically designed for indoor and outdoor container gardening. These mixes often contain a blend of peat moss, vermiculite, and perlite, providing excellent drainage and nutrient retention.
Some benefits of using commercial potting mix include consistent quality and ease of use – simply dig in the recommended amount and follow the instructions. However, there are also some potential drawbacks to consider. For example, bagged mixes can be more expensive than reused potting soil, especially for large gardens or frequent users. Additionally, many commercial potting mixes contain additives like fertilizers and wetting agents, which may not align with your personal gardening values.
When choosing a commercial product, look for eco-friendly options that use sustainable materials and minimal packaging. Some brands also offer organic or natural alternatives, which can be a good choice for gardeners who prioritize environmental sustainability.
Overcoming Common Challenges When Working with Reused Potting Soil
We know that working with reused potting soil can come with its own set of challenges, but don’t worry, we’ve got some practical solutions to help you overcome them. Let’s dive into the common issues and their easy fixes.
Dealing with Weeds or Pest Infestations
Dealing with weeds or pest infestations is one of the biggest challenges when working with reused potting soil. Weeds can quickly overtake a garden bed, while pests like aphids, whiteflies, and spider mites can decimate plants. However, there’s no need to resort to harsh chemicals that can harm your plants, people, or the environment.
One effective non-toxic control method is to use mulch or cover crops to suppress weeds. You can also hand-pull weeds regularly, making sure to remove their roots to prevent regrowth. For pest infestations, try introducing beneficial insects like ladybugs or lacewings that feed on pests. Neem oil and diatomaceous earth are also safe alternatives to chemical pesticides.
It’s essential to identify the problem early on, as this makes it easier to control weeds or pests before they get out of hand. Regularly inspect your plants for signs of infestation, such as yellowing leaves, holes in leaves, or actual insects visible on the plant. By taking proactive steps and using non-toxic methods, you can keep your reused potting soil garden healthy and thriving while minimizing waste and saving money.
Addressing Nutrient Deficiencies
When reusing potting soil, it’s common for nutrient levels to decrease over time. This can lead to stunted growth and poor plant health. To identify nutrient deficiencies, monitor your plants’ responses to the reused soil. For example, if you notice yellowing leaves or slow growth, it may be a sign that the soil is lacking essential nutrients like nitrogen or iron.
Some plants are more tolerant of these conditions than others. Leafy greens like kale and spinach can thrive in nutrient-deficient soil, while flowering plants like roses require more fertile conditions to bloom. To address nutrient deficiencies, add organic amendments like compost or well-rotted manure to the reused potting soil. These additives will replenish essential nutrients and improve soil structure.
Another option is to repot your plants into fresh soil that’s rich in nutrients. However, this can be wasteful if you’re trying to minimize waste. Instead, focus on gradually improving the nutrient levels of the reused potting soil over time by adding small amounts of amendments and monitoring their effects on plant health.
Frequently Asked Questions
Can I reuse potting soil from containers with poor drainage?
Yes, you can still reuse potting soil from containers with poor drainage, but it’s essential to remove any debris or excess water before adding it back to your garden or indoor space. To do this, mix the old soil with fresh organic matter like compost or well-rotted manure, which will help improve its structure and fertility.
How often should I test the pH level of my reused potting soil?
It’s recommended to test the pH level of your reused potting soil every 1-2 months, especially if you’re using it for acid-loving plants like azaleas or blueberries. This will ensure that the soil remains within the optimal range for plant growth and prevent nutrient deficiencies.
What are some common signs that my reused potting soil needs to be replaced?
Common signs that your reused potting soil needs to be replaced include poor drainage, an unpleasant odor, or a significant decrease in plant growth. If you notice any of these issues, it’s best to start fresh with new potting mix and rejuvenate the old soil through composting.
Can I reuse potting soil from containers with high levels of pesticides?
No, it’s not recommended to reuse potting soil from containers that have been treated with high levels of pesticides. These chemicals can persist in the soil for extended periods, posing a risk to your plants and potentially harming beneficial microorganisms.
How do I prevent nutrient deficiencies when reusing potting soil?
To prevent nutrient deficiencies when reusing potting soil, it’s essential to add organic matter like compost or well-rotted manure regularly. This will help replenish the soil’s nutrients and maintain its fertility over time. You can also consider using a balanced fertilizer specifically designed for reused potting soil.