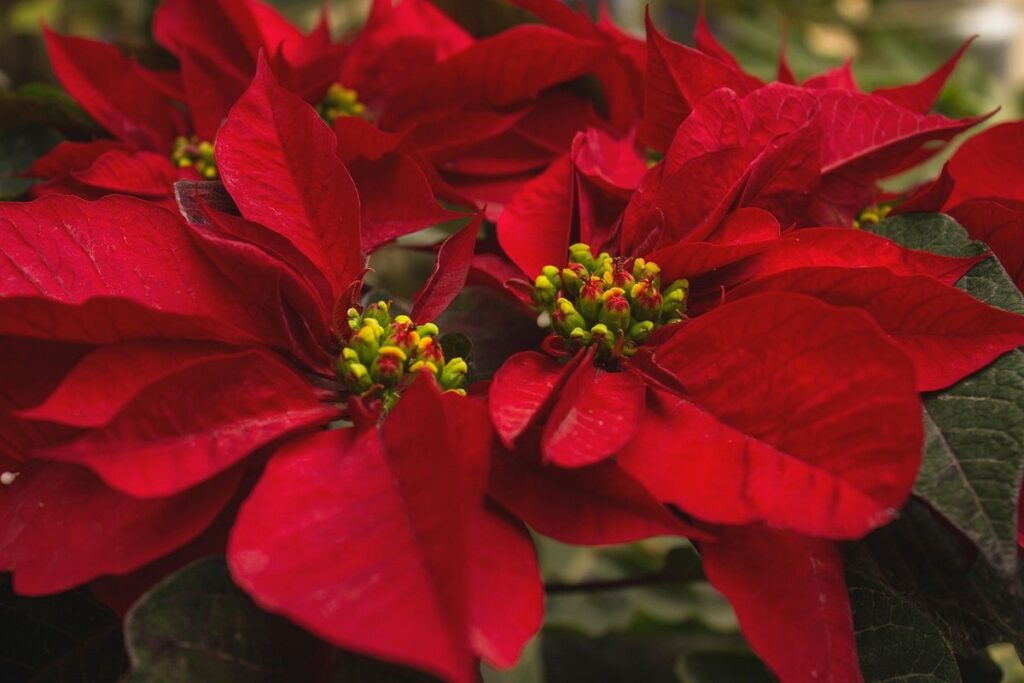
If you’re like many holiday enthusiasts, you’ve probably fallen in love with the vibrant colors and festive charm of poinsettias. These beautiful plants are a staple during the winter season, but after they’ve finished blooming, it’s essential to know how to care for them properly so they continue to thrive throughout the year. One crucial step in their ongoing health is repotting poinsettias, which requires some careful planning and attention to detail. In this comprehensive guide, we’ll walk you through the perfect timing for repotting your poinsettia, discuss the ideal potting mix selection, and share expert tips on post-repotting care to ensure these festive plants continue to bloom year after year. By following our advice, you can keep your poinsettias happy and healthy all season long.
Choosing the Right Time to Repot
When it comes to repotting your poinsettia, timing is everything. Understanding when to repot will help you give your plant the best chance at thriving in its new home.
Understanding Poinsettia Dormancy
When repotting poinsettias, timing is everything. While it’s tempting to repot your plant as soon as you bring it home, it’s crucial to wait until it’s dormant. This period typically falls between late winter and early spring, just before the poinsettia begins its new growth cycle.
During dormancy, the poinsettia plant is naturally shedding old leaves and preparing for a fresh start. Repotting at this stage allows you to assess the root system and give the roots more room to grow, which can lead to healthier and more vibrant plants in the long run.
Signs that indicate it’s time for repotting include a pot-bound poinsettia with tightly packed soil, yellowing leaves, or a slow growth rate. If you notice these symptoms, don’t hesitate to repot your plant. By doing so during dormancy, you’ll give your poinsettia the best chance to thrive in its new environment and set it up for success in the upcoming growing season.
Preparing the Plant for Repotting
Before repotting your poinsettia, it’s essential to prepare the plant for its new home. Start by gently removing the plant from its current pot and inspecting the roots. Check if they have filled out the container or are circling around the edges. If so, it’s a clear sign that the plant needs repotting.
Take this opportunity to prune any old or damaged stems, as well as remove any weak growth. This will help promote healthy new growth and prevent the spread of disease. For example, if you notice any dead or dying leaves, now is the time to trim them off.
When selecting a new pot for your poinsettia, choose one that is only slightly larger than the current one. Poinsettias prefer well-draining soil and don’t like their roots to be sitting in waterlogged conditions. Make sure the pot has drainage holes to prevent root rot. A shallow pot with good air circulation will help keep your poinsettia happy and thriving.
When repotting, gently spread out the roots and place them in the new container with fresh potting mix. Water well after repotting to settle the soil and give your plant a boost of hydration.
Selecting the Right Potting Mix
When repotting poinsettias, choosing the right potting mix is crucial to promote healthy root growth and prevent waterlogged soil. Let’s dive into selecting a high-quality potting mix specifically designed for tropical plants like your poinsettia.
Understanding Poinsettia Specific Needs
When it comes to repotting poinsettias, selecting the right potting mix is crucial for their survival and optimal growth. Poinsettias have specific requirements when it comes to pH levels, drainage, and nutrient needs that set them apart from other plants.
Poinsettias prefer a slightly acidic to neutral soil pH, ranging from 6.0 to 7.0. A potting mix with a higher pH can cause the leaves to become scorched and the plant to decline in health. To ensure optimal growth, look for a potting mix specifically designed for acid-loving plants or add a small amount of peat moss or perlite to lower the pH.
Good drainage is also essential for poinsettias, as they are prone to root rot if the soil becomes waterlogged. A well-draining potting mix containing ingredients like vermiculite, perlite, or sand will help excess moisture escape, preventing root rot and promoting healthy growth.
In terms of nutrient needs, poinsettias require a balanced fertilizer with a slightly higher nitrogen content during the growing season. Avoid using high-phosphorus fertilizers, as they can promote excessive vegetative growth at the expense of flowering. A 20-10-10 or 15-5-15 NPK ratio is suitable for repotting poinsettias.
Popular Potting Mix Options for Poinsettias
When repotting poinsettias, it’s essential to choose a potting mix that provides optimal drainage and aeration. There are various popular options available, each with its unique characteristics.
For organic gardeners, coconut coir-based potting mixes are an excellent choice. These mixes retain moisture well while allowing excess water to drain freely, reducing the risk of root rot. You can also look for mixes containing peat moss or composted bark, which provide a natural buffer against pH fluctuations and improve soil structure.
Inorganic options include mixes made from perlite or vermiculite. These materials are designed to promote drainage and prevent waterlogging. However, they may require additional fertilizers as they tend to lack nutrients.
A mix specifically formulated for tropical plants like poinsettias often works well too. These mixes typically contain a blend of organic matter, such as peat moss or compost, and inorganic ingredients like perlite or vermiculite.
When selecting a potting mix, consider the specific needs of your poinsettia. If you live in an area with low humidity, for example, a mix with added moisture-retentive properties may be beneficial.
Repotting Techniques for Poinsettias
When repotting poinsettias, timing and technique are crucial to prevent shocking the sensitive plant. This section covers essential steps to successfully transplant your poinsettia into a new container.
Step-by-Step Repotting Instructions
When it’s time to repot your poinsettia, follow these simple steps to ensure a smooth transition for your plant. Start by gently removing the plant from its current pot, taking care not to damage the roots or disturb the soil. This can be done by carefully sliding a blunt instrument like a spatula or knife around the inside edge of the pot to loosen it.
Next, inspect the roots and remove any dead or circling roots with sterile pruning shears. This will help prevent the roots from becoming constricted as they grow outward into their new pot. Gently wash away any old potting mix that’s clinging to the roots under running water, then let the plant sit for a few minutes to allow excess moisture to drip off.
Now it’s time to add fresh potting mix to your new container, leaving enough space at the top for watering and fertilizing. Place the poinsettia in its new home, gently firming the soil around the roots to secure the plant in place. Water well after repotting to settle the soil and provide the necessary moisture for establishment.
Tips for Reducing Shock and Stress
When repotting poinsettias, it’s essential to minimize shock and stress for these sensitive plants. One crucial step is adjusting their watering schedule. Poinsettias are prone to root rot if the soil is too wet, so it’s best to water them sparingly until they adjust to their new pot.
Make sure the soil is dry to the touch before watering again. You can also reduce watering frequency for a few weeks after repotting. A good rule of thumb is to check the soil moisture daily during this period. For example, if you normally water your poinsettia once a week, try reducing it to every 10-14 days after repotting.
In addition to adjusting watering schedules, provide optimal light conditions for your poinsettias. Most species require bright, indirect light, but some may prefer direct sunlight. If possible, place your poinsettia near an east- or west-facing window for gentle, consistent lighting. Keep in mind that extreme temperatures and drafts can also cause shock, so choose a location with stable conditions. By following these tips, you’ll help your poinsettias recover from repotting stress and thrive in their new pot.
Post-Repotting Care for Poinsettias
After repotting your poinsettia, it’s crucial to provide optimal care to ensure its vibrant colors and healthy growth continue. Let’s dive into the essential post-repotting care tips you need to know.
Watering and Fertilization Strategies
After repotting your poinsettia, it’s essential to adjust its watering and fertilization schedule to promote healthy growth. During the first few weeks after repotting, poinsettias require more water due to the shock of being transplanted into a new pot.
Water your poinsettia when the top 1-2 inches of soil feel dry to the touch. However, avoid overwatering, as this can lead to root rot and other problems. Check the moisture level by sticking your finger into the soil up to the first knuckle; if it feels dry, it’s time for water.
As your poinsettia grows, you’ll need to adjust its fertilization schedule accordingly. During the active growth stage (spring-fall), feed your poinsettia with a balanced fertilizer (20-20-20) once a month. However, during the dormant stage (winter), reduce fertilization to once every 6 weeks. You can also use a high-phosphorus fertilizer (10-20-10) during the bloom period to promote flowering.
Keep in mind that overfertilization can damage your poinsettia’s roots, so it’s essential to follow these guidelines carefully. With proper care and attention, your repotted poinsettia will thrive and provide beautiful blooms for years to come.
Pruning and Training Tips
Pruning poinsettia plants after repotting is crucial to maintain their shape and encourage healthy growth. To prune effectively, you’ll need a pair of clean, sharp scissors or pruning shears. Start by removing any dead or damaged leaves, as these can be breeding grounds for pests and diseases.
Next, focus on maintaining the plant’s natural shape. If your poinsettia has grown leggy, cut back the stems to about one-third from the top. This will encourage branching and a fuller appearance. Make clean cuts just above a leaf node, as this promotes new growth from that point.
To train your poinsettia for optimal display, consider using stakes or a trellis to support its weight. Gently tie the plant’s stems to the stake using soft ties or twine, leaving enough room for growth. This will help maintain the plant’s shape and keep it upright during the growing season.
Pruning and training your poinsettia regularly will not only improve its appearance but also promote healthy growth and a thriving plant overall. By following these simple tips, you’ll be able to enjoy your beautifully grown poinsettias all season long.
Troubleshooting Common Issues
We’ve covered the basics of repotting poinsettias, but what if things don’t go as planned? This section tackles common issues you may encounter when repotting your poinsettia.
Pests and Diseases
When repotting poinsettias, it’s essential to monitor them closely for signs of pests and diseases. One common pest that affects poinsettias is the mealybug, which appears as a white, cottony mass on the stems or leaves. Aphids are another problem, recognizable by their small, soft bodies and sticky honeydew secretions.
To identify an infestation, check for yellowing leaves, stunted growth, or actual pests visible to the naked eye. If you suspect an issue, inspect your poinsettia thoroughly before taking action. For mealybugs, gently spray with water to dislodge them, followed by a soap solution (1 tablespoon of mild dish soap per 1 quart of water). Avoid using harsh chemicals, as they can damage the plant.
Prevent fungal diseases like root rot and leaf spot by ensuring proper drainage in your potting mix. Water carefully, avoiding overwatering, which fosters disease growth. If you notice any signs of infection, prune infected areas to prevent further spread. Regularly inspect your poinsettia for early warning signs of pests or diseases to catch issues before they become severe and require more drastic treatments.
Nutrient Deficiencies and Other Problems
When repotting poinsettias, it’s not uncommon to encounter issues that can affect their health and appearance. One common problem is nutrient deficiency, particularly potassium and magnesium, which are essential for healthy growth. A lack of these nutrients can cause yellowing leaves, stunted growth, and reduced flowering. To address this issue, fertilize your poinsettia with a balanced fertilizer (20-20-20) during the growing season, and consider adding a magnesium-rich supplement to promote leaf health.
Light issues are another potential problem post-repotting. If your poinsettia is not receiving enough light, it may become leggy or experience reduced flowering. Conversely, if it’s exposed to direct sunlight for extended periods, it can suffer from scorching. To mitigate this issue, place your poinsettia in a location with bright, indirect light, such as an east- or west-facing window.
Another common problem is overwatering, which can cause root rot and kill the plant. Be mindful of your watering schedule, and ensure the pot has proper drainage holes to prevent waterlogged soil.
Frequently Asked Questions
Can I repot my poinsettia during the winter holiday season?
Yes, it’s actually a good idea to delay repotting until after the holidays when the plant has finished blooming and is less likely to drop its colorful bracts. However, if you notice your poinsettia is showing signs of root bound or nutrient deficiency, consider repotting as soon as possible.
What should I do if my poinsettia has dropped all its leaves after repotting?
This can be a normal response to the shock of being transplanted. To promote new growth and prevent further leaf drop, ensure your poinsettia is receiving sufficient light (4-6 hours of direct sunlight per day) and maintain a consistent temperature between 65°F to 70°F (18°C to 21°C). Also, avoid overwatering, as this can cause root rot.
How do I prevent my repotted poinsettia from getting too leggy?
Poinsettias tend to grow more compactly when provided with brighter light. To encourage bushy growth and prevent lankiness, prune your poinsettia after repotting to maintain a balanced shape. Remove any weak or spindly branches, and trim back the tips of longer stems to encourage branching.
What’s the ideal pot size for repotting my poinsettia?
When selecting a new container for your poinsettia, choose one that is only 1-2 sizes larger than the original. This will prevent overwatering and root rot, while still giving your plant enough room to grow. A slightly wider pot is better than a deeper one, as this allows for easier watering and aeration of the roots.
Can I use regular potting mix instead of a specifically designed poinsettia potting mix?
Yes, you can repot your poinsettia in regular potting mix if that’s what you have on hand. However, keep in mind that it may not provide the optimal balance of nutrients and moisture retention for this sensitive plant. If possible, opt for a high-quality potting mix specifically formulated for indoor plants or cacti and succulents to ensure your poinsettia receives the best support for growth.