Are you a proud plant parent looking to give your beloved houseplant some extra TLC? Repotting is an essential part of houseplant care, but it can be overwhelming if you’re not sure where to start. Choosing the right pot and repotting technique can make all the difference in keeping your plants healthy and thriving. But did you know that common mistakes like over-watering or under-preparing the soil can lead to disaster?
In this article, we’ll share expert tips on how to repot houseplants successfully. From selecting the perfect pot to aftercare maintenance, we’ve got you covered. Whether you’re a seasoned pro or just starting out with your first plant, our advice will help you avoid common pitfalls and give your plants the best chance of success. We’ll also provide specific guidance for popular plants, so you can tailor our tips to suit your unique needs.
Choosing the Right Pot
When it comes to repotting, selecting a pot that suits your plant’s needs is crucial for its continued health and growth. Choose wisely by considering factors like size, material, and drainage.
Considering Plant Size and Growth Rate
When choosing a pot for your houseplant, it’s essential to consider its size and growth rate. A pot that is too small will cause the roots to become cramped, leading to slow growth and potentially even root rot. On the other hand, a pot that is too large can lead to waterlogged soil, which can be detrimental to the plant’s health.
As a general rule of thumb, you should choose a pot that is 1-2 sizes larger than the current one for most houseplants. This will give the roots enough room to grow without becoming waterlogged. However, if your plant has a particularly fast growth rate or produces a lot of new roots quickly, you may need to opt for an even larger pot.
For example, peace lilies and dracaena can tolerate smaller pots due to their slower growth rates, while ficus trees and philodendrons require more space to accommodate their rapid root growth.
Understanding Pot Material and Size Options
When it comes to choosing the right pot for your houseplant, understanding the material and size options is crucial. There are several types of pots available, each with its own set of pros and cons. For instance, ceramic pots are aesthetically pleasing and can retain moisture well, but they can be heavy and prone to cracking. Plastic pots, on the other hand, are lightweight and affordable, but may lack durability and can harbor bacteria.
Wooden pots offer a natural look and feel, but can be more expensive than other options and require regular maintenance to prevent rotting. Ultimately, the choice of pot material depends on your personal preference and the specific needs of your plant.
When it comes to size, choose a pot that is slightly larger than the previous one to give the roots room to grow. A good rule of thumb is to increase the pot size by 1-2 inches in diameter for every year the plant has been in its current pot. This will help prevent root bound and ensure your plant continues to thrive.
Preparing the Plant for Repotting
Before you start repotting your houseplant, take some time to prepare it by gently removing any old potting mix and checking its roots for signs of damage. This step is crucial for a healthy transfer.
Watering and Soil Preparation
Before repotting your houseplant, it’s essential to water it properly. But when is the right time? The general rule of thumb is to water your plant a day or two before repotting. This allows the soil to settle and makes the roots more receptive to new potting mix. However, if your plant is already soggy or has wet soil, it’s best to wait until the top inch of soil feels dry.
When it comes to preparing the soil, a well-draining mix is crucial. Over time, houseplant potting mixes can break down and become compacted, causing water to accumulate in the roots. To prevent this, use fresh potting mix specifically designed for indoor plants. Look for mixes that contain perlite or vermiculite, which help retain moisture but also drain excess water quickly.
When repotting, gently remove the old soil from the roots and replace it with fresh potting mix. This will give your plant a chance to absorb essential nutrients and refresh its roots.
Inspecting and Pruning Roots (if necessary)
Inspecting and pruning roots is not always necessary, but it’s crucial to check for root bound conditions before repotting. If the plant has outgrown its container and the roots have filled the pot, pruning becomes essential. You can identify root-bound plants by gently removing the soil or checking the drainage holes at the bottom of the pot. A mature root system with no room to expand is a clear sign that your houseplant needs repotting.
When inspecting the roots, look for signs of circling, tangling, or growth outside the pot’s boundaries. Remove any dead or damaged roots and gently tease apart the remaining ones using a blunt instrument like a chopstick or pencil. This will help redistribute the roots, promoting healthy growth in the new pot. To prune the roots effectively, cut back any overgrown sections, making sure to leave at least one inch of stem intact. Remember to disinfect your tools between cuts to prevent spreading diseases.
Repotting Techniques
When it comes time to repot your houseplant, you’ll want to master some essential techniques to ensure a smooth and successful transition for both you and your plant. Let’s dive into the best methods for a happy replanting experience.
Step-by-Step Instructions for Repotting
When it’s time to repot your houseplant, having a clear plan will ensure you get the job done efficiently and with minimal stress for both you and your plant. Here’s a step-by-step guide to follow:
First, prepare a new pot that is only 1-2 sizes larger than the current one. This allows for fresh soil without overwatering the roots. Next, gently remove the plant from its original container by turning it on its side and sliding out the root ball.
If the plant has developed a lot of old, compacted soil around its base, you may need to use more force to coax it loose. Use your fingers or a blunt instrument like a chopstick to break up any stubborn clumps. Be careful not to damage delicate roots in the process.
Once the plant is free from its pot, inspect the roots for any signs of circling or tangling. Gently tease them apart with your fingers to encourage healthy growth in the new soil. Finally, place the repotted houseplant back in its new home and water it thoroughly to settle the soil.
Common Mistakes to Avoid During Repotting
When repotting houseplants, it’s easy to get caught up in the excitement of giving them fresh soil and a bigger space. However, making common mistakes can be detrimental to their health. One of the most significant errors is overwatering. This occurs when you’re too enthusiastic with the watering can or don’t check the soil moisture before repotting.
Another mistake is using a pot that’s too small for the plant’s roots. This might seem counterintuitive, but it’s essential to consider your houseplant’s root growth when choosing a new container. If the roots are cramped in a small pot, they won’t have enough room to grow and thrive.
To avoid these errors, make sure to inspect the soil moisture before repotting. Stick your finger into the top inch of soil to check its dryness. Only water if it feels dry. Also, choose a pot that’s only 1-2 sizes larger than the original one. This will give the roots enough room to grow without becoming waterlogged or root-bound.
Aftercare and Maintenance
Now that you’ve successfully repotted your houseplant, it’s time to think about what comes next: caring for the new soil and keeping your plant thriving. We’ll walk you through our top aftercare tips.
Watering and Fertilizing Schedule
After repotting your houseplant, it’s essential to adjust its watering and fertilizing schedule to ensure optimal growth. Over-watering can be detrimental to the plant, causing root rot and other issues, while under-fertilization can hinder growth and development.
When it comes to watering, start by checking the soil moisture a few days after repotting. Stick your finger into the soil up to the first knuckle, and if the soil feels dry, it’s time to water. Water thoroughly until you see water coming out of the drainage holes. Then, reduce watering frequency based on the plant’s response. For example, if the soil is still moist after a week, you may only need to water every 10-14 days.
As for fertilizing, wait at least 2-3 weeks before applying fertilizer to allow the roots to settle and grow. A balanced, water-soluble fertilizer (20-20-20) is an excellent choice for most houseplants. Follow the manufacturer’s instructions for application rates and frequency. As a general rule, fertilize your repotted plant every 4-6 weeks during the growing season (spring-fall). This will provide essential nutrients without overloading the soil with fertilizer.
Monitoring Plant Health and Adjusting as Needed
After repotting your houseplant, it’s essential to monitor its health closely and make adjustments as needed. This is a critical phase in the plant’s life cycle, and with attentive care, you can prevent potential issues and ensure optimal growth.
Pay attention to changes in your plant’s appearance, such as wilting, yellowing leaves, or droopy stems. These signs may indicate stress, disease, or nutrient deficiencies. For instance, if your plant is experiencing root rot due to overwatering, it may develop brown spots on the leaves or emit a foul odor.
Check for pests like spider mites, mealybugs, and scale, which can infest your plant after repotting. Regularly inspect your plant’s soil moisture, temperature, and humidity levels to prevent fungal diseases and root rot. Adjust your care routine based on your plant’s response. If you notice any issues, reassess your watering schedule, fertilization plan, or potting mix quality. Consider pruning affected areas or repotting the plant into fresh, well-draining soil.
By monitoring your plant’s health and adapting to its needs, you’ll be better equipped to handle challenges that arise after repotting. This proactive approach will help you maintain a thriving, happy houseplant.
Tips for Specific Plants
If you have plants that require special care, such as orchids or ferns, we’ve got some tailored advice to ensure their repotting goes smoothly. Learn how to prep and care for these sensitive plants.
Special Considerations for Popular Houseplants
When it comes to repotting popular houseplants like snake plants, spider plants, and peace lilies, there are some special considerations to keep in mind. These plants have specific needs that can be easily overlooked during the repotting process.
Snake plants, for instance, prefer to be slightly root-bound, so don’t worry if their roots start to grow out of the pot – it’s actually a sign that they’re happy and healthy! When repotting snake plants, choose a pot only 1-2 sizes larger than the original one, and gently tease out any tangled roots with your fingers or a blunt instrument.
Spider plants, on the other hand, are notorious for producing baby plantlets, which can make them look like they need to be repotted more frequently. However, it’s essential not to disturb these offsets when repotting, as they’re an essential part of the spider plant’s reproductive cycle. Instead, gently lift the entire pot out of its saucer and inspect the roots from underneath.
Peace lilies, being tropical plants, require more moisture and humidity than other houseplants. When repotting a peace lily, use a well-draining potting mix to prevent waterlogged soil, and avoid getting water on the plant’s leaves or crown to prevent rot.
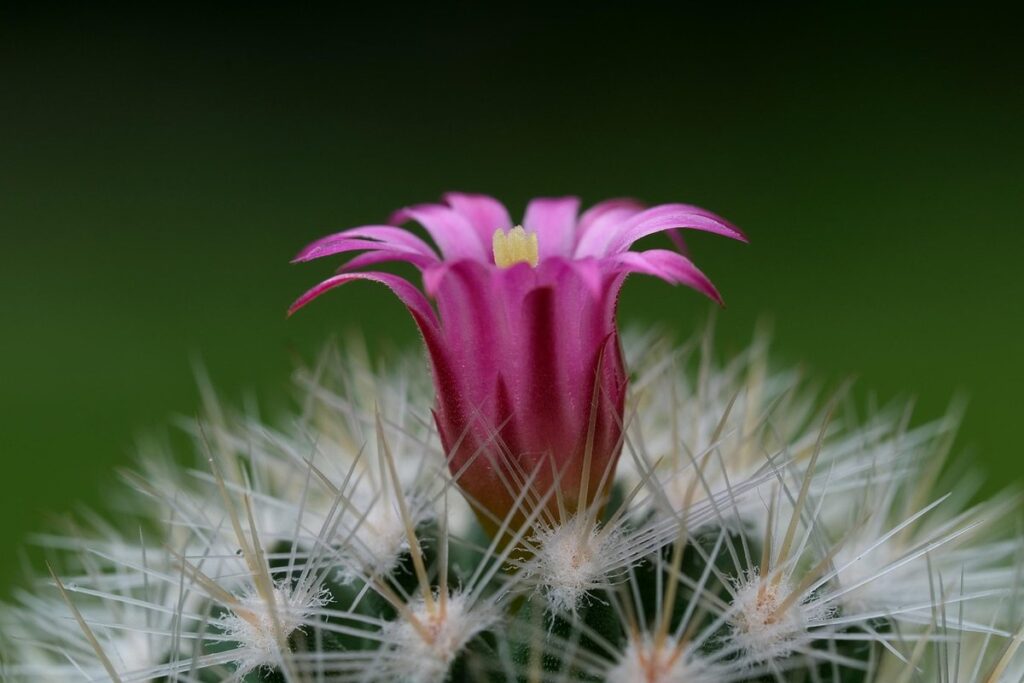
How to Repot Succulents and Cacti
When it comes to repotting succulents and cacti, it’s essential to handle their sensitive leaves and stems with care. These plants are particularly prone to damage during the repotting process due to their delicate nature. To minimize the risk of injury, gently remove any dead or dying roots, and trim back overgrown areas.
To prevent shock to the plant, choose a pot that is only slightly larger than the previous one. This will allow the roots to adjust gradually to the new environment without becoming waterlogged. A well-draining potting mix specifically designed for cacti and succulents should be used to prevent root rot.
When handling the leaves and stems of these plants, it’s crucial to avoid touching or bruising them, as this can cause scarring or even lead to infection. To move them safely, use a fork or trowel to carefully separate the plant from its pot, making sure not to damage any roots in the process.
Some popular techniques for repotting succulents and cacti include the “water method” and the “root hook.” The water method involves gently placing the plant into a bucket of water before transferring it to its new pot. This helps loosen any adhering soil without causing undue stress on the roots.
Conclusion
Now that you’ve repotted your houseplants and given them a fresh start, let’s wrap up our journey together by summing up the key takeaways from this guide.
Recap of Key Takeaways
When repotting houseplants, it’s essential to remember the key takeaways from each section. Proper repotting techniques and aftercare are crucial for healthy and thriving plants.
Firstly, choose the right pot size and type of soil that suits your plant’s needs. A general rule is to select a container that is only 1-2 sizes larger than the current one to prevent waterlogging. Secondly, handle your roots with care when transplanting. Avoid damaging or pruning them excessively, as this can cause shock.
Regular aftercare is also vital for newly repotted plants. Keep the soil consistently moist but not waterlogged, and ensure good air circulation around the plant. Fertilize sparingly until the plant has adjusted to its new environment.
Some common mistakes to avoid include overpotting, which can lead to root rot and other issues. Be mindful of your plant’s specific needs, and don’t be afraid to research or consult with experts if you’re unsure about the best approach. By following these guidelines, you’ll set your houseplants up for success and enjoy a long, healthy life together.
Final Tips and Recommendations
As you’ve reached the end of our repotting journey together, it’s time to put everything into practice with confidence. Before you begin, take a moment to review the steps we’ve covered and ensure you have all the necessary materials within arm’s reach.
When approaching repotting, remember that patience is key. Don’t rush through the process – instead, focus on doing each step correctly. Take your time to inspect the roots, gently tease them apart if needed, and make sure the new pot has sufficient drainage holes.
Some bonus tips for achieving success include repotting during the spring or summer months when your plants are actively growing, using a high-quality potting mix specifically designed for indoor plants, and avoiding overwatering. Keep in mind that some houseplants, such as African Violets and Begonias, prefer to be slightly root-bound, so don’t feel pressured to repot them too frequently.
By following these final tips and being mindful of your plant’s specific needs, you’ll set yourself up for a successful repotting experience. Happy planting!
Frequently Asked Questions
Can I repot my houseplant at any time, or are there specific seasons to do it?
Repotting can be done year-round, but it’s best to avoid extreme temperatures (below 50°F or above 80°F) and sensitive plants like orchids during their dormant season. For most plants, spring and summer are ideal times for repotting, as they’re actively growing.
How often should I inspect the roots of my houseplant after repotting?
Regular root inspections are crucial to prevent root bound conditions. Inspect your plant’s roots every 6-12 months by gently removing it from its pot and checking for circling or tangled roots. If you notice any issues, prune them before returning the plant to its pot.
Can I reuse the old soil from my houseplant’s previous pot?
Reusing old soil can lead to soil-borne diseases and pests. It’s best to discard the old soil and use fresh, high-quality potting mix specifically designed for indoor plants. This will help prevent any potential issues and provide your plant with a clean start.
How long does it take for my houseplant to adjust to its new pot after repotting?
The adjustment period varies depending on the type of plant and how well it was cared for during repotting. Generally, most plants take 1-2 weeks to adjust, but some may require up to a month. Monitor your plant’s health closely during this time and make adjustments as needed.
What are some common mistakes I can avoid when watering my newly repotted houseplant?
When watering your newly repotted houseplant, be cautious not to overwater or underwater. Check the soil moisture daily by sticking your finger into the soil up to the first knuckle. Water only when the top 1-2 inches of soil feel dry. This will help prevent waterlogged soil and ensure a healthy recovery for your plant.