Are you wondering when to give your beloved rosemary plant a fresh new home? Repotting is an essential part of keeping your rosemary healthy and thriving. However, timing is everything when it comes to repotting this fragrant herb. If you’re not careful, you might be doing more harm than good.
In this article, we’ll dive into the best time to repot rosemary, taking into account seasonal changes and climate considerations that affect your plant’s growth. We’ll explore the optimal times for spring and summer repotting, as well as some tips on how to prepare your rosemary for its new home. Whether you’re a seasoned gardener or just starting out with rosemary, this article will provide you with the knowledge you need to keep your plants happy and healthy. Let’s get started!
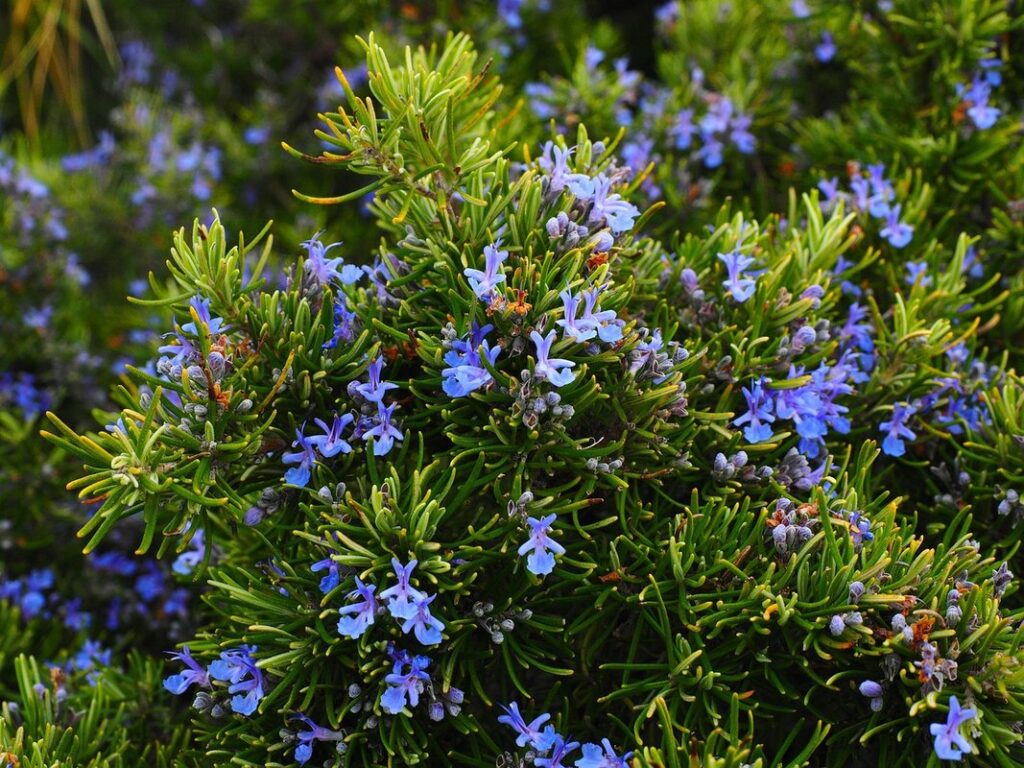
Understanding Rosemary’s Growth Cycle
To grow and thrive, rosemary needs a regular growth cycle, and understanding its patterns is key to knowing when to repot your plant. Let’s take a closer look at how rosemary grows over time.
Seasonal Timing and Repotting
Rosemary’s growth cycle is closely tied to its need for repotting. As it transitions from one season to another, its watering, fertilizing, and pruning needs change. During the spring and summer months, rosemary is at its most vigorous, producing new growth and requiring more frequent watering and fertilization. It’s essential to keep an eye on your plant’s moisture levels during this time, as overwatering can lead to root rot.
As summer gives way to autumn, rosemary begins to slow down, and its water needs decrease significantly. This is a great opportunity to repot your rosemary, taking the chance to refresh the soil and prune back any leggy growth. Prune away about one-third of the plant’s foliage to encourage bushy new growth and prevent it from becoming too woody.
In contrast, winter months require much less attention, but occasional pruning can still be beneficial in maintaining shape and promoting healthy new growth come spring.
Determining the Right Time Based on Climate
When it comes to repotting rosemary, understanding its growth cycle and how climate factors affect it is crucial. Temperature plays a significant role, as rosemary thrives in temperatures between 60°F to 80°F (15°C to 27°C). Avoid repotting during extreme temperatures, such as below 40°F (4°C) or above 90°F (32°C), as this can cause stress and potentially kill the plant.
Humidity is another critical factor. Rosemary prefers well-ventilated areas with moderate humidity levels, typically between 40% to 60%. If your area has high humidity, ensure good air circulation around the plant to prevent fungal diseases. Conversely, if it’s too dry, consider misting the leaves occasionally to keep them healthy.
Sunlight exposure also impacts rosemary growth. In general, direct sunlight for at least four hours a day is ideal. However, this may vary depending on your region and climate zone. For example, in hotter climates like USDA zones 10-11, provide some shade to prevent scorching, while in cooler areas like zones 4-5, ensure the plant receives adequate sunlight during the growing season.
When repotting rosemary, wait until the weather is mild and stable. In regions with distinct seasons, aim for spring or fall when temperatures are more consistent. For those living in areas with a long growing season, consider repotting in late summer to early autumn. By taking climate factors into account, you’ll be able to provide your rosemary plant with the best conditions for healthy growth and development.
Signs That Rosemary Needs Repotting
If you’re wondering whether it’s time to give your rosemary plant a new home, look out for these telltale signs that it needs repotting. These subtle changes can indicate it’s ready for a fresh start.
Overcrowding and Root Binding
As you continue to care for your rosemary plant, it’s essential to monitor its growth and adjust its environment as needed. One common issue that can arise is overcrowding, which occurs when the plant’s roots become tangled or restricted within the confines of its container. To identify an overcrowded rosemary plant, look for signs such as:
* Stunted growth or legginess
* Leaves turning yellow or wilted
* Slowed production of new leaves and stems
If you notice any of these symptoms, it may be time to separate the plants. Gently remove the individual rosemary plants from their potting mix, taking care not to damage the roots. Trim away any damaged or circling roots before repotting each plant into a slightly larger container with fresh potting mix.
Root binding is another concern that can arise when rosemary is grown in a small pot for an extended period. Signs of root binding include:
* Roots growing out of the drainage holes
* Water pooling around the base of the plant, indicating that the roots have filled the entire container
* A general decline in plant health and vigor
If you observe any of these signs, it’s time to repot your rosemary into a larger container with more room for its roots to grow.
Watering Issues and Nutrient Deficiencies
When rosemary is struggling with watering issues and nutrient deficiencies, it can be challenging to determine the underlying problem. One common symptom of overwatering is yellowing leaves, which can indicate that the roots are rotting due to excess moisture. On the other hand, underwatered plants will develop crispy or wilted foliage.
Nutrient deficiencies in rosemary often manifest as stunted growth or a lack of new shoots. This can be caused by inadequate fertilization or poor soil quality. To address these issues, repot your rosemary plant with fresh potting mix and prune any damaged roots to promote healthy growth. Make sure to choose a well-draining potting mix to prevent waterlogged soil.
Keep an eye out for signs of nutrient deficiencies, such as yellow leaves on the lower stems or stunted growth. If you notice these issues, consider repotting your rosemary with a balanced fertilizer to provide essential nutrients like nitrogen, phosphorus, and potassium. By addressing watering problems and nutrient deficiencies through repotting, you can help your rosemary plant thrive and enjoy its fragrance and culinary uses for years to come.
Preparing Rosemary for Repotting
Before you repot your rosemary, make sure it’s ready for its new home by checking its roots and preparing it for a smooth transition. This involves carefully examining the plant’s condition.
Choosing the Right Potting Mix
Choosing the right potting mix for your rosemary plant is crucial to ensure its healthy growth and survival. When it comes to repotting rosemary, a well-draining mix specifically designed for herbs is essential. Look for mixes that contain ingredients like peat moss, perlite, or vermiculite, which help retain moisture while preventing waterlogged soil.
For indoor plants, consider using a potting mix with added nutrients, such as slow-release fertilizers, to promote healthy growth in low-light conditions. On the other hand, outdoor rosemary plants thrive in well-draining mixes that contain a higher proportion of organic matter like compost or worm castings. These ingredients provide essential nutrients and help retain moisture in dry environments.
Some popular potting mix options for rosemary include Miracle-Gro Organic Choice Potting Mix and Espoma Organic Herb Tone Potting Mix. When selecting a mix, ensure it’s free from chemicals and additives that can harm your plant. A good potting mix should have the following characteristics: good drainage, moisture retention, and adequate nutrient supply.
Cleaning and Handling the Roots
When cleaning and handling rosemary roots, it’s essential to be gentle to prevent damage. Start by gently removing the plant from its pot, taking care not to disturb the roots excessively. Use a soft-bristled brush or a small, clean tool to delicately sweep away any debris or old potting mix clinging to the roots.
To clean the roots further, you can submerge them in a bucket of lukewarm water (around 70°F to 80°F) for about 30 minutes. This will help loosen any compacted soil and make it easier to separate the roots without causing damage. After soaking, use your fingers or a soft-bristled brush to gently tease apart the roots, working from the base of the plant upwards.
Remember to work carefully around delicate root hairs, as these are sensitive areas that can be easily damaged. If you encounter any particularly stubborn or circling roots, try using a small, sharp tool like a chopstick or pencil to gently coax them loose without causing excessive disturbance. This will help minimize stress on the plant during repotting and promote healthy growth in its new pot.
The Repotting Process: Step by Step
Now that you know when to repot your rosemary, let’s walk through the simple steps involved in safely transplanting your herb into a fresh pot. This is where things can get a little tricky if not done correctly!
Steps for Indoor Rosemary Plants
When repotting indoor rosemary plants, it’s essential to follow some specific steps to ensure their healthy growth and continued success. Start by preparing a new pot that is only one to two sizes larger than the current one. This will prevent the soil from becoming too wet and reduce the risk of root rot.
Next, gently remove the rosemary plant from its old pot, taking care not to disturb the roots excessively. Use a fork to loosen any stuck roots, but avoid cutting or damaging them. Once the plant is out, discard the old potting mix and inspect the roots for any signs of circling or tangling.
Now it’s time to plant your rosemary in fresh soil. Fill the new pot with a high-quality potting mix, leaving about an inch at the top for watering. Gently place the rosemary plant into its new home, making sure the crown (where the stem meets the roots) is level with the soil surface. Firm the soil around the roots to secure the plant in place.
To prevent transplant shock, water your rosemary plant sparingly until it’s established in its new pot.
Tips for Outdoor Rosemary Plants
When repotting outdoor rosemary plants, you’ll need to consider their unique challenges and requirements. Since these plants are exposed to changing weather conditions, they can be more sensitive during the repotting process.
One key consideration is the timing of repotting based on temperature fluctuations. Avoid repotting your rosemary plant when the temperatures are extreme – either too hot or too cold. This can cause shock to the roots and affect their ability to adapt to the new soil and container.
Another factor to consider is watering. Outdoor rosemary plants often require more frequent watering due to exposure to direct sunlight and wind. When repotting, ensure that the new pot has good drainage holes to prevent waterlogged soil.
To minimize stress on your plant, choose a new pot with slightly wider diameter than the old one. This will provide enough room for the roots to grow without becoming waterlogged. Water your rosemary plant thoroughly after repotting and keep it in a shaded area for a few days to allow it to adjust.
By considering these factors, you can successfully repot your outdoor rosemary plants and help them thrive. With proper care and attention, your rosemary plant will continue to grow and produce its signature fragrance.
Post-Repottting Care: Ensuring Success
Now that you’ve successfully repotted your rosemary, it’s time to focus on providing optimal post-repottting care to ensure your herb thrives in its new container. Proper care will encourage healthy growth and prevent setbacks.
Initial Aftercare Instructions
After repotting your rosemary plant, it’s essential to provide it with proper care to support its recovery. For the next week or two, avoid getting water on the leaves or crown of the plant, as this can cause root rot and other problems.
Watering is crucial during this period. Water your rosemary plant sparingly, allowing the top 1-2 inches of soil to dry out between waterings. Overwatering can be detrimental, so check the soil moisture regularly. For the first week after repotting, stick to a gentle misting or watering once every 7-10 days.
Fertilizing your rosemary plant is also important during this time. Use a balanced, water-soluble fertilizer (20-20-20) at half the recommended strength. This will provide essential nutrients without burning the roots of the newly repotted plant. Feed your rosemary plant once a month for the next three months to promote healthy growth and prevent nutrient deficiencies.
Monitor your plant’s response to these care instructions, adjusting as needed to ensure its optimal health and recovery.
Long-Term Maintenance and Expectations
After repotting your rosemary plant, it’s essential to establish a regular maintenance routine to ensure its continued health and growth. Watering is critical, especially during the first few weeks after transplanting. Aim to keep the soil consistently moist but not waterlogged. Check the moisture level by sticking your finger into the soil up to the first knuckle; if the soil feels dry, it’s time to water.
As for fertilization, a balanced fertilizer (10-10-10) applied once a month during the growing season will suffice. However, avoid over-fertilizing, as this can cause more harm than good. Pruning is also crucial in maintaining your rosemary plant’s shape and promoting new growth. Pinch off any leggy stems or trim back the entire plant by one-third to encourage bushy growth.
Regular inspections for pests and diseases are vital. Check for signs of spider mites, mealybugs, or aphids, which can be controlled with insecticidal soap or neem oil. Fungal diseases like root rot or leaf spot can be prevented by ensuring good air circulation and avoiding overwatering.
Common Mistakes to Avoid When Repotting Rosemary
When repotting rosemary, it’s easy to make mistakes that can harm your plant’s health and even kill it. Here are some common errors to watch out for.
Overwatering and Root Rot
Overwatering and root rot are two common mistakes to avoid when repotting rosemary. When you overwater your rosemary plant, it can lead to root rot, which is a condition where the roots of the plant start to decay due to excessive moisture. This can be devastating for your plant, causing it to weaken, become susceptible to diseases, and eventually die.
To prevent overwatering and root rot, make sure to repot your rosemary in well-draining soil that will help excess water drain away from the roots. You should also avoid getting water on the leaves or crown of the plant, as this can cause moisture to accumulate and lead to rot. Water your rosemary sparingly after repotting, allowing the top inch of soil to dry out between waterings.
Monitor your plant closely for signs of root rot, such as yellowing leaves, soft stems, or a foul odor emanating from the pot. If you notice any of these symptoms, remove the plant from its pot and inspect the roots. Trim away any affected areas with sterile scissors, and repot the rosemary in fresh soil to give it a chance to recover.
Insufficient Light and Nutrient Deficiencies
When repotting rosemary, it’s not just about selecting the right time to do so. Insufficient light and nutrient deficiencies can also have a significant impact on its health. If your rosemary plant is not receiving sufficient light, it may become leggy and weak, making it more prone to disease and pests.
This is often a result of inadequate light exposure or placement in areas with harsh direct sunlight that causes scorching. On the other hand, if you’re repotting into soil lacking essential nutrients, your rosemary will struggle to grow and thrive. This can be due to using low-quality potting mix or not fertilizing it adequately.
To avoid these common mistakes, make sure to choose a location with bright, indirect light for your rosemary plant. You can also supplement its nutrient intake by using a balanced fertilizer during the repotting process. A general-purpose 10-10-10 fertilizer is suitable, but be sure to follow the manufacturer’s instructions for application rates.
Monitor your plant closely after repotting and adjust its care routine as needed to prevent nutrient deficiencies from arising. Regularly inspect the leaves for signs of nutrient stress, such as yellowing or droopy tips, which can indicate an underlying issue that needs addressing.
Frequently Asked Questions
Can I repot rosemary at any time of the year, or are there specific seasons for repotting?
Rosemary can be repotted during certain times of the year to ensure its optimal growth and health. While it’s generally best to repot in spring and summer when rosemary is most vigorous, you may need to consider factors like climate, temperature, and humidity when determining the right time for your specific plant.
How often should I inspect my rosemary plant for signs of needing a new pot?
Regularly inspecting your rosemary plant can help identify potential issues early on. Check for signs like yellowing leaves, stunted growth, or waterlogged soil, which may indicate that it’s time to repot your rosemary.
What happens if I accidentally overwater my rosemary after repotting, and how do I prevent root rot?
Overwatering can be detrimental to your rosemary plant. If you notice signs of root rot, such as soft or mushy stems, yellowing leaves, or a foul odor from the soil, reduce watering immediately and consider repotting in fresh, well-draining potting mix.
Can I use regular potting mix for my rosemary, or do I need to choose a specific blend?
While you can use regular potting mix, it’s recommended to choose a high-quality potting mix specifically designed for herbs like rosemary. This type of mix will provide better drainage and prevent waterlogged soil.
How long does it typically take for my rosemary plant to recover from repotting shock, and what can I do to support its recovery?
Rosemary plants may experience some stress after repotting, but with proper care, they should quickly recover. Monitor your plant’s watering needs closely and provide optimal growing conditions to minimize the risk of shock. Keep in mind that it may take a few weeks for your rosemary to fully adjust to its new environment.