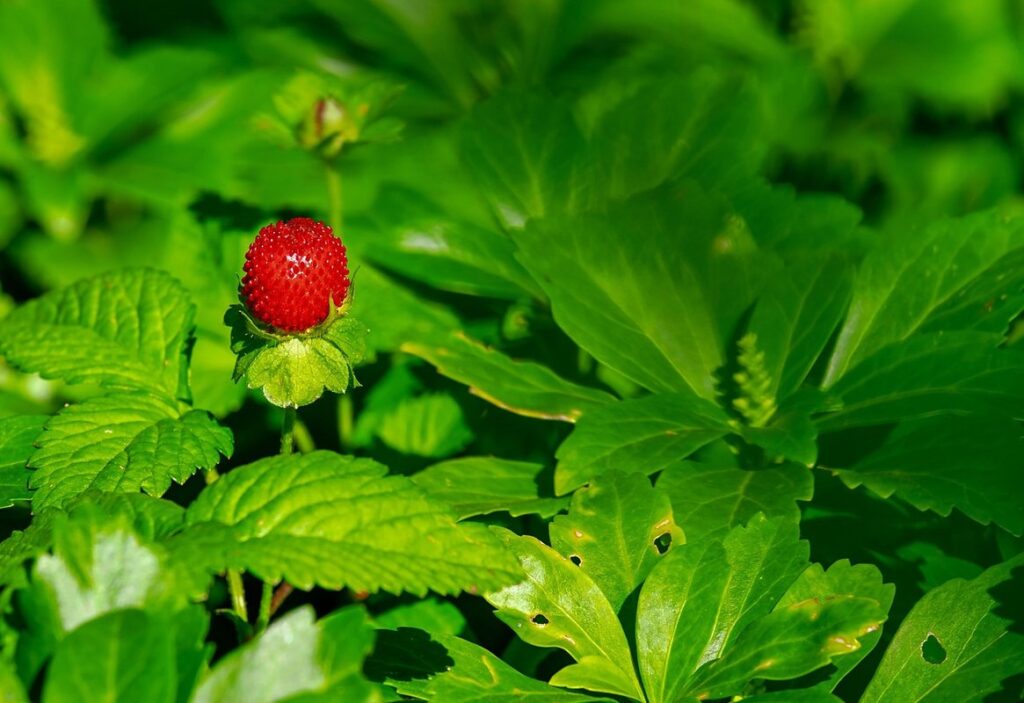
Strawberry lovers rejoice! If you’re struggling to get your strawberry bed up and running, or perhaps you’re looking to revamp an existing one, this comprehensive guide is just for you. Planning and maintaining a thriving strawberry bed requires more than just throwing some seeds in the ground – it needs careful planning, design, and attention to detail.
In this article, we’ll walk you through every step of the process, from assessing your current setup and identifying areas for improvement to troubleshooting common issues like poor yields or pests. By following our expert advice, you’ll be on track to enjoying a bumper crop of juicy, delicious strawberries all season long. Whether you’re a seasoned gardener or just starting out, this guide has everything you need to plan, design, and maintain a strawberry bed that will impress even the most discerning fruit enthusiast!
Planning and Preparation
Before you start digging up your strawberry bed, it’s essential to plan carefully, taking into account factors like soil quality, climate, and existing infrastructure. Let’s break down the key considerations for a successful renovation project.
Assessing Your Current Strawberry Bed
Evaluating your existing strawberry bed is an essential step in planning a successful renovation. Take a closer look at its condition, size, and layout to determine what changes are necessary. This assessment will help you identify areas that require improvement, whether it’s upgrading irrigation systems, adjusting soil pH levels, or reconfiguring the bed’s layout.
Begin by inspecting the strawberry plants themselves. Check for signs of disease, pests, or nutrient deficiencies. Also, consider the plant’s age and productivity. If your strawberries are over 3-5 years old, they may be nearing the end of their lifespan and in need of replacement. Next, examine the bed’s size and layout. Is it too small to accommodate your desired strawberry varieties? Are there any obstructions or pathways that hinder access?
Take note of your current crop yields and how they align with your goals for the renovated bed. Are you looking to increase production or switch to a different variety? This information will help guide your renovation decisions, ensuring that your new bed meets both your immediate needs and long-term aspirations.
Setting Goals and Budget
When planning your strawberry bed renovation, it’s essential to set clear goals that will guide your decisions throughout the process. Start by considering what you want to achieve with your renovated bed. What are your desired yields? Do you want to grow a specific variety of strawberries or increase your overall harvest? Are there any space constraints or limitations in your garden that you need to work around?
To ensure your goals are realistic, consider factors like climate, soil quality, and the amount of time you have available for maintenance. For example, if you live in an area with limited sunlight, it may not be feasible to grow certain varieties of strawberries that require full sun.
In terms of space efficiency, think about how you can maximize your strawberry bed’s potential. Consider using raised beds or container gardens to make the most of small spaces. Aesthetic preferences are also important – do you want a tidy and organized look or a more rustic, natural appearance? By setting specific goals for your strawberry bed renovation, you’ll be able to create a plan that meets your needs and budget.
When it comes to establishing a realistic budget, consider both the cost of materials and labor. Make a list of all the necessary components, including soil, plants, irrigation systems, and fencing (if needed). Research different suppliers and compare prices to find the best value for your money. Don’t forget to factor in any potential upgrades or additions you may want to make down the line.
To give you a better idea of what to expect, here are some estimated costs for common strawberry bed renovation components:
* Soil: $50-$100 per cubic yard
* Strawberry plants: $20-$50 each (depending on variety)
* Irrigation systems: $100-$300 (depending on complexity and size)
* Fencing: $200-$500 (depending on type and length)
Keep in mind that these are just rough estimates, and actual costs may vary depending on your specific needs and location. To stay within budget, prioritize your goals and allocate resources accordingly. For example, if you’re short on cash for materials, consider using reclaimed or repurposed items to save money.
By setting clear goals and establishing a realistic budget, you’ll be well-equipped to tackle your strawberry bed renovation project with confidence and success. Remember to stay flexible and adapt to any unexpected challenges that may arise during the process – and don’t hesitate to seek professional advice if needed!
Choosing the Right Location
When it comes to planning a strawberry bed renovation, one of the most crucial decisions you’ll make is choosing the right location. This may seem like a no-brainer, but many gardeners overlook this critical factor, which can ultimately lead to subpar yields and frustration.
First and foremost, sunlight is essential for strawberries. They require at least six hours of direct sunlight per day to produce an abundance of fruit. So, ensure that your strawberry bed receives the necessary light by placing it in a spot that gets morning sun or dappled shade during peak summer months. Avoid areas with dense tree coverage or under power lines, as these can cast deep shadows and reduce yield.
Soil quality is also a vital consideration when selecting a location for your strawberry bed. Strawberries prefer well-draining, slightly acidic soil with a pH between 5.5 and 6.5. If your yard’s natural soil doesn’t meet these criteria, consider amending it before planting.
Designing Your Strawberry Bed Renovation
Now that you’ve planned your renovation, let’s dive into designing a strawberry bed layout that will maximize space and yield. We’ll explore how to create a functional and beautiful design.
Understanding Soil Requirements
When it comes to growing delicious strawberries, having the right soil conditions is crucial. Strawberries have specific needs when it comes to soil pH, nutrient content, and drainage.
First, let’s talk about soil pH. Strawberries prefer a slightly acidic to neutral soil pH, ranging from 5.5 to 6.5. If your soil is too alkaline or too acidic, it can affect the plant’s ability to absorb essential nutrients. To test your soil pH, you can purchase a DIY testing kit or send a sample to a lab for analysis. Based on the results, you may need to amend your soil with lime (to raise pH) or sulfur (to lower pH).
In terms of nutrient content, strawberries require a balanced diet of nitrogen, phosphorus, and potassium. A general-purpose fertilizer can provide these essential nutrients, but be sure to follow the instructions carefully to avoid over-fertilizing. Drainage is also vital for strawberry growth, as standing water can lead to root rot and other problems. Aim for a well-draining soil mix with a slightly sandy texture.
To amend your soil accordingly, consider adding organic matter like compost or manure to improve structure and fertility. You can also incorporate perlite or vermiculite to enhance drainage. By understanding and addressing these specific needs, you’ll be well on your way to creating the perfect strawberry bed for a bountiful harvest.
Bed Size and Layout Optimization
When designing your strawberry bed renovation, one of the most critical aspects to consider is the optimal bed size and layout. A well-planned bed can significantly impact the efficiency of maintenance, accessibility, and even yield quality.
Aim for a minimum bed width of 3-4 feet (90-120 cm) to allow for easy access between rows. This will also prevent overcrowding, which can lead to disease transmission and reduced fruit quality. As for length, consider a maximum of 8-10 feet (240-300 cm), allowing you to reach all areas without straining.
Pathways are another crucial aspect to plan for. Leave space for narrow paths between beds, typically 18-24 inches (45-60 cm) wide, depending on your preferred method of irrigation and harvesting. Also, consider incorporating raised platforms or benches along the perimeter to create a comfortable workspace while maintaining accessibility features like trellises or supports.
When designing your strawberry bed layout, think about how you will navigate between rows and access plants from all sides. By optimizing your bed dimensions and including pathways and accessibility features, you’ll be able to enjoy reduced maintenance time and improved crop yields.
Choosing the Right Strawberry Variety
When it comes to designing your strawberry bed renovation, choosing the right variety is crucial for optimal growth and yield. With over 600 varieties of strawberries available, selecting the perfect one can be overwhelming. However, understanding their growth habits, yields, and disease resistance will help you make an informed decision.
Some popular strawberry varieties include ‘Everbearing’, which produces multiple harvests throughout the season, while ‘Day-Neutral’ and ‘Florian’ produce continuous crops from spring to fall. Other factors to consider are climate resilience, flavor profile, and size of the fruit. For example, if you live in an area with hot summers, look for varieties like ‘Camarosa’ or ‘Albion’, which are known for their heat tolerance.
In terms of disease resistance, some popular options include ‘Seascape’, ‘Ventana’, and ‘Festival’. These varieties have built-in resistance to powdery mildew, a common issue in strawberry gardens. When selecting the best variety for your specific climate and preferences, consider factors like temperature requirements, soil type, and sun exposure.
Preparing Your Site for Renovation
Before you begin renovating your strawberry bed, make sure you’ve prepared the site by clearing debris and leveling the ground to ensure optimal growth conditions. This step sets the foundation for a successful renovation project.
Clearing and Digging
Before diving into the renovation process, it’s essential to clear and prepare the site for new strawberry plants. Start by inspecting the area for debris, such as dead leaves, twigs, and weeds. Remove any unwanted material that could compete with your strawberries for water and nutrients.
If you’re renovating an existing bed, you may need to dig up the current plants. This will give you a fresh start and allow you to replant in the optimal location. Use a fork or spade to carefully dig around the plant’s roots, taking care not to damage any nearby plants.
Once the debris is removed and the old plants are out of the way, assess the soil condition. Test its pH level and nutrient content to determine if any amendments are needed. Based on your findings, add organic matter like compost or well-rotted manure to improve drainage and fertility.
Keep in mind that strawberry beds typically require a depth of 6-8 inches to accommodate their spreading roots. Check the existing soil depth and adjust accordingly to ensure your new plants have enough space to grow. By clearing and preparing the site, you’ll create an ideal environment for your strawberries to thrive.
Installing New Irrigation Systems
When it comes to strawberry cultivation, proper irrigation is essential for optimal growth and yields. A well-designed and installed irrigation system can make all the difference in ensuring that your strawberries receive just the right amount of water at the right time. Without adequate moisture, strawberries may become stressed, leading to reduced flavor, texture, and overall quality.
To install an efficient and reliable irrigation system, follow these steps:
* Conduct a thorough site analysis to identify areas where water may be seeping into the bed or collecting in low-lying spots.
* Choose a suitable irrigation method for your strawberry bed, such as drip irrigation, sprinkler systems, or soaker hoses.
* Calculate the optimal watering schedule based on factors like climate, soil type, and plant density.
* Install pipes and emitters that are designed specifically for strawberry cultivation, taking care to avoid over- or under-watering.
Proper installation and regular maintenance of your irrigation system will help prevent issues like root rot, fungal diseases, and water waste.
Adding Mulch and Other Soil Amendments
When preparing your strawberry bed for renovation, adding organic mulch and other soil amendments is an essential step to improve its fertility, structure, and overall health. Mulch acts as a protective barrier against extreme temperatures, moisture fluctuations, and nutrient depletion. By incorporating 2-3 inches of organic mulch into your bed, you’ll retain valuable nutrients and suppress weed growth.
Consider adding the following amendments to enhance soil fertility:
* Compost: This rich, dark soil conditioner boosts microbial activity, improving nutrient availability for strawberry plants.
* Worm Castings: Rich in nitrogen, phosphorus, and potassium, these natural fertilizers promote healthy root development and fruit production.
* Well-Rotted Manure: High in organic matter, this amendment enhances soil structure, aeration, and water retention.
To incorporate these amendments, follow these steps:
- Apply 2-3 inches of mulch around strawberry plants, keeping it several inches away from plant crowns to prevent moisture buildup.
- Mix 10% compost or worm castings into the top 6-8 inches of soil to improve fertility and structure.
- Rake well-rotted manure evenly throughout the bed to promote aeration and water retention.
Regularly replenishing your strawberry bed with these amendments will ensure optimal growing conditions for your plants, leading to healthier, more productive harvests.
Planting and Establishing Your Strawberry Bed
Now that you’ve renovated your strawberry bed, it’s time to plant new life into it. This next step requires careful planning to ensure a successful harvest.
Preparing the Soil for Planting
Preparing the soil for planting is an essential step in creating a thriving strawberry bed. Before you start planting, take some time to aerate, fertilize, and balance the pH of your soil. Aeration involves loosening the soil to allow air, water, and nutrients to reach the roots of the plants. Use a fork or spade to gently loosen the top 8-10 inches of soil, being careful not to damage any underlying roots.
Fertilization is also crucial for strawberry plant growth. Use a balanced fertilizer that contains nitrogen, phosphorus, and potassium (NPK) to promote healthy root development, fruiting, and overall plant health. Follow the manufacturer’s instructions for application rates and timing. Additionally, consider incorporating organic matter like compost or manure into your soil to improve its structure and fertility.
To ensure optimal growth, it’s also essential to balance your soil pH. Strawberries prefer a slightly acidic to neutral soil pH between 5.5 and 6.5. Use a soil testing kit to determine your soil’s pH level and adjust it as needed with lime or sulfur.
Planting Strawberries Correctly
When planting strawberries correctly, it’s essential to consider the right spacing, depth, and orientation of plants. A general rule of thumb is to plant strawberry crowns 18-24 inches apart, depending on the variety. This allows for adequate air circulation and sunlight penetration between plants.
To determine the optimal depth for your strawberry crowns, look for the crown node, which is the point where the roots meet the crown. Plant this node just above the soil surface, making sure not to bury it too deep or expose the roots to heat stress. Water thoroughly after planting to settle the soil and provide enough moisture for establishment.
When orienting your strawberry plants, consider the direction of sunlight in your garden. For most varieties, south-facing slopes receive adequate light, but some species prefer a more shaded area. If you’re unsure, plant multiple rows with different orientations to find what works best for your specific strawberries.
Keep in mind that these guidelines can vary depending on your local climate and soil conditions. Consult with local nurseries or gardening experts for personalized advice tailored to your region’s unique needs.
Post-Planting Care and Maintenance
After planting and establishing your strawberry bed, it’s essential to provide optimal post-planting care and maintenance for a bountiful harvest. This involves monitoring the plants’ watering needs, pruning them regularly, and keeping an eye out for pests and diseases.
Watering is a critical aspect of strawberry bed maintenance. Strawberries require consistent moisture, especially during their first year of growth. Aim to provide about 1-2 inches of water per week, either through rainfall or irrigation. Make sure the soil drains well to prevent waterlogged soil conditions that can lead to root rot. Mulching around plants helps retain moisture and suppress weeds.
Regular pruning is also crucial for promoting healthy growth and fruiting. Remove any weak or dead flower stalks to direct energy towards producing larger berries. After harvesting, cut back the plant to about 2-3 inches from the crown to encourage new growth.
Keep a close eye out for common pests like aphids, slugs, and snails, which can quickly spread disease throughout your strawberry bed. Regularly inspect plants for signs of disease such as yellowing leaves or black spots on the fruit. Take action promptly if you notice any issues, and consider implementing integrated pest management (IPM) techniques to minimize chemical use.
Monitoring Progress and Addressing Challenges
As you work on transforming your strawberry bed, it’s essential to regularly check its progress and tackle any arising challenges that might affect its overall performance. This helps ensure a successful renovation outcome.
Tracking Growth and Yields
As you tend to your renovated strawberry bed, it’s essential to keep a close eye on its progress. Regular monitoring will help you identify areas where your plants are thriving and those where they need attention. Start by tracking growth by measuring the height of your strawberry plants weekly or bi-weekly. You can also record observations about their leaf color, fruit size, and overall health.
Monitoring yields is equally crucial, as it allows you to adjust your strategy for optimal results. Keep track of how many fruits each plant produces, and note any variations between different types of strawberries. This will help you determine which varieties are performing well in your specific climate and soil conditions.
Pay attention to any challenges that arise, such as pests or diseases. Act promptly to address these issues before they spread and cause significant damage. For example, if you notice aphids on your plants, use neem oil or insecticidal soap to control the infestation. By adapting your strategy based on your observations, you’ll be able to optimize yields and create a thriving strawberry bed that rewards your efforts.
Troubleshooting Common Issues
As you tend to your strawberry bed, it’s not uncommon to encounter common issues that can impact yields and overall health. One of the most frustrating problems is pest infestations. Slugs, snails, and aphids are notorious strawberry pests that can quickly spread and cause significant damage.
To address these unwanted visitors, consider using physical barriers like copper tape or crushed eggshells around plant stems to deter slugs and snails. For aphid control, try introducing natural predators such as ladybugs or lacewings into your garden. Regularly inspect your plants for signs of infestation and take action promptly.
Another common challenge is disease susceptibility. Strawberries are prone to fungal diseases like powdery mildew and botrytis. To prevent these issues, maintain good air circulation around plants, water carefully to avoid overhead watering, and remove any infected leaves or flowers. You can also use fungicides as a last resort.
Poor yields often stem from inadequate soil conditions or insufficient sunlight. Soil pH imbalance can affect nutrient uptake, while lack of direct sunlight can reduce fruiting potential. Regularly test your soil to ensure it’s within the optimal pH range for strawberry cultivation (5.5-6.5). Additionally, provide at least 8 hours of direct sunlight daily by strategically placing your bed or pruning nearby plants.
Monitoring progress and being proactive in addressing challenges will help you identify issues early on, minimizing their impact and ensuring a bountiful harvest.
Continuously Improving Your Strawberry Bed
Regularly assessing your strawberry bed’s performance is crucial to ensure it continues to thrive and meet its full potential. Set aside time every week or two to inspect your plants, soil, and other components of the bed. Check for signs of pests, diseases, or nutrient deficiencies that could impact yields. Look for any changes in plant growth, fruit size, or color.
If you notice any issues, make adjustments as needed. For example, if you’re not getting adequate pollination, consider bringing in beneficial insects or using a small brush to gently transfer pollen from one plant to another. If your soil is too dry or waterlogged, adjust your irrigation schedule accordingly.
Keep track of weather patterns and note how they affect your strawberry bed. Extreme temperatures, rainfall, or sunshine can impact growth and fruit production. By continuously monitoring and adjusting your strawberry bed’s conditions, you’ll be able to fine-tune its performance and maximize yields over time. Remember to also rotate your strawberries annually to prevent soil depletion and maintain soil fertility.
Frequently Asked Questions
How often should I water my strawberry bed during renovation?
Watering is crucial, but too much can be detrimental to the plants. Water your strawberry bed as needed, taking into account factors like soil type and climate. A general rule of thumb is to water when the top 2-3 inches of soil feel dry to the touch. Be cautious not to overwater during renovation, as this can lead to root rot and other issues.
What if I encounter pests or diseases in my existing strawberry bed?
Pests and diseases are common challenges in any strawberry bed. To address these issues, inspect your plants regularly for signs of infestation or infection. Use organic or integrated pest management (IPM) techniques whenever possible, such as introducing beneficial insects or using neem oil to control pests.
Can I still grow strawberries in areas with poor sunlight?
While most strawberry varieties require full sun (6-8 hours of direct sunlight), there are some varieties that can tolerate partial shade. If you have a spot with limited sunlight, look for ‘Albion’ or ‘Seascape’, which are more tolerant of shade. However, be aware that yields may still be lower than in areas with more sunlight.
How do I determine the optimal strawberry bed size and layout?
The ideal bed size depends on your space constraints, desired yields, and preferred growing method (e.g., container or in-ground). Consider a minimum of 4-6 square feet per plant to allow for good air circulation and easy access. For a beginner, a smaller bed is often easier to manage and can help prevent overwatering.
What additional resources are available to further support my strawberry bed renovation?
For more specific guidance on topics like soil testing or pest management, consider consulting with local gardening experts, extension services, or online forums. You can also join online communities or social media groups dedicated to home gardeners, where you’ll find valuable advice and experiences shared by fellow growers.