Are you tired of looking at your lush green lawn with unwanted spots of tiny, three-leafed clover sprouts? Getting rid of clovers in your lawn can be frustrating and embarrassing. Not only do they steal nutrients from your grass, but they also create an uneven appearance that’s hard to ignore. The good news is that removing clovers is not as difficult as you think, and with the right techniques and methods, you can say goodbye to these pesky plants for good. In this comprehensive guide, we’ll show you how to identify clover growth, prevent it from coming back, and use various control methods to remove them completely. From chemical treatments to natural remedies, we’ve got you covered.
Understanding Clover Growth and Problems
Before we dive into removal methods, it’s essential to understand why clover growth can be a problem and how its behavior affects your lawn.
What are White and Red Clover?
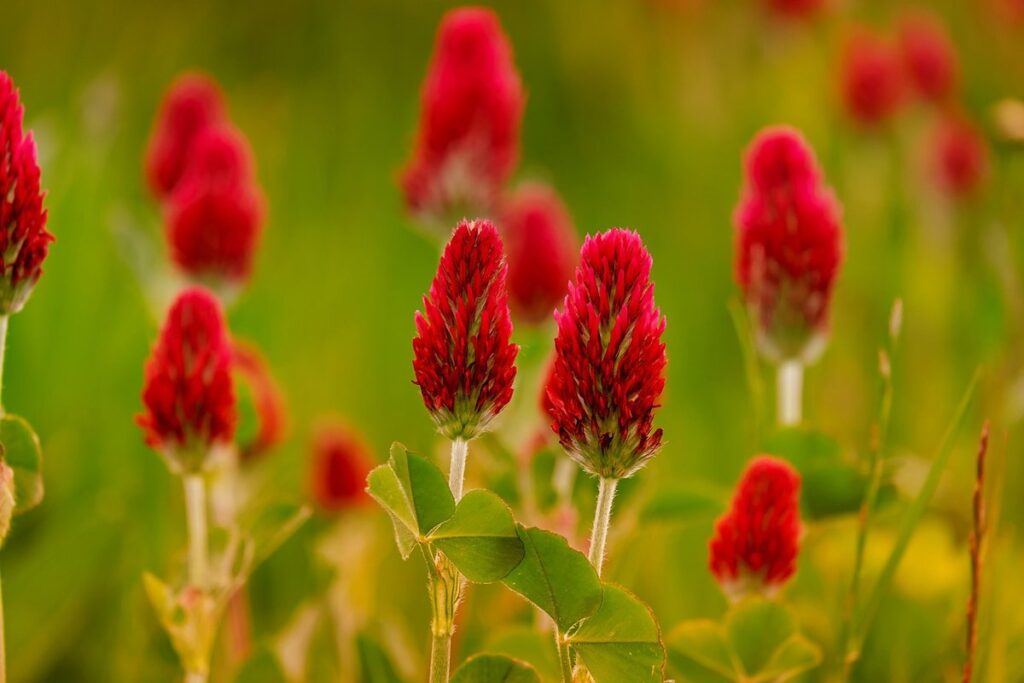
When it comes to clover growth in lawns, you’re likely dealing with one of two types: white clover (Trifolium repens) or red clover (Trifolium pratense). White clover is a perennial weed that spreads quickly through underground stolons, forming small white flowers in clusters. It thrives in shady areas and can tolerate a wide range of soil conditions.
Red clover, on the other hand, is an annual weed with pink or red flowers arranged in clusters. It prefers well-drained soil and full sun, but can also grow in partial shade. Both types of clover are problematic because they outcompete your lawn’s grass for water, nutrients, and light. They’re also difficult to eradicate once established due to their ability to reproduce vegetatively.
If you spot either white or red clover in your lawn, it’s essential to address the issue promptly to prevent further spreading. A combination of cultural, mechanical, and chemical control methods can help get rid of clovers. We’ll discuss these methods in more detail later on, but for now, let’s focus on understanding why clovers are such a challenge to manage.
Why Do Lawns Get Infested with Clovers?
Lawn care enthusiasts often find themselves frustrated with clover infestations. But have you ever wondered why these tiny plants seem to appear out of nowhere and take over your lawn? The reasons are quite simple, yet interconnected.
Firstly, poor soil quality is a major contributor to clover growth. If your soil lacks essential nutrients like nitrogen or phosphorus, it creates an environment that’s perfect for clovers to thrive in. These adaptable plants can tap into the existing water and nutrient resources, outcompeting your desired grass species. To combat this, consider getting a soil test done and applying the necessary fertilizers.
Climate conditions also play a significant role. Clover growth is often favored by areas with mild winters, cool summers, and adequate rainfall. If you live in an area with these conditions, it’s no wonder why clover seems to pop up everywhere! To minimize its spread, maintain a healthy lawn through regular mowing, watering, and fertilizing.
Lastly, environmental factors like overwatering or poor drainage can also lead to clover infestations. If your lawn is consistently waterlogged, it creates an ideal environment for clovers to sprout. Make sure to adjust your watering schedule and address any underlying drainage issues to prevent this from happening.
Common Problems Caused by Clover Growth
Excessive clover growth can bring about several issues that may compromise the health and appearance of your lawn. For one, it can lead to reduced grass health as clovers tend to outcompete native grasses for water, nutrients, and sunlight. This can result in thinning or patchy areas of your lawn, making it look unkempt.
Moreover, clover growth can cause uneven mowing due to its tendency to grow in irregular patterns. Mowers may struggle to navigate through dense patches of clovers, leading to an inconsistent cut that can further exacerbate the problem. Regularly scheduled mowings might become a challenge as well, with lawnmower blades getting clogged by the thick clover stems.
Another issue associated with excessive clover growth is increased weed competition. Clover plants have a deep taproot system that allows them to access water and nutrients more efficiently than grasses. This can enable weeds such as dandelions or plantain to thrive, further crowding out your native grass species. To tackle this problem effectively, it’s essential to combine multiple strategies like selective herbicides, physical removal of clover plants, and improved lawn care practices.
Identifying Clover Types and Infestation Levels
To effectively get rid of clovers in your lawn, it’s essential to first identify which type is present and at what infestation level. This helps you choose the best removal method for your specific situation.
Visual Identification of Clover Types
When it comes to getting rid of clovers in your lawn, it’s essential to identify the type of clover you’re dealing with. Two common types are white clover (Trifolium repens) and red clover (Trifolium pratense). Let’s take a closer look at each.
White clover has small, rounded leaves that are typically 1-2 inches long and have a pale green color. The flowers are tiny, white, and clustered together in a ball-like shape, often referred to as “hoping” or “clover heads.” They tend to grow close to the ground, forming a dense mat of foliage. White clovers are often found in lawns with poor soil quality.
Red clover, on the other hand, has larger leaves that are 2-3 inches long and have a deeper green color than white clover. The flowers are pinkish-red in color, smaller than white clover flowers, but still clustered together. Red clovers grow taller than white clovers, often reaching up to 12 inches high, and tend to produce more seeds.
By being able to identify these key characteristics, you’ll be better equipped to tackle the infestation. Remember that both types of clovers are perennial weeds, meaning they will regrow if not removed completely.
Assessing the Severity of a Clover Infestation
When assessing the severity of a clover infestation, it’s essential to get a clear picture of the extent of the problem. To do this, you’ll need to measure the percentage of clover coverage in your lawn. One method is to use a grid system: divide your lawn into sections and count the number of square feet covered by clovers in each section. Multiply this number by the total number of sections to get an overall estimate.
Another approach is to use a measuring tape or app to measure the perimeter of your lawn, then calculate the area using the formula for the shape of your yard (e.g., rectangle, circle). Once you have the total area, determine what percentage it represents compared to the entire lawn. For example, if clovers cover 20% of a 10,000 sq. ft. lawn, that’s 2,000 sq. ft. of clover growth.
It’s also crucial to consider the overall health and appearance of your lawn when evaluating infestation severity. Are there other issues like thinning or pests that could be contributing to the problem? By getting a comprehensive view, you’ll be better equipped to develop an effective plan for tackling the infestation.
Determining the Root Cause of the Problem
Identifying the root cause of the clover infestation is crucial to effectively getting rid of it and maintaining a healthy lawn. When clover takes over your lawn, it’s often a symptom of underlying issues that need attention. One common reason for clover growth is poor soil quality, particularly low nitrogen levels. Clover can thrive in conditions where other grasses struggle, making it a opportunistic weed.
To determine the root cause of the problem, start by assessing your lawn’s nutrient levels and pH balance. You can purchase a DIY soil testing kit or consult with a local nursery to get professional advice. Once you have this information, you can take corrective action to address any imbalances. For example, if your soil is deficient in nitrogen, consider applying a balanced fertilizer that includes this essential nutrient.
It’s also important to note that clover infestations can be caused by factors such as overwatering or poor drainage, which can lead to an environment conducive to weed growth. By addressing these underlying issues, you’ll not only reduce the likelihood of future clover infestations but also promote a healthier, more resilient lawn that’s better equipped to withstand other challenges.
Preventative Measures and Lawn Care Tips
To keep those pesky clovers at bay, it’s essential to understand how to properly maintain your lawn, including choosing the right grass type and mowing techniques.
Maintaining Healthy Soil Conditions
To prevent future clover growth and maintain a healthy lawn, it’s essential to focus on improving soil quality through fertilization, aeration, and other methods. Clover thrives in low-fertilizer environments, so by introducing balanced nutrients, you’ll create an environment where grass can outcompete this pesky weed.
Start by testing your soil pH levels to determine if it’s acidic or alkaline. Most lawns prefer a slightly acidic to neutral pH range (6.0-7.0). Based on the test results, adjust your fertilizer application accordingly. A balanced fertilizer (e.g., 10-10-10 N-P-K) will provide essential nutrients for grass growth without promoting clover.
Regular aeration is another crucial step in maintaining healthy soil conditions. This process allows air, water, and nutrients to penetrate deeper into the soil, reducing compacted layers where clover tends to grow. Aerate your lawn once or twice a year, depending on soil type and traffic.
In addition to fertilization and aeration, maintain a consistent mowing schedule (2-3 inches) to promote healthy grass growth and reduce clover seed dispersal. Also, avoid overwatering, as this can create an environment conducive to clover growth. By implementing these strategies, you’ll be well on your way to creating a lush, clover-free lawn.
Proper Mowing and Watering Habits
Regular mowing and watering habits play a crucial role in maintaining a healthy lawn that’s less susceptible to clover infestations. When you keep your grass at the right height, it creates an environment where other plants like clovers struggle to grow.
Mowing your lawn too short can weaken the grass, making it more vulnerable to disease and pests, including clovers. Keep in mind that different types of grass have recommended mowing heights – for example, tall fescue prefers 3-4 inches, while Kentucky bluegrass does best at 2.5-3 inches.
A regular watering schedule is also essential. Overwatering can lead to shallow root growth, making your lawn more prone to clover invasion. Underwatering, on the other hand, can stress the grass, creating an opening for weeds like clovers to take hold.
To create a healthy environment for your lawn, mow it once a week during the growing season and water deeply but infrequently. This encourages deep root growth, making your grass more resistant to disease and pests. Keep in mind that this may require some experimentation to find the right balance for your specific climate and soil type.
Integrated Pest Management (IPM) Techniques
When it comes to controlling clover growth, Integrated Pest Management (IPM) techniques offer a holistic approach that combines cultural, mechanical, biological, and chemical methods. By adopting an IPM strategy, you can create a balanced ecosystem that promotes healthy grass growth while suppressing unwanted clover.
Culturally, maintaining proper mowing practices is crucial. Keep your lawn at the recommended height for your grass type to prevent shallow roots and promote deep growth. Water deeply but infrequently to encourage deep root development, making it harder for clover to compete. Fertilize your lawn with a balanced fertilizer that promotes healthy grass growth.
Mechanically, regular lawn aeration can help loosen compacted soil, allowing air, water, and nutrients to reach the roots. Aerating also helps break up dense clumps of clover, making them easier to remove. Use a dethatching rake or a scarifier to manually remove dead grass and debris that can harbor clover seeds.
Biologically, introduce beneficial insects like ladybugs or lacewings that feed on clover seeds. You can also use natural herbicides like vinegar-based products or soap-based solutions to control clover growth without harming the environment.
Chemical and Non-Chemical Methods for Clover Control
To effectively get rid of clovers, you’ll want to consider both chemical and non-chemical methods, which we’ll break down in detail below. This includes natural remedies and commercial products that can help control clover growth.
Herbicides and Weed Killers
Herbicides can be an effective way to kill clovers in your lawn, especially for large areas. However, it’s essential to use them judiciously and follow safety precautions. The effectiveness of herbicides depends on the type used; selective ones target specific plants, while non-selective herbicides like glyphosate will kill all vegetation.
Some popular chemical treatments include weed killers like Roundup (glyphosate) or Ortho Weed-B-Gone (diquat). When applying these products, ensure you follow the label instructions for concentration and application rates. Wear protective clothing, including gloves, a mask, and safety goggles to prevent skin contact and inhalation of fumes.
One key point to note is that herbicides can also kill desirable plants in your lawn, so it’s crucial to identify clover correctly before treatment. To minimize damage, spot-treat affected areas instead of applying the product across the entire lawn. Always test a small area first to check for any adverse reactions or lingering effects on your grass. Regularly monitor your lawn after herbicide application and be prepared to take further action if necessary.
Natural and Organic Controls
If you’re looking for non-chemical methods to control clover growth, there are several natural and organic options worth exploring. One effective approach is using homemade remedies that target the underlying causes of clover infestation. For instance, a mixture of 1 tablespoon of dish soap, 1 gallon of white vinegar, and 1 quart of water can be used as a natural herbicide. This solution should be applied directly to the affected areas of your lawn.
Another option is using natural herbicides like corn gluten meal or clover killer products that contain ingredients like citric acid or fatty acids. These products work by disrupting the growth patterns of clovers and preventing seed production. Regular application of these natural herbicides can help control clover growth without harming the environment.
It’s also worth considering manual removal methods, such as digging up or pulling out clover plants by hand. This approach may be time-consuming but is a cost-effective and non-toxic solution for small areas of infestation.
Physical Methods for Clover Control
When it comes to removing clovers from your lawn, physical methods can be an effective and environmentally friendly approach. One of the most straightforward manual methods is hand-pulling. This involves carefully grasping the clover plant at its base and pulling it out of the ground. However, this method can be time-consuming and may not reach the entire root system.
To make hand-pulling more efficient, you can use a tool like a fork or a cultivator to loosen the soil around the clover roots. This will make it easier to remove the plant without leaving any fragments behind. For larger areas with dense clover growth, using a shovel or a spade to dig up the roots may be necessary.
When using these tools, be sure to wear gloves and work carefully to avoid spreading the clover seeds further into your lawn. It’s also essential to dispose of the removed clover plants properly to prevent re-growth. Repeatedly removing clovers by hand or digging up their roots can eventually deplete their energy reserves and help you achieve a clover-free lawn.
Maintaining a Healthy Lawn After Removing Clovers
Now that you’ve successfully removed clovers from your lawn, it’s essential to focus on maintaining its overall health and appearance. This is where proper care comes in.
Post-Remediation Care Tips
After removing clovers from your lawn, it’s essential to make some adjustments to ensure your grass recovers and thrives. This is a critical stage where proper care can either help your lawn regain its health or lead to further problems.
Firstly, adjust your mowing schedule. Since you’ve just removed the clover, your lawn may be more susceptible to damage from over-mowing. Reduce the frequency of mowing for a while, allowing your grass to recover and establish itself before resuming regular maintenance. This might mean going from weekly to every 10-14 days.
When it comes to watering, be cautious not to overdo it. Grass under stress can become more vulnerable to disease, so avoid excessive water application until your lawn is fully established. Instead of deep watering, opt for shallow but frequent watering sessions to encourage a strong root system. Monitor your lawn’s response and adjust accordingly – ideally you’ll see healthier, denser grass in the long run.
Additionally, ensure your mower blades are sharp to prevent tearing at your grass as it recovers.
Monitoring for Future Infestations
Monitoring for Future Infestations is crucial to ensure your lawn remains healthy and weed-free. After removing clovers, it’s easy to let your guard down and assume the problem has been solved. However, this complacency can lead to a recurrence of unwanted growth. To prevent future infestations, you need to remain vigilant and maintain a proactive approach.
Start by regularly inspecting your lawn for signs of clover or other weeds. Look for small patches of clover or tiny white flowers that are often mistaken for miniature daisies. Be aware of the changing seasons, as clovers tend to thrive in moist environments during spring and fall. Keep an eye out for areas with poor drainage or low-lying spots where water tends to collect.
To stay ahead of potential issues, consider implementing a maintenance schedule that includes regular mowing, fertilizing, and aerating your lawn. This will promote healthy growth and strengthen the soil, making it less hospitable to weed infestations.
Frequently Asked Questions
What are the best conditions to apply herbicides for clover control?
When using herbicides, ensure that you follow the manufacturer’s instructions and take necessary precautions to avoid overspray or drift onto desirable plants. Apply herbicides when the clovers are actively growing, typically during spring or early summer, but not during peak growth periods or in areas with high rainfall.
Can I use physical methods alone to remove large infestations of clover?
While physical removal can be effective for small areas, it may not be sufficient for extensive clover infestations. In such cases, a combination of methods – including chemical treatments, natural controls, and proper lawn care practices – may be necessary to achieve optimal results.
How do I prevent clovers from spreading through stolons in my lawn?
To prevent white clover (Trifolium repens) from spreading via underground stolons, focus on maintaining a healthy, dense lawn through regular mowing, watering, and fertilizing. This will reduce the likelihood of stolons developing and new clover growth appearing.
What are some common mistakes people make when trying to remove clovers?
Common errors include incorrect identification of clover types, inadequate preparation for removal methods (e.g., not addressing underlying soil conditions), and failing to address prevention measures post-remediation. By understanding these pitfalls, you can refine your approach and achieve better results.
How long does it typically take for lawns to recover after removing clovers?
Recovery time varies depending on the extent of infestation, lawn care practices, and weather conditions. Generally, it may take several months (4-6) for a lawn to fully recover from a moderate clover infestation, while more severe cases may require longer periods (8-12 months).