Are you tired of dealing with unwanted clover grass in your lawn? Not only can it be unsightly, but it can also choke out other plants and reduce the overall health of your yard. Getting rid of clover grass requires a multi-faceted approach that involves understanding its causes and choosing the right removal methods. In this article, we’ll walk you through non-chemical and chemical solutions to eliminate clover grass for good, including physical removal, solarization, mulching, herbicides, and fertilizers. We’ll also share prevention strategies to keep your lawn weed-free in the long run. Whether you’re a seasoned gardener or just starting out, this guide will provide you with the knowledge to take back control of your lawn and enjoy a lush, healthy appearance all season long.
Understanding Clover Grass and Its Challenges
To effectively get rid of clover grass, it’s essential you first understand its growth habits and common challenges that can make eradication more difficult. This includes identifying why clover thrives in certain areas.
What is Clover Grass?
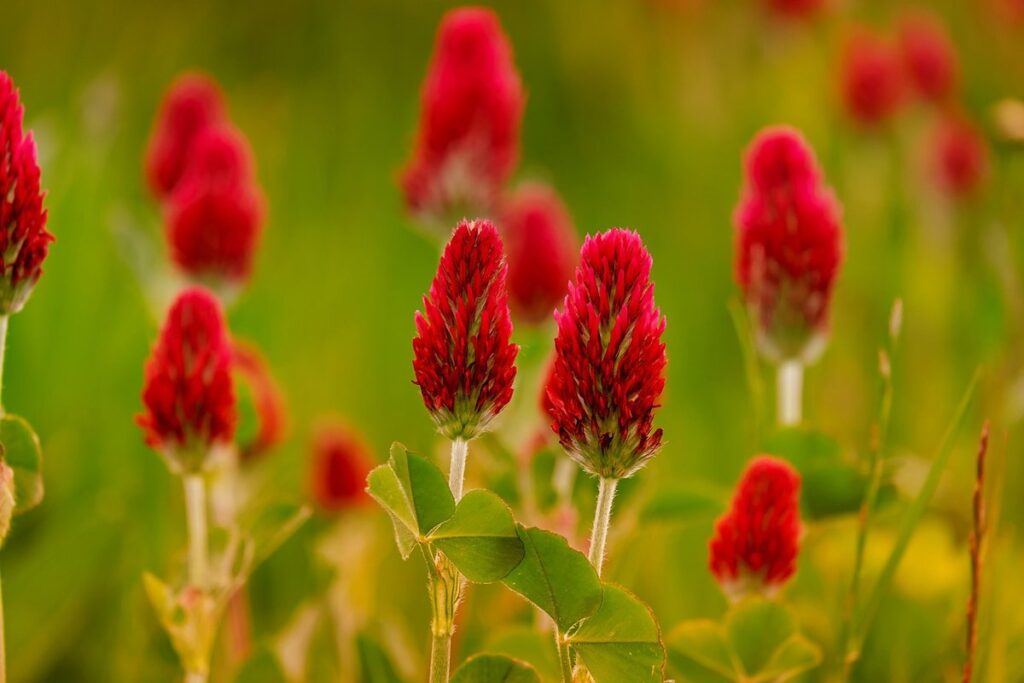
Clover grass is a perennial weed that has been a thorn in many gardeners’ sides. But before we dive into how to get rid of it, let’s take a closer look at what it is and its different types. There are two main species of clover grass: white clover (Trifolium repens) and red clover (Trifolium pratense).
White clover has small, oval-shaped leaves with 3-5 leaflets that grow close to the ground. It produces small, pink or white flowers in clusters, and is often found growing in lawns, meadows, and along roadsides. Red clover, on the other hand, has larger leaves with 3-5 leaflets, and produces pink or red flowers in round clusters.
One of the main reasons clover grass can be so invasive is that it can spread quickly through underground stems ( stolons) that root at the nodes, allowing new plants to grow. This means that even if you manage to get rid of one patch of clover, there may be more lurking beneath the surface.
Why Is It Difficult to Remove?
Getting rid of clover grass can be a daunting task for many homeowners. One major reason for this is its deep and extensive root system. Clover grass has a unique ability to grow new roots from existing ones, making it difficult to eradicate completely. This means that simply pulling or digging up the visible plants may not be enough to get rid of the problem altogether.
Another challenge in removing clover grass is its rapid spreading capabilities. Clover seeds can remain dormant in soil for years, only to germinate and sprout new growth when conditions are favorable. This allows the plant to quickly colonize large areas, making it a formidable opponent in lawn maintenance. As you attempt to remove clover grass, be aware that it can easily spread to adjacent lawns or gardens through stolons (above-ground stems) or rhizomes (underground stems). To tackle this issue effectively, focus on treating the soil itself rather than just the visible plants.
Preparation for Clover Grass Removal
Before we dive into removing clover grass, it’s essential to prepare your lawn properly to ensure effective results and avoid any potential damage. This section will guide you through the necessary steps to take before tackling the removal process.
Assessing Your Lawn and Identifying Clover Grass Areas
When it comes to getting rid of clover grass, understanding the extent of the infestation is crucial. Before you start treatment, it’s essential to assess your lawn and identify areas with clover grass. This will not only help you determine the best course of action but also give you a clearer picture of what you’re up against.
Start by walking around your lawn and visually inspecting the areas where clover grass is most prominent. Look for characteristic white or pink flowers, as these are often the first signs of an infestation. Make note of any irregularities in the lawn’s texture or color that may indicate clover growth. Take a closer look at the areas with dense concentrations of flowers, as these are likely to be the worst-affected regions.
Take a few minutes to assess the overall severity of the infestation by considering factors such as:
* The size of the affected area
* The density and spread of the clover grass
* The type of underlying soil or lawn conditions that may be contributing to the infestation
By taking this step, you’ll be better equipped to tackle the problem effectively and choose the most suitable removal method for your specific situation.
Preparing Your Equipment and Safety Gear
To tackle clover grass removal successfully, it’s essential to prepare yourself with the right equipment and safety gear. Start by investing in some basic personal protective equipment (PPE), including gloves, long-sleeved shirts, and pants to prevent skin irritation from the plant’s sap.
Knee pads are also a must-have, as they’ll provide comfort and protection while you’re on your hands and knees working on removing the clover grass. Safety glasses or goggles can be helpful in protecting your eyes from potential splashes of herbicides (if you choose to use them).
When it comes to actual equipment, you’ll need tools such as a rake or a fork for removing the roots and foliage, as well as a weeding tool like a hoe or a cultivator for digging out the entire plant. If you’re planning to use an herbicide, ensure that you have the right one according to your lawn’s type, climate, and specific weed problem.
Remember to always read and follow the instructions on the herbicide label carefully before applying it.
Non-Chemical Methods for Removing Clover Grass
If you’re not keen on using herbicides, don’t worry – there are plenty of other ways to get rid of clover grass without resorting to chemicals. Let’s explore some effective non-chemical methods for removal.
Physical Removal: Digging and Weeding
When it comes to removing clover grass without using chemicals, physical removal methods are an effective and environmentally friendly approach. One of the most straightforward ways to remove clover grass is by digging up its roots. To do this, start by identifying the areas with thick clover grass growth and use a garden fork or spade to carefully dig out the roots. Be sure to get as much of the root system as possible, as any remaining roots can regrow into new plants.
Another method for physical removal is manual weeding. This involves manually pulling out individual weeds, making sure to get as much of the root as possible. To make this process easier, try using a tool with a long handle and a forked end, which allows you to pull out multiple weeds at once without having to bend down. For smaller areas or isolated clumps of clover grass, hand-weeding can be an efficient way to remove unwanted growth.
Remember to also address any newly sprouted clover grass by physically removing it before it has a chance to spread and form new roots.
Solarization and Mulching as Alternative Approaches
Solarization and mulching are two non-chemical methods for removing clover grass that are worth exploring. Solarization involves trapping sunlight to kill plants by creating a clear plastic sheet over the affected area. This method is effective because it allows the sun’s intense heat to penetrate the soil, reaching temperatures of up to 140°F (60°C) within hours. This extreme heat destroys weed seeds and existing plant roots, preventing regrowth.
Mulching, on the other hand, involves covering areas with a barrier to prevent seed germination. Organic mulches such as wood chips or straw can be applied 3-4 inches thick over the affected area. As it breaks down, it suppresses clover grass growth by blocking light and preventing water from reaching the seeds. However, this method requires regular replenishment of the mulch layer to maintain its effectiveness.
Both solarization and mulching are non-toxic and environmentally friendly approaches that can be implemented on a small scale or in larger areas, making them suitable for residential or commercial use.
Chemical Methods: Herbicides and Fertilizers
If you’re not a fan of manual labor, chemical methods can be a quick solution to eradicate clover grass from your lawn. We’ll explore herbicides and fertilizers that can help.
Choosing the Right Herbicide for Clover Grass
When it comes to choosing the right herbicide for clover grass, there are several factors to consider. The type of herbicide you select will depend on whether you want to target existing growth (post-emergent) or prevent new growth from emerging (pre-emergent).
Pre-emergent herbicides, such as pendimethalin and dithiopyr, are ideal for preventing clover grass seeds from germinating. These types of herbicides form a barrier on the soil surface that prevents seeds from sprouting. However, if you’re dealing with an existing infestation, post-emergent herbicides like 2,4-D or dicamba may be more effective.
It’s essential to carefully read and follow the label instructions for any herbicide you choose. This will help ensure safe application and minimize risks to the environment. Additionally, consider factors such as soil type, climate, and nearby water sources when selecting an herbicide. If you’re unsure about which product is best for your specific situation, consult with a local nursery or gardening expert for guidance.
Remember that repeated applications may be necessary to completely eliminate clover grass. Always follow the recommended dosage and application frequency to avoid overuse and potential damage to desirable plants.
Using Fertilizers to Promote Healthy Lawn Growth
When it comes to promoting healthy lawn growth and reducing the likelihood of weed infestations like clover grass, using fertilizers is a crucial step. By providing essential nutrients to your lawn, you’re creating an environment where grass can thrive, making it more resistant to weeds.
Using the right fertilizer for your lawn type is key. A balanced fertilizer that contains nitrogen (N), phosphorus (P), and potassium (K) in a 10-10-10 ratio will provide all the necessary nutrients for healthy growth. Nitrogen promotes leaf growth, while phosphorus encourages root development, making your grass stronger and more resilient to weeds.
Applying fertilizers at the right time is also important. Spring and fall are ideal seasons for fertilizing, as this allows your lawn to prepare for the growing season ahead. Avoid applying fertilizers during extreme weather conditions, such as when it’s extremely hot or dry, as this can cause damage to your lawn.
Remember, fertilizers are not a substitute for proper lawn care practices like mowing, watering, and aerating. By combining fertilizer applications with these regular maintenance tasks, you’ll be well on your way to creating a lush, weed-free lawn that you can enjoy all season long.
Prevention Strategies for Keeping Clover Grass Under Control
To prevent clover grass from taking over your lawn, it’s essential to implement some key strategies that’ll keep its growth under control and maintain a balanced ecosystem. Let’s explore these methods together.
Proper Mowing and Watering Techniques
Maintaining a healthy lawn is crucial to preventing clover grass from taking over. When it comes to mowing and watering techniques, many homeowners inadvertently contribute to the growth of this pesky weed. To keep your lawn looking its best while discouraging clover grass, follow these simple tips.
First, maintain your mower at the recommended height for your specific type of grass. For most cool-season lawns, this is between 2.5 and 3 inches. Keeping your grass taller than this can lead to weakened blades, making it easier for weeds like clover grass to take hold. When mowing, keep a consistent pattern to avoid tearing the grass.
When it comes to watering, be mindful of overhydration. Clover grass thrives in moist environments, so it’s essential to strike a balance between keeping your lawn hydrated and avoiding excessive water usage. Aim to provide about 1-2 inches of water per week through rainfall or irrigation. Avoid frequent shallow watering sessions, as this can encourage weed growth. Instead, water deeply once or twice a week to promote deep root growth in your grass.
Aerating and Fertilizing Regularly
Regular aerating and fertilizing are essential practices for maintaining healthy soil and preventing weed growth, including clover grass. By improving soil structure and nutrient levels, you can create an environment that discourages weeds from taking hold. Aerating, or removing small plugs of soil to improve drainage and air circulation, should be done at least once a year, preferably in the spring when the ground is moist but not waterlogged.
Fertilizing with a balanced, slow-release fertilizer will provide essential nutrients for your lawn’s growth while preventing weed seeds from germinating. Apply fertilizers during the growing season, typically between March and September, following the recommended application rates to avoid over-fertilization. This will help promote deep root growth, reducing the likelihood of weeds competing for water and nutrients.
To further enhance soil health, consider incorporating organic matter like compost or well-rotted manure into your lawn. These additives improve soil fertility, increase water retention, and support beneficial microbial activity. By following these steps and maintaining regular aerating and fertilizing practices, you’ll be better equipped to prevent clover grass from gaining a foothold in the first place.
Common Mistakes to Avoid When Removing Clover Grass
When removing clover grass, it’s easy to make mistakes that can lead to a bigger headache down the line. Be aware of these common oversights before you start your removal process.
Using the Wrong Herbicide or Application Method
Using herbicides to control clover grass can be effective, but it’s not without its risks. One common mistake is selecting the wrong type of herbicide for the job. For example, using a non-selective herbicide like glyphosate on a small area can be wasteful and may damage surrounding plants. On the other hand, using a selective herbicide like 2,4-D on a larger area can lead to over-spray and drift onto nearby crops or sensitive vegetation.
It’s also crucial to choose an herbicide that’s specifically labeled for use on clover grass. Some products are designed for broadleaf weeds only, while others may be more effective against specific types of clover. Always read the label carefully before making a purchase, and don’t rely solely on generic terms like “weed killer.” The application method is also critical – using too much herbicide or applying it during peak sunlight hours can lead to reduced efficacy and increased risk of drift.
To avoid these pitfalls, start by identifying the type of clover grass you’re dealing with and choose an herbicide specifically designed for that species. Always follow the recommended usage rates and application timing, and consider consulting with a professional if you’re unsure about the best approach.
Not Addressing Underlying Causes of Weed Growth
When tackling clover grass removal, it’s easy to focus solely on the symptoms rather than the underlying causes. However, ignoring these root issues can lead to continued weed growth and a persistent battle against unwanted vegetation.
Poor soil quality is often a major contributor to clover grass proliferation. If your lawn lacks essential nutrients or has poor drainage, weeds will capitalize on these weaknesses. For instance, if your soil pH is too high or too low, it can create an environment conducive to clover growth. To address this, consider getting a soil test done and adjusting the pH level as needed.
Inadequate lawn maintenance is another crucial factor to examine. Failure to mow regularly, aerate, or fertilize can leave your lawn vulnerable to weeds. Clovers are particularly adept at outcompeting other plants in areas with poor air circulation or compacted soil. To prevent this, make sure to maintain a regular mowing schedule and use a leaf rake to loosen compacted soil.
Don’t fall into the trap of treating only the symptoms – take proactive steps to identify and address the underlying causes of clover growth on your lawn.
Frequently Asked Questions
How long does it take to completely remove clover grass from my lawn?
The time required for complete removal depends on the size of your lawn, the severity of infestation, and the methods you choose. Non-chemical methods like solarization and mulching can be slower but more sustainable, taking several months to a year or more. Chemical methods with herbicides can provide faster results but may require repeated applications over several weeks.
Can I use the same herbicide for other types of weeds as well?
No, using the wrong herbicide or application method can lead to unintended consequences and damage your lawn further. Clover grass requires specific herbicides that target its growth habits. Using a broad-spectrum herbicide can harm desirable plants in your yard, so it’s crucial to choose the right product and follow instructions carefully.
How do I prevent clover grass from growing back after removal?
Prevention is key! Regular maintenance like proper mowing, watering, aerating, and fertilizing can help promote a healthy lawn that crowds out weeds. Keep an eye on your soil pH levels and adjust them if necessary to create an environment less conducive to clover growth. Also, maintain good drainage and avoid over-watering areas where clover tends to thrive.
Can I use mulch as a permanent solution or will it wash away over time?
Mulching can be an effective long-term solution for weed control when done correctly. However, its effectiveness depends on the type of mulch used and how well it’s maintained. Organic mulches like wood chips or bark break down over time but provide ongoing benefits to your soil health. Replenishing mulch as needed is essential to maintain its protective effects.
What should I do if I accidentally spray herbicide on desirable plants while trying to eliminate clover grass?
If you’ve inadvertently sprayed herbicides on desirable plants, act quickly! Wash the affected area with plenty of water and seek advice from a gardening expert or a lawn care professional. Some herbicides can be neutralized by immediately rinsing the plant with water, but others may require more specialized treatment.