Are you tired of watching your plants struggle in their pots, despite your best efforts to care for them? It’s likely that the culprit is stale potting soil mix. Over time, this vital component can break down and lose its ability to support healthy root growth, leading to weakened plants and reduced yields. Refreshing your potting soil mix can be a game-changer, but where do you start? In this guide, we’ll walk you through the process of assessing your soil’s condition, selecting replacement materials, and troubleshooting common issues that may arise. By the end of it, you’ll have the knowledge and confidence to give your plants a fresh start and boost their health with a rejuvenated potting soil mix.
Understanding the Importance of Fresh Potting Soil Mix
As a gardener, you likely understand that your potting soil mix is only as good as its ability to provide optimal growing conditions for your plants. Let’s explore why fresh soil is crucial for their success.
The Risks of Old or Poor-Quality Potting Soil
Using old or poor-quality potting soil can have detrimental effects on your plants’ growth and health. One of the primary concerns is reduced fertility, which can be attributed to depleted nutrient levels over time. As a result, plants may not receive the necessary nutrients for healthy development, leading to stunted growth, yellowing leaves, and decreased yields.
Moreover, old potting soil is more susceptible to pests and diseases due to its compromised structure and lack of beneficial microorganisms. This vulnerability can lead to infestations and outbreaks that are difficult to control, ultimately harming your plants’ well-being. Furthermore, poor-quality potting soil often exhibits decreased water retention capabilities, causing the soil to dry out rapidly between waterings.
To put this into perspective, consider a study by the University of California, Davis, which found that using fresh potting soil can increase plant growth rates by up to 25% compared to reusing old soil. This highlights the importance of regularly refreshing your potting soil mix to maintain optimal conditions for healthy plant development.
How Often to Refresh Your Potting Soil Mix
When it comes to refreshing your potting soil mix, there’s no one-size-fits-all answer. The frequency of refreshment depends on several factors, including the type of plant, size of the pot, and climate where you live.
For example, plants like ferns and peace lilies prefer a more frequent refresh schedule every 1-2 months, as their roots can quickly deplete the soil’s nutrients. On the other hand, plants like succulents and cacti require less refreshment, typically every 3-4 months, due to their low water requirements.
In general, it’s recommended to refresh your potting soil mix every 1-6 months, depending on the factors mentioned above. However, the best approach is to observe your plants’ specific needs and adjust accordingly. For instance, if you notice your plant’s leaves are turning yellow or its growth has slowed down, it may be a sign that the soil needs refreshing.
Monitor your plants’ responses to refreshes and adjust the frequency based on their unique requirements. Keep in mind that over-refreshing can harm your plants, so start with small increments and observe the effects before making further adjustments.
Preparing to Refresh Your Potting Soil Mix
Before you start refreshing your potting soil mix, take a moment to assess its condition and identify areas that need improvement. This will ensure a successful refresh process for your plants.
Assessing Your Current Soil Conditions
When assessing your current potting soil mix, it’s essential to evaluate its pH levels, nutrient deficiencies, and texture and structure. Start by testing the pH level using a soil testing kit or sending a sample to a lab for analysis. Most plants thrive in slightly acidic to neutral soils with a pH between 6.0 and 7.0. If your mix is too alkaline (above 8.5) or acidic (below 4.5), it may affect nutrient availability.
Check the soil’s nutrient levels by looking for signs of deficiency, such as yellowing leaves or stunted growth. You can also conduct a simple pH indicator test using household items like coffee grounds (acidic) or crushed eggshells (alkaline). Next, inspect the soil’s texture and structure by digging in with your hands or a tool. Look for signs of compaction, waterlogging, or poor drainage.
If you notice any issues during this assessment, it may be time to refresh your potting soil mix.
Choosing the Right Replacement Materials
When it’s time to refresh your potting soil mix, choosing the right replacement materials is crucial. You’ll want to select ingredients that not only replenish nutrients but also address specific plant needs and potting conditions.
Sterilized compost, for instance, is an excellent option for adding beneficial microbes and improving soil structure. However, it can be expensive and may contain weed seeds or pests if not properly processed. On the other hand, peat moss helps retain moisture and suppress weeds, but its high acidity can harm plants with low pH tolerance.
Perlite, a volcanic glass material, excels at aeration and drainage, making it ideal for containers and seed starting mixes. But be cautious: excessive perlite can lead to nutrient deficiencies due to leaching. To select the best materials, consider your plants’ specific needs: acidic-loving plants like azaleas thrive in peat moss-rich mixes, while cacti prefer well-draining perlite-based mixes.
Ultimately, a balanced mix is key. Combine replacement materials thoughtfully, taking into account their benefits and drawbacks to create an optimal blend for your plants.
Refreshing Your Potting Soil Mix: Step-by-Step
Now that you’ve learned why and how to refresh your potting soil mix, it’s time to put those skills into practice with a step-by-step guide. Let’s dive in!
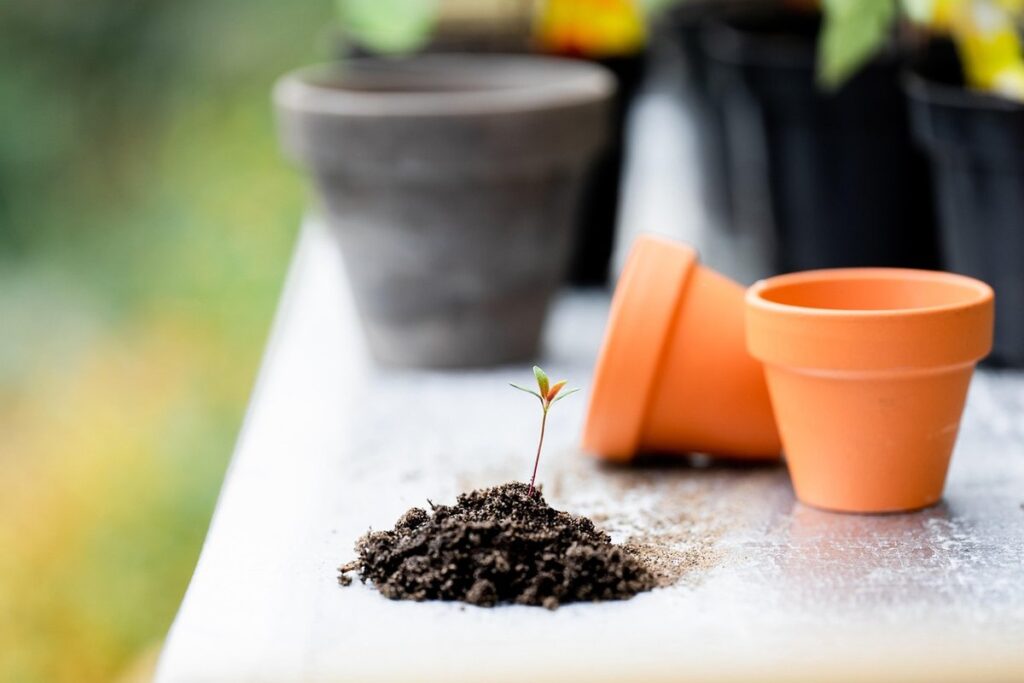
Removing Old Potting Soil
When removing old potting soil from your pots, it’s essential to do so carefully to avoid compacting or damaging the roots of your plants. Start by gently loosening the soil around the edges using a fork or a chopstick. This will prevent you from accidentally tearing out any roots as you remove the soil.
As you continue to loosen the soil, work your way around the pot in sections, removing about 1-2 inches at a time. Use a gentle scooping motion with your trowel or spade to lift out the old soil, taking care not to compact it further. If some of the soil sticks to the roots, try gently teasing it apart with your fingers or a blunt instrument.
To minimize waste and prevent soil from getting lost, consider placing an old sheet or tarp under the pot to catch any loose soil as you work. You can also use a garden hose to rinse away any remaining bits of soil that cling to the roots or the pot itself. Remember to handle the removed soil carefully, as it may still contain viable seeds and microorganisms that can be repurposed for composting.
Mixing New Materials with Existing Soil
When mixing new replacement materials with existing soil, it’s essential to consider the proportions, texture, and aeration requirements to ensure a well-balanced potting medium. Start by setting aside a small batch of the existing soil for blending with the new material. This will allow you to assess its texture and pH level.
As a general rule, aim to mix 10-20% of new materials with 80-90% of existing soil. For example, if you’re adding perlite or vermiculite, start by incorporating small amounts (about 5%) and gradually increase the proportion as needed. Monitor the mixture’s texture; it should still drain adequately but not excessively.
To achieve consistency throughout the potting medium, aim for a uniform mix of materials. If using new soil amendments like worm castings or compost tea, be sure to distribute them evenly to avoid hotspots. Avoid compacting the mixture, as this can lead to poor aeration and water retention. Instead, gently blend the components until they’re well combined and smooth to the touch.
Maintaining proper aeration is critical for healthy root development. Ensure the new mix has sufficient pore space to allow for airflow by incorporating materials like peat moss or coconut coir. Regularly inspect the potting medium’s texture and adjust as needed to ensure optimal performance.
Tips for Successful Refreshing
Now that you’ve learned how to refresh your potting soil mix, let’s dive into some practical tips for successfully incorporating new ingredients and maintaining a healthy balance. This will ensure your plants thrive in their revitalized environment.
Monitoring Plant Health During Transition
When refreshing your potting soil mix, it’s essential to monitor plant health closely during the transition period. This can be a challenging time for plants as they adjust to the new soil composition. One common issue is nutrient shock, where plants experience a sudden surge or drop in available nutrients. To mitigate this risk, gradually introduce the refreshed soil mix by starting with a small amount and gradually increasing it over several days.
Root disturbance can also occur during this period, especially if the plant’s roots have become accustomed to the old soil. To minimize disruption, handle the roots gently when transplanting into the new soil mix. Keep an eye out for signs of stress such as yellowing leaves or droopy stems. If you notice any adverse reactions, slow down the transition process and allow your plants more time to adjust.
Regular water checks can also help you identify potential issues early on. Stick your finger into the soil up to the first knuckle to gauge moisture levels. Water accordingly, but avoid overwatering which can exacerbate root disturbance. By paying close attention to your plant’s needs and making adjustments as necessary, you can ensure a smooth transition to your refreshed potting soil mix.
Troubleshooting Common Issues
If you’ve refreshed your potting soil mix and are still encountering issues, don’t worry – it’s not uncommon. One common problem is yellowing leaves, which can be caused by a variety of factors including overwatering or underwatering. To troubleshoot this issue, start by checking the moisture levels in the soil. Stick your finger into the soil up to the first knuckle and if the soil feels dry, it’s time to water. If the soil is consistently waterlogged, consider repotting the plant in fresh potting mix.
Droopy stems can also be a sign of a problem with the refreshed soil. This may indicate that the soil lacks essential nutrients or that there are pests present. Inspect your plants carefully for any signs of infestation and treat promptly if necessary. To prevent pest issues, make sure to sterilize your tools and repotting equipment before working with fresh potting mix.
Pest infestations can be a major problem in refreshed soil mixes, especially if the old potting material was contaminated. To minimize this risk, ensure that you’re using high-quality potting materials from reputable suppliers.
The Benefits of Regular Soil Refreshes
Regular soil refreshes can greatly benefit your plants’ health, but what exactly are these benefits and how do they occur? Let’s dive into the advantages of refreshing your potting mix.
Improved Plant Growth and Health
Regular potting soil refreshes can have a profound impact on plant growth and health. One of the most significant benefits is increased nutrient uptake. Over time, potting mixes can become depleted of essential nutrients, hindering plant development. Regular refreshing ensures that plants receive a balanced diet, promoting healthy growth and maximizing yields.
Enhanced root development is another key advantage of regular soil refreshes. As new, fresh ingredients are incorporated into the mix, roots are able to explore and absorb more effectively, leading to a stronger, more robust system. This not only increases a plant’s overall vigor but also enhances its ability to withstand stress and disease.
To maximize these benefits, it’s essential to choose a high-quality refresh mix that contains a diverse range of nutrients. Look for products with balanced NPK ratios (nitrogen, phosphorus, potassium) as well as additional micronutrients like calcium, magnesium, and sulfur. By incorporating regular soil refreshes into your potting routine, you’ll be amazed at the noticeable improvements in plant health and growth.
Reduced Pests and Diseases
When you refresh your potting soil mix regularly, one of the most significant benefits is reduced pest and disease problems. This is because refreshing the soil breaks the life cycle of pests and diseases that have taken hold, giving your plants a fresh start.
By removing old, infested soil and replacing it with a new mix, you’re disrupting the lifecycle of pests like spider mites, mealybugs, and scale. These pests often thrive in stagnant soil conditions, but by refreshing the soil, you’re creating an environment that’s less conducive to their survival. Similarly, diseases like root rot, powdery mildew, and leaf spot are more likely to occur in old, damp soil. Refreshing your potting mix helps reduce fungal infections by introducing a new, clean medium for plant roots to grow.
In addition to breaking the life cycle of pests and diseases, refreshing your potting soil also promotes beneficial microbial activity. This is achieved through the introduction of fresh organic matter, which feeds beneficial microorganisms like mycorrhizal fungi. These microbes work symbiotically with plant roots, providing essential nutrients and strengthening their defenses against disease and pests.
Refreshing Your Potting Soil Mix for Specific Plants
Some plants require a more tailored approach to refreshing their potting soil, and it’s essential to make adjustments based on factors like moisture levels and nutrient needs. This means considering unique requirements for plants like orchids and succulents.
Indoor Plants
When it comes to refreshing the potting soil mix for indoor plants, you’ll want to consider the unique needs of each type. Tropical plants like orchids and bromeliads thrive in well-draining mixes with a slightly acidic pH, while cacti and succulents prefer a gritty, dry mix that prevents waterlogged soil.
For houseplants like peace lilies and snake plants, a balanced mix with good drainage is key. These plants can tolerate some neglect, but they’ll still appreciate a refreshing potting soil mix every 6-12 months. To determine the best mix for your indoor plant, take note of its native habitat and adjust accordingly.
For example, if you have a cactus that’s adapted to arid desert conditions, use a cactus-specific potting soil mix that contains perlite or sand to prevent waterlogging. On the other hand, a tropical plant like a fern will do well in a mix with plenty of peat moss and vermiculite.
When refreshing your potting soil mix for indoor plants, make sure to repot the entire root system, gently teasing apart any clumps. This will help prevent compacted soil and promote healthy growth.
Outdoor Container Gardens
When it comes to refreshing potting soil mix in outdoor container gardens, several factors come into play. First and foremost, consider the weather conditions in your area. If you live in an area with high temperatures and intense sunlight, your containers may dry out faster than usual, leading to nutrient deficiencies. To combat this, refresh your soil mix by incorporating a water-retentive additive or mulch to help retain moisture.
Drainage is also crucial for outdoor container gardens. Make sure the potting mix drains well to prevent waterlogged conditions that can lead to root rot and other issues. If you notice poor drainage, consider adding perlite or vermiculite to improve aeration and reduce waterlogging.
Another key factor to consider is nutrient availability. Outdoor containers can be prone to nutrient deficiencies due to leaching over time. To replenish nutrients, refresh your potting mix with a balanced fertilizer specifically designed for container gardens. This will provide your plants with the necessary nutrients to thrive.
Frequently Asked Questions
Can I refresh my potting soil mix for indoor plants with sensitive roots?
Yes, it’s essential to refresh the soil for your indoor plants as well. Indoor plants can be more susceptible to root damage from old or poor-quality potting soil. To minimize risk, use a gentle mixing process when combining new and existing materials.
How do I handle plant shock after refreshing my potting soil mix?
Plant shock is common during this transition period. To reduce stress on your plants, water them thoroughly after mixing new and existing materials. Also, maintain consistent moisture levels until they fully recover from the refresh.
What’s the best way to test if my potting soil mix is depleted of nutrients?
Conduct a simple pH test using a pH meter or testing kit. A low pH reading may indicate nutrient depletion. Additionally, inspect your plants’ growth and look for signs of nutrient deficiencies, such as yellowing leaves or stunted growth.
Can I reuse some of the existing potting soil in my garden beds after refreshing them?
It’s generally recommended to discard all old potting soil mix when refreshing your garden beds. This helps prevent any potential pests, diseases, or nutrient imbalances from affecting new plant growth.
How often should I check and refresh my potting soil mix for outdoor container gardens?
Outdoor containers are more prone to drying out and nutrient leaching due to increased exposure to wind and sunlight. Check your potting soil mix every 2-3 months during the growing season and refresh as necessary to ensure optimal plant growth and health.