If you’re looking to boost your garden’s productivity, you might want to consider bringing in some expert help – literally. Raising healthy queen bees is an art that can make all the difference for your plants, but it requires knowledge and attention to detail. With a little practice, though, anyone can learn how to raise their own queen bees, providing their gardens with the perfect pollinators.
In this comprehensive guide, we’ll walk you through everything you need to know about raising queen bees for your garden, from setting up the right environment to harvesting and replacing your queen bee. We’ll cover topics such as preparing a suitable habitat, introducing new queens, and identifying signs of a healthy or struggling colony. Whether you’re an experienced apiarist or just starting out, our expert tips will help you raise thriving queen bees that will make your garden flourish.
Understanding the Importance of Queen Bees
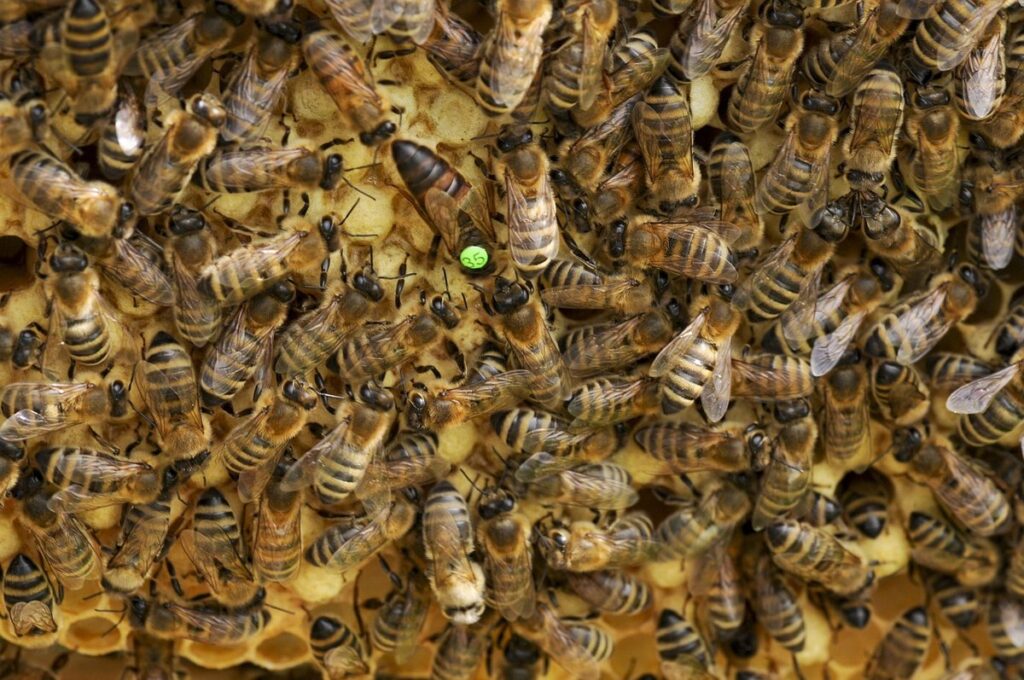
At the heart of a thriving beehive lies the queen bee, responsible for laying eggs and maintaining colony growth. In this next part, we’ll explore why these essential bees are vital to your garden’s ecosystem.
Why You Need a Queen Bee in Your Garden
When it comes to maintaining a healthy bee colony and ensuring successful garden pollination, one crucial element often gets overlooked: the queen bee. These regal insects play a vital role in the survival of their colonies, and by extension, the health and productivity of your garden.
The queen bee’s primary function is to lay eggs, which ensures the colony’s growth and replenishment. Without her, the colony would eventually die out due to lack of replacement workers. Moreover, the queen’s pheromones help regulate the behavior and social structure of the colony, maintaining harmony among its members.
For gardeners, having a healthy queen bee in their garden is essential for successful pollination. With an abundance of flowers blooming at different times, it’s not uncommon to have nectar-rich blooms that need pollinators. A thriving queen bee will ensure your garden receives the attention it needs from her hardworking daughters, resulting in bountiful harvests and a vibrant ecosystem. By providing your queen bees with optimal living conditions and care, you’ll be well on your way to creating a self-sustaining and productive garden.
Benefits of Keeping Queen Bees for Gardening Purposes
When you raise queen bees for gardening purposes, you unlock a multitude of benefits that can transform your garden into a thriving oasis. For starters, the increased crop yields that come with having a strong, healthy bee population is nothing short of remarkable. By pollinating flowers and crops, your queen bees will ensure that your fruits and vegetables are bursting with flavor and nutrients.
But the advantages don’t stop there – improved fruit set is another significant benefit of raising queen bees. This means that your plants will produce more fruit, which in turn leads to a bountiful harvest. To put this into perspective, studies have shown that without pollinators like honeybees, up to 30% of crops worldwide would be lost.
One of the most appealing aspects of raising queen bees is the reduction in pesticide use. By maintaining a balanced ecosystem with these beneficial insects, you can significantly reduce your reliance on chemicals. This not only benefits the environment but also ensures that your garden remains chemical-free and safe for consumption. With proper care and management, your queen bees will be busy pollinating and thriving – making them an invaluable addition to any gardening endeavor.
Preparing for Queen Bee Raising: Essential Equipment and Supplies
To successfully raise queen bees, you’ll need a solid foundation of essential equipment and supplies, which we’ll cover in detail below. Let’s get started on building your beekeeping essentials!
Setting Up a Suitable Environment for Your Queen Bees
When setting up an environment for your queen bees, it’s essential to create a suitable space that mimics their natural habitat. To do this, you’ll need the right equipment. A beehive is the primary dwelling place for your queen and her colony. Choose a hive with good ventilation, as this will help regulate temperature and prevent moisture buildup.
In addition to the hive itself, make sure you have protective gear for yourself when working with bees. This includes a beekeeping suit, veil, and gloves to prevent stings. You’ll also need a variety of tools, such as a smoker to calm the bees, a frame grip to handle frames safely, and a queen excluder to keep her separate from the rest of the colony.
Other essential items include a brood box for raising larvae, a honey super for harvesting nectar, and a feeding trough for providing sugar water or royal jelly. When setting up your hive, ensure it’s placed in a location that receives direct sunlight and is protected from strong winds. This will help maintain a stable environment for your queen bees to thrive.
Choosing the Right Type of Hive for Your Needs
When it comes to choosing the right type of hive for queen bee raising, you have several options to consider. The three most popular types are Langstroth, Top-bar, and Warre hives, each with its own unique characteristics that may suit different needs.
Langstroth hives are a traditional choice among beekeepers and offer excellent ventilation, easy access to frames, and a robust design. They are ideal for large-scale queen production and are often used in commercial operations. However, they can be more expensive than other options and require more maintenance.
Top-bar hives, on the other hand, are a more modern and innovative design that allows for easier inspection and monitoring of the bees. They consist of horizontal bars instead of frames, making it simpler to remove and replace combs. Top-bar hives are great for hobbyists or small-scale queen production due to their simplicity and lower cost.
Warre hives, named after the French beekeeper Émile Warré, are a type of natural beehive that mimics the bees’ natural habitat. They feature a vertical design with a movable roof, allowing for easy access without disturbing the bees. Warre hives are perfect for those who prioritize minimal disturbance and a more harmonious relationship with their queen bees.
Ultimately, the choice between these types of hives depends on your specific needs, experience level, and resources. Consider factors such as space, budget, and personal preference when deciding which type of hive will best suit your queen bee raising endeavors.
Obtaining a Queen Bee: Options and Considerations
If you’re interested in raising queen bees for your garden, you’ll need to consider where to source them from and what type of beekeeper you want to become. Here are some options to explore.
Purchasing a Queen Bee from a Reputable Supplier
When purchasing a queen bee from a reputable supplier, it’s essential to do your research and consider several key factors. First, look for suppliers who are experienced breeders with a proven track record of producing high-quality queens. Check online reviews, ask for referrals from other beekeepers, and visit the breeder in person to get a sense of their operation.
Consider the breed and genetics of the queen you’re interested in. Different breeds are suited to different climates and environments, so make sure you choose one that’s well-suited to your area. Some popular breeds include Carniolans, Italians, and Buckfasts, each with their own unique characteristics.
When selecting a breeder, also look for certifications such as the American Beekeeping Federation (ABF) or the National Honey Board (NHB). These organizations have strict standards for queen breeders to ensure they’re producing high-quality queens. Finally, make sure you understand the return and exchange policies of the supplier in case the queen doesn’t thrive in your colony.
When purchasing a queen bee from a reputable supplier, it’s essential to do your research and consider several key factors.
Raising Your Own Queen Bees: The Process and Challenges
Raising your own queen bees can be a rewarding experience for beekeepers, but it requires attention to detail and careful monitoring. The process begins with creating a queen cell, which involves selecting a healthy brood nest and introducing a larvae to a specialized cell. This cell is typically made of wax or plastic and has a specific design that encourages the development of a single female larva.
As you monitor the queen cell’s development, it’s essential to ensure it remains clean and free from pests. You should also check for signs of disease or parasites, such as deformed wings or unusual behavior. After about 7-10 days, the cells will start to spin a cocoon, and after another week, you can expect your new queen bee to emerge.
Keep in mind that raising queen bees requires patience and dedication, but with proper care, you’ll be able to produce healthy, vigorous queens for your apiary. With experience, you’ll become more confident in identifying potential issues and taking corrective action.
Caring for Your Queen Bee: Tips and Best Practices
Taking good care of your queen bee is crucial for a thriving garden, so let’s dive into some essential tips and best practices to ensure her health and happiness.
Providing Adequate Nutrition and Hydration for Your Queen Bee
When it comes to raising queen bees for your garden, providing adequate nutrition and hydration is crucial for her health and productivity. A well-fed and hydrated queen bee is essential for the overall success of your apiary.
First and foremost, ensure that you’re feeding your queen a high-quality diet rich in protein, vitamins, and minerals. You can do this by providing sugar water with an energy-rich supplement like royal jelly or bee bread. Aim to feed her at least once a day, but make sure not to overfeed, as this can lead to congestion and other health issues.
In terms of hydration, it’s essential to provide your queen with access to fresh water at all times. Change the water frequently to prevent bacterial growth and ensure it’s free from contaminants. A general rule of thumb is to place a shallow dish filled with clean water near the hive entrance.
Adequate nutrition and hydration will have a direct impact on your queen’s egg-laying ability, pheromone production, and overall health. By following these simple guidelines, you’ll be well on your way to creating a thriving and productive apiary.
Maintaining a Healthy Colony Environment
As you nurture your queen bees, it’s essential to create a healthy environment that allows them to thrive. A balanced ecosystem is crucial for the well-being of your colony. To manage pests and diseases effectively, start by inspecting your hives regularly. Look for signs of infestation or disease, such as abnormal behavior, unusual odors, or visible parasites like mites.
To prevent pest issues, use integrated pest management (IPM) techniques that combine physical barriers, chemical controls, and biological agents. For example, you can install screened bottom boards to reduce mite populations and apply sugar dust or powdered sugar to repel small hive beetles. Regularly clean your equipment and maintain a sanitized environment to prevent disease transmission.
Some common pests to watch out for include small hive beetles, wax moths, and varroa mites. Regular monitoring can help you identify issues early on, reducing the risk of colony loss. By maintaining a healthy environment, you’ll be well on your way to raising thriving queen bees that will pollinate your garden with ease.
Monitoring and Managing Your Queen Bee’s Performance
Now that you’ve successfully raised your queen bee, it’s essential to monitor her performance to ensure a strong and healthy colony. Regular inspections will help identify any issues early on.
Tracking Egg Production and Brood Development
Monitoring egg production and brood development is crucial to maintaining a healthy and thriving queen bee colony. To do this effectively, you’ll want to start by checking the brood nest for eggs daily, ideally during peak laying times when the queen is most active. Use a method called ‘egg counting’ where you carefully remove frames from the hive, holding them against a light source to spot any newly laid eggs.
You can also assess colony growth by observing the overall number of bees and their behavior within the hive. Check for an increase in brood (immature bee larvae) at different stages of development, which indicates the queen is laying consistently and effectively. For instance, if you notice a high percentage of sealed brood (i.e., cells containing fully formed pupae), it suggests the colony is experiencing robust growth.
Another important aspect to consider is brood pattern, which refers to the arrangement of eggs within the comb. A well-organized pattern usually indicates a strong and healthy queen bee. Conversely, an irregular or patchy pattern may suggest issues with egg-laying or disease presence.
Identifying Signs of Health Issues in Your Queen Bee
As you continue to monitor and manage your queen bee’s performance, it’s essential to be aware of common health issues that can affect her longevity and overall colony well-being. One of the most critical signs of a problem is changes in her behavior. A healthy queen bee should be active, mobile, and consistently laying eggs. If she becomes lethargic, stops flying, or shows decreased egg-laying activity, it may indicate an underlying issue.
Another indicator of health problems is the presence of pests or diseases within the colony. Check for signs of parasites like varroa mites, small hive beetles, or American foulbrood bacteria. These invaders can weaken the queen’s immune system and impact her ability to lay eggs. Look for symptoms such as discolored wax, unusual odors, or dead bees. Regular inspections will help you catch these issues early on.
To identify potential problems, inspect your queen bee regularly, paying attention to her overall condition, brood pattern, and worker bee activity. If you notice any irregularities, consult with a local beekeeping expert for guidance. Early detection is key to preventing health issues from taking hold and ensuring the continued success of your queen bee colony.
Harvesting and Replacing Your Queen Bee: A Guide
Now that your queen bee is mature, it’s essential to know when and how to harvest her for a new colony, ensuring healthy growth. We’ll walk you through this delicate process step-by-step.
Understanding the Life Cycle of a Queen Bee
As you work with queen bees for your garden, it’s essential to understand their life cycle and when they need to be replaced. A queen bee typically lives for around 2-3 years, but her fertility declines after the first year. During this time, she will lay eggs in the hive, which will eventually hatch into new worker bees.
The queen’s reproductive prime usually lasts from spring to summer, during which she can lay up to 1,500 eggs per day. However, as winter approaches and daylight hours decrease, her egg-laying rate slows down significantly. This natural decline in productivity is a sign that it’s time to consider replacing the queen bee.
In a well-managed hive, the queen will typically be replaced every 2-3 years to maintain optimal production and prevent genetic drift. When selecting a new queen, choose one from a reputable breeder or supplier, taking into account factors like genetics, temperament, and resistance to disease. Replacing your queen bee regularly ensures the continued health and productivity of your hive.
Preparing for Queen Replacement: Steps and Timing
When you notice signs that your queen bee is nearing her end-of-life cycle, it’s essential to prepare for a replacement. This process involves several steps that need to be executed at the right time to ensure the colony’s health and productivity.
Around 6-8 weeks before the expected queen failure, start preparing a new queen cell by adding a frame with eggs or larvae from a healthy queen’s brood to your colony. Monitor the development of the new queen cells closely, as it can take around 16 days for them to mature.
When the new queens emerge, it’s crucial to introduce them to the colony carefully to avoid any aggression or conflict. Perform this introduction when the existing queen is still active but weakened, usually within a few hours after she has ceased laying eggs. Release the new queen near the entrance of the hive and observe the reaction of the worker bees. Once they start pheromone communication with the new queen, it’s a sign that she has been accepted. After successful introduction, remove any remaining queen cells to maintain colony health and prevent competition among queens.
Frequently Asked Questions
What’s the ideal time of year to introduce new queen bees to my garden?
The ideal time for introducing new queen bees depends on your location and climate. Generally, spring is a great season to introduce new queens, as it allows them to establish themselves before the heat of summer. Summer can be challenging due to high temperatures, while fall might not provide enough nectar sources for the colony. Consult local beekeepers or experts to determine the best time for your specific region.
How do I handle queen bee replacement if I notice signs of struggling or failing colonies?
Yes, replacing a struggling queen bee is crucial for maintaining a healthy colony. Identify the reasons behind the issues (e.g., disease, pests, inadequate nutrition). Purchase a new, high-quality queen from a reputable supplier and introduce her to the hive under proper conditions. Ensure you’re prepared with suitable equipment and supplies to minimize disruptions.
Can I raise multiple queen bees at once, or is it best to focus on one colony?
No, it’s not recommended to start multiple colonies simultaneously unless you have extensive experience and resources. Raising a single, thriving colony allows for better monitoring, care, and adjustments as needed. Once you’ve mastered the process with one colony, consider expanding.
How often should I inspect my queen bees for signs of health issues?
Regular inspections are crucial in maintaining healthy colonies. Schedule regular checks (at least every 7-10 days) to monitor your queen’s performance, egg production, and brood development. Watch for signs of disease, pests, or other potential issues. Adjust your care routine accordingly to ensure the colony thrives.
What are some common mistakes new beekeepers make when raising queen bees?
New beekeepers often overlook the importance of proper hive maintenance, inadequate nutrition, or insufficient protection from pests and diseases. Ensure you’re prepared with suitable equipment and supplies, keep accurate records of egg production and brood development, and stay informed about local best practices for maintaining healthy colonies.