Creating a thriving raised garden bed is all about starting with the right foundation – and that means getting your soil mix just right. As any seasoned gardener knows, a well-crafted blend can make all the difference in producing healthy, vibrant plants. But what makes an ideal raised garden bed soil? Is it as simple as selecting a one-size-fits-all formula or is there more to it? The truth is that with so many variables at play – from drainage and aeration to fertilization and pH levels – creating the perfect mix can be a daunting task. In this article, we’ll break down the expert tips you need to create your own customized blend, optimize its performance, and build a healthy base for your garden’s success.
Choosing the Right Soil Mix
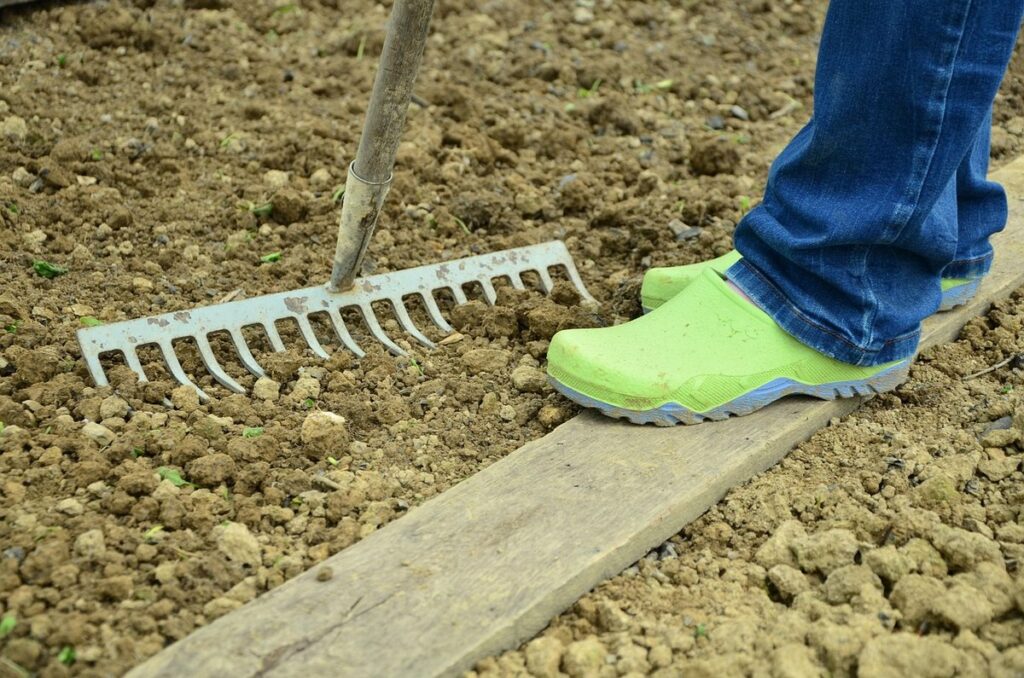
When selecting a soil mix for your raised garden bed, it’s essential to consider several factors that affect plant growth and health. Let’s explore what makes a good soil mix.
Benefits of a Customized Blend
When it comes to selecting the right soil mix for your raised garden bed, one size doesn’t fit all. What works for a friend’s garden might not work for yours, and that’s where a customized blend comes into play.
The pH level of your soil is a crucial factor to consider. If your soil is too alkaline or acidic, it can hinder plant growth, making it essential to choose a mix that caters to the specific needs of your plants. For example, tomatoes prefer a slightly acidic soil with a pH between 6.0 and 7.0.
Nutrient content is another vital aspect to consider. A customized blend allows you to tailor the nutrient levels to suit the specific requirements of your plants. If your bed will be dedicated to heavy feeders like leafy greens or flowering plants, you’ll want a mix rich in organic matter and essential micronutrients.
Drainage is also crucial in raised beds, especially if water tends to collect in certain areas. A customized blend can help address this issue by incorporating materials with improved drainage properties, such as perlite or vermiculite. By choosing the right soil mix for your specific needs, you’ll set yourself up for success and enjoy a bountiful harvest from your raised garden bed.
Understanding Soil Type Options
When it comes to choosing the right soil for your raised garden bed, you’re likely to come across various types of soils. Each has its own set of characteristics, advantages, and disadvantages. To make an informed decision, let’s break down some of the most common options.
Topsoil is a popular choice for raised beds due to its affordability and easy availability. It’s a mixture of mineral particles, organic matter, and living organisms that support plant growth. The pros include being cost-effective, readily available at most gardening stores, and able to be mixed with other amendments. However, it can be prone to compaction, may contain weed seeds or pests, and requires regular replenishment.
Compost is another excellent option for raised beds, offering a rich source of nutrients and beneficial microorganisms. Composting involves breaking down organic matter like food scraps, leaves, or grass clippings into a nutrient-dense material that improves soil structure and fertility. Its benefits include increased crop yields, improved water retention, and enhanced overall ecosystem health.
Bagged potting mixes are also widely used in raised garden beds due to their convenience and ease of use. These pre-mixed blends typically contain a combination of peat moss, vermiculite, perlite, or other ingredients designed for optimal drainage and root growth. The advantages include being lightweight, easy to handle, and often fortified with nutrients. However, they can be expensive compared to other options, may lack the benefits of organic matter, and require frequent replenishment.
Ultimately, selecting the right soil mix will depend on your specific needs, preferences, and growing conditions. Consider factors like climate, plant type, and budget when deciding which option is best for you.
DIY vs. Pre-Mixed Soil Mixes
When it comes to choosing the right soil mix for your raised garden bed, one of the biggest decisions you’ll face is whether to create your own custom blend or purchase pre-mixed bags from a gardening store. Both options have their advantages and disadvantages, which we’ll explore below.
Creating your own custom soil mix gives you complete control over the ingredients and can be tailored to your specific plant needs. You can choose the perfect combination of peat moss, vermiculite, perlite, or compost to suit your climate, soil type, and preferred growing method. For example, if you’re growing vegetables in a hot and dry climate, you may want to add more organic matter like compost or manure tea to retain moisture.
On the other hand, purchasing pre-mixed bags can be convenient and save time. Many reputable brands offer high-quality mixes specifically formulated for raised beds, which can reduce the risk of over- or under-fertilization. However, these mixes may contain fillers or by-products that aren’t ideal for your specific plants, and you may end up with excess ingredients left over.
If you do decide to create your own mix, here are a few tips: start small with a 5-gallon bucket, experiment with different ratios of ingredients until you find the perfect balance, and consider getting soil testing done to ensure optimal pH levels.
Building a Healthy Base with Organic Matter
When it comes to creating a thriving raised bed garden, building a strong foundation is essential. Let’s dive into adding organic matter for healthy soil structure and fertility.
The Role of Compost in Raised Bed Soil
Incorporating compost into your raised bed’s soil is one of the most effective ways to create a thriving garden ecosystem. Compost adds a wealth of beneficial microorganisms that break down organic matter and release essential nutrients, thereby improving soil fertility. Regularly amending your raised bed soil with compost will also enhance its structure, allowing water and air to penetrate more evenly.
When choosing a compost to add to your raised bed soil, consider selecting one high in worm castings or finished compost from an organic garden operation. Both types are rich in beneficial microbes that can help combat diseases and pests naturally. You can also create your own compost at home using kitchen scraps, leaves, and grass clippings.
To maximize the benefits of compost, aim to add it to your raised bed soil every 1-2 months throughout the growing season. This will provide a steady supply of nutrients as well as support a diverse community of beneficial microbes.
Using Manure and Peat Moss as Additives
When it comes to creating a healthy base for your raised garden bed soil, incorporating natural amendments like animal manure and peat moss can make all the difference. Manure from herbivores such as cows, horses, or goats is rich in nutrients like nitrogen, phosphorus, and potassium that promote plant growth and microbial activity.
Using composted manure, however, is essential to avoid contaminating your soil with pathogens. To incorporate manure into your raised bed, mix 10-20% of it into the top 6-8 inches of the soil. This will allow microorganisms to break down the nutrients over time, releasing them for plant uptake.
Peat moss, on the other hand, helps retain moisture and suppress weeds by creating a barrier between the soil and roots. It’s an acidic amendment that can lower the pH of your raised bed, but mixing it with lime can mitigate this effect. A 2:1 or 3:1 ratio of peat moss to topsoil is recommended for optimal performance.
By combining these natural amendments, you’ll create a nutrient-rich environment that encourages beneficial microorganisms to thrive and supports healthy plant growth in your raised garden bed.
Why Mulch Matters in Raised Bed Soil
Mulch plays a vital role in maintaining a healthy raised bed ecosystem. One of its primary functions is temperature regulation. Mulch acts as an insulating layer, protecting the soil from extreme temperatures, whether it’s scorching heat or freezing cold. This not only benefits the plants by maintaining a stable root zone but also reduces the risk of frost damage during winter.
Mulch also suppresses weeds effectively. By covering the soil surface, mulch prevents weed seeds from germinating and growing. It creates an environment that discourages weeds from sprouting, making it easier to maintain your raised bed. Regularly replenishing the mulch layer ensures a consistent barrier against weeds.
In addition to temperature regulation and weed suppression, mulch also retains moisture in the soil. This helps plants access water more efficiently, reducing the need for frequent watering. Mulch can be made from various organic materials like wood chips, straw, or bark. When choosing a mulch, consider its decay rate, as it will impact how often you’ll need to replenish it.
As with any gardening practice, it’s essential to apply the right amount of mulch to avoid suffocating your plants. A general rule is to maintain a 2-3 inch layer, keeping it a few inches away from plant stems.
Optimizing Drainage and Aeration
Proper drainage and aeration are crucial for your raised bed’s health, preventing waterlogged soil and root suffocation that can harm plants. We’ll explore ways to optimize these essential elements.
Designing for Adequate Water Flow
When designing raised beds with proper drainage, it’s essential to consider the slope, depth, and material selection. A gentle slope of about 1-2% will allow water to flow freely without creating puddles that can suffocate plant roots.
The ideal depth of a raised bed is around 6-8 inches for most vegetables and flowers. This allows for enough root growth while preventing excessive water retention. If you’re building a bed with a slope, ensure the deeper side faces south or west to prevent water from accumulating in low areas.
Choose materials that allow for good drainage, such as wood (pressure-treated or naturally rot-resistant), composite decking, or even raised beds made from recycled plastic. Avoid using solid-bottomed containers or wooden planks without gaps, as these can trap water and lead to root rot.
To ensure proper drainage, also consider the distance between your raised bed and any surrounding hardscaping. Leave enough space for water to flow freely, ideally 6-12 inches around the bed’s perimeter. By following these guidelines, you’ll create a well-draining raised bed that promotes healthy plant growth and reduces maintenance efforts.
The Importance of Soil Texture and Structure
Soil texture and structure play a vital role in facilitating water penetration, aeration, and root growth in raised garden bed soil. When it comes to drainage, soil with the right balance of sand, silt, and clay particles allows for optimal water infiltration. A mix of 40-60% sand, 20-40% silt, and 10-30% clay is ideal for most plants.
Good structure also enables aeration, which is essential for healthy root growth. Well-draining soil has adequate pore space between its particles, allowing oxygen to penetrate and reach the roots. Conversely, compacted or poorly structured soil can lead to waterlogging and oxygen depletion, causing plant stress and stunted growth.
To achieve optimal texture and structure in your raised garden bed soil, focus on incorporating organic matter like compost or well-rotted manure. These amendments help break down clay particles, improve drainage, and increase pore space for aeration. Mix 2-4 inches of these materials into the top 6-8 inches of soil to create a nutrient-rich environment that supports healthy root growth and optimal water use.
Tips for Avoiding Waterlogging and Compaction
Waterlogging and compaction are common issues that can hinder healthy plant growth in raised garden beds. To identify these problems, look for signs such as standing water on the surface, soft or squishy soil, or plants with yellowing leaves. Waterlogging occurs when the soil’s drainage capacity is exceeded by rainfall or irrigation, while compaction happens when the soil is heavily compacted, making it difficult for roots to grow.
To address these issues, adjust your soil mix by incorporating more organic matter like compost or well-rotted manure. This will improve the soil‘s structure and increase its water-holding capacity. You can also add perlite or sand to enhance drainage.
In addition, review your irrigation schedule to ensure it’s not contributing to waterlogging. Consider installing a rain sensor or adjusting the watering frequency based on weather conditions. For example, if you’re using an automatic irrigation system, set it to skip watering when it rains for 2-3 days in a row. This will help prevent overwatering and reduce the risk of root rot.
Fertilizing and Amending Your Raised Bed Soil
Now that you’ve built your raised bed, it’s time to think about feeding it: we’ll cover the essential steps for fertilizing and amending your soil. This includes choosing the right nutrients and when to apply them.
Understanding Nutrient Cycles in Raised Beds
In a raised bed ecosystem, nutrient cycling is a vital process that ensures the health and fertility of the soil. Beneficial microorganisms play a crucial role in this cycle, breaking down organic matter and releasing essential nutrients for plant growth. These microbes thrive on decaying plant material, compost, and other amendments, converting them into a form that’s easily absorbed by roots.
To foster nutrient cycling in your raised bed, it’s essential to create a balanced ecosystem. This can be achieved by incorporating diverse plant species, which will provide a range of nutrients through their growth and decay. Adding organic matter like compost or well-rotted manure also encourages beneficial microorganisms to flourish. Aim for a mix of 20-30% organic matter in your raised bed soil.
Aim to maintain an average carbon-to-nitrogen ratio of 1:5 to 2:10, as this will support the growth of microbes. By providing the right conditions for nutrient cycling, you’ll create a thriving ecosystem that supports healthy plant growth and reduces the need for synthetic fertilizers.
How to Fertilize Without Overloading the Soil
When it comes to fertilizing your raised bed soil, it’s essential to strike a balance between nourishing your plants and avoiding over-fertilization. Overloading the soil with too many nutrients can lead to nutrient imbalances, water pollution, and even harm beneficial microorganisms.
To start, you’ll need to choose between organic and synthetic fertilizers. Organic options like compost, manure, or fish emulsion are rich in slow-release nutrients that promote healthy microbial activity. Synthetic fertilizers, on the other hand, provide a quick burst of nutrients but can be harsh on soil biota if overused.
To avoid over-fertilization, it’s crucial to understand your soil’s nutrient needs. Test your soil regularly to determine its pH levels and nutrient deficiencies. Start with a balanced fertilizer that provides equal amounts of nitrogen (N), phosphorus (P), and potassium (K). Apply small amounts at regular intervals, rather than a single large dose. This approach will ensure your plants receive the nutrients they need without overwhelming the soil ecosystem.
Supplementing with Micronutrients and pH Balancers
While selecting and preparing raised bed soil is crucial for optimal plant growth, supplementing with micronutrients and pH balancers can be just as important. Micronutrient supplements provide essential nutrients like iron, zinc, and boron that are often lacking in garden soils. These micro-nutrients play a significant role in promoting healthy root development, photosynthesis, and resistance to diseases. For example, iron is necessary for plant chlorophyll production, while zinc helps with cell division and protein synthesis.
To determine if your raised bed soil needs micronutrient supplements, consider the following factors: the type of plants you’re growing (acid-loving plants like blueberries require more acidic soils), the local climate, and the initial soil composition. Most commercial potting mixes are formulated to be well-balanced but may not provide enough micro-nutrients for long-term plant growth.
You can choose from a variety of micronutrient supplements available in the market, including liquid or granular forms. Some popular options include fish bone meal, alfalfa meal, and kelp meal. Always follow the manufacturer’s instructions when applying these supplements, as overuse can be detrimental to soil health.
Monitoring and Adjusting Your Soil
As you tend to your raised garden bed, it’s essential to keep a close eye on soil conditions and make adjustments as needed to ensure optimal growth. Regular monitoring will help you catch any issues before they become major problems.
Understanding Soil Testing Results
When you receive your soil test results, it’s essential to understand what they mean and how to adjust your raised bed soil accordingly. A typical report will include the pH level, nutrient content, and potential contaminant presence.
Let’s break down each section. The pH level is a measure of how acidic or alkaline your soil is. Most vegetables prefer a slightly acidic to neutral pH between 6.0 and 7.0. If your results show a pH above 7.5, you may need to add sulfur or peat moss to lower it.
Next, examine the nutrient content. Soil test reports often list levels of nitrogen (N), phosphorus (P), and potassium (K). If any of these nutrients are lacking, consider adding organic amendments like compost or manure to rectify the issue. For example, if your soil is low in phosphorus, you can try adding bone meal or rock phosphate.
Finally, look for contaminants like heavy metals or pesticides, which can be present due to polluted soil or water. If you find any of these contaminants, it’s best to test again after removing the affected soil and taking steps to prevent future contamination.
To accurately interpret your results, consult with a local extension office or gardening expert if needed. They’ll provide personalized advice on how to adjust your raised bed soil for optimal growth.
Identifying Potential Soil Issues Early On
Identifying potential soil issues early on is crucial to maintaining healthy and thriving plants in your raised garden bed. One common sign of a problem is nutrient deficiencies, which can be caused by factors like poor drainage, inadequate fertilization, or over-fertilization. Look for symptoms such as yellowing leaves, stunted growth, or a general lack of vigor. If you suspect a nutrient deficiency, consider getting a soil test to determine the pH level and nutrient content.
Pests and diseases are another common issue in raised garden beds. Check your plants regularly for signs of infestation or infection, such as holes in leaves, white powdery patches, or unusual growths. For pests, use physical barriers, repellents, or organic pest control methods like neem oil or insecticidal soap. To address diseases, remove infected plant material, improve air circulation, and adjust watering schedules.
Be proactive by monitoring your soil and plants regularly to catch issues early on. Keep a gardening journal to track changes and note any problems that arise. This will help you identify patterns and make informed decisions about how to address potential soil issues before they become major problems.
Strategies for Continuous Improvement
As you continue to nurture your raised garden bed, it’s essential to keep monitoring its soil mix, structure, and ecosystem health. This ongoing process will help you identify areas for improvement and make adjustments as needed.
To maintain optimal conditions, start by regularly testing your soil pH levels using a DIY kit or sending samples to a lab for analysis. Based on the results, adjust your fertilization schedule accordingly. For example, if your soil is too acidic, add dolomitic limestone to raise the pH levels.
Keep an eye out for nutrient deficiencies, such as nitrogen or potassium depletion, and address them promptly by adding organic amendments like compost or manure tea. Monitor your soil’s water-holding capacity by observing how quickly it drains excess moisture after watering. If necessary, incorporate more perlite or vermiculite to improve aeration and drainage.
Additionally, observe the overall ecosystem health by monitoring for pests, diseases, and weeds. Implement integrated pest management techniques, such as companion planting or physical barriers, to maintain a balanced environment without harming beneficial insects or microorganisms. By regularly assessing your raised bed’s soil mix and making adjustments, you’ll create a thriving ecosystem that supports healthy plant growth throughout the growing season.
Frequently Asked Questions
Can I use the same soil mix for all my raised garden beds?
No, it’s best to create a customized blend for each bed based on its specific needs, taking into account factors like plant type, climate, and soil conditions. A one-size-fits-all approach may lead to suboptimal results.
How often should I test the pH level of my raised garden bed soil?
Regular testing is essential every 6-12 months to ensure your soil remains within the optimal pH range for your plants. This frequency can vary depending on factors like soil type, climate, and fertilization practices.
What’s the ideal mix ratio for compost and other additives in a customized blend?
A general rule of thumb is to start with 20-30% compost and adjust according to specific needs. Be mindful that over-composting can lead to nutrient imbalances, while under-composting might compromise soil structure.
Can I use manure from my own pets or animals as fertilizer for my raised garden bed?
Yes, but it’s crucial to pasteurize or compost the manure first to kill pathogens and weed seeds. This ensures safe and effective fertilization without introducing potential contaminants into your garden.
How do I balance nutrient deficiencies in my raised garden bed soil, especially if I’m using a pre-mixed blend?
Start by conducting a comprehensive soil test to identify specific nutrient gaps. Based on the results, supplement with targeted fertilizers or additives like micronutrients and pH balancers to restore optimal levels. Regular monitoring and adjustments will help maintain a healthy balance.