If you’re looking for a sustainable way to fertilize your plants, cultivating mealworms is an innovative solution that’s gaining popularity among gardeners. These tiny insects are not only eco-friendly but also provide essential nutrients to your plants, promoting healthy growth and development. By learning how to cultivate mealworms, you’ll be reducing waste in the garden while creating a valuable fertilizer source. In this article, we’ll explore the process of cultivating mealworms for garden fertilizer, from setting up their habitat to harvesting and using them as a nutrient-rich supplement. We’ll cover tips on maintaining a healthy mealworm population, how to use their castings as fertilizer, and why this method is a game-changer for sustainable gardening practices. Whether you’re a seasoned gardener or just starting out, cultivating mealworms can help you create a more environmentally friendly garden.
Understanding Mealworms as a Sustainable Fertilizer
Now that you’ve successfully started your mealworm colony, let’s dive into how to use these nutritious insects as a sustainable fertilizer for your garden. We’ll explore their unique benefits and applications.
What are Mealworms and Their Benefits in Gardening
Mealworms are a type of insect that belongs to the Tenebrio molitor species. They are commonly found in decaying organic matter and are often considered pests due to their ability to infest food products and crops. However, these insects have been used as a natural fertilizer source for centuries, particularly in permaculture gardening.
Using mealworms as a fertilizer can provide essential nutrients to plants, including nitrogen, phosphorus, potassium, and micronutrients like iron and zinc. This is because the insects excrete nutrient-rich waste that is rich in beneficial microorganisms, which help to promote healthy plant growth. When used in composting, mealworms can break down organic matter efficiently, producing a nutrient-dense fertilizer that is free from synthetic chemicals.
To utilize mealworms as a fertilizer source, you can set up a worm farm or use them directly in your garden beds. A simple way to do this is by creating a mealworm-based compost pile, where the insects are introduced to rotting organic matter and allowed to break it down naturally.
The Science Behind Mealworm Fertilizer
Mealworms have an incredible ability to break down organic matter into nutrient-rich waste that’s perfect for gardens. As they feed on decaying plant material, they release enzymes that help to decompose complex nutrients into simpler forms. This process is called “nutrient cycling,” and it’s a crucial part of the mealworm’s role in creating fertilizer.
As mealworms consume organic matter, their bodies extract valuable nutrients such as nitrogen, phosphorus, and potassium. These nutrients are then excreted in the form of waste, which can be collected and used as a natural fertilizer for plants. In fact, studies have shown that mealworm compost is rich in beneficial microbes, including bacteria and fungi, which help to improve soil structure and fertility.
To harness this nutrient-rich waste, simply set up a mealworm composting system where they can feed on decaying organic matter. As the mealworms break down the material, collect their waste and mix it with other compost materials like peat moss or coconut coir. This will create a rich, earthy fertilizer that’s perfect for gardens.
Preparing the Environment for Mealworm Cultivation
Before starting your mealworm cultivation journey, it’s essential to create a suitable environment that provides optimal conditions for these insects to thrive and multiply. Here, we’ll guide you through preparing the perfect space.
Setting Up a Suitable Enclosure for Mealworms
When it comes to setting up an enclosure for breeding and raising mealworms, proper temperature, humidity, and light control are crucial. Mealworms thrive in a warm environment between 75°F to 85°F (24°C to 29°C), so you’ll need to choose or create an enclosure that can maintain this temperature range.
You can either purchase a commercial terrarium or insectarium, or repurpose a large glass container like a jar or aquarium. If using the latter, make sure it’s clean and dry before adding mealworms. You’ll also want to ensure good ventilation in your enclosure by drilling a few small holes in the lid or sides for airflow.
Humidity levels should be moderate, around 50-60%, to prevent moisture buildup and mold growth. To maintain humidity, you can place a water bowl in the enclosure or use a humidifier specifically designed for insects. As for lighting, mealworms don’t require intense light but need some indirect illumination to simulate natural daylight. Use low-wattage LED grow lights or place the enclosure near an east- or west-facing window to provide gentle, filtered light.
Providing Adequate Food and Water for Mealworms
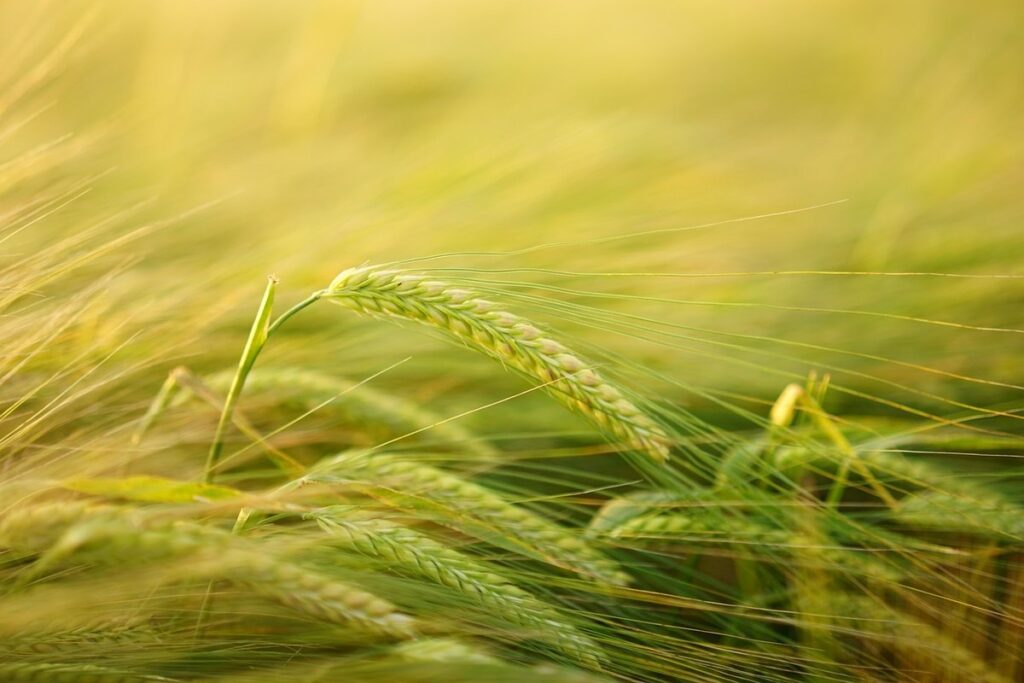
When it comes to cultivating mealworms for garden fertilizer, providing them with adequate food and water is crucial for their survival and optimal growth. Mealworms are detritivores, which means they feed on decaying organic matter. To meet their dietary needs, you can offer a variety of food sources such as oats, barley, wheat bran, or even vegetable scraps like carrots and sweet potatoes.
It’s essential to provide mealworms with clean water at all times. You can use a shallow dish or tray filled with fresh water, changed daily to prevent bacterial growth. A good rule of thumb is to maintain a humidity level between 50-70% in their enclosure to keep them hydrated and comfortable.
Avoid overfeeding, as this can lead to mold growth and contaminate the mealworms’ food source. Monitor their consumption closely and adjust the amount accordingly. By providing your mealworms with a balanced diet and access to clean water, you’ll ensure they thrive and produce high-quality fertilizer for your garden.
Breeding and Raising Mealworms for Garden Fertilizer
To cultivate mealworms effectively, you’ll need to understand how to provide them with optimal living conditions and manage their breeding process for a steady supply of fertilizer. This section covers those essential steps in detail.
Life Cycle and Stages of Mealworm Development
Mealworms undergo a complex life cycle that spans four stages: egg, larva, pupa, and adult. The duration of each stage is influenced by factors like temperature, humidity, and food availability.
The female mealworm beetle lays 10-50 eggs at a time on a substrate like wood or paper. After about two weeks, the eggs hatch into larvae, also known as mealworms. These hungry creatures feed voraciously for several weeks, shedding their skin multiple times as they grow. During this stage, they convert food into energy and biomass that can be harnessed for gardening purposes.
After reaching full size, typically after 3-4 months, the larva enters a pupal stage, where it undergoes metamorphosis to transform into an adult beetle. This stage usually lasts around two weeks.
Adult mealworms emerge from their cocoons and begin the cycle anew by mating with other beetles. Understanding these stages is crucial for optimizing mealworm breeding and harnessing them as efficient garden fertilizers.
Optimizing Mealworm Population Growth and Density
To optimize mealworm population growth and density, it’s essential to create an environment that promotes their health and development. Ensure adequate space by maintaining a minimum of 1-2 square inches per mealworm at all times. This will prevent overcrowding, which can lead to stress, disease, and reduced fertility.
Keep your enclosure clean by removing uneaten food and waste daily, and replace the substrate completely every week or two. A balanced diet rich in fiber and protein is crucial for optimal growth. Provide a variety of foods such as oats, wheat bran, carrots, apples, and sweet potatoes to cater to their nutritional needs.
Maintain a consistent temperature range of 70-80°F (21-27°C) with a slight increase during the day. Humidity levels should be around 50-60%. Monitor your mealworms’ population regularly by tracking growth rates and density. Harvesting at optimal densities can help maintain healthy populations, while over-harvesting can lead to reduced fertility.
By implementing these strategies, you’ll create an ideal environment for your mealworms to thrive and maximize their potential as a garden fertilizer.
Harvesting and Processing Mealworm Fertilizer
Once you’ve harvested your mealworms, it’s time to turn them into fertilizer. This process involves collecting and processing their frass, also known as worm castings, into a nutrient-rich compost.
Identifying Maturity and Harvesting Mealworms
When it comes to harvesting mealworms for fertilizer, timing is everything. You’ll know it’s time to harvest when you notice a significant color change in the mealworms’ bodies. This process is called apolysis, and it indicates that the mealworms are mature and ready to be harvested.
As mealworms grow and develop, their bodies undergo a series of changes. Before harvesting, they will typically turn yellow or orange, signaling that they’re approaching maturity. This color change can vary depending on factors such as diet, temperature, and humidity.
To identify the right moment for harvest, keep an eye out for this color shift. You may also notice a slight increase in the mealworms’ size and weight during this time. Once you’ve observed these changes, it’s likely that your mealworms are ready to be harvested. Harvesting at the optimal time will ensure that your fertilizer is rich in nutrients and has the best potential for plant growth.
It’s worth noting that over-harvesting can lead to a decrease in fertility, so make sure to only take what you need, leaving some for the colony to continue thriving.
Composting or Using Live Mealworms Directly
When it’s time to harvest mealworms for fertilizer, you’ve got two main options: composting or using them directly in your garden. Both methods have their benefits and drawbacks.
Using live mealworms directly in your garden can be a great option if you’re looking for a quick boost of nutrients. Mealworms are high in nitrogen, phosphorus, and potassium, making them an excellent addition to your soil. Simply scatter the live worms over your soil or mix them into your compost pile. Keep in mind that mealworms can escape or die quickly, so it’s essential to apply them immediately after harvesting. This method is ideal for small gardens or pots where you want a rapid response.
On the other hand, composting mealworms involves creating a nutrient-rich humus by allowing the worms to break down food waste and organic matter. This process can take anywhere from a few weeks to several months, depending on factors like temperature and moisture levels. The resulting compost is an excellent soil amendment, rich in beneficial microbes that will help your plants thrive.
If you do choose to compost mealworms, make sure to maintain optimal conditions: keep the pile moist but not soggy, and turn it regularly to ensure even decomposition. This method may take longer, but the end result is a valuable resource for your garden.
Applying Mealworm Fertilizer to Your Garden
Now that you have a thriving mealworm colony, it’s time to put their nutrient-rich waste to good use as fertilizer for your garden. Here’s how to apply this valuable resource effectively.
Soil Preparation and Conditioning
Before applying mealworm fertilizer to your garden, it’s essential to prepare and condition the soil. Mealworm fertilizer is a high-protein, nutrient-rich amendment that can be quite potent, so it’s crucial to ensure your soil is balanced and ready to receive it.
When preparing your soil for mealworm fertilizer, consider its pH level. If your soil tends towards acidity or alkalinity, it may not be suitable for the initial application of mealworm fertilizer. Ideally, aim for a slightly acidic to neutral pH range between 6.0 and 7.0, as this will allow the mealworm fertilizer to take effect more efficiently.
Additionally, assess your soil’s nutrient balance. Mealworm fertilizer is rich in nitrogen, phosphorus, and potassium (NPK), so it’s essential to ensure that these nutrients aren’t already present in excessive amounts. Conduct a soil test to determine its NPK levels, as well as other essential micronutrients like calcium, magnesium, and sulfur.
Some general guidelines for nutrient balance are:
• If your NPK levels exceed 20-10-10 (nitrogen-phosphorus-potassium), it’s best to apply mealworm fertilizer with caution or dilute it with water.
• For soils with low NPK levels, apply the recommended dose of mealworm fertilizer according to package instructions.
Types of Plants That Benefit from Mealworm Fertilizer
When it comes to applying mealworm fertilizer to your garden, not all plants are created equal. Some varieties benefit more from this nutrient-rich fertilizer than others. If you’re looking to use mealworm fertilizer to give your fruiting and flowering plants a boost, here are some examples of plants that will particularly appreciate the extra nutrients.
Fruiting plants like strawberries, blueberries, and raspberries are natural eaters of high-nutrient foods. By incorporating mealworm fertilizer into their care routine, you can enhance their flavor, texture, and overall health. For example, a study found that strawberry plants treated with mealworm fertilizer had higher yields and better disease resistance than those without.
Flowering varieties like roses, marigolds, and zinnias also benefit from the calcium, iron, and magnesium present in mealworm fertilizer. These essential micronutrients promote healthy root growth and development, leading to vibrant blooms and strong stalks. As a bonus, using mealworm fertilizer reduces your carbon footprint by minimizing synthetic fertilizers and creating a closed-loop nutrient cycle.
Remember to follow the recommended application rates for best results. Start with a small amount and gradually increase as needed to avoid overfertilizing your plants.
Tips for Successful Mealworm Cultivation and Use
To successfully cultivate mealworms, you’ll want to ensure you’re providing them with a balanced diet and proper living conditions. This includes tips on feeding, housing, and monitoring your worm population.
Common Challenges and Solutions in Mealworm Raising
As you begin to cultivate mealworms for garden fertilizer, you may encounter some common challenges that can hinder your progress. One of the most frequent issues is overcrowding, which can lead to stress and disease among the worms. To prevent this, ensure you have a sufficient container size for the number of worms you’re raising.
Another issue is temperature fluctuations. Mealworms are sensitive to extreme temperatures, so it’s essential to maintain a consistent temperature between 75°F to 85°F (24°C to 30°C) in their enclosure. Avoid placing their habitat near drafty windows or heating vents.
Humidity levels can also be a problem if not monitored properly. Mealworms thrive in humid environments, but excessive moisture can lead to mold and fungal growth. Aim for a humidity level between 50% to 70%.
Inadequate food supply is another challenge that may arise. Provide a balanced diet of fruits, vegetables, and grains to ensure the mealworms are healthy and thriving.
If you notice any of these issues, take corrective action immediately to prevent further complications. Regularly clean and inspect their enclosure, adjust temperature and humidity levels as needed, and provide an ample food supply. With proper care and attention, you can overcome common challenges and successfully cultivate mealworms for your garden fertilizer needs.
Ensuring Food Safety and Handling Practices
When it comes to using mealworms as a natural fertilizer for your garden, ensuring food safety and handling practices are crucial. You’ve worked hard to cultivate these insects, and you want to make sure they’re processed and handled correctly to avoid contamination.
First and foremost, it’s essential to handle harvested mealworms in a sanitary environment. Wash your hands thoroughly before and after handling the insects, and ensure any equipment or containers used for processing are clean and sanitized. This includes utensils, gloves, and even the storage containers they’ll be placed in.
Next, consider how you’ll process the mealworms. Will you be drying them to create a powder, or freezing them for later use? Each method requires specific handling practices to prevent contamination. For example, if you’re drying the mealworms, ensure they’re spread evenly on a clean surface and not overcrowded, as this can lead to moisture accumulation and bacterial growth.
By following proper food safety and handling practices, you’ll be able to enjoy the benefits of using mealworms in your garden while minimizing the risk of contamination. Remember, it’s always better to err on the side of caution when working with living organisms.
Frequently Asked Questions
Can I use mealworms with other fertilizers, or should I stick to using them alone?
Mealworms can be used in conjunction with other natural fertilizers, such as compost tea or worm casting, to create a nutrient-rich blend for your plants. In fact, combining mealworm fertilizer with other sustainable options can provide an extra boost of beneficial microbes and nutrients.
How do I prevent pests from infesting my mealworm colony?
To maintain a healthy mealworm population, it’s essential to keep their enclosure clean and free from pests. Monitor the colony regularly for signs of infestation, such as mold or fungal growth, and ensure that the enclosure is well-ventilated to prevent moisture buildup.
What are some common mistakes beginners make when cultivating mealworms?
One common mistake is overfeeding or under-feeding the mealworms, leading to stunted growth or an imbalance in their nutrient intake. It’s crucial to strike a balance between providing adequate food and water while maintaining a clean and healthy environment for the colony.
Can I use live mealworms directly as fertilizer, or do they need to be composted first?
You can choose to either compost the mealworms or use them live as fertilizer, depending on your preference. Composting will break down the nutrient-rich insect bodies into a finer consistency, making it easier for plants to absorb. However, using live mealworms directly can also provide benefits by introducing beneficial microbes into the soil.
How often should I harvest and replace the mealworm castings?
The frequency of harvesting depends on your specific needs and how quickly you want to reap the benefits of mealworm fertilizer. As a general rule, you can expect to harvest every 2-4 weeks during peak production periods, making sure not to deplete the colony’s nutrient reserves.