Are you ready to unlock the secrets of raising healthy, thriving queen bees? Queen rearing is an essential skill for any beekeeper looking to improve their apiary. With a single high-quality queen bee, you can transform your colony’s performance and increase honey production. But where do you start? Selecting the right queen, grafting larvae, providing optimal nutrition, and controlling pests are just some of the critical steps involved in successful queen rearing.
In this comprehensive guide, we’ll take you through each stage of queen rearing, from initial selection to monitoring their health and performance. By mastering these techniques, you’ll be well on your way to producing top-notch queens that will elevate your beekeeping operation. So whether you’re a seasoned pro or just starting out, keep reading to discover the art of queen rearing bees.
Understanding the Importance of Queen Bees
As you begin to learn about queen rearing, it’s essential to understand why these remarkable insects play a crucial role in your beehive’s health and productivity. Let’s explore their importance together!
The Role of the Queen in a Bee Colony
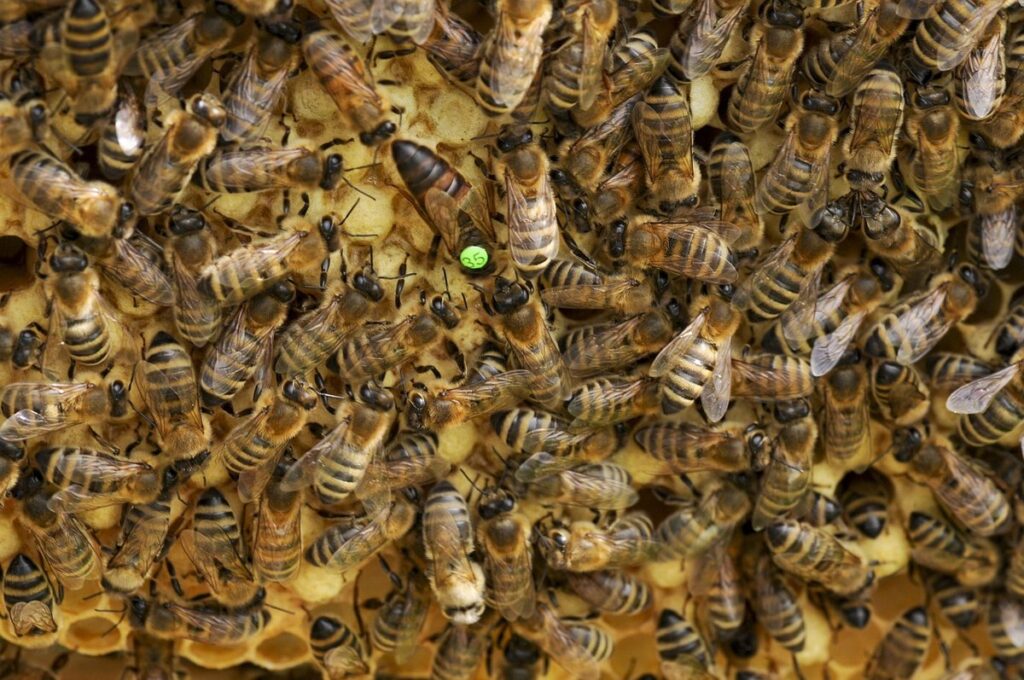
The queen bee is the heartbeat of a thriving colony, and her role cannot be overstated. At around 2-3 years old, she begins to lay eggs at an incredible rate of up to 1,500 per day, making her the sole reproductive force behind the colony’s growth. This staggering number is what drives the colony forward, ensuring its survival and prosperity.
But the queen’s impact extends far beyond just reproduction. Her pheromones regulate the social hierarchy of the colony, influencing the behavior of worker bees and maintaining a sense of order within the hive. When she’s present, the colony thrives; when she’s absent or failing, the colony begins to decline.
As you consider your own beekeeping practices, it’s essential to prioritize the health and well-being of your queen. Regular inspections can help identify any issues early on, allowing for swift action to be taken. By recognizing the importance of this single bee and taking steps to ensure her success, you’ll set your colony up for long-term growth and productivity.
Signs of a Healthy Queen Bee
A healthy queen bee is essential for the well-being and productivity of your colony. To identify if your queen is thriving, look for signs such as a strong pheromone production. A healthy queen will emit a pungent, sweet smell that signals to the worker bees that she’s present and fertile. If you notice a decrease in this scent or an unusual odor, it may indicate a problem with the queen.
Another key indicator is her egg-laying habits. A healthy queen should be laying eggs consistently throughout the day, ensuring a steady supply of brood for the colony. Check for an average of 1-2 eggs per cell in the honeycomb cells, which indicates proper oviposition and fertility. On the other hand, fewer than one egg per cell might suggest the queen is not laying efficiently.
Pay attention to your queen’s overall appearance as well. A healthy queen should be plump, shiny, and have a smooth exoskeleton. Look for any signs of disease or parasites that can compromise her health, such as mites or varroa infestations. Regular inspections will help you catch potential issues early on, ensuring the longevity and productivity of your queen.
Common Issues with Queen Bees
As you work with queen bees, it’s essential to be aware of some common issues that can arise. One of the most significant problems is the queen’s age. As she grows older, her reproductive abilities may decline, and she may start to lay fewer eggs or even stop laying altogether. This can have a ripple effect on your colony’s population growth.
Another issue related to queen bees is disease. Queens are just as susceptible to diseases like nosema, American Foulbrood, and Varroa mite infestations as worker bees. If you notice any signs of illness in your queen, it’s crucial to take action quickly to prevent the spread of disease throughout the colony.
Poor genetics can also be a significant problem when it comes to queen bees. This can manifest as slow growth rates, low honey production, or even aggression within the colony. To avoid these issues, it’s essential to select high-quality queens from reputable breeders and integrate them into your apiary thoughtfully. Regular monitoring of your queen’s health and behavior will also help you catch any potential problems early on.
The Process of Rearing Queen Bees
Rearing a new queen is a multi-step process that requires careful attention to detail, starting from selecting suitable larvae through grafting and nurturing them in individual cells. Let’s walk through this delicate procedure together.
Choosing the Right Stock
When selecting a queen bee stock for rearing, there are several key factors to consider. The first consideration is breed, as different breeds have unique characteristics and traits that may be more desirable in certain situations. For example, Italian bees are known for their high honey production and gentle nature, making them an excellent choice for hobbyists or commercial beekeepers who want a low-maintenance queen.
Genetic traits are also essential to consider, particularly if you’re looking to improve the overall health and resilience of your colony. Look for queens that have been bred from lines with desirable traits such as resistance to disease, cold hardiness, or high-quality brood production.
Color is another factor to consider when selecting a queen bee stock. While color has no direct impact on the quality of the queen, it can be an important consideration if you’re looking for a specific visual characteristic in your colony. For example, some beekeepers prefer queens with a darker coloration as they believe this helps to reduce swarming tendencies.
Ultimately, the right queen bee stock for rearing will depend on your specific needs and goals. It’s essential to research different breeds and genetic lines to find one that aligns with your vision for your apiary.
Grafting Techniques for Queen Rearing
Grafting is a delicate process that requires precision and patience. When preparing cell cups for grafting, it’s essential to ensure they’re free of debris and moisture. A gentle cleaning with a soft brush or cloth will suffice. Next, the larva must be selected carefully. You’ll want to choose a healthy, plump larva between 2-3 days old, as this is typically when they’re most receptive to grafting.
When placing the larva into the cell cup, make sure to orient it correctly, with its head pointing towards the top of the cup. The amount of royal jelly provided should be minimal, as excess can hinder growth and development. To ensure accurate placement, you can use a grafting tool or even a tiny amount of honey to secure the larva in position.
It’s also crucial to maintain optimal temperature and humidity levels during the grafting process. Aim for temperatures between 85-90°F (30-32°C) and relative humidity above 50%. Proper cell cup preparation, larva selection, and environmental conditions are all vital components of successful grafting techniques in queen rearing.
Nucleus Colonies (Nucs) and Their Use in Queen Production
Nucleus colonies (nucs) play a crucial role in queen production, serving as a foundation for raising high-quality queens. A nuc is essentially a miniaturized version of a full colony, consisting of 3-5 frames of bees, including a laying queen, brood, and food stores. To create a nuc, you’ll typically take frames from a strong, queen-right colony and combine them into a single box or nuc hive.
Managing nucs requires attention to detail, as they can be prone to swarming due to their small size. To minimize this risk, it’s essential to ensure the nuc has a sufficient food supply and maintain a healthy population of forager bees. A good rule of thumb is to check on your nuc every 7-10 days during the peak brood season to monitor its progress and make any necessary adjustments.
When selecting frames for a nuc, look for strong, cell-drawn comb with a mix of open cells and sealed brood. This will give the new queen an ideal environment in which to lay eggs and establish her colony. By following these steps and providing proper care, you can successfully manage nucs and increase your chances of raising high-quality queens.
Housing and Feeding Queen Bees
Caring for a young queen bee requires providing her with a safe, nourishing environment. This section will cover essential tips on housing and feeding your precious queen to ensure optimal growth and health.
Brood Boxes and Queen Rearing Equipment
When it comes to queen rearing, having the right equipment is essential for successfully raising healthy and productive queens. One of the most critical pieces of equipment you’ll need is a brood box, which is specifically designed for housing larvae and young bees. These boxes typically have frames with cells that allow for easy monitoring and management of the brood.
A queen excluder is also an important piece of equipment to have in your arsenal. This device fits over the top of the honey super and prevents the queen from laying eggs above a certain point, helping you to control where she’s laying her eggs and preventing swarming. When selecting a queen excluder, look for one made from durable materials that will withstand regular use.
Other equipment you may find useful when rearing queens includes queen cages, which are used to hold the newly emerged queen in place while she hardens her wings and prepares for release. It’s also essential to have a reliable tool for monitoring the brood and identifying any potential issues early on. Regularly inspecting your equipment and maintaining it properly will help ensure you’re able to produce high-quality queens that thrive in their new hives.
Nutrition and Feeding Requirements for Queen Bees
When it comes to queen bees, their nutritional needs are just as crucial as those of worker bees. In fact, a queen bee’s diet plays a vital role in her overall health and fertility. A high-quality diet rich in protein, carbohydrates, and essential vitamins is essential for maintaining her reproductive function.
One common way to feed queen bees is with sugar syrup. This mixture of water and granulated sugar can be made at home or purchased pre-made from bee suppliers. The general rule of thumb is to mix one part sugar with one part water by weight. However, it’s essential to note that sugar syrup should not contain any additives like honey or flavorings, as these can harm the queen.
Pollen, on the other hand, provides a natural source of protein and vitamins for queen bees. You can feed pollen patties directly to the queen or mix it with sugar syrup for a more balanced diet. It’s also crucial to provide a clean water source at all times, free from contaminants that might harm the queen.
When introducing new queens to your apiary, make sure to monitor their feeding habits closely and adjust as necessary. A well-fed queen is more likely to thrive in her new environment.
Pest Control and Disease Management
As you work with queen bees, it’s essential to be aware of the common pests and diseases that can affect their health. American Foulbrood (AFB) is a bacterial disease that’s highly contagious and can spread quickly through colonies. It’s caused by the bacterium Paenibacillus larvae, which enters the colony through contaminated equipment or bees themselves.
To manage AFB, it’s crucial to maintain good hygiene practices, such as using dedicated equipment for queen rearing and disinfecting all surfaces regularly. You should also monitor your colonies closely for signs of disease, including discolored or dead brood, and take action promptly if you suspect an outbreak.
Other pests that can affect queen bees include mites, small hive beetles, and wax moths. To control these, use a combination of methods such as introducing beneficial insects like Trichogramma wasps to prey on mite eggs, using diatomaceous earth or sugar dust to repel beetles, and physically removing moth larvae from the colony.
Regular inspections and proactive management can help prevent pest and disease issues in your queen bee colonies.
Selecting and Maintaining a Healthy Queen Bee
When it comes to successful queen rearing, selecting and maintaining a healthy queen is crucial. This section will walk you through what to look for and how to keep your queen thriving.
Selection Criteria for Queen Replacement
When selecting a new queen bee for your apiary, there are several key factors to consider. One of the most important is her egg-laying ability. A good queen should be able to lay around 1,500-2,000 eggs per day during peak season, which typically falls between May and July. If she’s not laying enough eggs, it can lead to a shortage of new bees in the colony, making it difficult for the colony to thrive.
Another critical factor is her pheromone production. A healthy queen produces a pheromone that helps regulate the behavior of the worker bees, including their egg-laying and foraging habits. If she’s not producing enough pheromones, it can lead to problems with swarming and disease control within the colony.
To determine if a queen is suitable, inspect her physically. Look for signs of good health, such as shiny wings and a plump abdomen. Observe her behavior in the hive, paying attention to how she interacts with the worker bees. If she’s dominant and assertive, it’s likely she’ll be able to establish a strong colony.
Integrated Pest Management (IPM) Strategies
Maintaining a healthy queen bee population requires careful consideration of Integrated Pest Management (IPM) strategies. These approaches not only help control pests but also promote the overall well-being of your bees.
One key aspect of IPM is understanding the types of pests that can affect your queen bee and her colony. Common culprits include mites, small hive beetles, and wax moths. By identifying these pests early on, you can implement targeted treatments to prevent infestations.
Regular inspections are crucial for detecting pest issues before they escalate. This involves checking the brood nest, honeycomb cells, and queen bee herself for signs of distress or infestation. A keen eye will also help you detect any changes in colony behavior, such as an increase in dead bees or a lack of honey production.
To manage pests effectively, it’s essential to adopt a holistic approach that balances control methods with environmental factors. For example, using integrated pest management techniques like introducing beneficial insects (e.g., ladybugs) or implementing physical barriers can be just as effective as chemical treatments in some cases.
By combining these strategies and staying vigilant during regular inspections, you’ll be well-equipped to protect your queen bee and her colony from pests. Remember, an ounce of prevention is worth a pound of cure – so take proactive steps now to safeguard your bees’ health.
Monitoring and Recording Queen Bee Performance
Monitoring and recording queen bee performance is crucial for maintaining a healthy and thriving colony. It’s essential to track key metrics that indicate the queen’s success, including egg laying rate, brood development, and overall colony growth.
To monitor the queen’s performance, you’ll need to inspect the hive regularly, ideally every 7-10 days during peak seasons. Look for signs of a strong, healthy queen, such as a well-developed brood pattern, plenty of sealed brood cells, and a moderate pace of egg laying. A good rule of thumb is to see at least 1,500-2,000 eggs per day in a strong colony.
Recording your observations will help you identify trends and patterns, allowing you to make informed decisions about queen replacement or introduction. You can use a simple logbook or spreadsheet to track metrics like egg laying rate, brood development, and nectar flow. By monitoring these key indicators, you’ll be able to fine-tune your management techniques and optimize the health and productivity of your colony. Regular record-keeping will also help you identify potential issues early on, ensuring a strong and resilient queen bee at the heart of your operation.
Advanced Techniques in Queen Rearing
Now that you’ve mastered the basics of queen rearing, it’s time to take your skills to the next level by learning advanced techniques for selecting and breeding the perfect queen.
Split-Springing and its Applications
Split-springing is a technique used to control the population growth and optimize queen rearing operations. It involves splitting the queen rearing unit (QRU) into two separate units after 7-10 days, when the first batch of queens has emerged. This allows for more even distribution of resources, such as food and space, which can lead to improved queen quality and reduced congestion in the QRU.
By split-springing, beekeepers can also better control the age and size of their queens, making it easier to select for desirable traits. For example, beekeepers may want to produce queens that are more suited to a specific region or climate. Split-springing allows them to do this by controlling the timing and frequency of queen emergence.
Practically, split-springing can be achieved by creating two separate boxes within the QRU, each with its own entrance and exit points. This helps to prevent congestion and overcrowding, which can lead to disease and pest issues. By implementing split-springing techniques, beekeepers can optimize their queen rearing operations and produce high-quality queens that meet their specific needs.
Artificial Swarm Control (ASC) Methods
Artificial Swarm Control (ASC) methods are gaining popularity among queen rearing enthusiasts as they offer a proactive approach to controlling swarming behavior and promoting queen production. By understanding the underlying principles of ASC, beekeepers can manipulate their colonies to produce multiple queens, thereby increasing the chances of successful queen rearing.
One of the key ASC methods is the “Multiple Queen Rearing” technique, which involves creating artificial swarms by manipulating the natural instincts of worker bees. This is achieved by introducing a new queen into a strong colony and allowing her to establish a new swarm cell. By replicating this process multiple times within a single colony, beekeepers can increase their chances of producing multiple queens.
Another ASC method is “Queen Clustering,” which involves inducing the formation of a queen cluster by manipulating temperature and humidity levels within the hive. This method allows beekeepers to identify potential queen cells and monitor their development more closely.
By incorporating ASC methods into your queen rearing program, you can take control of swarming behavior and increase the likelihood of successful queen production. With patience, practice, and attention to detail, even novice beekeepers can master these techniques and reap the rewards of a thriving queen rearing operation.
Hybrid Breeding Programs and Their Potential Benefits
Hybrid breeding programs have revolutionized queen reearing by allowing beekeepers to leverage the strengths of multiple lineages. By crossing foundation stock from different breeds, you can create a more resilient and adaptable queen population.
Increased genetic diversity is one of the primary benefits of hybrid breeding programs. This means your queens are less susceptible to disease, more resistant to environmental stresses, and better equipped to handle pests. For example, a study in Australia showed that hybrids were significantly more resistant to varroa mite infestations than purebred colonies.
To implement a hybrid breeding program, you’ll need to identify suitable foundation stock from reputable suppliers or other beekeepers with desirable genetics. It’s essential to maintain detailed records of your breeding program, including pedigree and performance data. This will help you track the effectiveness of your hybrids and make informed decisions for future breeding cycles.
By incorporating hybrid breeding into your queen rearing strategy, you can enhance the overall health and productivity of your apiary, ultimately leading to improved colony performance and reduced losses.
Frequently Asked Questions
How Do I Know If My Queen Bee Is Releasing Pheromones Properly?
Yes, queen bees release pheromones to regulate their colony’s growth and behavior. You can check for proper pheromone release by observing the number of eggs laid per day, the overall health of the colony, and the presence of a strong “queen scent” during inspections. If you suspect an issue with pheromone production, consult a local beekeeping expert or perform further research to identify potential causes.
What’s The Ideal Temperature Range For Queen Bees?
The ideal temperature range for queen bees is between 85°F (29°C) and 95°F (35°C). While they can tolerate some variation, temperatures outside this range may affect their performance and overall health. Ensure your apiary provides a stable environment within this range to support optimal queen development.
Can I Use The Same Hive For Queen Rearing And Regular Beekeeping?
Yes, but it’s not recommended. When rearing queens, you’ll need to isolate them from the rest of the colony to prevent hybridization and ensure proper genetic selection. Using separate hives or equipment for queen rearing will help maintain the integrity of your breeding program.
How Do I Store Queen Cells For Long-Term Use?
For long-term storage, place queen cells in a sealed container with some candy or sugar water to sustain them during transport. Keep them in a cool (around 50°F/10°C), dark place until you’re ready to graft them into new colonies. Monitor their condition regularly and replace any cells showing signs of deterioration.
Can I Use A Single Queen Bee To Found Multiple Colonies?
No, it’s not recommended. When founding multiple colonies, it’s essential to ensure genetic diversity by using different queens or breeding stock. This reduces the risk of inbreeding and related health issues within your apiary. Consider acquiring multiple high-quality queen bees from reputable breeders to support your expansion plans.