Are you wondering how to keep your garden hive thriving? One crucial aspect is maintaining healthy queen bee cells. As the heart of any colony, a strong and productive queen ensures maximum honey production and keeps your bees buzzing with energy. However, recognizing when a queen cell needs attention can be tricky.
In this article, we’ll guide you through the process of identifying, preparing for, and maintaining healthy queen bee cells in your garden hives. We’ll explore the importance of monitoring these delicate structures and what to do if your queen is not performing optimally. By following our tips and advice, you’ll be well-equipped to ensure a thriving colony and reap the rewards of a successful apiary.
Understanding the Importance of Queen Bee Cells
Let’s dive into the fascinating world of queen bee cells and explore why these specialized cells are crucial for a thriving garden hive. We’ll examine their role in determining the hive’s future generations.
What is a Queen Bee Cell?
At the heart of every thriving honeybee colony is the queen bee cell. This specialized cell plays a critical role in the health and longevity of the colony by ensuring a steady supply of new queens. But what exactly is a queen bee cell, and how does it function?
A queen bee cell is essentially a specific type of brood cell that is designed to nurture the development of a new queen. These cells are typically larger than regular worker cells, allowing for the growth and maturation of the developing queen. The process begins when the worker bees select a suitable larva from the colony’s brood nest and transfer it into a specialized queen cup.
Within the queen cell, the larva is fed a special diet that encourages its development into a fertile egg-laying queen. This complex process requires precise timing and attention to detail, as the wrong sequence of events can lead to the emergence of an infertile drone or even a dead queen. By understanding how queen bee cells function, gardeners and beekeepers can better support their colonies and promote overall health and productivity.
Characteristics of Queen Bee Cells
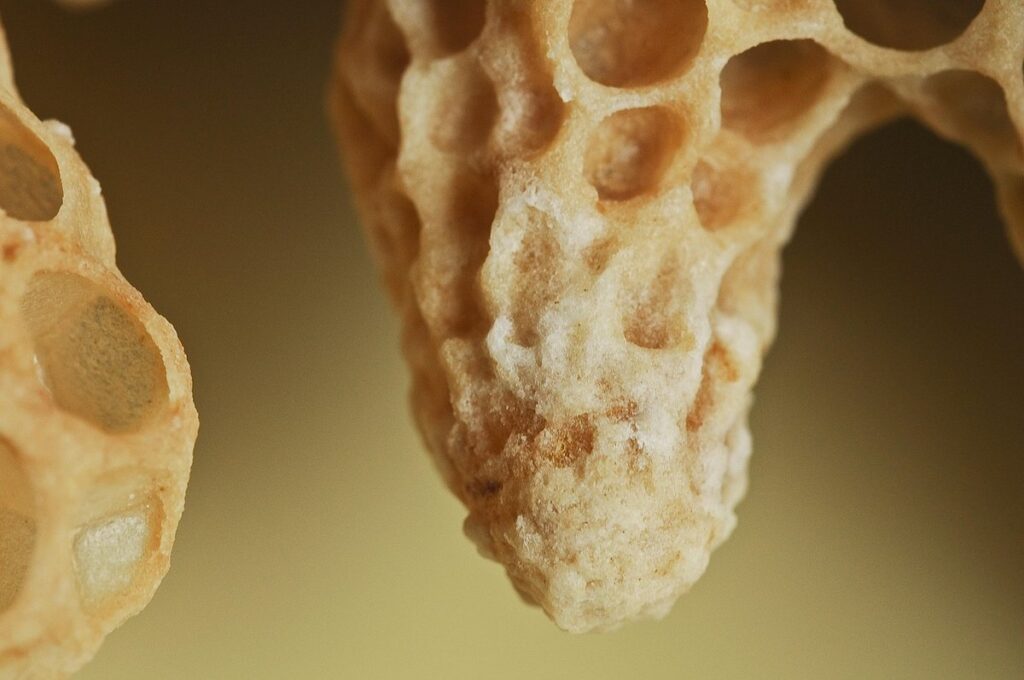
When it comes to queen bee cells, there are several physical characteristics that can help identify them. These specialized cells, also known as “queen cups,” are typically larger than regular worker honeycomb cells and have a slightly different shape.
One of the key characteristics of queen bee cells is their size. They are usually about 1-2 times larger in diameter than standard worker cells, which allows for the queen bee to grow and develop properly. The cells also tend to be located in areas of the hive with high humidity and temperature, as these conditions help promote the development of the royal jelly that nourishes the developing queen.
Beekeepers can identify queen bee cells by their location within the hive and their distinctive shape. They are often found near the center of the hive, where the temperature and humidity levels are more stable. Look for cells with a slightly larger entrance and a more elongated shape than standard worker cells. Experienced beekeepers can also recognize these cells based on their familiarity with the hive’s layout and behavior.
It’s essential to note that not all large or unusual-looking cells are necessarily queen bee cells, so it’s crucial to observe the behavior of the bees surrounding them as well.
Why Queen Bee Cell Production Matters
Regular queen bee cell production is crucial for maintaining a healthy and thriving colony. One of the most significant benefits is its impact on honey production. A strong, well-mated queen is essential for maximizing nectar collection and conversion into honey. Without a productive queen, the colony may struggle to produce sufficient honey for storage and sale.
Another critical aspect is brood growth. A regular supply of healthy queens ensures that the colony maintains a consistent and stable population. This is particularly important during times of stress or disease when a robust brood can help the colony recover more quickly. A colony with a weak or failing queen may experience slowed or stopped brood growth, leading to reduced numbers and increased vulnerability.
In addition to these benefits, regular queen bee cell production helps maintain overall colony stability. A well-managed queen rotation program ensures that the colony has a steady supply of high-quality queens, reducing the risk of queen failure and subsequent colony collapse. By prioritizing regular queen cell production, beekeepers can enjoy healthier colonies, increased honey production, and a more resilient apiary overall.
Identifying and Preparing for Queen Bee Cells
When inspecting your garden hive, it’s crucial to identify and prepare for queen bee cells, which will determine the future health and productivity of your colony. Let’s explore the signs of these special cells.
Recognizing Signs of Queen Bee Cell Production
Recognizing the signs of queen bee cell production is crucial for beekeepers to ensure the health and longevity of their colonies. One of the earliest indicators that a colony is producing new queen cells is the presence of large, sealed cells on the edge of the comb. These cells are usually located near the edges of frames or in areas where the bees have created new cells.
Another sign is the increase in the number of nurse bees tending to the cells. You may notice more bees gathering around the area where you suspect queen cell production has begun. This can also be accompanied by an increase in the amount of royal jelly being produced, which can appear as a sticky substance on the frames or in the cells.
Bees may also start to cluster near the suspected queen cells, indicating that they are preparing for the emergence of a new queen. If you notice any of these signs, it’s essential to inspect your colony closely and look for actual queen cells being produced.
Preparing for Queen Bee Cell Emergence
Now that you’ve identified a queen bee cell, it’s time to prepare the hive for its emergence. This is an exciting phase of the queen rearing process, but it requires careful attention to ensure the new queen is healthy and thriving.
As the queen cell approaches emergence, increase the nectar flow by supplementing with sugar water or high-energy feed. This will give the new queen a strong foundation to start her colony. Monitor the hive’s temperature closely, aiming for a range of 92-95°F (33-35°C) around the clock. Maintain good air circulation and ensure there are no drafts that could chill the emerging queen.
Once the new queen emerges, you’ll need to transfer her to a separate box or nucleus colony to allow her to establish her own colony. This is known as “grooming” the queen, where she’s given the opportunity to mate with multiple drones. You can also use this time to inspect the hive for any potential issues and perform any necessary maintenance tasks. By following these steps, you’ll be well-prepared for the new queen’s emergence and set her up for success in establishing a thriving colony.
Managing the Emergence Process
When managing the emergence process, it’s essential to be gentle yet firm when handling the new queen bee. Upon her release from her cell, carefully collect her in a small container filled with a cotton ball or soft cloth to minimize disturbance. Keep her separated from the rest of the colony for at least 24 hours to allow any residual pheromones from the old queen to dissipate.
Once the new queen is fully emerged and has had time to settle, it’s crucial to integrate her into the colony seamlessly. To do this, release her directly onto the honeycomb frames in the evening when the bees are most active. This allows the new queen to immediately start laying eggs and establish her dominance.
Monitor the queen’s progress closely during the first few days after integration, ensuring she’s being accepted by the colony and that egg-laying is increasing. If necessary, consider adding a ‘queen excluder’ to prevent any potential conflicts between the old and new queens. By following these steps, you’ll be able to successfully integrate your new queen bee into her garden hive, promoting healthy growth and productivity.
Maintaining Healthy Queen Bee Cells
Maintaining healthy queen bee cells is crucial for a thriving garden hive, and that’s exactly what we’ll dive into next: the best practices to keep your queen strong.
Factors Affecting Queen Bee Cell Health
The health and well-being of your queen bee cell can be significantly affected by various factors. One crucial aspect is nutrition, which plays a vital role in maintaining the overall health of the queen. A balanced diet rich in proteins, carbohydrates, and essential vitamins and minerals is necessary for optimal growth and development.
Environmental conditions also impact the queen’s health. For instance, exposure to extreme temperatures or humidity levels can lead to stress, potentially affecting the queen’s fertility. Moreover, poor ventilation within the hive can contribute to disease buildup and increase the risk of queen loss.
Disease and parasites are another significant concern for queen bee cell health. Pests like mites and small hive beetles can harbor diseases that spread rapidly through the colony, compromising the queen’s health. Regular inspections and maintenance practices, such as monitoring for signs of infestation or disease, are essential to ensure the queen’s well-being.
To mitigate these risks, it is recommended to provide your queen bee cell with a clean and well-maintained environment, rich in nutrients and free from diseases. Regular checks on food availability, water quality, and overall colony health will help you identify potential issues before they become major problems.
Best Practices for Queen Bee Cell Maintenance
Regular inspections and monitoring of colony conditions are essential for maintaining healthy queen bee cells. When inspecting the queen cell, look for signs of a mature larva, such as a plump abdomen and a slight darkening of the cuticle. You should also check the cell’s temperature, ensuring it is around 90-100°F (32-38°C), which is ideal for brood rearing.
Monitor your colony’s overall health by checking for factors like adequate food storage, proper ventilation, and sufficient water supply. Regularly inspecting the hive for signs of pests or diseases will also help prevent issues that could affect queen cell development.
Consider performing inspections with a magnifying glass to get a closer look at the cells. This will allow you to detect any potential problems early on. Be sure to handle the queen cells gently, as rough handling can cause stress to the developing queen and compromise her health. By following these best practices, you’ll be well on your way to maintaining healthy queen bee cells in your garden hive.
Common Issues with Queen Bee Cells
As you work to maintain healthy queen bee cells, it’s essential to be aware of common issues that can arise. Failed emergences and queenless colonies are two significant concerns that can impact the overall health and productivity of your garden hive.
Failed emergences occur when a queen cell fails to produce a viable queen bee after grafting or cell production. This can be due to various reasons, including poor cell preparation, inadequate nutrition, or unsuitable environmental conditions. For instance, if the cells are not provided with enough royal jelly or are exposed to high temperatures, it can hinder successful emergence.
Another critical issue is the queenless colony, where the original queen has either died or abandoned her hive, leaving no replacement in sight. This can be caused by factors such as disease, parasites, or even queen failure due to old age. To mitigate these problems, ensure that you regularly inspect your cells for signs of distress and maintain a strong, healthy colony through regular management practices.
Monitoring your queen bee cells closely and taking prompt action when issues arise can make all the difference in maintaining a thriving garden hive.
Selecting and Replacing Queens
When it comes time to manage your garden hive, selecting and replacing queens is a crucial part of maintaining a healthy colony. We’ll walk you through the process.
Evaluating New Queens
When selecting a new queen for your colony, it’s essential to identify key characteristics of a healthy and productive one. A good starting point is to assess the current queen’s performance. Consider factors like egg-laying capacity, brood distribution, and overall colony growth.
A healthy queen should have a robust body with straight wings, no visible signs of disease or parasites, and a well-developed abdomen for storing sperm. Look for queens with a shiny exoskeleton, which indicates good nutrition and overall health.
When evaluating new queens, examine their temperament too. A calm and docile queen is more likely to accept a new colony without causing harm to the bees. Some breeders even provide behavioral profiles for their queens, giving you an idea of how they’ll interact with your bees.
If possible, observe the queen’s movement and behavior during the selection process. A healthy queen will typically be active, exploring her surroundings and communicating with the workers. This can help you gauge her overall vitality and suitability for your colony.
Understanding Queen Life Expectancy
When it comes to maintaining a healthy and thriving garden hive, understanding queen life expectancy is crucial. A typical queen bee’s lifespan can range from 2 to 5 years, depending on various factors such as nutrition, genetics, and environmental conditions.
Factors that can impact a queen’s longevity include her age at introduction, nutrition and hydration levels, exposure to diseases and parasites, and the overall health of the colony. For instance, a queen introduced to the hive when she is already mature (around 1-2 years old) may live shorter than one introduced as a young cell.
To maximize a queen’s lifespan, it’s essential to monitor her age and provide optimal care. Regularly inspecting your hive for signs of disease or pest infestations can also help prevent the spread of infections that might affect the queen. Additionally, maintaining a balanced diet for your bees by providing an adequate sugar water ratio and supplementing with pollen when necessary, can contribute to a healthier colony and extend the queen’s lifespan.
Keep in mind that even with proper care, queens will eventually reach the end of their natural lifespan and need replacement.
Replacing an Aging or Unproductive Queen
Replacing an aging or unproductive queen can be a challenging task for beekeepers. It’s essential to identify when a new queen is needed, as the health and productivity of the hive depend on it. If you notice a decline in egg-laying rates, reduced honey production, or changes in brood patterns, it may be time to consider replacing the queen.
To select a new queen, research different breeds that suit your region’s climate and beekeeping practices. Consider factors such as temperance, disease resistance, and egg-laying capacity. You can purchase queens from reputable breeders or suppliers online.
When introducing a new queen, ensure you follow proper protocols to prevent disruption to the hive. Start by preparing the receiving hive with sugar water and pheromone sprays to calm the bees. Then, carefully remove the old queen’s cage, making sure not to harm her. Introduce the new queen in a separate cage within the hive, allowing her to emerge naturally before releasing her into the colony.
Remember to monitor the hive closely after introducing the new queen for any signs of stress or conflict. With proper care and introduction, your bees should adapt quickly to their new leader.
Managing Queen Bee Cell Emergence in Different Climates
As you tend your garden hive, managing queen bee cell emergence is crucial to prevent swarming and ensure a healthy colony. This section will explore climate-specific strategies for successful cell development.
Regional Considerations for Queen Bee Cells
When it comes to managing queen bee cells, regional considerations play a significant role. Climate and geography can affect the colony’s ability to produce and manage these vital cells. For instance, in tropical regions with high temperatures and humidity, queen bees may have shorter lifespans due to increased metabolic rates.
In contrast, temperate climates with moderate temperatures allow for more efficient brood production, leading to a higher likelihood of successful queen cell emergence. Beekeepers in these areas can focus on maintaining optimal colony health through proper nutrition and space allocation.
However, regions with harsh winters may require specialized care during the cold months. For example, beekeepers may need to provide additional insulation or relocate their colonies to avoid frost damage. By understanding regional climate patterns, beekeepers can better predict and prepare for queen cell emergence, ensuring a healthy and thriving colony.
Keep in mind that local microclimates can also impact queen cell production. Factors such as nearby water sources, vegetation, and topography can all contribute to the unique conditions affecting your specific region.
Seasonal Factors Affecting Queen Bee Cell Emergence
When it comes to managing queen bee cell emergence in garden hives, seasonal factors play a crucial role. As a beekeeper, you need to understand how temperature, daylight hours, and food availability impact the queen’s behavior and decision to emerge.
Temperature is one of the most significant factors influencing queen bee cell emergence. Bees are cold-blooded creatures, and their metabolism slows down in cooler temperatures. When temperatures drop below 50°F (10°C), queen development will slow down or even stop. Conversely, temperatures above 85°F (30°C) can cause queen cells to emerge prematurely.
Daylight hours also affect queen cell emergence. Bees typically prefer 12-14 hours of daylight per day for optimal brood production. During the summer solstice, bees may produce too many queens if there’s an abundance of food and warm temperatures. Conversely, during winter months with shorter daylight hours, bees may slow down their reproductive cycle.
As a beekeeper, it’s essential to monitor these seasonal factors and adjust your management strategies accordingly. For example, you can provide supplementary food sources during periods of scarcity or use specialized equipment to control temperature fluctuations in the hive.
Special Considerations for Extreme Climates
When managing queen bee cell emergence in extreme climates, it’s essential to consider the unique challenges these environments present. In regions with intense heat or cold, for example, queen cells may not emerge as they would in more moderate temperatures. In such cases, beekeepers must take extra precautions to ensure their queens are healthy and thriving.
For areas prone to extreme heat, providing adequate ventilation and shade is crucial. This can be achieved by installing screened roofs on hive boxes or placing dark-colored tarps over the hives during the hottest part of the day. Beekeepers should also monitor their bees’ water intake closely, as dehydration can exacerbate heat stress.
In regions with harsh winters, queen cell production may slow down due to cold temperatures and reduced daylight hours. To combat this, beekeepers can provide supplemental feeding and ensure their hives have adequate insulation. They should also consider using specialized equipment, such as winterized hive boxes or insulated roofs, to help protect the queen cells from cold damage.
It’s also worth noting that some climates experience extreme weather events like hurricanes or droughts, which can impact queen cell emergence. Beekeepers in these regions must be prepared to respond quickly and take necessary precautions to safeguard their hives and queens.
Integrating New Queens into a Colony
When introducing new queen bees to your garden hive, it’s essential to do so gradually and carefully to prevent disturbing the existing colony. We’ll walk you through this delicate process step by step.
Best Practices for Introducing New Queens
When introducing a new queen to a colony, it’s crucial to minimize stress and ensure a smooth transition. This can be achieved by following some key best practices.
Before the introduction, prepare a separate hive stand for the new queen to prevent her from getting lost or injured during transfer. Also, make sure the receiving hive is free of pests and diseases.
Next, prepare the new queen by gently brushing off any debris that may have accumulated on her wings. This will also help stimulate her pheromone production, making it easier for the colony to accept her.
When introducing the new queen, do it during the early morning or late evening when the bees are less active. Gently place the queen in a hive with some bees from the existing colony, and ensure they’re in direct contact with her as soon as possible.
Managing Conflict between Established Queens and New Queens
When introducing a new queen into an established colony, it’s not uncommon for conflicts to arise. This is especially true when the existing queen has been ruling the hive for some time and has developed a hierarchy of workers loyal to her. To manage these situations effectively, beekeepers need to be aware of the potential risks and take proactive steps.
One common issue that can occur is worker bees becoming aggressive towards the new queen or even attacking her. This usually happens when they sense a threat to their established social order. In such cases, it’s essential to provide a safe environment for the new queen by placing her in a separate enclosure or “nucleus” hive with a smaller number of workers. As she lays eggs and establishes herself as the dominant queen, the aggression should subside.
In extreme cases, beekeepers may need to requeen the entire colony or perform a split to isolate the new queen’s influence. This can be a complex process requiring careful planning and execution. Ultimately, success depends on understanding the social dynamics of the hive and making informed decisions to minimize disruption.
Ensuring Successful Integration
Ensuring successful integration of a new queen into an existing colony requires careful planning and execution. When introducing a new queen to a thriving colony, it’s essential to consider the social dynamics at play. To prevent queen rejection, ensure that the new queen is introduced slowly and under controlled conditions. This can be achieved by placing her in a separate section of the hive or a nuc (nucleus colony) before gradually merging them with the main colony.
Aim for a 1:1 ratio between the number of workers in the introduction area and those in the new queen’s cell. Monitor the bees’ behavior closely, as they may attack the queen or her attendants if they perceive them as intruders. Keep an eye out for signs of aggression, such as increased defensive behavior around the hive entrance.
To facilitate a smooth transition, it’s also crucial to maintain a healthy and thriving colony overall. Regular inspections can help identify any underlying issues that might affect the integration process. By following these guidelines, you can minimize the risk of queen rejection and ensure successful integration of your new queen into her new home.
Conclusion: The Importance of Queen Bee Cells in Garden Hives
Now that we’ve explored the role of queen bee cells in garden hives, it’s time to summarize their importance. These specialized cells are the heartbeat of a thriving hive, responsible for maintaining genetic diversity and ensuring the colony’s survival. Without healthy queen bee cells, your hive may struggle to produce new queens, ultimately affecting its overall population growth.
To maintain the health and productivity of your garden hives, it’s essential to regularly inspect them for signs of disease or pests that could harm your queen bees. By monitoring their condition closely, you can take proactive steps to prevent problems from arising in the first place. By prioritizing the well-being of these critical cells, you’ll be rewarded with a robust and resilient hive capable of thriving season after season.
Frequently Asked Questions
How do I know if my queen bee cell is healthy versus unhealthy?
A healthy queen bee cell will have a strong, rounded shape and a smooth, even surface. Unhealthy cells may appear misshapen or have visible cracks or damage. Monitor your cells closely for signs of disease or pests, and take prompt action to address any issues.
Can I prepare my hive for queen bee cell emergence in advance?
Yes, it’s essential to ensure your hive is well-prepared for the emergence process. Make sure you have a clear flight path, adequate ventilation, and sufficient space for the new queen. Consider adding extra supers or modifying the hive configuration as needed to accommodate the emerging queen.
How long does it typically take for a new queen bee to mature?
The development time for a new queen can vary depending on factors such as climate, nutrition, and genetics. On average, it takes around 16-18 days from egg-laying to emergence, but this can range from 14-20 days.
What are some common mistakes to avoid when managing queen bee cell production?
Some common pitfalls include failing to identify and replace an aging or unproductive queen, neglecting to provide adequate nutrition and resources for the colony, and not maintaining proper hive hygiene. Regularly monitor your colony’s health and take proactive steps to address any issues.
Can I reuse old queen bee cells or do they need to be replaced?
It’s generally recommended to use new, dedicated queen bee cells for each emergence process. Reusing old cells can lead to reduced success rates and increased risks of disease transmission. Consider investing in high-quality, sterilized cells specifically designed for queen rearing.
What should I do if my newly emerged queen doesn’t seem to be taking over the hive?
If your new queen is not assuming dominance, check for any signs of injury or damage. Ensure that she has adequate resources and space within the hive. It’s also possible that an established queen may still be present; carefully monitor the colony’s behavior and consider separating the new queen if necessary.