Are you tired of throwing away those perfectly good pumpkins after Halloween? Drying pumpkins is a simple yet effective way to preserve their flavor, texture, and nutrients for longer periods. Not only does it reduce food waste, but it also allows you to enjoy your favorite pumpkin dishes year-round. But how do you dry a pumpkin in the first place? In this comprehensive guide, we’ll walk you through various methods of drying pumpkins, including solar drying, oven drying, and using a dehydrator. Whether you’re a seasoned gardener or a beginner cook, our step-by-step instructions will have you preserving pumpkins like a pro in no time.
Understanding Pumpkin Drying
When it comes to drying pumpkins, understanding the process is crucial for achieving optimal results. This section will break down the basics of pumpkin drying and what you need to know to get started successfully.
Benefits of Pumpkin Drying
Drying pumpkins offers numerous benefits that make it an attractive option for gardeners and food enthusiasts alike. One of the primary advantages is its ability to preserve pumpkins for longer periods. Dried pumpkins can be stored for several years, allowing you to enjoy them during seasons when fresh ones are scarce.
Another significant benefit of drying pumpkins is reduced storage space. Unlike fresh pumpkins that require a dedicated area for storage, dried ones take up minimal space and can be easily stacked or packaged. This makes it ideal for small gardens, indoor spaces, or areas with limited storage capacity.
Dried pumpkins also offer versatility in terms of usage. They can be rehydrated when needed and used in various recipes, such as soups, stews, and baked goods. Moreover, dried pumpkin can be powdered or made into flour, providing a convenient and shelf-stable ingredient for cooking.
By drying your own pumpkins, you not only preserve them but also save storage space and create a versatile ingredient for future use.
Types of Pumpkins Suitable for Drying
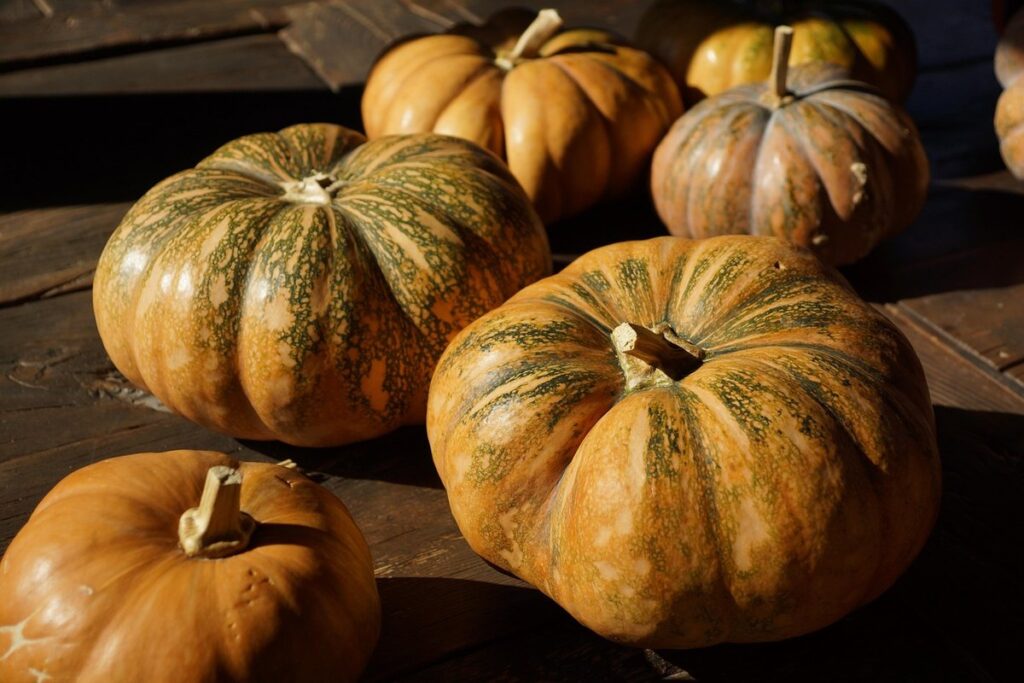
When it comes to drying pumpkins, not all varieties are created equal. Some types of pumpkins are better suited for drying than others due to their characteristics and uses. For example, sugar pumpkins and pie pumpkins are ideal for drying because they have a sweet, nutty flavor and a high water content that helps them retain their texture after drying.
Other popular varieties suitable for drying include Dickinson Field pumpkin and Long Island Cheese pumpkin. These types of pumpkins have a lower moisture content than larger pumpkins, making them easier to dry and store. When selecting pumpkins for drying, look for ones with a hard rind and no soft spots or bruises.
When choosing a variety, consider the type of dried product you want to create. For instance, sugar pumpkins are perfect for making sweet treats like pumpkin spice mix, while pie pumpkins work well for baking spices blends. Consider the flavor profile and texture you’re aiming for, and select a variety that will deliver the desired results. By choosing the right type of pumpkin, you’ll be one step closer to creating delicious dried pumpkin products at home.
Pre-Drying Preparation
Before you start drying your pumpkins, it’s essential to prepare them properly. This involves washing, cutting, and de-seeding, which are crucial steps that will impact the quality of your dried pumpkin products.
Start by washing the pumpkins thoroughly with mild soap and water to remove any dirt or debris. A soft-bristled brush can help loosen stubborn dirt particles. Rinse the pumpkins well to ensure all soap residue is removed. This step helps prevent any contaminants from affecting the drying process.
Next, cut your pumpkin into slices or smaller pieces depending on your desired end product. Be sure to use a sharp knife for clean cuts and minimal waste. It’s also essential to remove the seeds and pulp as they can cause uneven drying and create an unappealing texture in the finished product.
When de-seeding, you can either scoop out the seeds with a spoon or use a specialized tool designed specifically for pumpkin de-seeding. Be careful not to puncture the pumpkin flesh while removing the seeds, as this can lead to mold growth during drying.
Methods for Pumpkin Drying
To dry pumpkin effectively, it’s essential to explore different methods that suit your needs and available equipment. This section will walk you through tried-and-true techniques for achieving perfectly dried pumpkin.
Solar Drying
Solar drying is a simple yet effective method for preserving pumpkins. To get started, you’ll need to set up a drying rack or tray with good air circulation. This can be as basic as placing the pumpkin slices on a wire mesh tray or as elaborate as building a custom drying rack with multiple levels. The key is to ensure that there’s enough space between each slice for air to pass through and speed up the evaporation process.
As the pumpkins dry, it’s essential to monitor temperature and humidity levels. Aim for a temperature range of 60-80°F (15-27°C) and relative humidity below 60%. You can use a hygrometer to track these conditions and adjust your setup accordingly. For example, if it’s too humid outside, consider moving the drying rack under a shaded area or using a dehumidifier to speed up the process.
With proper setup and monitoring, solar drying can take anywhere from 3-7 days to complete, depending on the size of your pumpkin slices and local climate conditions. Regularly check on your pumpkins for dryness by gently lifting an edge – they should feel leathery and slightly flexible when done.
Oven Drying
Drying pumpkins in a home oven is a convenient and efficient method that requires attention to temperature control. Preheat your oven to 150-200°F (65-90°C), depending on the desired level of dryness. Slice or chop the pumpkin into thin pieces, removing any seeds or pulp. Line a baking sheet with parchment paper to prevent sticking.
Place the pumpkin slices in a single layer, ensuring they don’t overlap. Monitor the temperature and adjust as needed. You can use an oven thermometer to ensure accuracy. For optimal results, rotate the baking sheet every 30 minutes to promote even drying. This process typically takes 2-4 hours, depending on the pumpkin’s thickness.
Keep an eye out for signs of over-drying, such as wrinkles or brittleness. Remove the pumpkin from the oven when it reaches your desired level of dryness. Store dried pumpkin slices in airtight containers to maintain freshness and prevent moisture absorption. Proper temperature control is crucial to achieve the perfect balance between flavor retention and texture preservation.
Dehydrator Drying
Using a dehydrator is an efficient and convenient method for drying pumpkins. These machines use circulating hot air to evaporate moisture from the pumpkin’s cells, resulting in dried pumpkin pieces that can be stored for extended periods. One of the primary benefits of using a dehydrator is its ability to dry large quantities quickly, making it ideal for batch processing.
However, it’s essential to note that not all dehydrators are created equal. Some models may require more frequent cleaning and maintenance due to their design or materials used. When selecting a dehydrator for pumpkin drying, consider factors such as temperature control, fan speed, and tray capacity.
To dry pumpkins in a dehydrator, slice the flesh into thin pieces and place them on the trays in a single layer. Set the temperature between 135°F to 155°F (57°C to 68°C) and monitor the progress. The drying process typically takes several hours, depending on the thickness of the slices and desired level of dryness.
Tips for Successful Pumpkin Drying
Now that you’ve learned how to dry pumpkin, let’s dive into some valuable tips and tricks for ensuring your dried pumpkin turns out perfectly every time. With these expert tips, you’ll be well on your way to a successful drying process!
Monitoring Temperature and Humidity
Monitoring temperature and humidity is crucial during the pumpkin drying process to prevent spoilage and ensure even drying. The ideal temperature range for drying pumpkins is between 150°F (65°C) and 180°F (82°C), with a relative humidity of 60-70%. If the temperature exceeds 180°F, it can cause the pumpkin to become overcooked, leading to a loss of flavor and texture.
To maintain optimal conditions, you can use a thermometer to monitor the air temperature and a hygrometer to track the relative humidity. Some dehydration machines come equipped with built-in temperature and humidity controls, but if you’re using a DIY setup, consider investing in these tools. For instance, a food dehydrator with adjustable temperature settings allows for precise control over the drying process.
Keep an eye on your equipment’s performance and adjust as needed to ensure consistent results. A well-ventilated area is also essential, as it helps to dissipate excess heat and moisture. Remember that maintaining optimal temperature and humidity levels will directly impact the final quality of your dried pumpkin.
Avoiding Over-Drying or Under-Drying
As you continue the drying process, it’s crucial to monitor your pumpkin’s progress closely to avoid over-drying or under-drying. Over-drying can be just as detrimental as under-drying, resulting in a loss of nutritional value and flavor.
Signs of over-drying include a leathery texture, brittleness, and a complete loss of moisture. Your dried pumpkin may crack or break easily if it’s been over-dried. On the other hand, signs of under-drying are more subtle but just as problematic. You might notice that your dried pumpkin is still slightly soft to the touch, feels damp, or has an unpleasant odor.
Mold growth is a clear indication of under-drying and requires immediate attention. Check for any visible mold or mildew on the surface of the dried pumpkin, paying particular attention to areas with high moisture content. If you notice any signs of mold, discard the affected area or the entire batch to prevent spoilage and foodborne illnesses.
Regularly inspect your drying pumpkin for these warning signs, and adjust the drying time as needed to achieve optimal results.
Storage and Preservation
To maintain the quality and shelf life of dried pumpkin slices or pieces, proper storage is essential. A cool, dry place with low humidity is ideal for storing dried pumpkin. You can store them in airtight containers, such as glass jars or plastic bags, to prevent moisture from seeping in.
It’s also crucial to keep your stored pumpkin away from direct sunlight and heat sources. Direct sunlight can cause the dried pumpkin to become stale or develop off-flavors, while heat can promote the growth of mold and bacteria. A cupboard or pantry with a consistent temperature between 50°F and 70°F (10°C and 21°C) is an ideal storage location.
Regularly check on your stored pumpkin for any signs of spoilage, such as mold, mildew, or an off smell. If you notice any issues, it’s best to use the affected pieces immediately or discard them altogether. By following these simple storage tips, you can enjoy your dried pumpkin for several months and use it in various recipes throughout the year.
Safety Precautions When Drying Pumpkins
Before you start drying your pumpkins, it’s essential to take a few critical steps to ensure your safety and the quality of your dried gourds. Follow these guidelines carefully for optimal results.
Handling Equipment Safely
When working with equipment such as knives and dehydrators during the pumpkin drying process, it’s essential to handle them with care. Knives can be sharp enough to cause serious injury if not used correctly, and dehydrators can pose a risk of burns or electrical shock.
To minimize these risks, make sure to always use a sharp knife for cutting pumpkins and carefully store the blade when not in use. Keep your fingers curled under and away from the blade while handling it, and never cut towards yourself. It’s also crucial to clean and sanitize knives regularly to prevent cross-contamination of bacteria.
When operating dehydrators, ensure you follow the manufacturer’s instructions for temperature settings and drying times. Be cautious when loading and unloading trays, as they can be hot and may cause burns if not handled carefully. Regularly inspect your equipment for any signs of wear or damage, and replace parts as needed to prevent malfunctions that could lead to accidents. By taking these precautions seriously, you can ensure a safe and successful pumpkin drying experience.
Food Safety Considerations
When it comes to drying pumpkins, food safety should be top of mind. Proper cleaning and storage practices are crucial to prevent contamination and ensure your dried pumpkin products remain safe for consumption.
Start by thoroughly washing the pumpkin with soap and water before cutting or slicing it. This helps remove any dirt, bacteria, or other contaminants that may have accumulated on the surface. Next, sanitize any tools or equipment you’ll be using to dry or process the pumpkin. You can do this by soaking them in a mixture of 1 tablespoon of unscented chlorine bleach per gallon of water for at least 10 minutes.
Proper storage is also essential. Dried pumpkins should be stored in airtight containers to prevent moisture from seeping in and causing mold or mildew. Keep containers away from direct sunlight, heat sources, and other foods that may contaminate them. Be sure to label containers with the date they were dried and what’s inside, so you can easily track how long they’ve been stored.
When drying pumpkins at home, it’s also important to follow safe handling practices. Use gloves when handling raw pumpkin to prevent the transfer of bacteria from your skin to the fruit. Avoid cross-contaminating other foods or surfaces with pumpkin juice or scraps. By following these guidelines, you can enjoy dried pumpkin products that are not only delicious but also safe to eat.
Allergic Reactions and Precautions
When working with dried pumpkin, it’s essential to be aware of potential allergic reactions and take necessary precautions when consuming it. Some individuals may experience an allergic reaction to dried pumpkin due to its high content of polyphenols and other compounds that can cause sensitivity.
If you’re new to consuming dried pumpkin or have a history of food allergies, start by introducing small amounts into your diet to monitor for any adverse reactions. Common symptoms of an allergy to dried pumpkin include hives, itching, swelling, stomach cramps, diarrhea, and difficulty breathing. In severe cases, anaphylaxis can occur.
To minimize the risk of allergic reactions, ensure you’re purchasing high-quality, organic dried pumpkin from reputable sources. Store your dried pumpkin in a cool, dry place, away from direct sunlight to maintain its nutritional value and prevent contamination. Before consuming dried pumpkin, always check the packaging for any signs of tampering or recall notices.
When handling and preparing dried pumpkin, be cautious not to cross-contaminate with other foods that may trigger allergic reactions.
Conclusion: Enjoy Your Dried Pumpkin Treats
Now that you’ve mastered the art of pumpkin drying, it’s time to enjoy the fruits of your labor and savor the delicious treats you’ve created. Here are some final tips for getting the most out of your dried pumpkin goodies.
Ideas for Using Dried Pumpkins
Now that you have dried pumpkin slices or pieces, it’s time to get creative with them! One of the best parts about drying pumpkins is that they can be used in a variety of recipes, from sweet treats to savory dishes. Here are some ideas to get you started:
You can use dried pumpkin as a topping for oatmeal or yogurt, adding a boost of flavor and nutrition to your breakfast routine. Simply sprinkle it on top of your favorite bowl and enjoy! Dried pumpkin is also a great addition to homemade granola or energy balls, providing a natural sweetener and chewy texture.
In baked goods, dried pumpkin can add moisture and depth to muffins, cakes, and breads. Try adding it to your favorite recipe for an extra special touch. You can also use it as a filling in ravioli or gnocchi, making for a delicious and unique pasta dish.
When cooking, dried pumpkin is a great substitute for canned pumpkin puree. Simply rehydrate it by soaking it in water or broth, then blend it into your favorite recipes. Get creative and experiment with different combinations – the possibilities are endless!
Encouraging Readers to Try It at Home
Now that you’ve mastered the art of pumpkin drying, it’s time to put your new skills into practice. Encourage yourself and others to give it a try at home. Not only is dried pumpkin a delicious and nutritious snack, but it’s also a great way to preserve this seasonal ingredient for year-round enjoyment.
To get started, you’ll need some fresh pumpkins, a dehydrator or your oven set on the lowest temperature setting, and a clean work surface. Begin by washing and cutting the pumpkin into thin slices, removing any seeds and pulp in the process. Next, spread the slices out evenly on your trays or baking sheets, making sure not to overlap them.
For optimal drying results, maintain a consistent temperature between 135°F to 155°F (57°C to 68°C). Dehydration times will vary depending on the thickness of your pumpkin slices and the moisture level in your environment. As a general rule of thumb, it may take anywhere from 6-12 hours for your dried pumpkin to be fully dry.
Once you’ve successfully dried your first batch, experiment with different seasonings and recipes to find your favorite ways to enjoy this versatile ingredient. Happy drying!
Frequently Asked Questions
Can I dry any type of pumpkin, or are some varieties better suited for drying?
Some types of pumpkins, such as ‘Sugar Pie’ and ‘Baby Boo’, have a higher water content than others. These varieties tend to work best for drying because they retain their texture and flavor after dehydration. When selecting a pumpkin for drying, choose ones with less moisture and a firmer skin.
How long does it take to dry a pumpkin using the methods discussed in the article?
The time required to dry a pumpkin can vary greatly depending on the method used. Solar drying typically takes 2-4 weeks, while oven drying may only require 1-3 hours. Using a dehydrator is often the quickest option, with times ranging from 6-12 hours.
Can I reuse a dehydrator or oven for other types of food after drying pumpkins?
Yes, both dehydrators and ovens can be reused for various types of food after drying pumpkins. However, it’s essential to properly clean and sanitize the equipment before switching to different foods to avoid contamination and ensure safe consumption.
What is the best way to store dried pumpkin to preserve its flavor and texture?
Dried pumpkin should be stored in airtight containers in a cool, dry place to maintain its quality. The ideal storage conditions include temperatures between 60°F-70°F (15°C-21°C) and humidity levels below 50%. Avoid storing dried pumpkin near strong-smelling foods or chemicals.
Can I use a food dehydrator with a temperature control if it doesn’t have a specific setting for drying pumpkins?
While not ideal, you can still dry pumpkins using a food dehydrator without a dedicated setting. Monitor the temperature closely and adjust as needed to prevent over-drying. A good starting point is around 135°F (57°C), but be prepared to make adjustments based on your equipment’s performance.