Are you ready to unlock the full potential of your prune cherry tree? Pruning is an essential part of keeping these beautiful trees healthy and productive, but many gardeners struggle with knowing where to start. With so much to consider, from growth cycles to timing and safety precautions, it’s no wonder pruning can feel like a daunting task.
In this comprehensive guide, we’ll walk you through everything you need to know about pruning your cherry tree effectively. We’ll cover the basics of when and how to prune, as well as more advanced techniques for promoting healthy growth and maximizing fruit production. Whether you’re a seasoned gardener or just starting out, our expert advice will help you enhance your tree’s health and yield delicious harvests all season long. Let’s dive in!
Understanding Cherry Tree Growth Cycles
To properly prune your cherry tree, it’s essential to understand its growth cycle and how pruning fits into that process. Let’s dive into the key stages of a cherry tree’s life.
Annual Dormancy and Growth Phases
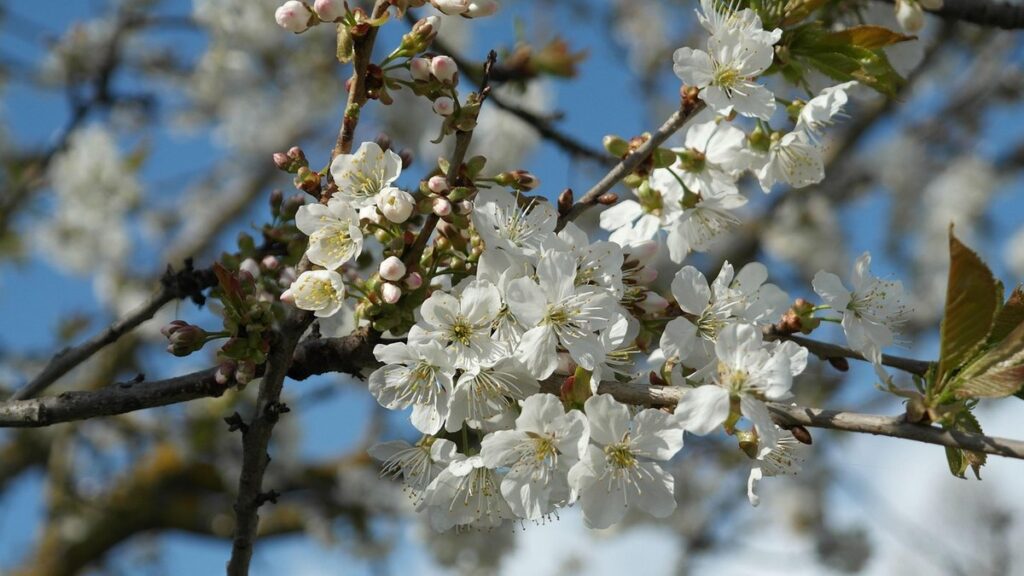
Cherry trees follow a predictable growth cycle that’s essential to understand for optimal pruning. Each year, they go through distinct phases of dormancy and active growth.
During the winter months (December to February), cherry trees are dormant, with their energy focused on stored reserves rather than new growth. This period is crucial for the tree’s overall health, as it allows it to conserve water and nutrients. Pruning during this time can be challenging due to the tree’s rigidity, making it best to prune immediately after dormancy.
As temperatures rise in late winter to early spring (March to April), trees begin their active growth phase. Buds swell, and new leaves emerge, signaling the start of a new growing season. This period is ideal for pruning, as the tree is more flexible, and cuts can be made with ease. Aim to prune your cherry tree during this time to promote healthy growth and encourage fruiting.
In contrast, summer months (May to July) see the tree in full bloom, with flowers and foliage thriving. While it may seem counterintuitive to prune during this active phase, strategically timed pruning can actually boost fruit production and prevent disease.
By understanding these growth cycles, you’ll be better equipped to prune your cherry tree effectively, promoting a balanced and productive canopy.
Identifying Fruit-Producing Wood
Identifying fruit-producing wood on cherry trees is crucial for making informed pruning decisions. As a cherry tree grower, you want to preserve the productive branches while removing any dead, diseased, or damaged ones. To do this effectively, you need to be able to identify which branches are responsible for producing cherries.
Start by looking for branches with a history of fruiting. These will typically have a more developed structure and may even exhibit signs of previous cherry production such as scars from last year’s fruit. When inspecting the tree, look for branches that are slightly thicker than others and have a more open, vase-like shape. This is often indicative of a well-established root system and indicates that the branch has had time to develop its fruiting capabilities.
When in doubt, remove the less vigorous or unproductive branches first, as these can be easily replaced by new growth from the remaining fruit-producing wood. By identifying which branches are producing cherries, you’ll be able to make targeted pruning decisions that will help maintain your cherry tree’s overall health and productivity.
Choosing the Right Pruning Tools
Choosing the right pruning tools is crucial for effectively and safely pruning your cherry tree. In this next step, we’ll explore the essential equipment you need to get started.
Types of Pruners and Loppers
When it comes to pruning cherry trees, having the right tools for the job is essential. Pruners and loppers are two of the most critical tools you’ll need to tackle this task effectively.
There are several types of pruners available, including:
* Bypass pruners: These are ideal for making clean cuts and are suitable for pruning small branches up to 1 inch in diameter.
* Anvil pruners: These have a flat blade that crushes the branch as you cut it, making them perfect for cutting thicker branches.
* Loppers with curved blades: These long-handled loppers allow you to reach high branches without using a ladder and are ideal for pruning larger branches up to 2 inches in diameter.
Loppers come in various lengths, from 12 to 30 inches, so choose one that feels comfortable for your height. Additionally, consider the material of the handles – aluminum or fiberglass options are often preferred for their durability and lightweight feel.
When selecting loppers, make sure they have a sharp blade and a sturdy locking mechanism to ensure smooth operation.
Tool Maintenance and Sanitization
Proper maintenance and sanitization of pruning tools are crucial when it comes to pruning cherry trees. This may seem like a minor detail, but failing to keep your tools clean can lead to the spread of diseases such as fire blight and bacterial canker. These diseases can cause significant damage to your tree, stunting its growth and even killing it.
To prevent this from happening, make sure to wash your pruning tools after each use with soap and water. This is especially important if you’re working on multiple trees or dealing with diseased branches. You should also disinfect your tools regularly using a solution of 1 part bleach to 10 parts water. This will help kill any bacteria that may be present.
Additionally, keep your pruning tools separate from your gardening gloves and other equipment to avoid cross-contamination. If you notice any signs of damage or wear on your tools, replace them promptly. With proper tool maintenance and sanitization, you can ensure a healthy and thriving cherry tree for years to come.
Basic Pruning Techniques
To prune cherry trees effectively, you need to know the basic techniques for cutting and shaping branches, which will be covered in this next part of our guide.
Removing Dead, Diseased, or Damaged Wood
When removing dead, diseased, or damaged branches from your cherry tree, it’s essential to prioritize safety and effectiveness. Start by wearing protective gear such as gloves and safety glasses to prevent injury from sharp branches or debris.
Begin by identifying the affected branches using visual inspection and gentle touch. Check for signs of decay, cracks, or splits in the wood, which can be indicative of disease or damage. Cut these branches off at the point where they meet a healthy branch, making sure not to leave any stubs that could become entry points for pests or diseases.
For larger branches, use loppers or pruning saws specifically designed for heavy-duty cutting. For smaller branches and twigs, you can use hand pruners or bypass pruners. Be cautious when working with electrical equipment near water sources or in wet conditions to avoid accidents.
Make clean cuts just above a growth node – the point on the branch where new growth occurs – to promote healing and minimize the risk of disease entry.
Reducing Branch Length and Shaping the Tree
Reducing branch length and shaping the tree is crucial for optimal fruit production and structural integrity. When selecting branches to reduce, look for those that are growing straight out from the trunk without crossing or rubbing against other branches. Remove these water sprouts as soon as possible, as they can weaken the tree’s structure and divert energy away from fruiting branches.
To shorten branch length, cut back to a growth node – where a leaf meets the stem – using clean, sharp pruning tools. Cut at an angle, leaving about 1/4 inch of stem attached to the bud. This will help the tree heal quickly and reduce the risk of disease.
When shaping the tree, consider its overall structure. Aim for a balanced canopy with branches that slope outward from the center. Prune back any overly vigorous or dense growth to create space between branches and allow air circulation. By regularly pruning your cherry tree, you’ll promote healthy growth, increase fruit production, and maintain its structural integrity.
Advanced Pruning Techniques
When you’re comfortable with the basics of cherry tree pruning, it’s time to take your skills to the next level by mastering more advanced techniques for optimal growth and bloom.
Thinning and Opening Up the Canopy
Thinning and opening up the canopy is an essential part of advanced pruning techniques for cherry trees. As cherry trees mature, their canopies naturally become denser, which can lead to reduced air circulation and sunlight penetration. This can cause a range of problems, including increased susceptibility to disease, reduced fruit production, and even branch dieback.
To address these issues, thinning and opening up the canopy involves removing select branches to allow more light to penetrate the tree. When selecting branches to remove, look for those that are growing inward or crossing over other branches. Remove no more than one-third of the existing canopy in a single year to avoid shocking the tree. This will help maintain its overall health and promote even growth.
For example, if you have a mature cherry tree with a dense canopy, consider thinning out about 20-30% of the smaller branches in the center of the tree. This will allow more sunlight to reach the inner parts of the tree and improve air circulation. Regularly thinning and opening up the canopy will also help promote fruiting by allowing light to penetrate to the tree’s fruiting spurs.
Renovation Pruning and Central Leader Selection
When it comes to renovating an old or neglected cherry tree, pruning plays a crucial role. Renovation pruning techniques are designed to restore the tree’s natural shape and promote healthy growth. This process involves cutting back branches to about one-third of their length, allowing new shoots to emerge from the stubs.
The goal is to create a balanced structure that allows sunlight to penetrate the canopy evenly. To achieve this, select 2-3 strong, upright branches as potential central leaders. These should be roughly equal in size and spaced at least 12 inches apart. Remove any weak or crossing branches, as they can cause damage to the tree.
Look for evidence of bud eyes – small swellings on the stem where buds will form. Choose a leader with well-placed bud eyes and a strong, straight growth habit. By selecting a central leader wisely, you’ll set your cherry tree up for success and ensure optimal fruit production in the years to come.
Timing and Scheduling Prune Sessions
When pruning cherry trees, it’s essential to plan your sessions carefully to ensure you don’t overload yourself with work on a single day. This section will walk you through the best timing and scheduling strategies for successful prune sessions.
Understanding Climate and Seasonal Conditions
When planning prune sessions for your cherry tree, it’s essential to consider climate and seasonal conditions. These factors can significantly impact the effectiveness of pruning and the overall health of your tree. In regions with hot summers, for example, pruning during the growing season can stimulate new growth that may not have time to harden off before winter, making it more susceptible to damage.
In areas with mild winters, cherry trees may not go dormant, and pruning at the wrong time can encourage excessive vegetative growth. To avoid these issues, prune your cherry tree in late winter or early spring, when the tree is still dormant. This allows you to remove dead, diseased, or damaged branches while minimizing the risk of new growth that won’t have time to harden off.
Keep an eye on weather forecasts and adjust your pruning schedule accordingly. In regions with cold winters, it’s best to prune in late winter or early spring when the threat of frost has passed.
Creating a Maintenance Schedule
Creating a maintenance schedule for your cherry tree is crucial to ensure its optimal growth and health. The frequency and timing of pruning sessions can make all the difference in maintaining the tree’s structure, promoting healthy growth, and preventing disease.
For young cherry trees (0-2 years old), it’s recommended to prune them annually during their dormant season, typically between February and March. This helps develop a strong root system and encourages an upright growth habit. As the tree matures, prune it every 2-3 years, focusing on maintaining its shape and promoting fruiting branches.
In general, cherry trees require pruning in late winter or early spring when they’re still dormant. Prune no more than one-third of the tree’s canopy to avoid stressing the tree. Be sure to inspect your tree regularly throughout the growing season for signs of disease, pests, or overgrowth, and adjust your maintenance schedule accordingly.
By following a regular pruning schedule, you’ll be able to enjoy a healthy, productive cherry tree that provides an abundance of delicious fruit for years to come.
Safety Precautions and Best Practices
Before pruning your cherry tree, make sure to wear protective gear and follow essential safety guidelines outlined below to avoid accidents. This will ensure a safe and successful pruning experience for you.
Personal Protective Equipment (PPE) and Precautions
When it comes to pruning cherry trees, safety should always be your top priority. To avoid injury, you’ll need to don some essential personal protective equipment (PPE). This includes a pair of sturdy, long-sleeved gloves that will protect your hands from thorns and branches.
Next up is a good pair of safety glasses or goggles with a wrap-around design to shield your eyes from debris. You’ll also want to wear closed-toe shoes or boots with slip-resistant soles to prevent accidents on wet or slippery surfaces. A dust mask or respirator can be useful if you’re working in areas with high levels of pollen or dust.
When handling pruning tools, keep a safe distance between yourself and others to avoid any accidental knocks or slips. Keep your work area well-lit and clear of clutter to maintain good visibility. Regularly inspect your tools for damage or wear, and consider using a tool sharpener to prevent accidents caused by dull blades.
Ensuring Compliance with Regulations and Ordinances
When pruning cherry trees, it’s essential to consider local regulations and ordinances that may impact maintenance. These rules can vary significantly depending on your location, so it’s crucial to familiarize yourself with the specific requirements in your area.
Check with your homeowner association (HOA) or local government to determine if there are any restrictions on pruning schedules, techniques, or plant species allowed. Some cities have ordinances that dictate when and how trees should be pruned, while others may specify certain types of cherry trees that can be planted.
For example, some areas may require you to prune your cherry tree during a specific timeframe to avoid disrupting wildlife habitats or protecting pollinators. Others might limit the height or shape of your tree based on property line restrictions or nearby infrastructure.
To ensure compliance, start by researching local regulations and consulting with your HOA or city’s department of public works. Keep detailed records of any pruning activities, including dates, techniques used, and results. This documentation can help you demonstrate adherence to regulatory requirements and make necessary adjustments to avoid potential fines or penalties.
Frequently Asked Questions
What if I’m unsure whether my cherry tree is actually dormant or active during the pruning season?
Check for buds on the branches, typically between February and March. Dormant trees have closed or slightly opened buds, while active trees have fully opened buds with visible green tissue.
How often should I maintain my pruning tools to ensure they remain effective and safe?
Regularly clean your pruning tools after each use to prevent the spread of diseases. Sharpen blades every 1-2 months, and consider sanitizing them between uses for optimal performance.
Can I prune my cherry tree during periods of extreme weather conditions, such as heavy rain or intense heat?
Prune when conditions are mild, avoiding heavy rain or extremely high temperatures (above 85°F/30°C) to prevent injury or damage. Pruning in wet or hot conditions can lead to disease spread and poor wound closure.
What if I accidentally cut a branch during pruning that’s still producing fruit? Should I remove the entire section?
If you inadvertently cut a fruitful branch, yes, it’s best to remove the entire section to maintain your tree’s overall health and productivity. This will also prevent further spreading of any potential diseases.
How do I know if my cherry tree requires renovation pruning, and what are its benefits for long-term health and production?
Renovation pruning typically involves cutting back a mature or neglected tree to about 1/3 of its height to promote new growth and maximize fruiting potential. This technique can help restore balance to the tree’s structure and stimulate renewed vigor in older trees.