Are you a backyard gardener struggling to get the most out of your plum tree? Pruning is an essential part of maintaining healthy growth and promoting optimal fruit production. But where do you start, especially when it comes to a complex task like pruning a plum tree diagram?
Pruning may seem intimidating, but with the right guidance, anyone can become proficient in this skill. In this article, we’ll break down the process into manageable steps, covering preparation, essential techniques, and aftercare tips to ensure your plum tree thrives. Whether you’re a seasoned gardener or just starting out, our comprehensive guide will walk you through each stage of pruning, from assessing the tree’s structure to enjoying a bountiful harvest.
Understanding Your Plum Tree’s Needs
To prune a plum tree effectively, you need to understand its specific needs and requirements. This includes knowing the best time to prune, and what tools are essential for the job.
Identifying the Right Time to Prune
When it comes to pruning a plum tree, timing is everything. Pruning at the right time can mean the difference between promoting healthy growth and inadvertently causing harm to your tree.
Climate plays a significant role in determining when to prune a plum tree. In regions with hot summers, late winter or early spring is an ideal time for pruning, as it allows the tree to heal quickly before new growth begins. Conversely, in cooler climates, pruning can be done later in the season, typically after fruiting has occurred.
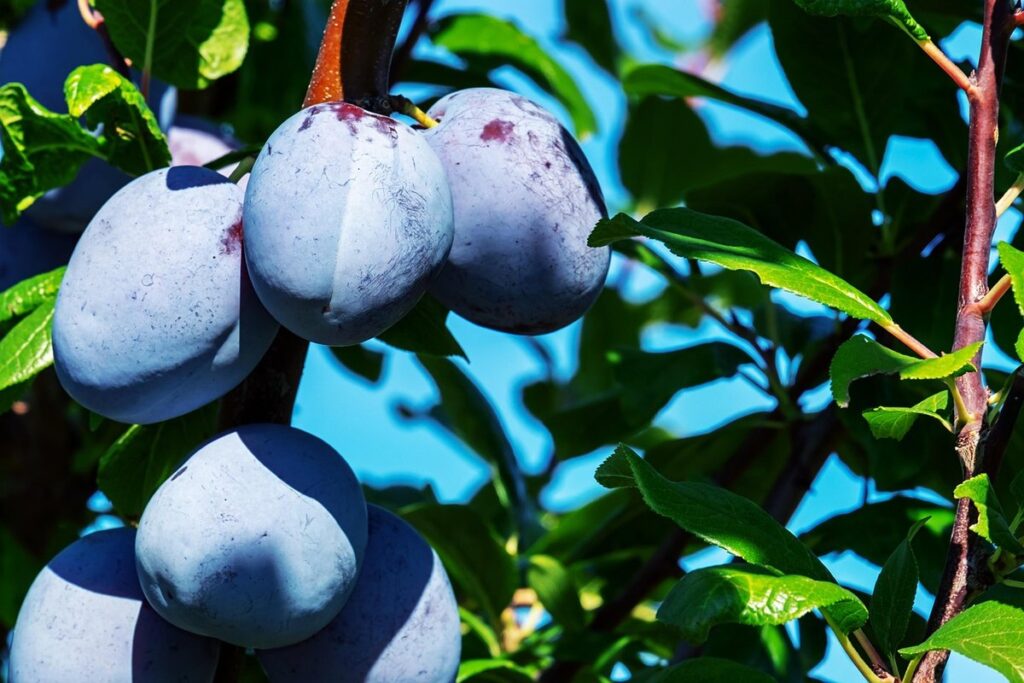
Tree age is also a crucial factor to consider when deciding on the best time to prune. Young plum trees (less than 2 years old) should not be pruned heavily, as this can stress the tree and reduce its ability to produce fruit. Mature trees, on the other hand, require regular pruning to maintain their shape, promote fruiting, and remove diseased or damaged wood.
In regions with frost-prone winters, it’s essential to prune plum trees before the onset of cold weather to prevent damage from ice and snow. In areas with mild winters, pruning can be done year-round, but it’s still vital to consider the tree’s specific needs and climate conditions to avoid causing unnecessary stress.
Tools and Equipment Required for Pruning
When it comes to pruning your plum tree, having the right tools and equipment is essential for safety and effectiveness. As you prepare to tackle this task, make sure you have the following must-haves on hand:
First and foremost, you’ll need a pair of high-quality loppers or pruning shears. These will come in handy for reaching branches that are just out of arm’s reach without having to use a ladder. Loppers are also ideal for thicker branches, up to about 2-3 inches in diameter.
For more stubborn branches or those with knots, you’ll need a pruning saw. This is especially important when dealing with older trees or those with significant growth spurts. A good pruning saw will make quick work of even the toughest cuts.
Other essential items include a pair of sturdy gloves to protect your hands from thorns and sap, as well as safety gear like goggles and a dust mask. These may seem like overkill, but trust us – they’re worth it! When working with sharp tools or dealing with falling debris, accidents can happen quickly.
Remember to also keep a first aid kit on hand, just in case. With these tools at your disposal, you’ll be well-equipped to tackle even the most challenging pruning tasks.
Preparation and Planning Before You Start Pruning
Before you start pruning your plum tree, take a few minutes to prepare and plan carefully. This will ensure that your tree receives the best possible care for optimal health and fruit production.
Assessing the Tree’s Structure and Health
Before you start pruning your plum tree, it’s essential to inspect its structure and health to identify any potential issues that may require attention. Start by walking around the tree and looking for signs of disease or pests, such as yellowing leaves, black spots, or aphids on the branches.
Check for any structural issues like cracked trunks, split limbs, or uneven growth patterns. These problems can weaken the tree’s overall health and make it more susceptible to damage during pruning. For example, a tree with a severely cracked trunk may require support or even removal if the crack is extensive.
Look for signs of nutrient deficiencies, such as pale leaves or stunted growth, which may indicate a need for fertilization. Also, inspect the soil around the base of the tree for any signs of waterlogging or nutrient buildup. A healthy plum tree should have a balanced root system and a well-draining soil environment.
Take note of any dead, diseased, or damaged branches that need to be removed during pruning to prevent the spread of disease or encourage new growth.
Removing Dead, Diseased, or Damaged Branches
When it comes to pruning a plum tree, removing dead, diseased, or damaged branches is an essential step before you start shaping its shape. This process not only enhances the overall appearance of the tree but also promotes healthy growth and prevents further damage.
Begin by identifying any branches that are lifeless, rotting, or severely cracked. These branches can be a haven for pests and diseases, so it’s crucial to remove them as soon as possible. Use pruning shears or loppers to make clean cuts at a 45-degree angle just above a growth node (the small swelling on the stem from which leaves or branches emerge). This will help the tree heal quickly and minimize the risk of disease spread.
Avoid making nicks or tearing the bark, as this can leave the tree vulnerable to infections. Instead, use a sharp pruning tool and make precise cuts. For more extensive damage, consider consulting an arborist for guidance on how to safely remove large branches. By removing dead, diseased, or damaged branches, you’ll create a healthier environment for your plum tree to thrive in.
Techniques for Pruning Plum Trees
When pruning a plum tree, it’s essential to remove weak and damaged branches to promote healthy growth and encourage fruiting. This section will walk you through the best techniques to achieve just that.
Reducing Tree Height and Width
When reducing tree height and width, it’s essential to prioritize maintaining the overall balance of the plum tree. This involves carefully considering which branches to remove, as pruning can significantly impact fruiting potential. When selecting branches for removal, look for those that are crossing or rubbing against each other, as these can cause damage and create an entry point for disease.
For larger trees, reducing height may require more aggressive pruning, but it’s crucial to avoid over-pruning, which can lead to sunscald and stress on the tree. To reduce width, remove lateral branches from the bottom of the tree, working your way up towards the top. When cutting branches, always cut at a 45-degree angle, about one-quarter inch above a growth node.
When pruning fruiting branches, it’s best to prune them in late winter or early spring, before new growth begins. This will allow you to remove any diseased or damaged wood without compromising the upcoming harvest. By carefully selecting which branches to remove and following proper pruning techniques, you can maintain a healthy, balanced plum tree that produces an abundance of fruit.
Shaping the Canopy and Promoting Air Circulation
When shaping the canopy of your plum tree, it’s essential to strike a balance between promoting air circulation and maintaining a healthy, fruit-bearing structure. One way to achieve this is by thinning branches, which helps reduce disease susceptibility and enhances fruit quality.
To begin, identify any crossing or rubbing branches, which can create an environment conducive to disease development. Remove these branches completely, making clean cuts just above a growth node using sharp, sterile pruning tools. This will not only improve air circulation but also allow more sunlight to reach the remaining branches and fruit.
Next, focus on opening up the center of the tree by removing select interior branches. This will promote air movement through the canopy, reducing humidity and the risk of fungal diseases. Aim for a balanced, layered structure with a clear leader and well-spaced lateral branches. By doing so, you’ll create an environment that fosters healthy growth, increases fruit production, and reduces the need for chemical interventions.
Advanced Pruning Techniques
Once you’ve mastered basic pruning techniques, it’s time to take your skills to the next level by learning how to tackle more complex tasks with confidence. This is where advanced pruning techniques come into play.
Top-Working Plum Trees
When it comes to top-working plum trees, you’re looking to transform the tree’s growth pattern by replacing its existing branches with new ones. This can be achieved through grafting and splicing methods.
Grafting involves joining a piece of stem (scion) from one tree onto the root system of another (rootstock). For plum trees, this is typically done in late winter or early spring when the tree is dormant. You’ll need to select healthy scions from a variety of plum tree with desirable traits such as disease resistance, fruit quality, or earlier ripening.
Splicing, on the other hand, involves joining two branches together to create a new stem. This method can be used to combine different varieties of plum trees and promote diversity in your orchard.
Both grafting and splicing methods offer several benefits, including improved tree vigor, increased yields, and better disease resistance. They also allow you to control the fruit’s quality and flavor by selecting the best scions for grafting.
Espalier Training
Espalier training is an excellent technique for plum trees, allowing you to maximize space and control the tree’s growth. To begin with espalier pruning, you’ll need a few essential tools: a sharp saw or loppers, pruners, and a sturdy trellis system. For small spaces or restricted root systems, espalier pruning is particularly beneficial as it allows for efficient fruit production.
To train your plum tree, start by selecting two to three main branches, ideally around 12-18 inches from the ground. Tie these branches to the trellis using soft material like twine or wire, ensuring they’re secure and evenly spaced. As new growth appears, continue to prune and train the branches, removing any weak or crossing stems. This will encourage a balanced structure and promote air circulation around the fruiting wood.
Regular espalier pruning helps maintain a compact shape, while also promoting healthy fruit production. By training your plum tree in this manner, you’ll enjoy more efficient use of space and an increased yield. Be patient, as espalier pruning requires dedication and attention to detail over time. With proper care and maintenance, your trained plum tree will thrive, providing bountiful harvests for years to come.
Aftercare and Maintenance
Now that you’ve pruned your plum tree, it’s essential to focus on aftercare techniques to keep your tree healthy and thriving throughout the growing season. Proper maintenance will also help prevent pests and diseases from taking hold.
Watering and Fertilizing Pruned Trees
Now that you’ve pruned your plum tree, it’s time to focus on its aftercare and maintenance. Proper watering and fertilization are crucial for the tree’s health and productivity.
Watering your tree is essential during the first growing season after pruning. Water thoroughly once or twice a week, depending on weather conditions. Avoid overwatering, which can lead to root rot and other issues. Instead, check the soil moisture by inserting your finger into the soil up to the knuckle. If it feels dry, it’s time to water.
Fertilization is also vital for your plum tree’s health. Apply a balanced fertilizer (10-10-10 NPK) in early spring, following the manufacturer’s instructions. You can also add a fruit tree-specific fertilizer for optimal results. Mulching around the base of your tree will help retain moisture and suppress weeds.
A 2-3 inch layer of organic mulch, such as wood chips or bark, is sufficient. Keep it a few inches away from the trunk to prevent rotting. By following these watering and fertilization tips, you’ll ensure your plum tree grows strong and healthy. Regular maintenance will also help promote fruiting and overall tree longevity.
Monitoring for Pests and Diseases
As you’ve just pruned your plum tree, it’s essential to keep a close eye on its health. Ongoing monitoring for pests and diseases is crucial during the growing season to prevent infestations or infections that can harm your tree.
Start by regularly inspecting your tree, looking out for signs of pests like aphids, whiteflies, or spider mites. Check for tiny eggs, dark spots, or sticky residue on leaves and branches. Common diseases in plum trees include powdery mildew, black knot, and bacterial leaf spot. Be aware of yellowing leaves, black spots, or white powder on leaves.
If you notice any issues, act quickly to implement control measures. For example, if you spot aphids, spray your tree with a mixture of soap and water. To prevent fungal diseases, ensure good air circulation around the tree and remove any infected branches. Keep an eye out for pests like codling moths or plum sawflies, which can cause significant damage.
Remember to monitor your tree regularly, ideally every 7-10 days during the growing season. This will allow you to catch potential problems early on and take corrective action before they spread. By staying vigilant, you’ll be able to protect your plum tree from pests and diseases, ensuring it remains healthy and productive.
Common Mistakes to Avoid When Pruning Plum Trees
When pruning your plum tree, it’s essential to steer clear of common mistakes that can harm its health and even lead to fruiting failures. Let’s explore these pitfalls together!
Incorrect Cutting Techniques
When pruning a plum tree, it’s essential to avoid using incorrect cutting techniques that can cause harm to the tree. One common mistake is topping, which involves cutting off the top of the tree to reduce its height. This method can lead to weak and awkward growth, making the tree more susceptible to disease and pests.
Another error is cutting too many branches at once, which can shock the tree and slow down its recovery process. This should be avoided by pruning no more than 25% of the tree’s canopy in a single year. Cutting too close to the trunk or collar can also cause damage to the tree, so it’s crucial to maintain a 12-inch margin between cuts.
Proper pruning techniques involve making clean cuts just above a bud or lateral branch, at a 45-degree angle. This helps promote healthy growth and encourages new shoots to emerge from the cut area. By being mindful of these common mistakes, you can prune your plum tree effectively and safely.
Over-Pruning and Under-Pruning
When it comes to pruning plum trees, two common mistakes can have serious consequences for the tree’s health and productivity: over-pruning and under-pruning. Both of these approaches can lead to a range of problems that can be difficult to recover from.
Over-pruning occurs when too much of the tree is removed in one go. This can cause stress to the tree, making it more vulnerable to disease and pests. In extreme cases, over-pruning can even kill the tree. Plum trees produce fruit on last year’s wood, so removing too much of this growth can reduce or eliminate fruit production for that season.
Under-pruning, on the other hand, is a lack of pruning altogether. This can lead to an overgrown and tangled mass of branches, making it difficult for light to reach the fruiting areas and reducing air circulation around the tree. Without regular pruning, plum trees are more likely to become diseased or infested with pests.
To achieve a balanced prune and avoid these common mistakes, it’s essential to remove no more than 25% of the tree’s growth each year. This allows the tree to recover and maintain its health while still promoting fruiting. Prune in sections, working from the bottom up to maintain balance and encourage new growth. Regular pruning will also help shape the tree into a strong, productive structure that requires less maintenance over time.
Frequently Asked Questions
Can I prune my plum tree if it’s still young (less than 2 years old)?
No, it’s best to wait until your plum tree is at least 2-3 years old before pruning. Young trees require protection from stress caused by pruning, which can hinder their growth and development.
How often should I inspect the tree after pruning for signs of disease or pests?
Regularly inspecting your pruned plum tree is crucial in monitoring its health. Check the tree every 1-2 weeks during the growing season (spring-fall) and at least once a month during the dormant season. Look out for signs like canker, cracks, or holes, as well as presence of insects.
How do I know if I’ve over-pruned my plum tree?
Over-pruning occurs when more than one-third of the tree’s foliage is removed in a single pruning session. To avoid this mistake, consider pruning smaller branches first and work your way up to larger ones. Prune only what’s necessary for maintaining shape or removing dead/diseased wood.
What should I do if I accidentally cut into a hidden wire or cable while pruning my plum tree?
If you accidentally damage any wires or cables during pruning, stop immediately and contact the relevant authorities (e.g., electric company) to report the incident. Then, carefully remove any damaged branches without causing further harm.
Can I prune my plum tree in the same season as planting it?
No, it’s not recommended to prune a newly planted plum tree within the first growing season after planting. This allows the tree time to establish its root system and become more resilient to pruning stress. Wait until the following year before pruning your young plum tree.