If you’re the proud owner of a pear espalier, you know how beautiful and productive they can be. However, maintaining their shape and promoting healthy growth requires regular pruning. Pruning is an essential part of pear tree care, but it can be intimidating if you’re not sure where to start. In this article, we’ll take the mystery out of pruning your pear espalier by breaking down the key steps in a clear and concise way. We’ll cover the basics of understanding the pruning cycle, choosing the right tools for the job, and avoiding common mistakes that can harm your tree’s health. From thinning and reducing branches to managing pests and diseases, we’ve got you covered with expert tips and advice on how to prune your pear espalier like a pro.
Choosing the Right Time to Prune
When pruning your pear espalier, timing is everything. In this crucial step, we’ll discuss how to determine the perfect moment to prune your tree for optimal growth and fruit production.
Understanding the Pruning Cycle
The pruning cycle for pear espaliers is an ongoing process that involves several stages to maintain their health and promote productivity. At its core, pruning is about removing unnecessary growth to encourage fruiting branches and create a balanced structure.
During the dormant season, typically from late winter to early spring, is when most pruning takes place. This is because it allows for the removal of dead or damaged wood without causing stress to the tree. In contrast, summer pruning can stimulate new growth, which may not be desirable during the heat of summer.
As a general rule of thumb, pear espaliers require annual pruning to maintain their shape and promote fruiting. Prune in late winter or early spring to remove any dead, diseased, or damaged branches. Then, prune lightly throughout the growing season to control growth and encourage fruiting.
It’s also essential to keep an eye on your espalier’s growth habit and adjust your pruning strategy accordingly. For example, if your tree is producing more vigorous growth than you’d like, it may be necessary to prune more frequently or in different areas of the tree.
Identifying the Optimal Pruning Seasons
When it comes to pruning pear espaliers, timing is everything. The optimal pruning season can vary significantly depending on your location and climate. In general, pear trees require regular maintenance to promote healthy growth, fruit production, and overall structure.
To determine the best time to prune based on your region, consider the following factors: temperature, rainfall, and sunlight exposure. In regions with mild winters, such as those in USDA Hardiness Zones 6-9, pruning can occur during the late winter or early spring (February-March). This allows for new growth and fruiting wood to emerge in time for the growing season.
In areas with harsher winters, like USDA Hardiness Zones 3-5, it’s best to prune in late March to early April, once the threat of frost has passed. For regions with hot summers, pruning during the cooler months (October-November) can help prevent water stress and promote healthy growth.
Keep in mind that these are general guidelines, and the specific climate conditions in your area may require adjustments. Be sure to observe your tree’s response to pruning and adjust your schedule accordingly. Regular monitoring will also help you identify any pest or disease issues early on.
Preparing for Pruning
Before you begin pruning your pear espalier, take some time to prepare the necessary tools and equipment. This will not only make the process more efficient but also ensure that it’s done safely. Start by gathering a set of high-quality pruning shears or loppers, depending on the size of your espalier’s branches. Make sure they’re clean and sharp, as dull blades can cause damage to the plant.
Next, inspect your pruning tools for any signs of rust or wear. If you notice any issues, now is the time to replace them. You’ll also need a pair of gloves to protect your hands from thorns and sap. Consider investing in a pruning saw for thicker branches, as well as a grafting knife if you’re working with younger trees.
Additionally, have a bucket or tray nearby to collect clippings and debris. This will help keep your work area clean and make it easier to dispose of the cut material afterwards. By having all the necessary tools and equipment ready to go, you’ll be able to focus on the task at hand and achieve a more precise pruning result.
Understanding Pear Tree Anatomy
To prune a pear espalier effectively, it’s essential to understand its basic structure and how different parts contribute to its overall health and productivity. Let’s start by exploring the key components of a pear tree.
Knowing Your Tree Structure
When it comes to pruning pear espaliers, understanding the different parts of the tree is essential for making informed decisions. Let’s break down the various branches you’ll encounter: scaffold, spurs, and water sprouts.
The scaffold branches are the main structural limbs that provide support for the rest of the tree. These branches are usually thicker and more robust than other parts of the tree. To identify them, look for sturdy branches that are roughly equal in size and spaced evenly apart along the trunk. Prune these branches sparingly to maintain their overall shape and promote healthy growth.
Spur branches, on the other hand, are smaller, shorter limbs that produce fruit. They typically grow from scaffold branches and are responsible for bearing flowers and fruits. Water sprouts, often referred to as “suckers,” are vigorous shoots that emerge from the trunk or roots of the tree. These can be pruned back to encourage more balanced growth and direct energy towards fruit production.
When pruning these branches, keep in mind their role within the overall structure of your pear espalier.
Identifying Fruit-Producing Wood
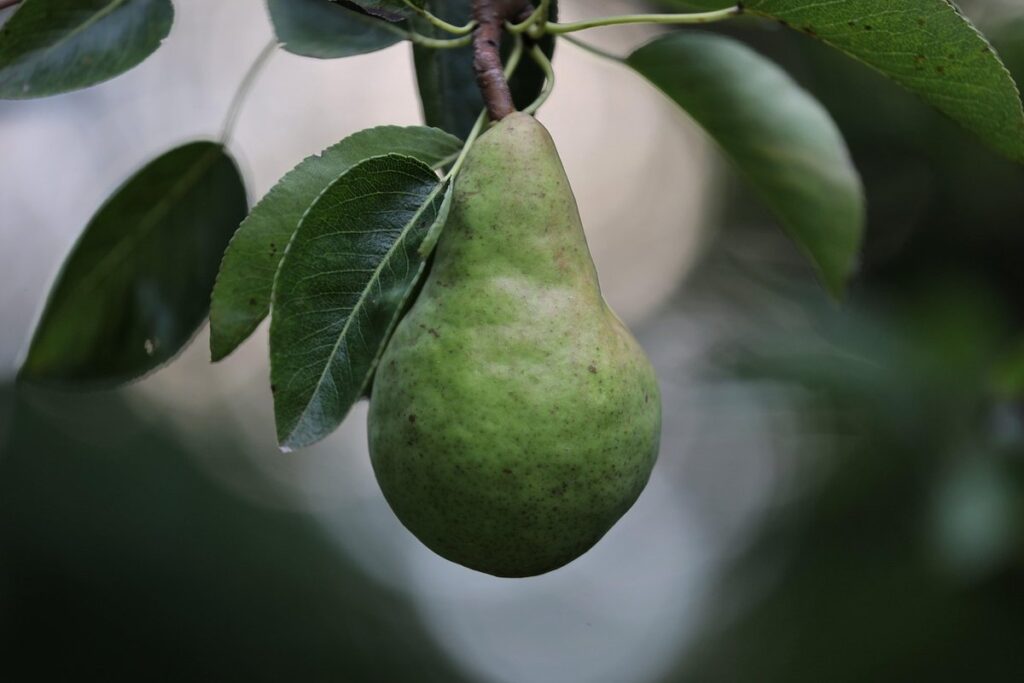
When working with pear espaliers, identifying fruit-producing wood is crucial to maintaining their productivity. To determine which branches are responsible for fruit production, look for the following characteristics: vigorous growth, a sturdy structure, and an abundance of fruiting spurs. Fruiting spurs are short, woody shoots that produce flowers and eventually fruit.
To identify these areas, inspect your espalier’s stems during the dormant season. Notice which branches have a more robust diameter and show signs of bearing fruit in previous seasons. These areas tend to be more vigorous and may even exhibit a slight swelling at the base of the spur, indicating where the fruit will develop.
When pruning your pear espalier, it’s essential to preserve these fruit-producing areas while removing any weak or dead wood that could compromise their productivity. By doing so, you’ll ensure continued fruiting and maintain the overall health of your tree.
Removing Dead, Diseased, or Damaged Wood
When pruning your pear espalier, it’s crucial to address any dead, diseased, or damaged branches. These issues not only compromise the tree’s appearance but also its overall health. Diseased wood can spread disease throughout the tree and even contaminate other nearby plants.
To identify problematic branches, inspect the tree regularly for signs of decay, such as cracks in the bark, soft spots, or an unusual color change. Dead wood is often brittle and breaks easily when bent or touched. Damaged branches may be partially broken but still remain attached to the tree. Remove these areas promptly to prevent further damage.
Use sharp, clean pruning tools to cut at a 45-degree angle just above a growth node (the point where a branch meets the trunk). This helps promote healthy healing and encourages new growth from the remaining nodes. Make sure to disinfect your tools between cuts to avoid spreading disease.
Techniques and Tools for Pruning
Now that you’re comfortable with pruning basics, let’s dive into the specific techniques and tools you’ll need to prune your pear espalier effectively.
Hand Pruning vs. Mechanical Pruning
When it comes to pruning your pear espalier, you have two main options: hand pruning and mechanical pruning. Both methods have their advantages and disadvantages, which we’ll explore below.
Hand pruning involves using manual tools like loppers, pruners, or knives to cut branches and shape the tree. This method offers more precision and control, allowing you to make precise cuts and remove individual leaves or small twigs. Hand pruning is ideal for delicate or sensitive areas of the espalier, such as around the graft union or near flowers. However, it can be time-consuming, especially when dealing with thicker branches.
Mechanical pruning, on the other hand, uses power tools like pole saws or pruning shears to cut larger branches and heavy growth. This method is faster and more efficient for removing large amounts of material, but requires more skill and care to avoid damaging the tree’s structure. Mechanical pruning is often used in commercial orchards where labor costs are a concern.
Ultimately, the choice between hand pruning and mechanical pruning depends on your personal preference, the size and complexity of your espalier, and the specific needs of your tree at that moment. Consider using both methods in combination to achieve optimal results – for example, using hand pruners for precise cuts and mechanical pruning for larger branches.
Using Pruning Tools Effectively
When working with pear espaliers, it’s essential to use pruning tools effectively to minimize damage and promote healthy growth. Loppers are ideal for thicker branches, typically 1-2 inches in diameter, as they provide the leverage needed to cut through robust wood without causing undue stress on the tree.
For thinner branches or more delicate cuts, bypass pruners (also known as secateurs) are a better choice. These tools have curved blades that pass each other when cutting, reducing the risk of crushing the wood and promoting clean cuts. Always use sharp blades to prevent tearing the bark or crushing the tissue.
When using pruning saws, choose one with fine teeth for precise cuts in smaller branches. The curved back design makes it easier to maneuver and control the cut. Be cautious not to apply too much pressure, as this can cause damage to the tree’s internal structure. Regularly clean and sharpen your tools to ensure they perform optimally.
To maintain healthy growth, prune at a 45-degree angle, making sure cuts are about one-quarter inch above an outward-facing bud. This will direct new growth away from the center of the espalier, promoting an open, balanced framework.
Common Pruning Mistakes to Avoid
When pruning pear espaliers, it’s easy to make mistakes that can compromise their health and productivity. One common error is over-pruning, which can stress the tree unnecessarily. Over-pruning can also lead to a loss of fruiting wood, resulting in reduced yields for several years.
Another mistake is pruning at the wrong time. Prune your pear espalier during its dormant season, typically between December and February, when it’s least active. Avoid pruning in spring or summer, as this can cause new growth that may not have time to harden off before winter.
Cutting too many branches at once can also be detrimental. Remove no more than one-third of the tree’s branches per year. This allows the remaining wood to re-grow and maintain its structure. When removing branches, cut just above a growth node (the small swell where a leaf meets the stem) using a clean, angled cut.
Pruning Techniques for Specific Goals
Now that you’ve learned the basics of pruning a pear espalier, let’s dive into specific techniques to achieve your desired goals, from promoting fruiting to enhancing plant health.
Thinning and Reducing
When it comes to pruning pear espaliers, thinning and reducing techniques are crucial for managing fruit production and maintaining air circulation. To control fruit production, identify the most vigorous branches and remove weaker ones, making sure not to over-prune as this can reduce yields. Cut back these branches by one-third to encourage bushy growth.
Remove any crossing or rubbing branches to prevent damage and promote healthy growth. Remove any weak or spindly shoots from the center of the espalier to allow air to circulate freely. This will help prevent disease and pest issues. To thin fruit, look for clusters of three or more fruit and remove one or two to encourage better growth.
Be sure to prune during the dormant season to minimize stress on the plant. It’s also essential to make clean cuts using sharp tools to promote healthy healing. By implementing these pruning techniques, you’ll be able to maintain a balanced espalier that produces an abundance of delicious fruit while minimizing disease and pest issues.
Renovation and Rejuvenation
Renovating an overgrown pear espalier can be a daunting task, but with the right approach, you can restore it to its former glory. If your tree has become unruly and is no longer producing fruit as expected, it may need a rejuvenation pruning.
To begin, assess the entire structure of your espalier. Identify any dead, diseased, or damaged branches that are weighing down the rest of the tree. Remove these immediately to prevent further damage and promote healthy growth. Next, reduce the number of main branches by about one-third to encourage new growth from the base.
Cut back overgrown stems to about 12-18 inches from the trunk, using a sharp, clean cut just above a bud eye or a lateral branch. This will help redistribute energy and promote new fruiting wood. Be sure to make these cuts in late winter or early spring when the tree is dormant to minimize stress.
By following these steps, you’ll be well on your way to revitalizing your pear espalier and enjoying a bountiful harvest for years to come.
Pest and Disease Management
When it comes to pruning pear espaliers, managing pests and diseases is an essential aspect of maintaining their health. Pruning can help minimize infestations by removing diseased wood, which prevents the spread of infection. This technique also promotes good air circulation around the plants, reducing the risk of fungal diseases.
To manage pests effectively, inspect your espalier regularly for signs of infestation, such as aphids, codling moths, or spider mites. Prune any affected areas immediately to prevent further damage. For example, if you notice aphid colonies on a branch, remove that entire section to prevent the insects from spreading.
Keep in mind that pruning should be done during the dormant season (winter or early spring) when plants are less susceptible to stress. This is also an ideal time to inspect for any disease-causing organisms like powdery mildew or scab. Regularly sanitizing your pruning tools with a solution of 1 part bleach to 9 parts water can help prevent the spread of diseases between cuts.
By incorporating these pest and disease management techniques into your regular pruning routine, you’ll be able to maintain a healthy and thriving pear espalier that produces delicious fruit for years to come.
Conclusion
Now that you’ve learned how to prune and train your pear espalier, let’s summarize what we’ve covered and give you a final checklist for future pruning sessions.
Recap of Key Points
To ensure your pear espalier remains healthy and productive, it’s essential to revisit the key takeaways from this comprehensive guide. Pruning is a crucial aspect of espalier care, as it helps maintain the tree’s shape, promotes fruiting, and prevents disease.
When pruning your pear espalier, consider the following critical factors: timing, tool selection, and technique. Timing is everything when it comes to pruning, so avoid pruning during the active growing season or when the tree is under stress. Choose a sharp, clean pruning saw or loppers to make precise cuts without damaging the tree.
Some essential pruning techniques to master include thinning, shaping, and renewal pruning. Thinning removes select branches to allow for better air circulation and sunlight penetration. Shaping helps maintain the espalier’s desired shape, while renewal pruning rejuvenates old growth by removing dead or diseased wood.
Remember to monitor your pear espalier’s progress regularly and adjust your pruning schedule accordingly. By incorporating these key points into your routine, you’ll be well on your way to growing a thriving, productive pear espalier that will provide delicious fruit for years to come.
Additional Tips and Resources
For those who want to delve deeper into pruning pear espaliers or seek expert guidance, here are some additional resources and recommendations:
If you’re looking for a more hands-on approach, consider taking an online course on orchard management or pruning techniques. Websites like Udemy, Coursera, or edX offer courses that cover the basics of fruit tree pruning, including specific tips for pear espaliers. Some popular courses also include video tutorials and interactive lessons that make it easier to understand complex concepts.
Alternatively, consult books written by experienced horticulturists or orchard experts. “The New Seed Starter’s Handbook” by Nancy Bubel offers comprehensive guidance on starting seeds and transplanting seedlings, which can be applied to pruning techniques. Another excellent resource is “Pruning & Training” by Roy Lancaster, a seasoned horticulturist with extensive knowledge of fruit tree management.
If you’re still unsure about how to prune your pear espalier or want personalized advice, consider consulting a local nursery professional or orchard expert. They can assess your specific situation and provide tailored guidance on pruning techniques that work best for your climate and soil type.
Frequently Asked Questions
Can I prune my pear espalier at any time, or are there specific seasons to consider?
You can prune your pear espalier during the dormant season, typically from late winter to early spring, as this is when most pruning takes place. Pruning during this period allows for the removal of dead or damaged wood without causing stress to the tree. However, some light pruning may be necessary during other seasons to maintain the tree’s shape and promote healthy growth.
How do I know if my pear espalier needs a renovation or rejuvenation?
A renovation or rejuvenation is necessary when your pear espalier becomes overgrown, diseased, or damaged beyond repair. Look for signs of decay, such as dead wood, fungal growth, or extensive branch breakage. If you notice these symptoms, it may be time to perform a more invasive pruning technique to restore the tree’s health and productivity.
What are some common mistakes to avoid when pruning my pear espalier?
Some common mistakes include over-pruning, which can stress the tree and reduce fruit production, as well as not removing enough dead or diseased wood, allowing diseases to spread. It’s also essential to use clean and sharp tools to prevent the transfer of diseases between cuts.
How often should I inspect my pear espalier for pests and diseases?
Regular inspections are crucial in maintaining the health and productivity of your pear espalier. Inspect your tree at least twice a month during growing seasons, looking for signs of pests or diseases such as aphids, spider mites, powdery mildew, or black spot.
Can I use mechanical pruning techniques on all types of pear espaliers?
Not all pear espaliers are suitable for mechanical pruning. Some varieties may require more delicate hand-pruning to avoid causing damage to the tree’s structure. It’s essential to assess your tree’s specific needs and adjust your pruning technique accordingly, taking into account its age, size, and growth patterns.