Orchid enthusiasts often struggle with maintaining their prized plants, but one crucial technique can make all the difference: pruning. Not only does pruning promote healthy growth by removing damaged or dying blooms and leaves, but it also helps prevent pest infestations that can spread disease throughout your orchid collection. By learning how to prune your orchids correctly, you’ll not only be rewarded with more vibrant flowers, but also encourage repeat blooming in some species. But what are the essential techniques and tips for various orchid types? Whether you’re a seasoned horticulturist or just starting out with these beautiful plants, this article will guide you through the process of pruning orchids to achieve maximum growth and flowering potential.
Understanding the Importance of Pruning
Pruning orchids is crucial for maintaining their health and encouraging new growth, but what makes it so essential that you should make time for it? Let’s dive into the importance of pruning.
Why Prune Orchids?
Pruning orchids is essential for their health and appearance. One of the primary reasons to prune orchids is to remove dead or dying flowers and stems. This not only maintains the plant’s aesthetic appeal but also prevents the spread of disease. For instance, if a flower is already wilted, it can’t be revived, so pruning it off at the base ensures that new blooms have room to grow.
Pruning also promotes new growth in orchids. When you remove old stems and flowers, the plant redirects its energy towards producing new leaves and roots. This process is called “hormetic” pruning, which stimulates the plant’s natural response to stress. As a result, your orchid becomes more robust and resilient.
Another reason to prune orchids regularly is to prevent pest infestations. Overcrowding can attract pests like mealybugs and spider mites, which thrive in compact environments. By pruning back your orchid, you reduce the chances of an infestation and create a healthier environment for the plant to flourish.
Regular pruning also encourages branching and encourages the growth of new flowers.
Identifying Pruning Needs
As you care for your orchid, it’s essential to observe its growth and development to determine when pruning is necessary. One of the most obvious signs that an orchid needs pruning is flower drop. If you notice that your orchid is shedding its flowers soon after they bloom, it may be a sign that the plant has finished producing flowers for the season.
Another indicator is keiki formation, where small plantlets grow on the sides of the leaves or from the center of the pot. These small plants are actually young orchids that will eventually separate and become new plants. As the keikis grow larger, they’ll start to put energy into their own roots and growth rather than nourishing the mother plant.
Lastly, pay attention to leaf growth – if your orchid’s leaves are becoming too long or unruly, it may be time to prune them back to maintain a balanced appearance. Pruning will also encourage new growth and help direct the plant’s energy towards producing more flowers. Keep an eye out for these signs and prune your orchid accordingly to keep it healthy and thriving.
Tools and Techniques
To effectively prune your orchid, you’ll need a few essential tools that will make the process easier and more precise. These tools are covered in detail below.
Choosing the Right Pruning Tools
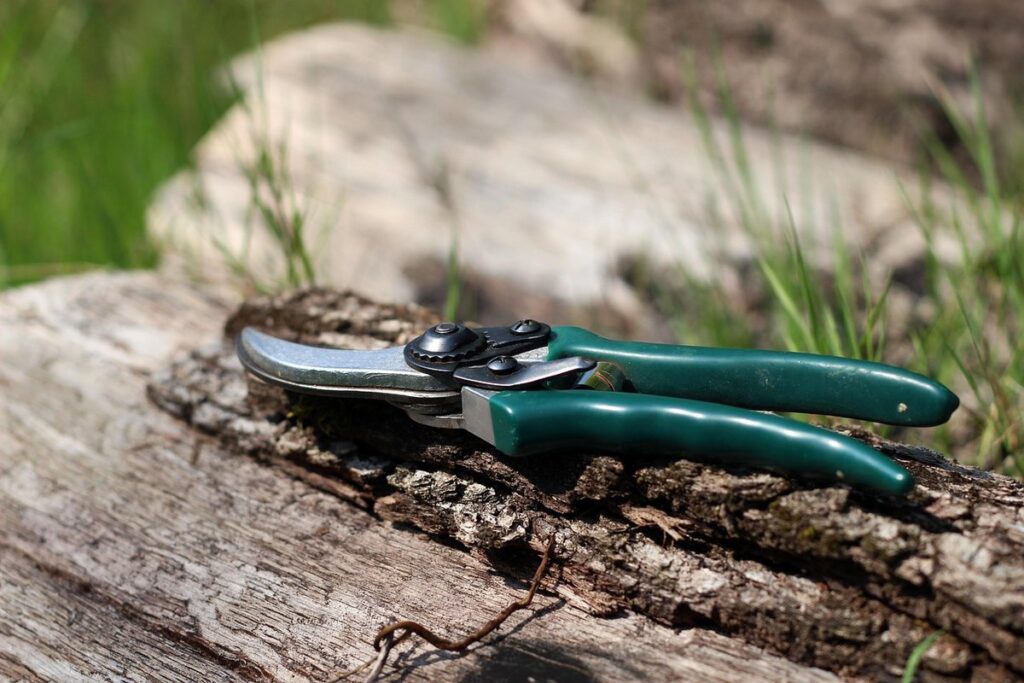
When it comes to pruning orchids, having the right tools is crucial for achieving clean cuts and promoting healthy growth. You’ll want to choose pruning tools that are specifically designed for delicate plants like orchids.
Sterile scissors or pruning shears are excellent choices for cutting back overgrown or dead roots, stems, and flowers. Look for tools with sharp blades made from stainless steel or high-carbon steel, as these materials resist rust and corrosion. Pruning knives can also be used, but be sure to use a sharp one to avoid crushing the delicate orchid tissue.
Before using any pruning tool on your orchids, make sure to sanitize it between uses. Wash the tools with soap and water, then dry them thoroughly before storing them in a clean area. This simple step helps prevent the spread of disease from plant to plant. By investing in the right pruning tools and following proper sanitation techniques, you’ll be well on your way to achieving beautiful, thriving orchids.
Basic Pruning Techniques
When it comes to pruning orchids, understanding the basic techniques is crucial for maintaining their health and encouraging new growth. Cutting back flower spikes, also known as phalaenopsis spikes, is a vital part of the process. To do this effectively, cut the spike about an inch above the node from which the blooms emerged. This will help promote the development of new flowers and encourage the plant to focus its energy on producing more blooms.
Removing dead or dying leaves is another essential aspect of pruning orchids. Take care when handling the plant’s delicate roots and gently trim away any damaged or discolored foliage. Be sure to disinfect your tools between cuts to prevent the spread of disease.
Repotting may also be necessary, especially for older plants that have outgrown their containers. Gently remove the plant from its pot, taking care not to damage the roots, and inspect the growing medium for any signs of decay or nutrient depletion. Replace the old medium with fresh, well-draining material to provide your orchid with a healthy environment in which to thrive.
When repotting, choose a container that is only slightly larger than the original one to prevent the plant’s roots from becoming waterlogged. By following these basic pruning techniques and incorporating regular repotting into your orchid care routine, you can help keep your plants strong, vibrant, and blooming beautifully for years to come.
Pruning for Specific Orchid Types
When pruning orchids, it’s essential to understand how different types respond to trimming and pruning. Some orchids require more frequent pruning than others, so let’s dive into specific care instructions for popular varieties.
Phalaenopsis (Moth Orchids) Pruning
Phalaenopsis (Moth) orchids are one of the most popular and low-maintenance varieties, making them a great choice for beginners. As they grow, you may need to prune them to maintain their health and encourage new blooms. Pruning Phalaenopsis is relatively simple and can be done at any time of the year.
To trim flower stems, cut back the stem about an inch above a node (where a leaf meets the stem). This will help direct the plant’s energy towards producing new flowers. Remove spent flowers to prevent seed production and promote re-growth. You can also use this opportunity to inspect the roots and remove any old potting media that may have broken down.
Regular repotting is not necessary for Phalaenopsis, but it should be done every 2-3 years as the potting mix breaks down. Choose a well-draining potting medium specifically designed for orchids and gently remove the plant from its pot. Inspect the roots and trim any that are circling or growing outside of the pot. This will help prevent waterlogged soil and promote healthy growth.
Dendrobium (Dendrobium Orchids) Pruning
Dendrobium orchids are one of the most popular and adaptable types of orchids, but they do require regular pruning to maintain their health and appearance. When it comes to pruning Dendrobiums, it’s essential to know when and how to cut back flower spikes.
To encourage repeat blooming, you should trim the spent flower spike about 1-2 inches above a node, or the joint where a leaf meets the stem. This will help direct energy towards producing new flowers on side shoots. It’s also crucial to remove any dead or dying leaves and stems as soon as possible to prevent disease from spreading.
In addition to pruning the flower spikes, you should also trim the aerial roots that grow on mature plants. Cutting these back will not only make your plant look more balanced but also help it absorb water and nutrients more efficiently. As for repotting, Dendrobium orchids typically require a fresh pot every 1-3 years to provide them with sufficient nutrients and prevent root bound conditions.
Repot your Dendrobium in the spring when new growth begins, using a well-draining potting mix specifically designed for orchids. Remove any old potting material from the roots, taking care not to damage the delicate aerial roots or roots on the pot’s surface.
Common Pruning Mistakes to Avoid
When pruning orchids, it’s easy to make mistakes that can harm your plant, but knowing what to avoid is key to keeping your orchid healthy and thriving. This section highlights common errors to watch out for.
Over-Pruning: The Consequences
Over-pruning is one of the most common mistakes orchid enthusiasts make. While pruning can be beneficial for promoting healthy growth and blooming, over-pruning can have devastating consequences for your plants.
When you remove too much tissue from an orchid, it becomes severely stressed. This stress weakens the plant’s defenses, making it more susceptible to disease growth. Fungal diseases like root rot thrive in moist environments, which is exactly what an over-pruned orchid provides. Bacteria, such as those causing bacterial leaf spot, can also take advantage of the weakened state.
Signs of over-pruning include yellowing or droopy leaves, soft stems, and a general decline in overall health. To recognize these signs, inspect your plant regularly for any changes in its appearance. If you notice any of these symptoms, reduce pruning to prevent further stress.
To avoid over-pruning, prune only what is necessary – remove dead or damaged tissue, and cut back overgrown canes. Limit your pruning sessions to 1-2 times a year, depending on the plant’s needs.
Incorrect Tool Use
When it comes to pruning orchids, one of the most critical factors is using the right tools. However, many growers inadvertently make mistakes when selecting and using their pruning instruments. One common error is using non-sterile tools or not cleaning them between uses.
This can lead to the spread of diseases such as crown rot or leaf spot, which can be devastating for your orchid plants. If you’re using a pair of scissors or pruning shears that have been used on another plant, you may inadvertently transfer fungal spores or bacteria, causing infection in your orchids. To avoid this, make sure to use sterile tools specifically designed for pruning orchids.
Before each use, gently clean your tools with soap and water, then disinfect them with a 10% bleach solution. This will help prevent the spread of diseases and ensure your orchids remain healthy. Remember, it’s always better to be safe than sorry – investing in dedicated pruning tools and maintaining their cleanliness is essential for optimal orchid care.
Tips and Best Practices
To get the most out of pruning, follow these essential tips and best practices that will help you achieve a healthy and thriving orchid. Prune with purpose to avoid damage.
Pruning Frequency
The frequency of pruning varies depending on the type of orchid and its growth habits. Phalaenopsis, also known as moth orchids, are one of the most popular varieties among enthusiasts. They typically require more frequent pruning than other types, with a minimum of 2-3 times per year. This is because they tend to produce more pseudobulbs, which need to be removed to maintain a healthy balance between growth and flowering.
Dendrobium orchids, on the other hand, are a type that produces canes instead of pseudobulbs. They require pruning less frequently, typically every 4-6 months. It’s essential to remove old or dying canes to encourage new growth and prevent the spread of disease.
In general, it’s best to prune orchids during their dormant season, which usually falls between spring and summer. This allows them to focus on producing new roots and flowers rather than putting energy into maintaining old growth. By pruning at the right time and frequency, you’ll be able to keep your orchid looking its best and encourage healthy growth and flowering.
After-Care Instructions
After pruning your orchid, it’s essential to provide it with the right conditions for optimal recovery. Maintaining proper humidity levels is crucial during this period. Orchids thrive in humid environments, typically between 40-70% relative humidity. You can achieve this by placing the plant on a tray filled with water and pebbles or using a humidifier nearby. This will help prevent dehydration and promote healthy growth.
Adequate light is also vital for your orchid’s recovery. Move it to a bright, indirect light location, such as an east- or west-facing window. Avoid direct sunlight, which can cause burning and damage the plant. If you’re keeping your orchid indoors, consider supplementing with grow lights if necessary.
Fertilizing at the right time is also crucial after pruning. Wait for 2-3 weeks before resuming fertilization to allow the plant to focus on recovery. When you do start fertilizing again, use a balanced, water-soluble fertilizer (20-20-20) and follow the manufacturer’s instructions for application rates.
By following these simple guidelines, you’ll help your orchid recover quickly and get back to blooming its beautiful flowers in no time.
Conclusion
Now that you’ve learned the ins and outs of pruning orchids, it’s time to summarize the key takeaways from our comprehensive guide so far. Let’s review what we’ve covered together.
Recap of Key Points
In this comprehensive guide to pruning orchids, we’ve covered essential aspects of caring for these delicate flowers. To recap, it’s crucial to understand the importance of pruning not just as a necessity but also as an opportunity to promote new growth and encourage blooming.
Pruning helps maintain the overall health of your orchid by removing dead or dying roots, stems, and leaves that can spread disease and pests. By carefully trimming away these affected areas, you prevent the problem from spreading and protect the rest of the plant. Regular pruning also encourages the development of new growth, which is essential for blooming.
Proper pruning techniques involve cutting back flower spikes after they’ve finished blooming to encourage a second bloom or to direct energy towards producing new flowers. This method can be especially beneficial for Phalaenopsis orchids, which are known to produce multiple blooms from the same spike.
To ensure you’re getting the most out of your pruning efforts, keep in mind that different types of orchids have varying needs when it comes to pruning frequency and technique. Some species, like Dendrobium, can be pruned back more aggressively than others, like Paphiopedilum, which require gentler handling.
In conclusion, pruning is a vital part of maintaining healthy orchids and encouraging blooming. By understanding the specific needs of your plant type and following proper pruning techniques, you’ll not only keep your orchid looking its best but also promote new growth and ensure continued blooms for years to come.
Frequently Asked Questions
How Often Should I Prune My Orchids After They’ve Bloomed?
Pruning frequency depends on the orchid type, but a general rule is to prune back about half of the stem after blooming. This encourages new growth and prevents weak or leggy stems. For some species, like Phalaenopsis, you may only need to trim dead flowers, while others, like Dendrobium, require more extensive pruning. Keep an eye on your orchid’s response and adjust pruning frequency accordingly.
What Are the Best Pruning Tools for Beginners?
As a beginner, it’s best to start with basic tools like sterile scissors or pruning shears. These are inexpensive and easy to use. For more delicate cuts, consider using a sharp, thin-bladed knife or pruning tool specifically designed for orchids. Always disinfect your tools between uses to prevent the spread of disease.
Can I Prune My Orchid in the Middle of Summer?
Pruning can be done at any time, but it’s generally best to prune in the spring or summer when new growth is most active. However, if you notice dead or dying flowers during this period, don’t hesitate to prune them off immediately to prevent disease spread.
Will Pruning Damage My Orchid’s Roots?
Pruning should not damage your orchid’s roots, but it’s essential to be gentle and careful when handling the plant. When pruning stems, make clean cuts just above a node (where a leaf meets the stem), as this will help promote new growth from that point.
How Long Does It Take for My Orchid to Recover From Pruning?
The recovery time varies depending on the orchid type and how extensive the pruning was. Generally, it can take anywhere from a few weeks to several months for your orchid to recover and produce new blooms after pruning. Keep in mind that this is an opportunity for your orchid to regrow and potentially bloom more vibrantly than before.