Are you tired of your repeat-blooming hydrangeas looking bare after their initial flush of color? If so, you’re not alone! Many gardeners struggle to get these beautiful plants to produce an abundance of blooms throughout the growing season. The good news is that with the right pruning techniques, you can maximize the number of flowers on your hydrangea shrubs and enjoy a longer blooming period.
In this article, we’ll take a closer look at how to prune your hydrangeas like a pro and get them to perform their best. We’ll cover the basics of pruning for repeat-blooming varieties, including when to prune, how to prune, and what tools to use. By following our expert advice, you can say goodbye to bare branches and hello to a blooming masterpiece that will impress your friends and neighbors all season long.
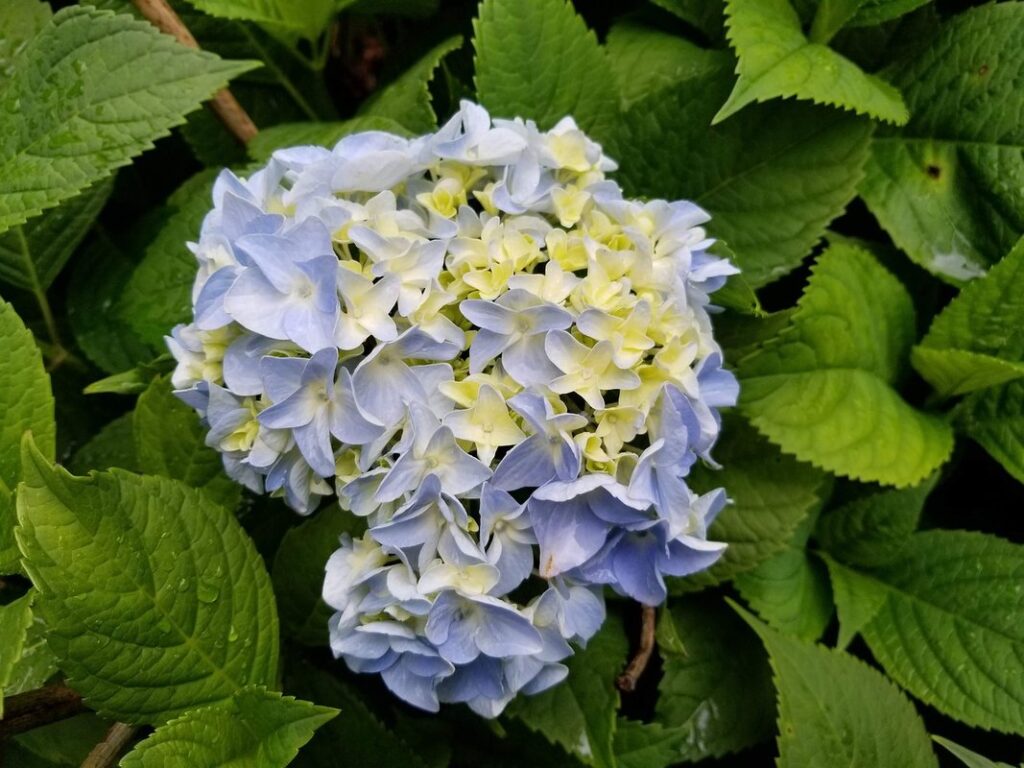
Understanding Hydrangea Growth Habits
To get the most out of pruning, it’s essential to understand how hydrangeas grow and develop throughout the year. Knowing their natural growth patterns will help you tailor your pruning techniques for optimal results.
The Importance of Dormancy in Hydrangeas
When it comes to hydrangea growth habits, one crucial aspect to understand is that these beautiful flowering shrubs typically bloom on old wood. This means that the flowers emerge from branches that have already been a year old. As a result, pruning during dormancy is essential for promoting new growth and encouraging more blooms.
Dormancy allows your hydrangeas to rest and recharge after a growing season, storing energy in their roots and stems. Pruning them during this period helps stimulate the production of new buds and flowers, which will bloom the following year. If you prune too early or late, you risk cutting off next year’s flowers. For example, if you prune your hydrangeas in the spring when they’re actively growing, you’ll remove the buds that were just forming.
To make the most of this dormancy period, it’s best to prune your hydrangeas in late winter or early spring, before new growth begins. This allows you to cut back any dead or damaged branches, shape the plant, and promote healthy new growth without sacrificing next year’s blooms. By pruning at the right time, you’ll be rewarded with a more vibrant and prolific hydrangea come summer.
Identifying the Right Time to Prune
Determining when your hydrangea is dormant is crucial before pruning. One of the most obvious signs is leaf drop – a sudden shedding of leaves that usually occurs between autumn and early spring. This period allows you to assess the shrub’s stem hardiness, which is an essential factor in pruning.
During this time, inspect the stems for any dead or damaged areas. Check for brittleness by gently bending the stems; if they snap easily, it’s a sign that the plant has gone dormant. Also, pay attention to weather conditions – a prolonged period of cold temperatures, typically below 40°F (4°C), will slow down growth and encourage dormancy.
When you notice these signs, it’s time to prune your hydrangea. Pruning during this dormant phase encourages new growth and promotes blooming in the next season. Remember that pruning too early can stimulate growth, causing the plant to bloom too soon, which may reduce its overall performance.
Pre-Pruning Checklist: Assessing Your Hydrangeas
Before you start pruning, it’s crucial to assess your hydrangea’s condition and needs. Take a close look at your plant to determine its overall health and any potential challenges that may impact blooming success.
Inspecting the Plant’s Overall Health
When inspecting your hydrangea’s overall health, it’s essential to look beyond its beauty and examine it for potential issues that could impact blooming. Begin by checking for signs of disease, such as yellowing leaves, black spots, or a white, powdery coating on the foliage. These can be symptoms of fungal diseases like powdery mildew or root rot.
Pests like aphids, scale, and spider mites can also damage your hydrangea’s health, so carefully inspect the stems, leaves, and flowers for any unwanted visitors. Look for sticky substance on leaves or stems, which could indicate an aphid infestation.
Nutrient deficiencies are another concern that can affect blooming. Soil pH, nutrient levels, and drainage all play a role in your hydrangea’s ability to absorb essential nutrients. Check the soil moisture by sticking your finger into the soil up to the first knuckle; if it feels dry, it’s time to water.
To promote healthy growth and encourage more blooms, consider adding a balanced fertilizer or a soil amendment specifically designed for hydrangeas in early spring or summer when new growth begins.
Determining Pruning Needs Based on Variety
When it comes to pruning hydrangeas, one of the most important factors is understanding the specific needs of your plant variety. Different types of hydrangeas require varying levels of pruning to promote healthy growth and maximize blooming potential.
For example, Bigleaf Hydrangeas (Hydrangea macrophylla) produce stunning flowers on old wood, meaning that last year’s stems will bear this year’s blooms. To encourage more flowers, prune these plants after they finish blooming in the summer, removing about one-third to one-half of the oldest stems.
On the other hand, Panicle Hydrangeas (Hydrangea paniculata) produce flowers on both old and new wood, making them a bit more forgiving when it comes to pruning. However, it’s still essential to remove dead or damaged branches in late winter or early spring to maintain their shape and promote healthy growth.
Smooth Hydrangeas (Hydrangea arborescens), also known as Oakleaf Hydrangeas, produce flowers on new wood, making them a great choice for gardeners who want to prune after blooming.
Techniques for Pruning Hydrangeas
Now that we’ve covered the basics of hydrangea pruning, let’s dive into some specific techniques to help you get the most blooms out of your plant. We’ll explore how to prune different types and ages of hydrangeas effectively.
Cutting Back Overgrown Stems
When it comes to pruning hydrangeas, cutting back overgrown stems is an essential step to promote healthy growth and encourage more blooms. This process can be a bit daunting, especially if you’re unsure where to start.
To identify which stems to remove, look for those that are dead, diseased, or damaged. These weak stems will not only detract from the plant’s appearance but also compete with healthier stems for nutrients and water. Remove any stems that are crossing or rubbing against each other, as this can cause damage and lead to disease.
When pruning overgrown stems, remove no more than one-third of the stem at a time. Cutting back too much can shock the plant and lead to weak growth. For example, if you’re cutting back a large stem, make a clean cut about 6-8 inches from the base of the plant, just above a leaf node (where a leaf meets the stem). This will help the plant redirect its energy towards producing new growth and blooms. By pruning regularly, you’ll be rewarded with more vibrant flowers and a healthier, more robust hydrangea plant.
Removing Dead or Damaged Wood
When pruning hydrangeas to promote more blooms, it’s essential to remove dead or damaged wood. This might seem like a daunting task, but trust us, it’s crucial for maintaining plant health and encouraging new growth.
Removing dead or damaged branches not only improves the appearance of your hydrangea but also helps prevent the spread of disease and pests. When you leave diseased or damaged wood intact, it can continue to thrive and produce spores or attract unwanted critters that feed on healthy tissues. By cutting out these affected areas, you’re essentially giving your plant a fresh start.
To identify dead or damaged wood, look for signs like dry, brittle stems; dark spots or patches; or branches that are cracked or split. Take a close look at the tips of stems and remove any growth that’s weak, wilted, or discolored. Cut these branches back to the nearest healthy section using clean, sharp pruning tools.
Make sure to sanitize your pruning shears between cuts to prevent spreading disease.
Post-Pruning Care: Fertilizing and Mulching
Now that you’ve pruned your hydrangeas, it’s time to focus on nourishing their roots and protecting their soil for a healthy bloom. Let’s explore fertilizing and mulching techniques together!
The Importance of Post-Pruning Fertilization
Fertilizing after pruning is essential to support healthy regrowth and encourage more blooms on your hydrangeas. When you prune your hydrangea plants, you’re removing spent flowers and promoting new growth. However, this process can also deplete the plant’s nutrient reserves, making it necessary to provide a boost with fertilizer.
As a general rule of thumb, choose a balanced, water-soluble fertilizer that contains equal amounts of nitrogen (N), phosphorus (P), and potassium (K). A 20-20-20 formula is a good starting point. You can also opt for an organic option like fish emulsion or compost tea, which will provide your plants with beneficial microbes and nutrients.
For best results, apply fertilizer immediately after pruning, following the manufacturer’s instructions for application rates. Water your hydrangeas thoroughly before fertilizing to ensure the roots are moist. This will help prevent burning your plant’s sensitive new growth. By providing your hydrangeas with a nutritious boost after pruning, you’ll set them up for success and encourage more vibrant blooms throughout the growing season.
Creating a Mulch Bed Around Your Hydrangea
Mulching around your hydrangea is an essential step in maintaining its health and encouraging blooming. As we’ve discussed earlier, pruning is crucial for promoting blooming, but proper care after pruning is just as important. Mulch acts as a protective barrier that retains moisture in the soil, reducing the need for frequent watering. This not only conserves water but also prevents overwatering, which can lead to root rot and other problems.
Mulching also suppresses weeds by blocking light from reaching them, preventing their growth. Weeds compete with your hydrangea for nutrients, so removing them ensures that your plant gets the necessary resources to bloom. Additionally, mulch helps regulate soil temperature, keeping it cool in summer and warm in winter. This is especially beneficial for hydrangeas, which thrive in temperatures between 60°F and 80°F.
To create a mulch bed around your hydrangea, start by applying a 2-3 inch layer of organic mulch such as wood chips or bark. Keep the mulch at least 6 inches away from the plant’s base to prevent moisture buildup and potential root rot. Replenish the mulch as needed, but avoid piling it too high to ensure good air circulation around your hydrangea.
Tips for Maximizing Blooms on Repeat-Blooming Hydrangeas
To get the most out of your repeat-blooming hydrangeas, follow these expert tips to encourage more frequent and vibrant blooms all season long. We’ll share our top advice for you!
Understanding the Needs of Repeat-Blooming Varieties
When it comes to repeat-blooming hydrangea varieties, understanding their specific pruning needs is crucial for maximizing blooms. Unlike single-season bloomers, these varieties produce flowers on both old and new wood, making them a bit more finicky when it comes to pruning.
Repeat-bloomers like ‘Tardiva’, ‘Limelight’, and ‘Vanilla Strawberry’ require regular maintenance to encourage repeat blooming. These plants typically need to be pruned after the initial bloom period in late spring or early summer, as well as again in fall. This two-step process helps control growth, promotes new flower buds, and encourages a second round of blooms.
When pruning repeat-bloomers, focus on removing any dead or damaged wood, cutting back overgrown stems to about one-third their length, and thinning out the center of the plant to allow for air circulation and sunlight penetration. Be sure to leave at least 3-4 pairs of leaves on each stem to ensure the plant has enough energy to produce new blooms.
By pruning your repeat-blooming hydrangeas correctly, you’ll be rewarded with a beautiful display of flowers throughout the growing season.
Promoting Continuous Bloom Production
To maintain continuous bloom production on repeat-blooming hydrangeas, it’s essential to adopt a consistent routine of deadheading and fertilizing. Deadheading is the process of removing spent flowers from the plant, which encourages new blooms to form. This can be done as soon as the flowers fade, and it’s best to remove the entire stem just above a leaf node.
When deadheading, be sure not to cut too much of the stem, as this can weaken the plant. Instead, trim off only what’s necessary, leaving about an inch or two of stem intact. This will help direct the plant’s energy towards producing new flowers rather than seed production.
Fertilizing is another crucial step in promoting continuous blooms. Use a balanced fertilizer that contains phosphorus, which promotes blooming, and apply it according to the manufacturer’s instructions. Repeat-blooming hydrangeas typically require a more frequent fertilization schedule, so be sure to fertilize every 4-6 weeks during the growing season.
By following this simple deadheading and fertilizing routine, you’ll be able to enjoy a continuous display of blooms on your repeat-blooming hydrangea.
Conclusion: Pruning Hydrangeas for a Vibrant Display
Now that you’ve mastered pruning techniques, let’s discuss how to prune your hydrangeas for maximum bloom potential and maintain their vibrant display all season long.
Recap of Key Takeaways
In conclusion, we’ve covered all the essential aspects of pruning hydrangeas to promote more blooms. By now, you should have a solid understanding of why pruning is crucial for these beautiful plants and how to do it effectively.
Let’s recap the key takeaways from this article: First, make sure your hydrangea is indeed a type that requires regular pruning (Bigleaf and Panicle varieties). If you’re unsure about the type or haven’t pruned your plant before, consult with a gardening expert or check the specific growing instructions for your variety. For Bigleaf hydrangeas, prune immediately after blooming to maintain shape and encourage new growth.
Next, familiarize yourself with the right pruning tools – a pair of sharp hand pruners or loppers will make the process easier. Remove any dead or dying branches, cutting them off at a 45-degree angle just above an outward-facing bud (this helps prevent water from collecting on the cut area and promotes healthy growth). Also, don’t forget to thin out the center of your plant, allowing sunlight to penetrate and promoting air circulation.
By pruning your hydrangea regularly, you’ll be rewarded with vibrant blooms year after year. For Panicle varieties, prune in late winter or early spring before new growth begins, cutting back stems to about one-third their height. This will encourage a fuller plant with more flowers.
Remember, the goal of pruning is not only to maintain shape but also to promote healthy growth and encourage blooming. With practice, you’ll become more confident in your ability to prune hydrangeas effectively, enjoying an abundance of beautiful blooms every year.
Frequently Asked Questions
What happens if I miss the optimal pruning time for my hydrangeas?
Yes, it’s not ideal to prune your hydrangeas outside of their dormant period, but you can still prune them at other times. However, keep in mind that pruning during active growth may reduce blooming potential or encourage new growth that might not produce flowers as desired. If you miss the optimal time, wait until dormancy and assess the plant’s overall health before proceeding with pruning.
Can I prune my repeat-blooming hydrangeas differently than single-bloom varieties?
Yes, repeat-blooming hydrangeas require a different approach to pruning than single-bloom varieties. These plants typically bloom on old wood, so pruning should focus on maintaining and encouraging the growth of these established branches, rather than cutting them back too severely. This will help promote continuous bloom production.
How do I identify which stems are old wood versus new growth?
Old wood is typically thicker and woody in appearance, with a more mature bark texture. New growth is thinner, with a softer, smoother bark. To ensure you’re pruning the right material, inspect your hydrangea’s branches carefully, and remove any dead or damaged wood to promote healthy growth.
Can I use regular garden shears for pruning my hydrangeas?
No, using regular garden shears can lead to crushed or torn stems, which can cause damage to your plant. Instead, invest in a good pair of loppers or hand pruners specifically designed for pruning thick branches and shrubs like hydrangeas.
How soon after pruning should I fertilize my hydrangea?
It’s best to wait until about 2-4 weeks after pruning before fertilizing your hydrangea. This allows the plant to heal and recover from any damage caused by pruning, reducing the risk of nutrient burn or other issues that can arise when applying fertilizer too soon.