Are you a succulent enthusiast looking for ways to share your favorite plants with friends or expand your collection? Propagating succulents from leaves is a great way to do just that, and it’s surprisingly easy once you know the process. With the right techniques and care, you can successfully grow new succulents from even the healthiest-looking leaves. In this step-by-step guide, we’ll walk you through everything you need to know about propagating succulents from leaves, from selecting the right leaves to post-propagation care and maintenance. Whether you’re a beginner or an experienced gardener, our expert tips will help you master the art of leaf propagation and enjoy the rewards of watching your succulent collection grow. By the end of this article, you’ll be confident in your ability to propagate succulents from leaves and start growing new plants today!
Understanding Succulent Leaf Propagation Basics
Let’s dive into the basics of propagating succulents from leaves, starting with understanding the essential techniques and tips for successful leaf propagation. You’ll learn how to prepare your leaves for propagation.
What is Succulent Leaf Propagation?
Succulent leaf propagation is a popular method of reproducing succulents that involves taking healthy leaves from mature plants and encouraging them to grow into new individuals. This technique has gained popularity due to its ease and efficiency compared to traditional stem cutting methods.
One of the primary benefits of succulent leaf propagation is its higher success rate. When done correctly, leaf propagation can yield a success rate of up to 80%, compared to the 20-30% success rate associated with stem cuttings. This means that more plants will survive and thrive when propagated using leaves.
Another advantage of this method is the ability to produce multiple offsets from a single leaf. For example, if you take a healthy Aloe Vera leaf, it can potentially produce up to five or six new plants. This makes succulent leaf propagation an excellent option for those looking to quickly expand their succulent collections or share plants with friends and family.
Overall, succulent leaf propagation offers a simple and effective way to reproduce your favorite succulents, making it an ideal choice for both beginners and experienced growers.
Choosing Healthy Leaves for Propagation
When it comes to propagating succulents from leaves, selecting healthy leaves with the right balance of water storage capacity and green tissue is crucial for success. A good starting point is to choose mature leaves that have reached their full size and color, as these will have developed enough chlorophyll to support photosynthesis during the propagation process.
To identify suitable leaves, look for ones with a thick, fleshy texture that’s free from any signs of damage or infection. Avoid taking leaves that are too young or too old, as they may not have sufficient water storage capacity or green tissue to support growth. You should also choose leaves that are relatively large and have a good balance between their water-storing ability (i.e., the thickness of the leaf) and the amount of green tissue.
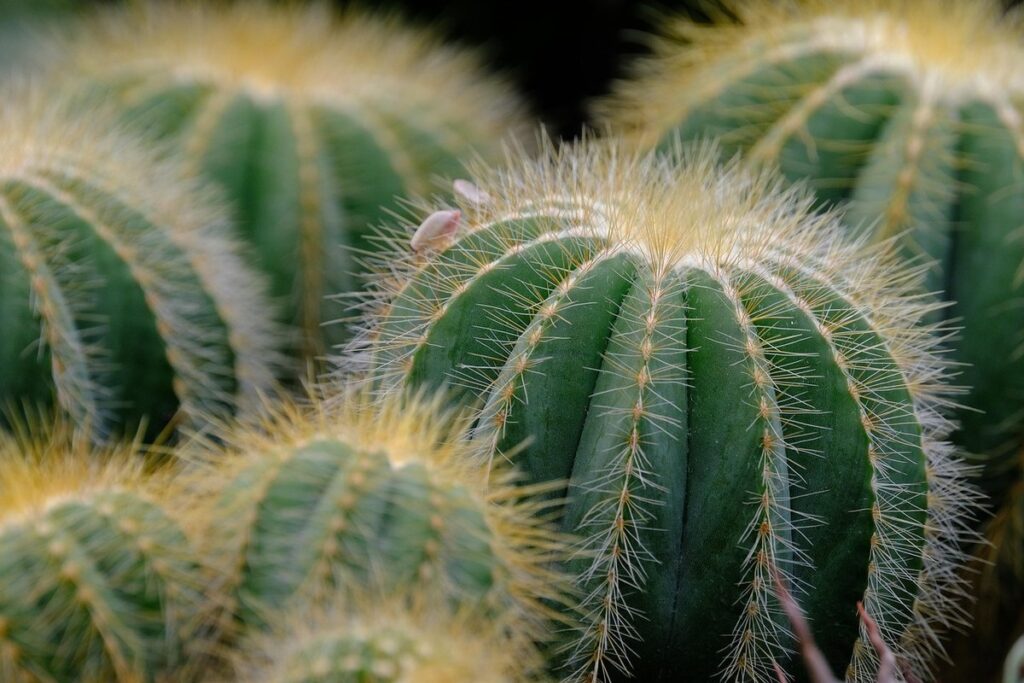
For example, Aloe vera leaves tend to work well for propagation because they have a thick, fleshy texture and plenty of green tissue. In contrast, leaves from smaller succulent species like Echeveria or Crassula may be too small or delicate for successful propagation. By choosing the right leaves, you’ll increase your chances of successful leaf propagation and grow healthy new plants.
Preparing Leaves for Propagation
Now that you’ve gathered your leaves, let’s get started on preparing them for propagation. This involves cleaning and preparing the leaf to give it the best chance of thriving in its new home.
Removing Leaves from the Mother Plant
When removing leaves from the mother plant for propagation, it’s essential to do so carefully and cleanly. You’ll need a pair of clean scissors or pruning shears specifically designed for succulents. Avoid using regular household scissors, as they can crush the delicate stem tissue, leading to infection.
Gently grasp the leaf near its base, and snip off about 1-2 inches of stem attached to the mother plant. Cut at an angle, taking care not to tear the remaining stem. For larger leaves, you may need to make a small notch on either side of the leaf to facilitate removal without causing damage.
To minimize risk of disease transmission, be sure to disinfect your tools between cuts with 70% isopropyl alcohol or a diluted bleach solution (1 part bleach to 10 parts water). Handle the removed leaves by their stems only, avoiding direct contact with the leaf surface. This will help prevent oils from your skin from transferring onto the leaves and potentially inhibiting rooting.
Drying and Curing Leaves
When it comes to propagating succulents from leaves, drying and curing is an essential step that cannot be overlooked. If not done correctly, the leaves can become susceptible to fungal growth, which can lead to root rot and reduce the chances of successful propagation.
To prevent this, you’ll want to dry your leaves thoroughly before moving on to the next steps. The ideal time for drying leaves depends on their thickness and moisture content. For thinner leaves, 7-10 days should be sufficient, while thicker ones may require up to two weeks. Place the leaves in a single layer on paper towels or newspaper, allowing for good air circulation.
It’s also crucial to avoid direct sunlight during this process, as it can cause the leaves to become brittle and prone to cracking. Instead, position them in a dry, well-ventilated area with indirect light. This will help prevent fungal growth while promoting even drying.
Check on your leaves periodically to ensure they’re not developing any signs of mold or mildew. Once dry, you’ll notice a slight change in color, typically turning from green to a lighter hue.
Rooting Leaf Cuttings in Water
Rooting leaf cuttings in water is a great way to propagate succulents, allowing you to see roots develop before transferring them to soil. Let’s dive into this easy method!
Preparing the Water Propagation Station
To create an ideal water propagation station for rooting leaf cuttings, you’ll need to gather some essential equipment and choose a suitable container. Start by selecting a clear glass or plastic container that’s large enough to hold the cuttings with at least 1-2 inches of space between them. A jar or vase with a wide mouth is perfect for this purpose.
For the water, use distilled or tap water that’s free from chlorine and other chemicals. Avoid using regular tap water as it may contain additives that inhibit root growth. Next, you’ll need some sharp scissors or pruning shears to cut the leaves cleanly from the mother plant.
When choosing a container, consider its size, material, and ability to accommodate the roots once they develop. A glass container is ideal as it allows for easy observation of the rooting process. Ensure the container has enough space for the water level to rise without overflowing. Fill the container with 2-3 inches of water and place the cut leaves inside, making sure the node (where the leaf meets the stem) is submerged in water. This setup will provide a perfect environment for your succulent leaves to develop roots and eventually grow into new plants.
Planting Leaf Cuttings in Water
When planting leaf cuttings in water, it’s essential to create an environment that promotes root growth and development. Fill a glass or container with enough water to submerge the leaf cutting, making sure not to overcrowd the vessel. The type of succulent you’re working with will determine the ideal water level; for example, larger leaves like those from Aloe vera may require more water than smaller ones like Echeveria.
Gently place the leaf cutting into the water, ensuring the base is fully submerged but not touching any surfaces that might cause rot. Secure the cutting in place using a toothpick or small rock if necessary. For species like Crassula and Sedum, you can also use a specialized rooting gel to enhance absorption of nutrients.
Monitor the water level regularly, topping it up as needed to prevent evaporation. Change the water completely every 1-2 weeks to maintain its oxygen levels and prevent bacterial growth.
Transferring Leaf Cuttings to Soil
Now that you’ve successfully rooted your succulent leaf cuttings, it’s time to transfer them into well-draining soil where they can continue to thrive. Choose a potting mix specifically designed for cacti and succulents.
Identifying Root Development
When transferring leaf cuttings to soil, it’s essential to identify when roots have developed sufficiently. Check for signs of healthy root growth by gently removing the cutting from its propagation medium and inspecting the roots. Look for a mass of white or light-colored roots that are slightly fleshy in texture. If you notice a decent amount of roots with a length of about 1-2 inches (2.5-5 cm), it’s usually time to transfer.
However, keep an eye out for potential issues like weak or sparse root growth, which can be caused by inadequate moisture, poor lighting, or insufficient nutrients in the propagation medium. Weak roots may not be robust enough to support the cutting as it grows, leading to a higher risk of failure. On the other hand, if you notice a mass of hairy, thin roots that are difficult to distinguish from the stem, this could indicate overwatering or poor air circulation.
To ensure successful transfer, choose cuttings with healthy root growth and transplant them into well-draining soil with adequate moisture and nutrients.
Planting Leaf Cuttings in Soil
When planting leaf cuttings in soil, it’s essential to use a well-draining potting mix to prevent root rot. Fill a small pot with the mix, leaving about 1-2 inches at the top for watering. Gently place the prepared leaf cutting into the soil, making sure the node (the joint where the leaf meets the stem) is buried. For some succulent species, like Aloe and Echeveria, you can plant the cutting upright, while others, like Crassula and Sedum, do best when planted horizontally.
Water sparingly after planting to settle the soil, then gradually increase watering as needed. Keep in mind that some succulents require more or less water depending on their species and environment. For instance, Aloe vera thrives in dry conditions and should be watered minimally, while Echeveria prefers moist soil but can tolerate some drought.
It’s also important to monitor the temperature and humidity levels around your planting area, as these can affect the success of your leaf cuttings. Most succulent species prefer bright, indirect light and temperatures between 65-75°F (18-24°C). By following these guidelines and adjusting for your specific succulent variety, you’ll be well on your way to successfully propagating from leaf cuttings.
Post-Propagation Care and Maintenance
Now that you’ve successfully propagated your succulents from leaves, it’s time to give them the care they need to thrive. We’ll walk you through how to keep them happy and healthy in this next phase of their life cycle.
Providing Optimal Growing Conditions
Providing optimal growing conditions is crucial for the successful propagation of succulent leaves. After carefully selecting and preparing your leaf cuttings, it’s essential to create an environment that promotes healthy root development and prevents the risk of rot.
Temperature plays a significant role in this process. Most succulents prefer daytime temperatures between 65°F to 75°F (18°C to 24°C) and nighttime temperatures around 55°F to 65°F (13°C to 18°C). Avoid placing your propagated leaves near heating or cooling vents, fireplaces, or drafty windows.
Maintaining the right humidity level is also vital. Succulents thrive in dry environments, so ensure that the potting mix isn’t waterlogged. A relative humidity of 40-50% is ideal for most succulent varieties. You can achieve this by placing the container on a tray filled with small rocks and water or using a humidifier.
Light requirements vary depending on the succulent species. Some prefer full sun, while others require partial shade. Research your specific succulent’s needs to provide the optimal amount of light. For most propagated leaves, bright indirect light is sufficient.
Monitoring for Pests and Diseases
Monitoring for pests and diseases is crucial during the post-propagation care of newly grown succulents. Inspect your plants regularly for signs of infestation or infection. Check the leaves and stems for any white powdery patches, black spots, or sticky honeydew droplets, which can indicate mealybugs, spider mites, or scale.
Keep an eye out for pests that like to feed on succulent sap, such as aphids, caterpillars, and beetles. If you notice any of these issues, treat the affected plants immediately with insecticidal soap or neem oil. For diseases, use a fungicide specifically designed for indoor plants.
Preventive measures can also be taken by maintaining good air circulation around your succulents, reducing watering to avoid over-saturation, and ensuring proper drainage in pots. Keep an eye on your plants’ responses to these treatments, and adjust as needed. Regularly inspecting your succulents will help you catch any potential problems before they become severe.
Troubleshooting Common Issues
As you attempt to propagate succulents from leaves, you may encounter some obstacles along the way, such as poor rooting success or fungal infections. This section will help troubleshoot common issues and get your propagation back on track.
Addressing Root Rot and Other Problems
Root rot and other issues can arise when propagating succulents from leaves. Overwatering is one of the most common problems, as excess moisture can cause roots to rot. To avoid this, ensure you don’t water your propagated cuttings too frequently. Check for signs of root rot by gently tugging on the stem; if it resists coming out of the soil, root rot has likely occurred.
Underwatering is another concern, especially during hot weather or when using small pots. Water carefully to prevent the cuttings from drying out completely, but also avoid overwatering which can lead to root rot.
Some succulents may drop their leaves naturally after propagation, this doesn’t always indicate failure. However, if you notice your cuttings consistently losing leaves, it could be a sign of too little light or nutrients.
Preventative measures include repotting the propagated cutting in well-draining soil and using small pots initially to avoid waterlogging.
Encouraging Healthy Growth
As you watch your newly propagated succulents grow and thrive, it’s essential to provide them with the right conditions for healthy growth. One key aspect of this is fertilization. Feed your succulent leaves with a balanced, water-soluble fertilizer during the growing season (spring-fall). Dilute the fertilizer to half the recommended strength to avoid burning your plants’ roots.
Repotting is another critical step in promoting healthy growth. Succulents typically need to be repotted every 1-2 years as their potting mix breaks down over time. Choose a well-draining potting mix specifically designed for cacti and succulents, and gently remove the plant from its old pot. Be cautious not to damage the roots during this process.
Pruning is also crucial in maintaining your succulent’s overall health. Remove any dead or damaged leaves to prevent the spread of disease and encourage new growth. Use a sharp, sterile tool to avoid spreading bacteria and fungi between plants. Prune your succulents regularly to maintain their desired shape and promote healthy, vigorous growth.
When repotting, prune back any long stems to encourage branching and bushy growth. This will also help prevent the plant from becoming too leggy. Be patient and observe your succulent’s response to pruning – some may require more frequent pruning than others.
Frequently Asked Questions
Can I propagate succulents from leaves year-round, or are there any seasonal limitations?
Yes, you can propagate succulents from leaves throughout the year, regardless of the season. However, it’s essential to monitor the health and quality of your leaves during extreme temperatures, as this may affect their ability to root properly.
How do I prevent my propagated succulent cuttings from drying out too quickly after propagation?
To minimize drying out, ensure the soil is consistently moist but not waterlogged during the first few weeks after planting. You can also cover the pot with a clear plastic bag or cloche to maintain humidity and reduce transpiration.
Can I propagate succulents from leaves that have been sitting on a windowsill for a while?
Yes, you can still propagate succulent leaves that have been stored on a windowsill. However, be cautious of any visible signs of decay or rot. If the leaves appear healthy, proceed with preparation and propagation as usual.
What if my propagated succulents develop root rot despite proper care?
If your propagated succulents are experiencing root rot, assess their environment for potential causes such as overwatering or poor drainage. Repot the affected plant in well-draining soil, and reduce watering frequency to prevent further damage.
How long does it take for propagated succulent cuttings to develop a strong root system?
The time it takes for propagated succulents to establish a robust root system can vary depending on factors like temperature, humidity, and care. Generally, you can expect new roots to emerge within 2-6 weeks after propagation, with optimal growth occurring in the first few months after planting.