If you’re an Oxalis lover like me, chances are you’ve fallen head over heels for this adorable, dainty plant. But let’s be real – those pesky little plants can get out of control quickly, and it’s time to learn how to propagate them before they take over your entire collection! Propagation is not only a great way to share Oxalis love with friends, but it also helps prevent overcrowding and ensures these lovelies continue to thrive. In this article, we’ll dive into the world of Oxalis propagation using stem cuttings, division, and layering – including expert tips on preparing your mother plant, aftercare, and troubleshooting common issues that might arise along the way. Whether you’re a seasoned pro or just starting out with these charming plants, by the end of this post, you’ll be well-equipped to multiply your Oxalis love and keep it growing strong for years to come.
Understanding Oxalis Love Plants
If you’re looking to multiply your oxalis love plant collection, understanding its propagation needs is key. Let’s dive into the basics of how and why oxalis plants reproduce.
What are Oxalis Love Plants?
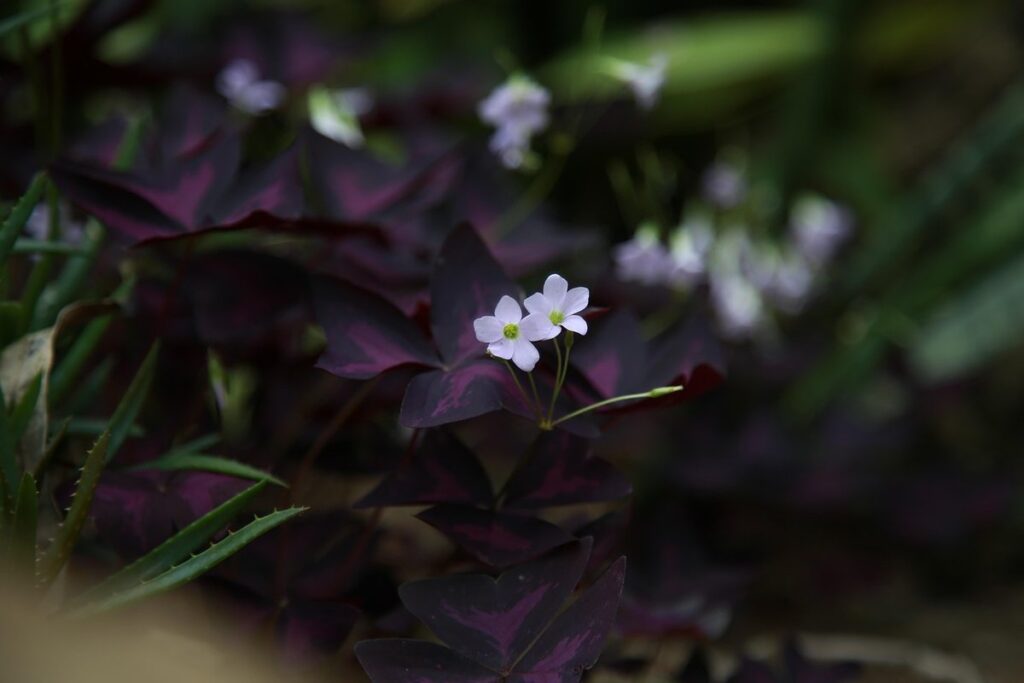
Oxalis love plants are a type of flowering plant that has gained immense popularity among indoor gardeners and houseplant enthusiasts. Also known as false oxalis or love plants, these delicate plants have captured the hearts of many with their unique characteristics and striking appearance.
One of the most distinctive features of oxalis love plants is their ability to produce an abundance of small, delicate flowers in shades of pink, white, and red. These blooms are a sight to behold, and they’re often accompanied by a sweet, vanilla-like fragrance that’s sure to delight. What sets oxalis love plants apart from other houseplants is their peculiar habit of releasing their roots into the air when they feel threatened or stressed.
This adaptation allows them to propagate easily, making them a great choice for those looking to multiply their plant collection. With proper care and conditions, an oxalis love plant can quickly become invasive, spreading its tiny tubers far and wide. This makes them a popular choice for gardeners who enjoy experimenting with unusual propagation methods.
Choosing Healthy Mother Plants for Propagation
When it comes to propagating oxalis love plants, choosing healthy mother plants is crucial for successful propagation. A robust and vibrant mother plant will not only increase the chances of successful propagation but also ensure that your new plants inherit desirable traits.
Look for mother plants with lush, dark green foliage and sturdy stems. Avoid those with wilted or yellowing leaves, as this can be a sign of underlying issues such as overwatering or nutrient deficiencies. Also, check for any signs of pests or diseases, such as whiteflies, mealybugs, or powdery mildew.
When selecting a mother plant, consider factors like growth habits and foliage texture. Do you want your new plants to have the same compact, bushy shape as their parent? Or do you prefer a more trailing or cascading habit? Choose a mother plant that exhibits the desired characteristics. Additionally, inspect the roots of the mother plant for any signs of damage or rot, which can affect the health and vigor of the new plants.
Importance of Propagation Methods for Oxalis Love Plants
Propagating oxalis love plants is not just a fun hobby, but it also comes with several benefits. One of the most significant advantages is that it allows you to increase the number of healthy plants in your collection without having to purchase new ones. This way, you can share your beloved oxalis love plants with friends and family or propagate them for sale at local plant markets.
Another benefit of propagation is genetic diversity. When you multiply a single parent plant, the resulting offspring may exhibit slightly different traits, such as leaf shape or flower color. By propagating multiple plants from a variety of sources, you can create a more diverse collection that will be better equipped to withstand disease and pests.
Propagating oxalis love plants also helps reduce stress on parent plants by giving them a break from constant watering, fertilizing, and pruning. This is especially important for sensitive plants like the oxalis love plant, which can become overwhelmed if over-manicured or watered too frequently.
Preparing for Propagation: Tools and Materials Needed
Before you begin propagating your oxalis love plant, gather the necessary tools and materials to ensure a successful process. This includes equipment like pruning scissors and pots, as well as specific soil requirements.
Necessary Equipment for Successful Propagation
When it comes to successfully propagating your Oxalis love plant, having the right equipment and materials is crucial. To get started, you’ll need a few essential tools that will help you achieve optimal results.
First and foremost, you’ll need some pots specifically designed for propagation. These pots are typically smaller than regular planting containers and have good drainage holes to prevent waterlogged soil. You can use clay or plastic pots, whichever suits your preference. For Oxalis love plants, it’s best to start with small pots (around 1-2 inches in diameter) to give the new roots enough room to develop.
You’ll also need a high-quality potting mix that is well-draining and pH-balanced for your Oxalis love plant. Avoid using regular garden soil as it can compact and prevent proper root growth. A good propagation mix should contain ingredients like peat moss, perlite, or vermiculite that will provide the necessary nutrients and moisture.
In addition to pots and potting mix, you’ll need some pruning shears to carefully cut the stem sections from your parent plant. This is a critical step in propagation as it ensures the new roots have enough energy to grow. Don’t use regular scissors or knives as they can crush the stems and hinder root development.
A rooting hormone powder or liquid will also be beneficial in stimulating root growth and increasing the chances of successful propagation. These products contain plant hormones that encourage cell division and root elongation. Follow the manufacturer’s instructions for application rates and timing.
When preparing your equipment, make sure to sterilize any tools with soap and water before use. This is essential to prevent contamination and promote healthy root development in your new Oxalis love plants.
Preparing the Parent Plant for Propagation
When preparing your oxalis love plant for propagation, it’s essential to start with a healthy mother plant. This involves taking cuttings or divisions from the parent plant and removing any diseased or damaged leaves.
To take cuttings, choose stems that are around 2-3 inches long, with at least two sets of leaves. Cut just above a node using a sterile tool, making sure each cutting has at least one leaf and some stem length. Remove lower leaves to prevent them from sitting in the propagation medium and causing rot.
When it comes to divisions, gently separate the roots of the mother plant, taking care not to damage any of the rhizomes or tubers. Remove any diseased or damaged leaves to prevent the spread of disease during propagation.
Removing diseased or damaged leaves is crucial at this stage as it helps prevent the spread of disease and encourages healthy growth in your new plants. Take a close look at the mother plant, removing any yellowing or wilted leaves that may be hiding beneath healthier foliage. This will give you a strong foundation for successful propagation and healthy new plants.
Water-Based Propagation Methods for Oxalis Love Plants
Water-based propagation methods are a fantastic way to multiply your oxalis love plants, and we’re excited to share two easy and effective techniques to try at home. You’ll be propagating in no time!
Stem Cuttings: A Step-by-Step Guide
Taking stem cuttings from oxalis love plants is an excellent way to multiply your favorite specimens. To do this successfully, start by selecting a healthy parent plant with multiple stems. Choose one stem that has at least two nodes and is around 3-4 inches long. Cut the stem just above a node using a sharp, sterile tool like a pruning knife or scissors.
Next, prepare the cutting by gently removing lower leaves, leaving only two to three sets of leaves at the top. This will help prevent moisture loss and promote rooting. Plant the cutting in a propagation tray filled with a well-draining mix, burying it up to the node. Water thoroughly and provide bright, indirect light. Maintain high humidity and warm temperatures (around 70-80°F) to encourage rooting.
Within 2-3 weeks, you should start seeing roots develop. Once they’ve reached about an inch long, transfer the cutting into a pot with good drainage holes. With proper care, your new oxalis love plant will thrive and produce beautiful flowers in no time.
Division Method for Oxalis Love Plants
When dividing established clumps of oxalis love plants, timing is everything. The ideal time for division is during the active growth season, typically in spring or early summer when the plant is producing new leaves and roots. Avoid dividing during the dormant season, as this can cause stress to the plant.
To divide a mature oxalis love plant, start by gently loosening the soil around the clump with a fork. Carefully separate the individual plants, making sure each section has at least one “eye” or growing point. It’s essential to handle the roots and rhizomes with care to avoid damaging them.
For optimal results, divide the clumps in the morning when the plant is at its highest water content. This will help minimize shock to the new divisions. Use a sharp, sterile tool to cut any circling roots or damaged areas. Repot the divided sections in well-draining potting mix and keep the soil consistently moist during the initial recovery period. With proper care, your oxalis love plant should quickly establish itself in its new home.
Soil-Based Propagation Methods for Oxalis Love Plants
You’ll love learning how to use soil-based methods to propagate your beloved oxalis plants, from division to layering and more. Let’s dive in!
Sowing Seeds: A Beginner’s Guide
When it’s time to propagate your beloved Oxalis Love plants using seeds from mature specimens, you’ll need to follow a simple yet precise process. Begin by harvesting the seeds from fully ripe seed pods. To do this, gently twist and pull off the pod, taking care not to damage its delicate contents. Allow the seeds to dry for a few days, either air-drying them or placing them in an envelope with a desiccant packet.
Once your seeds are ready, prepare the sowing medium by filling small pots or cells with a well-draining mix specifically designed for seed starting. Moisten the mix gently but thoroughly, then plant the seeds about 1/8 inch deep, spaced evenly apart. Sow multiple seeds per pot as not all will germinate; this allows you to select the strongest seedlings later on.
Aftercare is crucial in this stage – maintain a consistent temperature between 65-75°F (18-24°C) and provide adequate humidity by covering the pots with plastic bags or cloths. Water carefully, ensuring the mix remains moist but not waterlogged.
Layering Method for Oxalis Love Plants
To propagate oxalis love plants using the layering method, you’ll need to gently bend stems while they’re still attached to the parent plant. This technique encourages new roots to form on the lower sections of the stem. Choose healthy stems with at least two nodes – these will serve as the foundation for your new plant.
Start by selecting a sturdy stem and carefully bending it downwards, towards the soil. Secure the bent section using a soft material like a toothpick or a small stick, ensuring it doesn’t damage the delicate roots that may be developing. Make sure the node is buried in the soil to facilitate root growth.
Monitor your progress regularly, adjusting the support as needed to ensure the stem remains at an optimal angle for rooting. This method typically takes several weeks to produce visible results, but with patience and proper care, you can successfully propagate new oxalis love plants using layering.
Post-Propagation Care: Tips for Success
Now that you’ve successfully propagated your Oxalis love plant, it’s time to focus on the essential post-propagation care tips to ensure healthy growth and thriving roots. Proper care will make all the difference in this delicate process.
Aftercare for Newly Propagated Plants
Now that you’ve successfully propagated your Oxalis love plants, it’s time to focus on their aftercare. This critical phase will determine whether they thrive and grow into healthy, vibrant plants.
To provide optimal growing conditions for your newly propagated Oxalis love plants, start by watering them carefully. Overwatering is a common mistake that can be detrimental to young plants. Water your Oxalis when the top inch of soil feels dry to the touch, making sure not to get water on the leaves to prevent rot. Fertilize sparingly, as over-fertilization can cause more harm than good. A balanced, water-soluble fertilizer applied at half the recommended strength will suffice.
Keep an eye out for pests like spider mites, mealybugs, and scale, which can infest your Oxalis in no time. Inspect your plants regularly, and if you notice any signs of pest activity, treat them promptly with insecticidal soap or neem oil. Provide bright, indirect light and maintain a consistent temperature between 65°F to 75°F (18°C to 24°C) for optimal growth. By following these simple steps, you’ll be well on your way to nurturing healthy, thriving Oxalis love plants.
Troubleshooting Common Issues in Propagation
When it comes to propagating oxalis love plants, issues can arise that may seem insurmountable. However, with a little knowledge and patience, you can troubleshoot common problems and get your plants back on track.
One of the most prevalent issues is fungal infections, which often manifest as black or brown spots on leaves. To combat this, make sure to clean and disinfect your propagation station regularly, using a mixture of soap and water to prevent the spread of spores. If you notice any signs of infection, isolate the affected plant immediately to prevent further contamination.
Another common problem is root rot, which can be caused by overwatering or poor drainage. To address this issue, check the roots carefully for any signs of decay. If they’re mushy or soft to the touch, it’s likely a case of root rot. Gently remove affected areas with sterile scissors and repot the plant in fresh, well-draining soil.
Monitor your plants closely during the propagation process, and be prepared to intervene if you notice any issues arising. With prompt action and proper care, even the most wayward oxalis love plants can flourish.
Conclusion: Maximizing Your Success with Oxalis Love Plant Propagation
You’ve made it through the process of propagating your oxalis love plant, and now it’s time to put those new plants to work in your garden. Let’s review what you’ve learned and how to maximize their success.
Recap of Key Takeaways
As you conclude your journey through the world of oxalis love plant propagation, it’s essential to recap the key takeaways and best practices covered throughout this article. By following these guidelines, you’ll be well on your way to successfully propagating this unique and charming plant.
Throughout this article, we’ve explored the importance of choosing healthy parent plants, as they are the foundation for successful propagation. We discussed the different methods of oxalis love plant propagation, including leaf cuttings, division, and seed starting. Each method has its own set of advantages and disadvantages, making it crucial to select the approach that best suits your needs.
One of the most critical aspects of oxalis love plant propagation is providing optimal growing conditions for the new plants. This includes maintaining a consistent temperature range between 65°F to 75°F (18°C to 24°C), ensuring adequate humidity, and offering bright, indirect light. It’s also essential to use a well-draining potting mix and water carefully to prevent root rot.
To ensure successful propagation, we recommend using sterile equipment, disinfecting any tools that come into contact with the parent plant, and avoiding over-handling of the new plants. This will help minimize the risk of contamination and promote healthy growth.
In addition, it’s crucial to be patient and monitor your progress closely. Oxalis love plant propagation can take several weeks to months, depending on the method used and environmental conditions. By following these key takeaways and best practices, you’ll be well-equipped to successfully propagate this unique and beautiful plant.
Frequently Asked Questions
What are the ideal conditions for storing propagated Oxalis love plants before transplanting?
Before transplanting, store the propagated plants in a bright location with moderate temperatures (around 65-75°F) and high humidity. This will help them establish strong roots and adapt to their new environment.
Can I propagate Oxalis love plants using leaves or only through stem cuttings?
While stem cuttings are a popular method, you can also propagate Oxalis love plants using leaf cuttings. However, keep in mind that leaf propagation may have lower success rates compared to stem cuttings.
How often should I water propagated Oxalis love plants during the first few weeks after transplanting?
Water your newly transplanted Oxalis love plants sparingly but consistently for the first week. After that, increase watering to once every 7-10 days, depending on the plant’s growth and environmental conditions.
Can I propagate Oxalis love plants year-round, or are there specific seasons to focus on?
While you can propagate Oxalis love plants throughout the year, spring and summer are ideal times for active propagation. This allows the new plants to establish themselves before the colder winter months.
What are some common signs of over-propagation, and how do I prevent them in my collection?
Watch out for signs like weak or spindly growth, yellowing leaves, and a general decrease in plant health. To avoid over-propagation, focus on propagating only healthy mother plants, and ensure each propagated plant receives enough space to thrive.