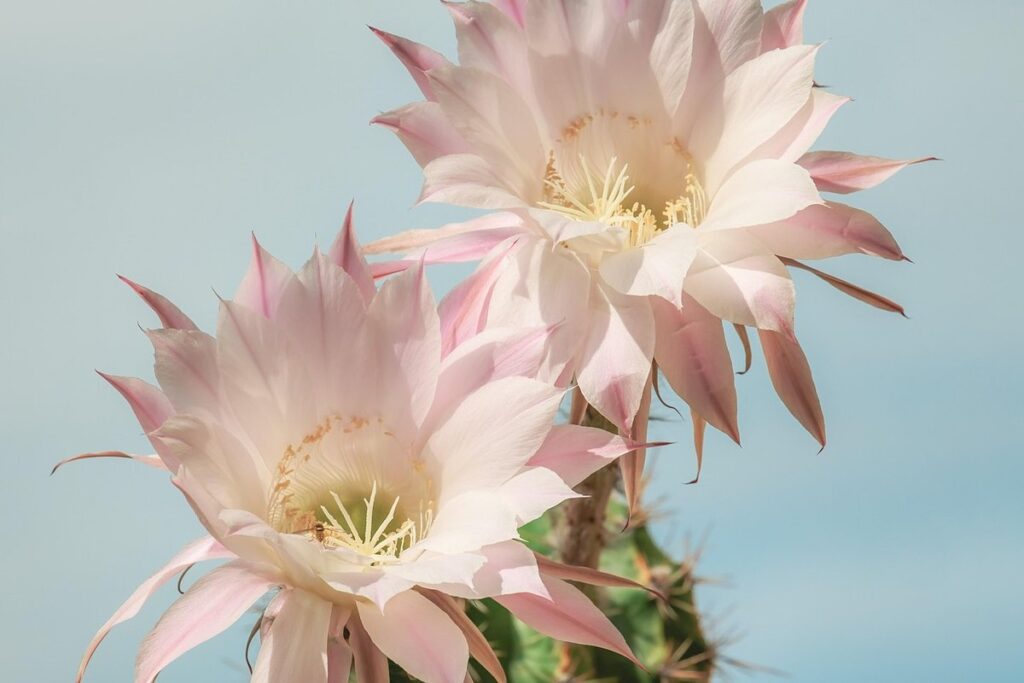
Are you an avid plant enthusiast eager to expand your orchid cactus collection? Do you want to learn the secrets of successful propagation, ensuring a thriving and diverse indoor jungle? Orchid cacti are indeed one of the most captivating plants for their unique beauty and adaptability. However, many growers struggle with replicating these stunning species in their own homes. With the right techniques and timing, anyone can master the art of orchid cactus propagation. This guide will walk you through optimal cutting selection, post-propagation care, and crucial timing considerations to guarantee successful growth. By following our comprehensive approach, you’ll be well on your way to cultivating a stunning array of orchid cacti in no time.
Choosing the Right Time for Propagation
When it comes to successful orchid cactus propagation, timing is everything. Knowing when to propagate your plant will ensure healthy growth and a strong root system.
Preparing the Mother Plant
Before taking cuttings from your orchid cactus, it’s essential to prepare the mother plant. This involves pruning and ensuring its overall health. Prune the mother plant during its dormant season, typically between fall and early spring, when growth is slowest. Remove any weak or damaged segments, as these can spread disease and cause stress to the plant.
To ensure the mother plant’s health, check for signs of pests or diseases. Inspect the plant carefully, looking for any white powdery patches (indicative of mealybugs) or small, mobile dots (signs of spider mites). If you find any issues, treat the plant promptly to prevent the problem from spreading.
In addition to pruning and pest control, provide optimal environmental conditions. Keep the mother plant in a bright, indirectly lit area with temperatures between 65-75°F (18-24°C) during the day and no lower than 55°F (13°C) at night. Maintain high humidity around the plant by placing it on a tray filled with water and pebbles or using a humidifier. With proper care, your mother plant will be ready for propagation in no time.
Regularly inspect the plant’s roots to ensure they’re healthy and not root-bound. If necessary, repot the mother plant into a slightly larger container with well-draining potting mix to accommodate its growing roots. By preparing the mother plant correctly, you’ll increase your chances of successful propagation.
Selecting the Right Cuttings
When it comes to selecting the right cuttings for orchid cactus propagation, you’ll want to choose healthy and vibrant sections from your mother plant. The two most common types of cuttings suitable for propagation are stem sections and leaf cuttings.
For stem section cuttings, look for thick, fleshy stems with at least one node (where a leaf meets the stem). This type of cutting will produce new roots and eventually grow into a new plant. When selecting stem sections, choose those that are around 3-5 inches long, as this length provides enough material for rooting without becoming too difficult to handle.
Leaf cuttings, on the other hand, are ideal for orchid cactus species with thin, waxy leaves. Cut off a healthy leaf from the mother plant, making sure to leave some stem attached at the base of the leaf. This type of cutting will also produce new roots and can grow into a new plant.
Remember to always inspect your cuttings carefully before propagation, looking for signs of disease or pests. A good quality cutting is key to successful propagation!
Preparing the Cuttings for Propagation
To successfully propagate your orchid cactus, you’ll need to prepare your cuttings carefully, focusing on cleaning and trimming them to promote healthy growth. This process is crucial to the success of your propagation efforts.
Cleaning and Sterilizing the Cuttings
Cleaning and sterilizing the cuttings is a crucial step in orchid cactus propagation. If the cuttings are not properly cleaned and disinfected, they can become infected with bacteria, fungi, or other pathogens, which can lead to root rot and other problems.
To clean your cuttings, start by gently washing them with mild soap and warm water. Use a soft-bristled brush to remove any dirt or debris from the leaf axils and stems. Rinse the cuttings thoroughly with distilled water to remove any remaining soap residue.
For added protection against infection, you can sterilize the cuttings using a bleach solution (1 part bleach to 10 parts water) or an alcohol swab (70% isopropyl alcohol). Dip each cutting into the solution for about 5-10 seconds before rinsing with distilled water. This will help kill any remaining bacteria and fungi on the surface of the cutting.
Remember, it’s essential to handle your cuttings gently to avoid damaging the delicate tissue, which can also lead to infection. By following these simple steps, you’ll be able to create a clean and healthy environment for your orchid cactus cuttings to propagate successfully.
Drying and Storing the Cuttings
Drying and storing the cuttings properly is crucial to prevent fungal growth and contamination. When you take cuttings from the orchid cactus, they’re prone to drying out quickly due to their small size and high water content. This makes them an ideal breeding ground for fungi.
To dry the cuttings effectively, place them in a well-ventilated area, away from direct sunlight. You can also use a paper bag or a breathable container to speed up the process. It’s essential to maintain some humidity during this phase to prevent the cuttings from drying out too quickly. A good rule of thumb is to dry them for 1-3 days before storing them.
When storing, ensure the environment is controlled and maintained at around 70-80°F (21-27°C) with low humidity levels. Avoid storing the cuttings in airtight containers or plastic bags as this can lead to condensation, promoting fungal growth. Instead, use a propagation tray with a transparent cover or store them on a paper towel-lined plate to maintain airflow and monitor moisture levels.
Propagation Methods: Stem Cuttings vs Leaf Cuttings
When it comes to propagating your orchid cactus, you have two popular methods to choose from: stem cuttings and leaf cuttings. Let’s dive into the details of each technique.
Using Stem Cuttings for Propagation
Using stem cuttings for propagation is an effective way to multiply orchid cacti. To begin with, choose a healthy mother plant and select a section of the stem that has at least two nodes. This will increase the chances of successful propagation. Next, prepare the cutting site by making a clean cut just above a node using a sharp, sterile knife or pruning tool.
Remove any lower leaves to prevent them from becoming waterlogged and reduce the risk of rot. Plant the cutting in a well-draining rooting medium, such as a mix specifically designed for cacti. Water gently but thoroughly, making sure not to overwater. Provide optimal care conditions by placing the container in bright, indirect light with daytime temperatures around 70-80°F (21-27°C) and nighttime temperatures around 55-65°F (13-18°C).
Monitor the cutting’s progress closely, and it should start producing new roots within 1-2 weeks. Once established, you can transfer the new plant to a larger pot using a well-draining cactus mix. With proper care, your stem cutting should thrive, allowing you to enjoy even more orchid cacti in your collection.
Using Leaf Cuttings for Propagation
Using leaf cuttings for propagation is an excellent method to multiply your favorite orchid cactus species. This technique involves taking a healthy leaf from the mother plant and using it to grow a new one. To start, select a firm, plump leaf with no signs of damage or disease. Cut the leaf about 2-3 inches from its base, making sure each section has at least two nodes (the joints where the leaf meets the stem).
Next, prepare your propagation medium by mixing equal parts of perlite and vermiculite. This well-draining mix will prevent root rot and promote healthy root growth. Plant the cut end of the leaf about 1 inch deep into the prepared medium, firming it gently to secure the leaf in place.
It’s essential to maintain high humidity around the planted leaf cutting by covering it with a clear plastic bag or cloche. Keep the medium consistently moist but not waterlogged, as this can lead to root rot. Root development typically occurs within 2-3 weeks, after which you can begin to notice new growth emerging from the node.
Rooting Mediums and Containers
To successfully propagate orchid cactus, you’ll need to choose the right rooting medium and container for your new plantlets, and we’re about to cover those essential details.
Soilless Mixtures vs Potting Mixes
When it comes to propagating orchid cacti, selecting the right rooting medium is crucial for success. Two popular options are soilless mixtures and potting mixes, each with its own set of advantages.
Soilless mixtures, also known as seed starting mixes or propagation mixes, are designed specifically for delicate plant cuttings like orchid cactus. These mixes typically contain a blend of peat moss, perlite, and vermiculite, which provide excellent moisture retention, aeration, and root development. Using a soilless mixture can help prevent overwatering and promote healthy root growth.
On the other hand, potting mixes are formulated for mature plants and may not provide the same level of precision as soilless mixtures. They often contain added fertilizers and larger particles that can hinder delicate roots from growing properly. However, if you don’t have access to a dedicated propagation mix, a high-quality potting mix can still be used as a substitute.
When choosing a rooting medium for your orchid cactus cuttings, consider the specific needs of the plant species. If possible, opt for a soilless mixture specifically designed for propagation. If using a potting mix, make sure it’s free of added fertilizers and has a well-balanced particle size to prevent root damage.
Choosing the Right Container Size
When it comes to propagating orchid cacti, choosing the right container size is crucial for successful growth and development. The ideal container size will depend on several factors, including the type and size of cutting, as well as the desired growth rate and mature plant size.
For smaller cuttings (1-2 inches in length), a small pot or propagation tray with a diameter of 1-3 inches is sufficient. This allows for adequate root growth without becoming waterlogged. On the other hand, larger cuttings (2-4 inches) may require a slightly larger container, around 4-6 inches in diameter.
Keep in mind that you can always transplant the cutting into a larger container once it has established itself and is showing signs of healthy growth. Overcrowding the roots in a small container can lead to reduced air circulation, increased risk of root rot, and stunted growth. By selecting the right container size, you’ll be providing your orchid cactus with the best possible conditions for thriving propagation.
Remember, it’s better to start with a slightly smaller container and gradually move up to larger ones as needed, rather than risking overcrowding from the outset.
Post-Propagation Care and Maintenance
Now that you’ve successfully propagated your orchid cactus, it’s time to focus on providing the right care and maintenance for your new plants to thrive. This involves learning about specific needs and habits to promote healthy growth and development.
Providing Optimal Conditions
When it comes to newly propagated orchid cacti, providing optimal conditions is crucial for their survival and growth. One of the most critical factors is light exposure. These plants typically require bright, indirect light but can suffer from scorching if exposed to direct sunlight. To avoid this, place your propagated orchid cactus in an east- or west-facing window, or use a sheer curtain to filter the sun’s rays.
Watering schedules for newly propagated orchid cacti are also essential to get right. Overwatering is a common mistake that can lead to root rot and kill your plant. Water your orchid cactus only when the soil feels dry to the touch, usually once every 7-10 days during the spring and summer months. Reduce watering to once a month in the fall and winter.
Temperature control is another vital aspect of post-propagation care. Most orchid cacti prefer daytime temperatures between 65°F (18°C) and 75°F (24°C), with a slight drop in temperature at night. Avoid placing your plant near heating or cooling vents, fireplaces, or drafty windows to maintain stable conditions.
Keep your propagated orchid cactus away from drafts, pets, and children to prevent damage and ensure proper growth. By providing the right balance of light, water, and temperature, you’ll be well on your way to successfully caring for your newly propagated orchid cactus.
Monitoring Progress and Addressing Issues
Monitoring your propagation’s progress is crucial to ensure healthy growth. Begin by checking for roots and new growth every week. Look for white, firm roots emerging from the nodes, indicating a strong start. If you notice yellowing or limp plants, it may be due to overwatering – root rot can set in quickly.
Pests like mealybugs, spider mites, or scale insects can also cause problems during propagation. Inspect your plants regularly for these unwanted visitors and treat them promptly with insecticidal soap or neem oil. Some orchid cacti may be more susceptible to pests than others, so adjust your treatment accordingly.
Keep a close eye on temperature fluctuations, humidity levels, and light exposure, as these factors can impact growth. Adjust your care strategies based on observations. For example, if you notice slow growth, consider increasing humidity or moving the plant to a brighter spot. By monitoring progress closely, you’ll be able to address potential issues early on and provide optimal conditions for healthy development.
Troubleshooting Common Propagation Challenges
We’ve all been there – a failed propagation attempt can be frustrating. This section will help you troubleshoot common issues to get your orchid cactus propagation back on track.
Identifying Causes of Failure
When attempting to propagate orchid cacti, it’s not uncommon for things to go awry. Identifying the causes of failure is crucial to refining your technique and achieving success. One common mistake that can lead to propagation failure is contamination. This often occurs when cuttings are exposed to bacteria or fungi during handling or storage. To minimize this risk, make sure to clean and disinfect all equipment thoroughly, and store cuttings in a sterile environment.
Inadequate light or temperature conditions can also be detrimental to successful propagation. Orchid cacti typically require bright, indirect light to photosynthesize effectively. If the area is too dark, the cutting may not receive enough energy to grow roots. Similarly, temperatures that are too low or too high can hinder root development. Aim for daytime temperatures between 65-75°F (18-24°C) and nighttime temperatures around 55-65°F (13-18°C).
Proper cutting preparation is also essential for successful propagation. Ensure the cutting is at least 2-3 inches long, with at least two nodes on each section. Remove any dead or damaged tissue to prevent infection and promote healthy growth. By avoiding these common mistakes and taking a few extra precautions, you can increase your chances of successful orchid cactus propagation.
Overcoming Specific Issues
When faced with common propagation challenges, it’s essential to address them promptly to prevent further complications. One of the most frustrating issues is slow rooting. This can be due to inadequate humidity, insufficient light, or waterlogged soil conditions.
To overcome slow rooting, ensure that you’re providing optimal growing conditions for your orchid cactus cutting. This includes maintaining a humid microclimate (40-60% relative humidity) and placing the cutting in a bright location with indirect sunlight.
Fungal infections can be another challenge, often caused by overwatering or high humidity levels. To combat this issue, treat infected cuttings with a fungicide specifically designed for orchids, and adjust your watering schedule to ensure that the soil isn’t consistently waterlogged.
Pest infestations, particularly mealybugs, spider mites, and scale insects, can also impact successful propagation. Monitor your cuttings regularly for signs of pests, and take action immediately if you notice any issues. Use insecticidal soap or neem oil to control infestations, and maintain clean growing conditions by disinfecting tools and repotting in fresh, sterilized soil.
It’s crucial to remain vigilant when propagating orchid cacti and address any emerging challenges early on to ensure the health and survival of your new plants.
Frequently Asked Questions
Can I propagate orchid cacti year-round, or is there a specific season for propagation?
Yes, you can propagate orchid cacti throughout the year, but optimal results are often achieved during the spring and summer months when plants are actively growing. Avoid propagating during periods of extreme temperatures, drought, or wet weather, as these conditions can impact successful growth.
How long does it take to see roots develop after propagation?
Roots typically begin developing within 2-4 weeks after propagation, but this timeframe may vary depending on factors like temperature, humidity, and the specific orchid cactus species. Be patient and monitor progress closely, as overwatering can lead to root rot.
Can I propagate multiple cuttings at once, or should I do them separately?
Yes, you can propagate multiple cuttings simultaneously, but make sure each cutting has sufficient space for root development and growth. Overcrowding can hinder the propagation process and lead to disease transmission between plants.
How often should I water newly propagated orchid cactus cuttings?
Water your newly propagated cuttings sparingly, allowing the soil to dry slightly between waterings. Watering frequency will depend on the specific needs of your plant species, but a general rule is to water once every 7-10 days during the first few months after propagation.
What are some common mistakes to avoid when propagating orchid cacti?
Some common pitfalls include overwatering, underwatering, and inadequate light exposure. Be mindful of these potential issues and take steps to prevent them, such as ensuring proper drainage, using a well-draining potting mix, and providing sufficient light for optimal growth.