Wanting to multiply your beloved Monstera plant or give it as a gift? Propagating Monstera cuttings can seem daunting, but with the right guidance and tools, you’ll be well on your way to achieving a higher success rate. Successfully propagating Monstera is essential for any plant enthusiast, whether you’re looking to expand your collection, share with friends and family, or simply want to ensure the continued health of your beloved plants.
In this article, we’ll walk you through step-by-step guides on how to propagate Monstera cuttings using expert tips and essential tools. We’ll cover everything from preparing the right environment for your cutting to monitoring its progress and addressing common challenges that may arise during the propagation process. By following these simple yet effective techniques, you’ll be able to multiply your Monstera with confidence, boosting your chances of achieving a high success rate in plant propagation.
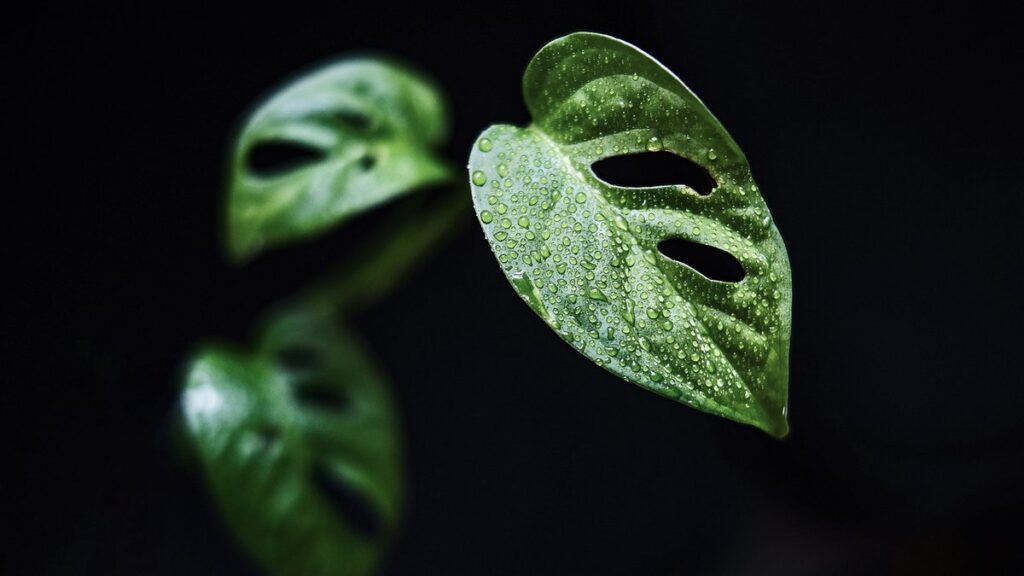
Choosing Healthy Monstera Cuttings
When selecting healthy monstera cuttings for propagation, it’s essential to choose pieces that have at least two nodes and are free of any signs of disease or pests. This ensures a strong start for your new plant.
Selecting the Right Type of Cutting
When it comes to propagating Monstera cuttings, selecting the right type of cutting is crucial for success. There are three primary types of Monstera cuttings: stem, leaf, and node. Each has its own advantages and suitability for propagation.
Stem cuttings are a popular choice for Monstera propagation. They’re relatively easy to obtain and can be taken from mature stems. Look for nodes with at least two sets of leaves, as this will give your new plant the best chance of establishing itself quickly. Leaf cuttings, on the other hand, are ideal for propagating Monstera species that produce aerial roots. These cuttings should have a small piece of stem attached to the base of the leaf.
Node cuttings are often considered the most challenging type, but they’re also the most rewarding. They involve taking a cutting from a mature plant with at least two nodes. This type of cutting is perfect for propagating Monstera varieties that don’t produce aerial roots. When selecting any type of cutting, ensure it’s healthy and free of disease or pests to increase your chances of success. Check for signs of rot, soft spots, or other abnormalities before making your cut.
Preparing the Cutting Station
Before you start preparing your Monstera cuttings for propagation, it’s essential to set up a clean and organized cutting station. This will help prevent contamination and ensure the health of your new plants.
To begin, choose a workspace that is well-ventilated and free from any debris or clutter. Cover your work surface with a clean cloth or paper to make cleanup easier. You’ll also need a few essential tools: a pair of sharp, clean pruning scissors specifically designed for plant propagation, rooting hormone powder or liquid (available at most gardening stores), and a well-draining potting mix.
When preparing the cutting station, make sure to disinfect all surfaces and tools with a gentle bleach solution. This will help prevent any potential diseases from spreading to your cuttings. For example, you can soak your pruning scissors in a mixture of 1 part bleach to 9 parts water for about 10 minutes before rinsing them thoroughly.
Have all the necessary materials within easy reach to avoid unnecessary handling and reduce stress on the plant during propagation. This will help ensure that your Monstera cuttings develop healthy roots and thrive into beautiful, thriving plants.
Preparation Methods: Air-Layering, Stem Cuttings, and Leaf Cuttings
Now that you’ve taken your Monstera cutting, let’s dive into the various preparation methods to ensure successful propagation. We’ll explore air-layering, stem cuttings, and leaf cuttings in more detail here.
Air-Layering Method for Monstera
Air-layering is a unique and effective method for propagating Monstera cuttings. It involves creating a rooting point on the stem of the mother plant, allowing roots to develop before cutting it away from the parent plant. To start air-layering, identify the nodes on the Monstera stem – these are the points where the leaves meet the stem. Gently wrap one of these nodes in moss or a suitable rooting medium, making sure to cover the node completely.
Secure the moss or rooting medium with twine or wire, ensuring it’s snug but not too tight. This will help retain moisture and provide an ideal environment for root growth. As roots begin to develop, you’ll notice them emerging from the wrapped area. Once roots have reached a suitable length, typically around 1-2 inches, carefully cut the stem below the node, leaving a small portion of stem attached to the new roots.
Monitor the cutting’s progress, providing it with bright, indirect light and maintaining consistent moisture levels. Within a few weeks, you should see significant root growth, indicating that your Monstera propagation has been successful.
Taking Stem Cuttings from Mature Monstera Plants
When taking stem cuttings from mature Monstera plants, it’s essential to select healthy stems with plenty of nodes. Choose stems that are around 10-15 cm long and have at least two sets of leaves. This will give you a better chance of successful propagation.
To prepare the stem for cutting, remove any lower leaves that would be submerged in water or soil when placed in the rooting medium. This prevents bacterial growth and promotes healthy root development. Use clean and sharp pruning tools to avoid crushing the stem tissue, which can cause infection or encourage rot. It’s also crucial to cut just above a node, as this is where new roots will emerge.
When making the cut, aim for a 45-degree angle, about 1-2 cm from the node. This helps prevent water from collecting on the cut end and encourages rooting. Make sure your tools are clean and disinfected between each cut to minimize the risk of transferring diseases or pests.
Propagating Monstera via Leaf Cuttings (Moniliformis)
Removing a mature leaf from your Monstera plant is the first step in propagating via leaf cuttings. Choose a healthy, firm leaf with a long stem attached to it, as this will increase its chances of rooting successfully. Gently twist or cut the leaf from the plant, making sure not to damage the petiole (the thin stalk that attaches the leaf to the plant).
Next, allow the cut end of the leaf to dry for 24-48 hours. This helps to form a callus over the wound, which will protect the leaf from rot and encourage root growth. Once the drying process is complete, prepare a pot with a well-draining rooting medium, such as a mix specifically designed for propagation.
Place the dried leaf in the pot, burying it up to its petiole. Firm the medium around the leaf gently but firmly, making sure not to compact it too much. Water the medium sparingly until it’s moist but not waterlogged. With proper care and patience, you should start seeing roots develop within 1-3 months.
Rooting Hormone: When to Use It and How
When it comes to propagating Monstera cuttings, using a rooting hormone can make all the difference in successful growth. Here’s when and how to use this powerful tool effectively.
What is Rooting Hormone?
Rooting hormone is a type of plant growth regulator that helps stimulate root development on cuttings. When applied to the base of a Monstera cutting, it encourages the plant to produce new roots and increase its chances of successful propagation.
The rooting hormone works by promoting cell division and elongation in the stem, which leads to the formation of new roots. This process can take anywhere from a few days to several weeks, depending on factors such as temperature, humidity, and light.
There are different types of rooting hormones available, including liquid, powder, and gel formulas. Liquid rooting hormone is often more convenient to use and requires only a few drops per application. Powdered rooting hormone, on the other hand, needs to be mixed with water according to the manufacturer’s instructions. Gel rooting hormone provides a thick layer that can help protect the cutting from drying out.
When choosing a rooting hormone for Monstera propagation, make sure to follow the recommended application rate and timing to avoid over-stimulating the plant. A general rule of thumb is to apply 1-2 mm of rooting hormone powder or gel to the cut end, or 5-10 drops of liquid rooting hormone per cutting.
Applying Rooting Hormone to Monstera Cuttings
When applying rooting hormone to monstera cuttings, it’s essential to do so correctly to ensure successful propagation. Dip the lower 2-3 inches of each cutting into a rooting hormone powder or liquid concentrate at a rate of about 1-2 teaspoons per gallon of water. For best results, use a concentrated solution specifically designed for tropical plants like Monstera.
Make sure to apply the hormone evenly and avoid over-saturating the cuttings. This can cause root rot and hinder the propagation process. You can also dust the powder directly onto the cutting’s node (where it was removed from the parent plant), but be cautious not to inhale or get it on your skin.
Some popular rooting hormones for monstera include Clonex, Dip ‘N Grow, and Rootone. Follow the manufacturer’s instructions for application rates and guidelines. For example, Clonex recommends a 1:20 ratio of concentrate to water. If using liquid, mix the solution according to the label and dip the cuttings as described earlier.
Remember that rooting hormone is just one step in the propagation process. Proper care and conditions are still crucial for successful growth.
Post-Propagation Care for New Monstera Plants
Now that you’ve successfully propagated your new Monsteras, let’s move on to providing them with the right care to ensure they thrive and grow into stunning plants. This is crucial for their development.
Watering and Humidity Requirements
Maintaining high humidity around newly propagated Monstera plants is crucial for their survival. This is especially true during the initial weeks after propagation when they are most vulnerable to drying out. You can achieve this by placing the cuttings on a tray filled with water and pebbles or using a humidifier nearby. The ideal relative humidity range for Monstera plants is between 50-70%. Monitor the surrounding environment and adjust accordingly.
Watering your newly propagated Monstera plant requires attention to detail. Water thoroughly once a week, allowing excess water to drain from the pot. Avoid getting water on the leaves or crown to prevent rot and fungal diseases. A well-draining potting mix is essential for preventing waterlogged soil conditions. Monitor temperature fluctuations; most Monstera varieties prefer daytime temperatures between 65-75°F (18-24°C) and nighttime temperatures around 55-65°F (13-18°C).
Providing Suitable Lighting Conditions
New monstera plants are sensitive to light and require specific conditions to thrive. After propagation, it’s essential to provide the right lighting environment to ensure healthy growth.
When it comes to the optimal light spectrum for new monsteras, they prefer bright, indirect light but can tolerate some direct sunlight. East- or west-facing windows are ideal, as they offer gentle, consistent light throughout the day. South-facing windows can also work, but be cautious of intense midday sun that may cause leaf scorch.
Aim for a medium to high light intensity, around 30,000-50,000 lux. This will help promote photosynthesis and support the plant’s growth without causing damage. Keep in mind that new monsteras are sensitive to extreme light fluctuations, so it’s best to maintain consistent lighting conditions.
In terms of duration, ensure your monstera receives at least 12 hours of light per day. Avoid placing it near windows with sheer curtains or blinds, as this can create inconsistent light patterns and impact growth. Monitor your plant’s response to its new environment, adjusting the lighting as needed to promote healthy development.
Common Challenges and Solutions for Propagating Monstera Cuttings
Propagating Monstera cuttings can be a bit tricky, especially when things don’t go as planned. Let’s tackle some of the most common challenges and explore solutions to get you back on track.
Identifying and Addressing Problems Early On
One of the most critical aspects of successful monstera cutting propagation is recognizing and addressing potential problems early on. Unfortunately, many growers encounter issues that can lead to root rot, fungal infections, or even plant death if left unchecked.
Some common signs of trouble include yellowing leaves, soft stems, or an unpleasant odor emanating from the soil. If you notice any of these symptoms, it’s essential to act quickly to prevent further damage. Start by removing the cutting from its pot and inspecting the roots for any visible signs of rot or fungal growth.
To address root rot, gently trim away affected areas with clean scissors, making sure not to damage healthy tissue. For fungal infections, treat the soil with a fungicide specifically designed for houseplants. Finally, repot the cutting in fresh, well-draining potting mix and maintain good air circulation around the plant. By catching these issues early, you can save your monstera cutting and give it a much better chance at thriving.
Troubleshooting Tips for Optimizing Success Rates
When you’re propagating Monstera cuttings, it’s not uncommon to encounter setbacks. However, by paying attention to a few crucial details, you can significantly increase the chances of successful propagation. One key factor is maintaining a clean and sterile environment. This means using dedicated tools for cutting and planting your Monstera cuttings, and disinfecting them regularly to prevent the spread of bacteria or fungal diseases.
It’s also essential to control temperature and humidity levels in your propagation station. Most houseplants prefer temperatures between 65-75°F (18-24°C), with a relative humidity of around 50-60%. If you’re propagating Monstera cuttings in a dry environment, you may need to mist the area regularly or use a humidifier to maintain optimal conditions.
By being mindful of these variables and taking proactive steps to optimize your propagation setup, you’ll be well on your way to successfully growing new Monsteras from cuttings.
Frequently Asked Questions
Can I propagate Monstera cuttings in water instead of a propagation station?
Yes, you can propagate Monstera cuttings in water, but make sure to change the water frequently to prevent bacterial growth and root rot. This method is ideal for smaller cuttings or those that are more prone to rot.
What if my cutting doesn’t produce roots after 2-3 weeks of propagation?
No, not all cuttings will produce roots within this timeframe, especially in less-than-ideal environments. Check your rooting hormone application and ensure the cutting is receiving adequate light, water, and humidity. If issues persist, try adjusting your propagation station or technique.
How often should I monitor my propagated Monstera plant for signs of pests or diseases?
Regularly inspect your propagated plants every 7-10 days for any signs of pests (e.g., spider mites, mealybugs) or diseases (e.g., root rot, leaf spot). Early detection and treatment will significantly improve the chances of successful propagation.
Can I propagate Monstera cuttings during different seasons? What are the ideal conditions?
Yes, you can propagate Monstera cuttings year-round. However, optimal results are typically achieved during spring and summer when temperatures range between 65°F to 75°F (18°C to 24°C). Maintain consistent humidity levels and provide sufficient light for best outcomes.
How do I prevent overwatering or underwatering my newly propagated Monstera plant?
Monitor your plant’s watering needs carefully, as both conditions can be detrimental. Check the soil moisture by sticking your finger into the soil up to the first knuckle. Water when the top inch of soil feels dry to the touch.